
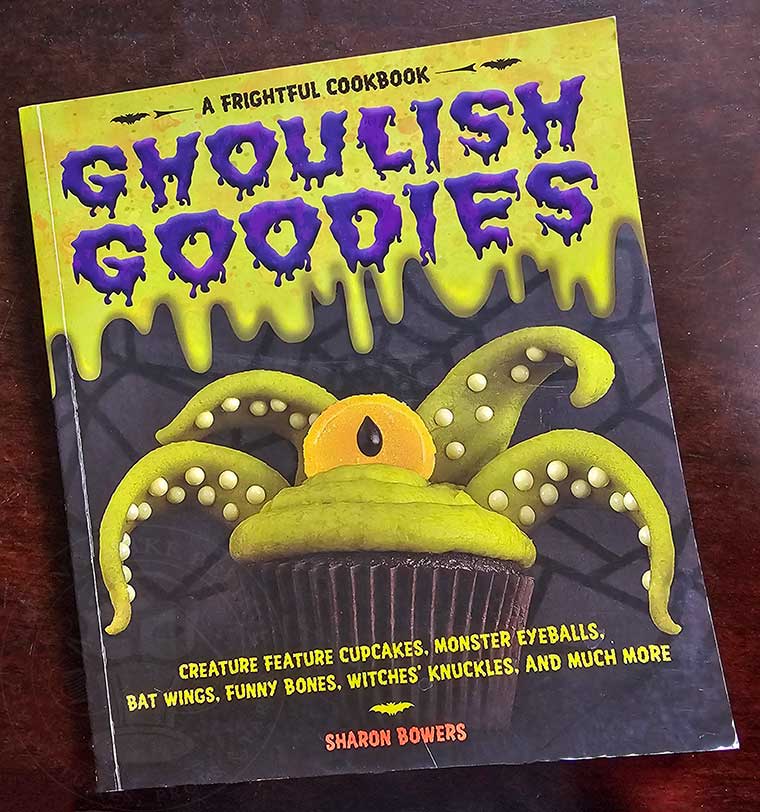
On a recent thrift run (the kind where you’re hunting for terrifying treasures and dusty oddities), I unearthed a delightful relic: Ghoulish Goodies, a 2009 “frightful cookbook” by Sharon Bowers. The cover alone reads like a booming billboard to anyone who treats Halloween as a lifestyle:
“(A) creature feature of cupcakes, monster eyeballs, bat wings, funny bones, witches’ knuckles, and much more.”
How could I resist?
Inside is a full spread of sinister sweets and peculiar party fare perfect for feeding a swarm of sugar-fueled trick-or-treaters or elevating any gathering that leans a little unearthly. What pulled me in immediately? The cupcakes. Not just any cupcakes – creature feature cupcakes, hairy eyeballs, monsters, spiders, worms – and a particularly charming batch of tombstone toppers that feel right at home in a haunted dessert graveyard.
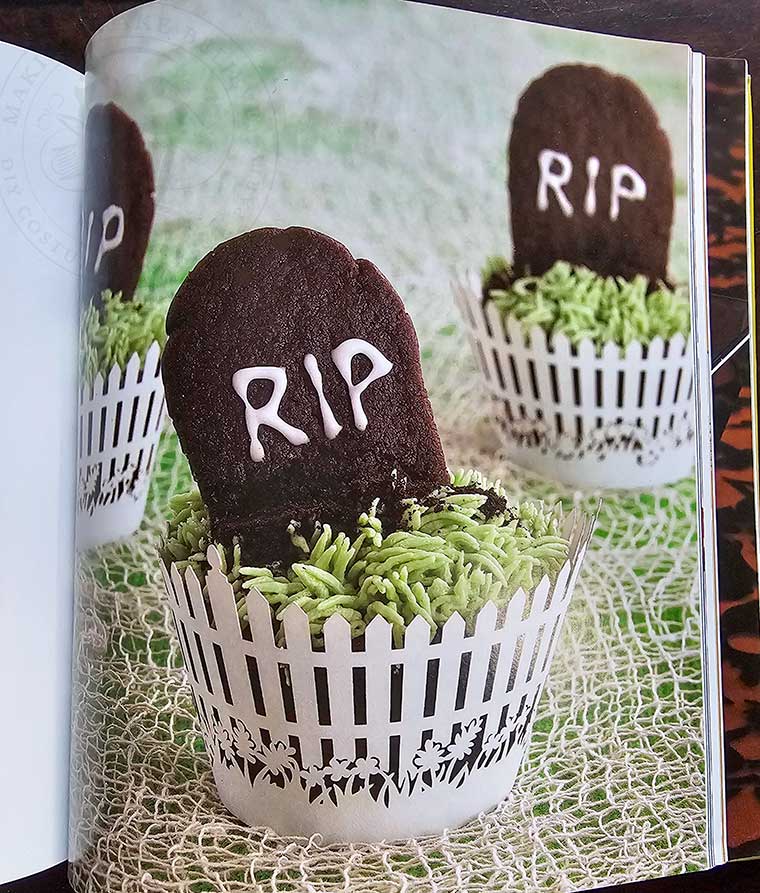
The twinge of nostalgia hit me as some of these designs echo the Halloween treats of my kiddo’s childhood. But one design caught my attention due to its wrapper: the tombstone-topped cupcake is encased in a tiny paper picket fence. It’s simple, a little eerie, and just theatrical enough to feel like a miniature graveyard scene sitting right in the palm of your hand. And, this unassuming paper detail set me on a quest to whip up a ghoulishly good set of wrappers and picks perfect for your next ghostly get-together.
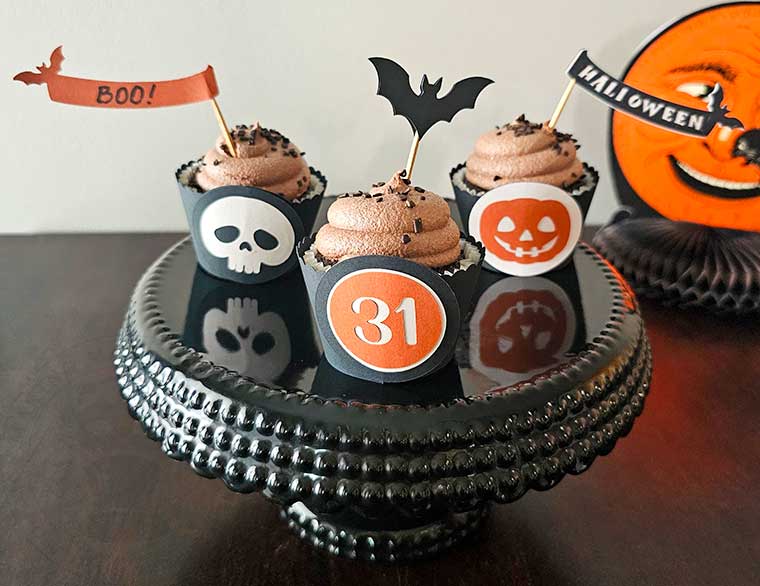
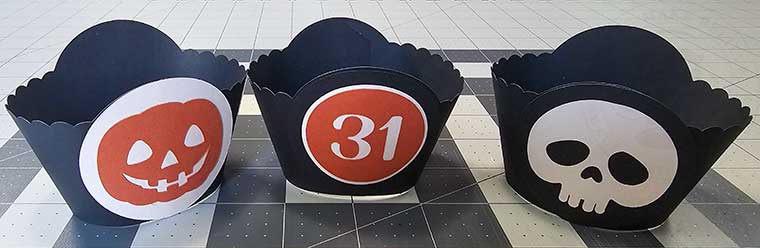
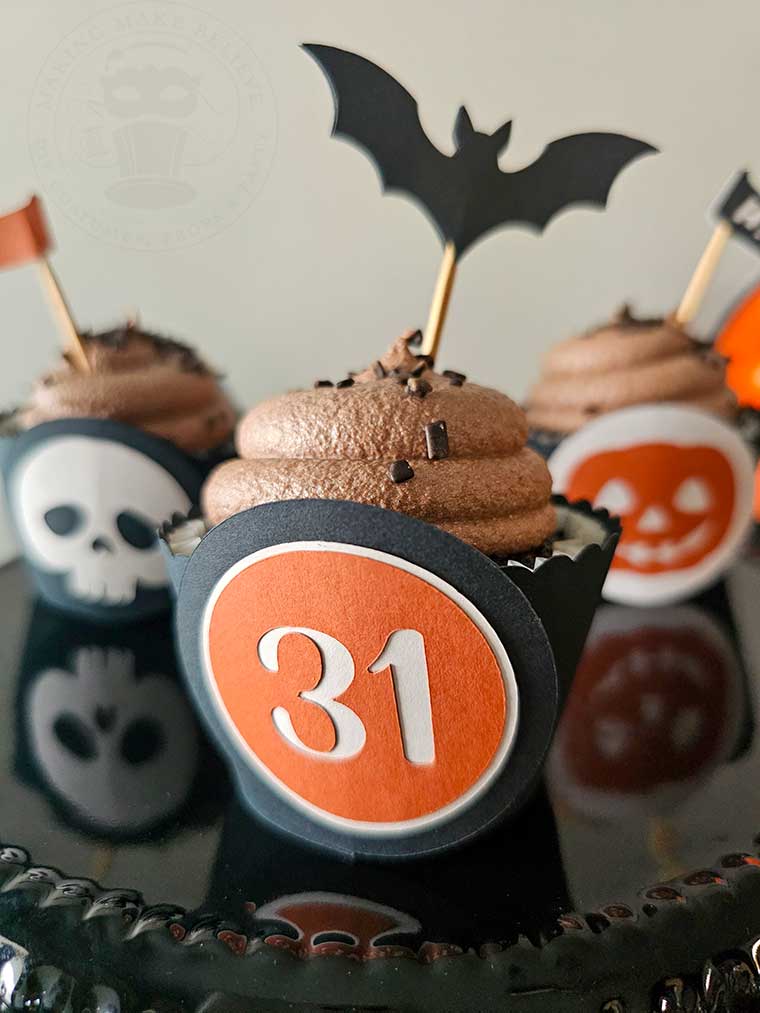
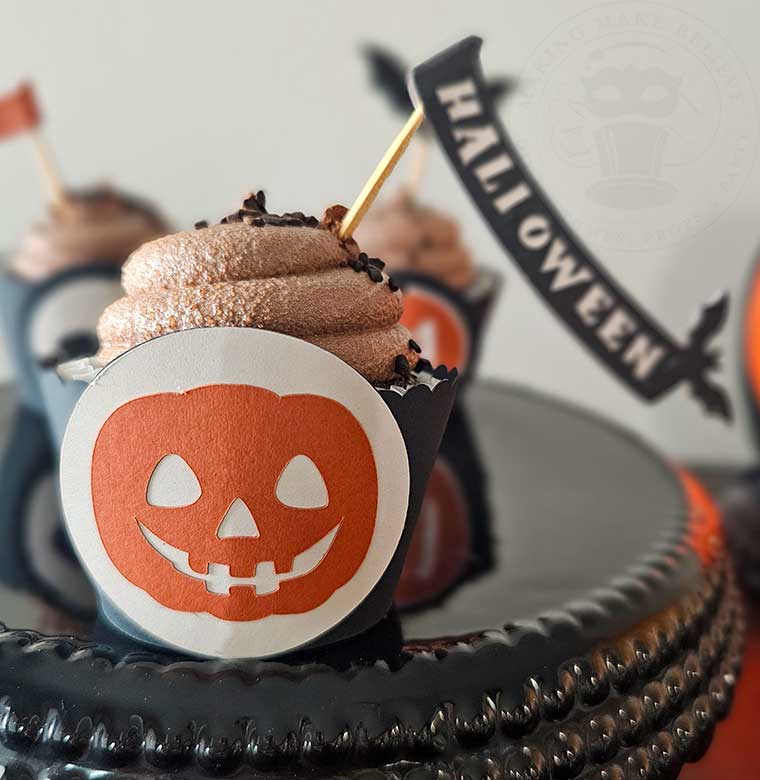
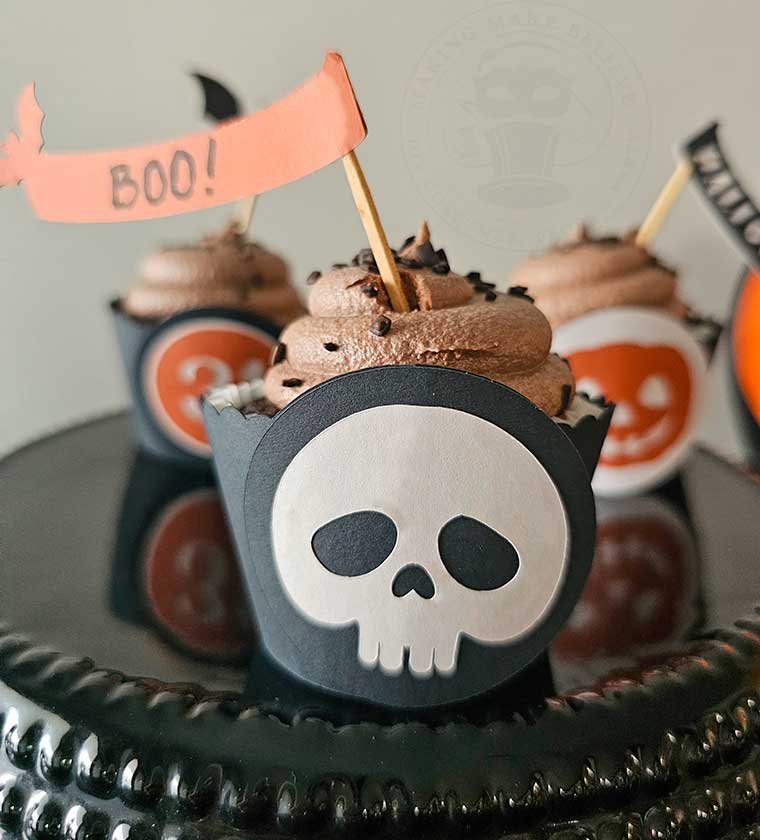
The set includes a simple scalloped edge cupcake wrapper, three haunted medallions, and two double-sided picks to ensure your haunted cupcake scape looks captivatingly creepy from every angle.
Sure, the standard accordion wrapper has its place. But if you’re craving something a bit more dreadfully dramatic or something that turns a simple cupcake into a haunting scene, well – you’ve come to the right place.

Why settle for generic grocery store liners when you can wrap your sweets in a ghoulie aesthetic? These high-contrast skull and jack-o’-lantern silhouettes turn a simple cupcake into a centerpiece. It’s the perfect way to add some “darkly dapper” architecture to your dessert spread without losing that classic October charm.
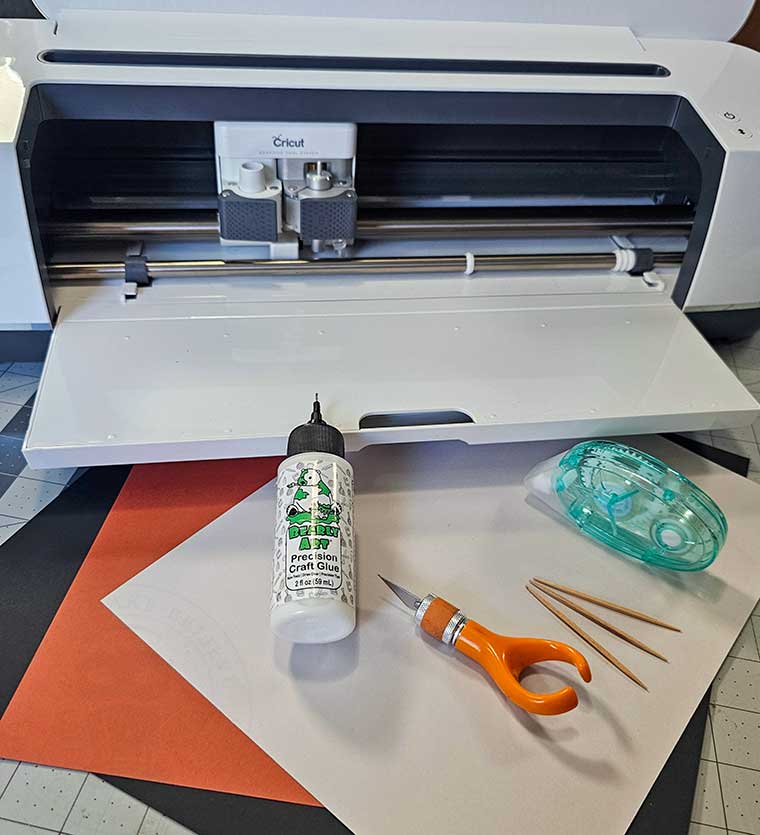
For this project, we will need:
Cardstock in three colors – I’m using black, orange, and off-white
Cutting machine with scoring tool and fine cut blade or scissors/finger blade
Adhesive – I’m using a double-sided tape roller and Bearly Art Precision Craft Glue
Toothpicks
Color printer and white cardstock if cutting by hand
We will also need the Retro Halloween Wrappers & Picks files from the Haunted Library. Select the SVG for machine cutting or the PDF for hand cutting.

If using the PDF Printable to cut by hand, open the Retro Halloween Wrappers & Picks PDF file in your favorite reader (Adobe, Foxit, etc.), print the elements onto white cardstock, and cut them out.

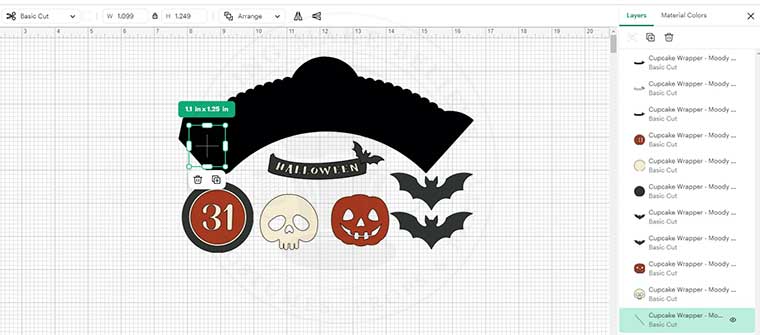
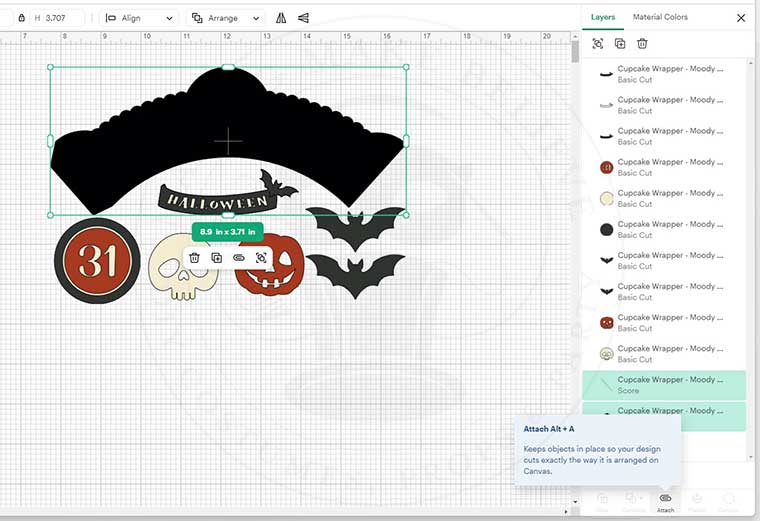
After downloading the Retro Halloween Wrappers & Picks from the Haunted Library, upload them to your favorite design software. I’m using Cricut Design Space.
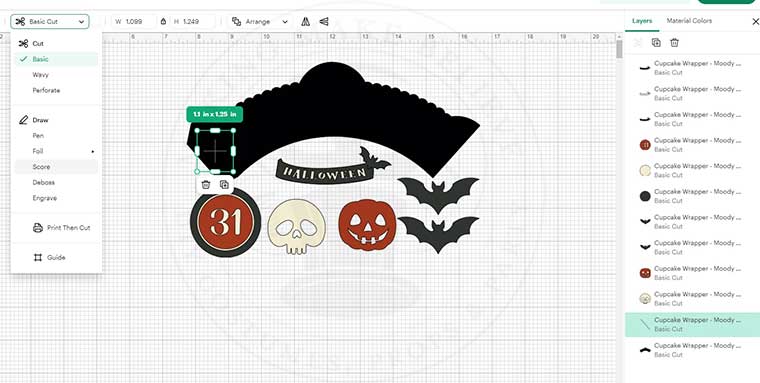
Next, ungroup the file, locate the cupcake wrapper score line in the Layers Panel, and change it from Basic Cut to Score in the Operation drop-down menu.
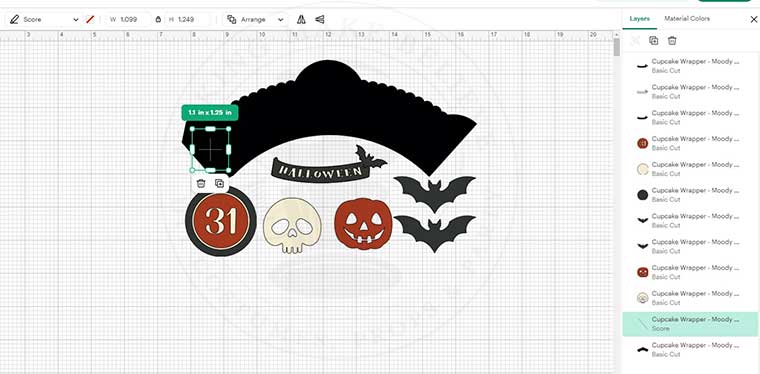
Then, taking care not to move the score line, select it along with the wrapper and then select Attach at the bottom of the Layers Panel.

Now, you are ready to cut out the elements.

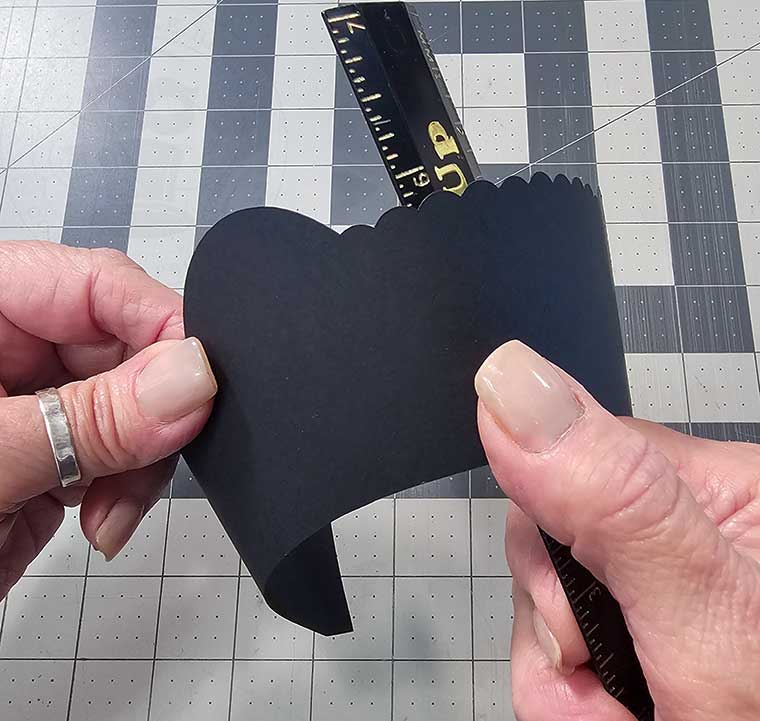
Beginning with the cupcake wrapper, use a ruler or the edge of your table to gently curl the paper. This will help the wrapper form more easily into a circular shape.
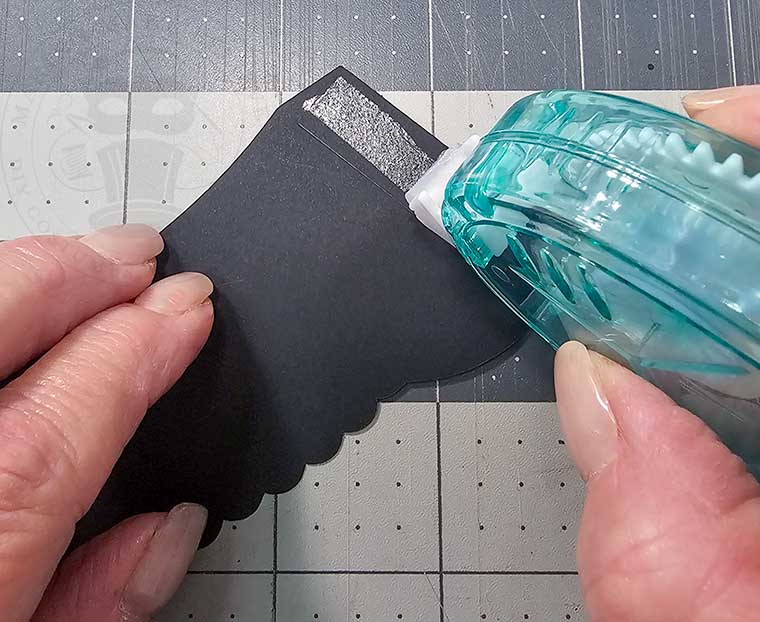
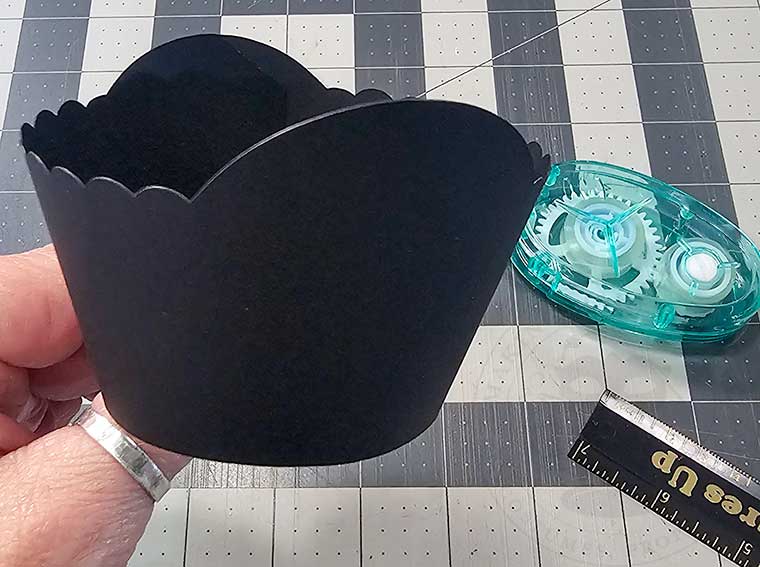
Run a line of adhesive on the outside edge of the score line and connect the ends. I like to use the double-sided tape for this.
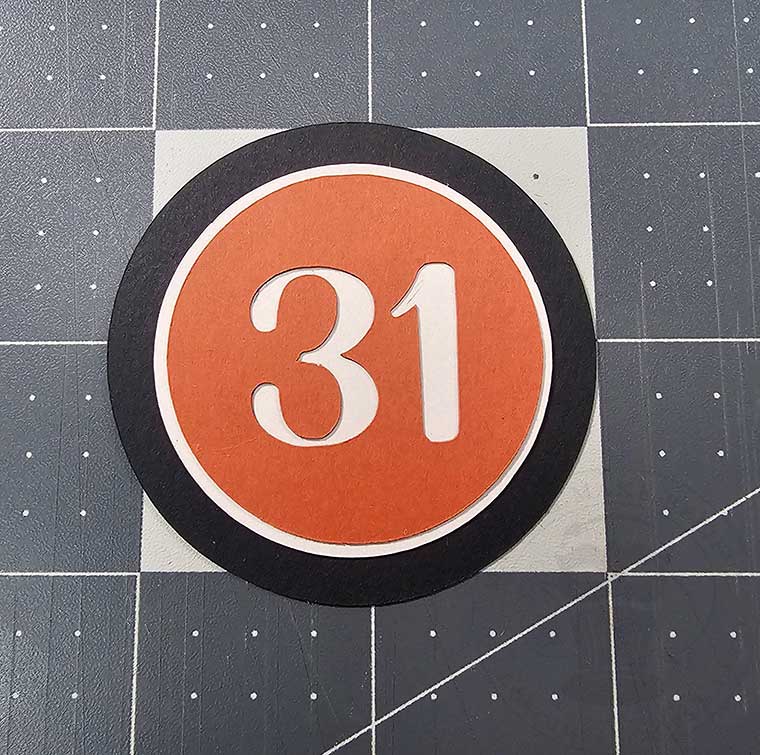
To construct the medallions, center the orange circle with the 31 cutout onto the off-white circle. I find that a few lines of liquid adhesive work best.
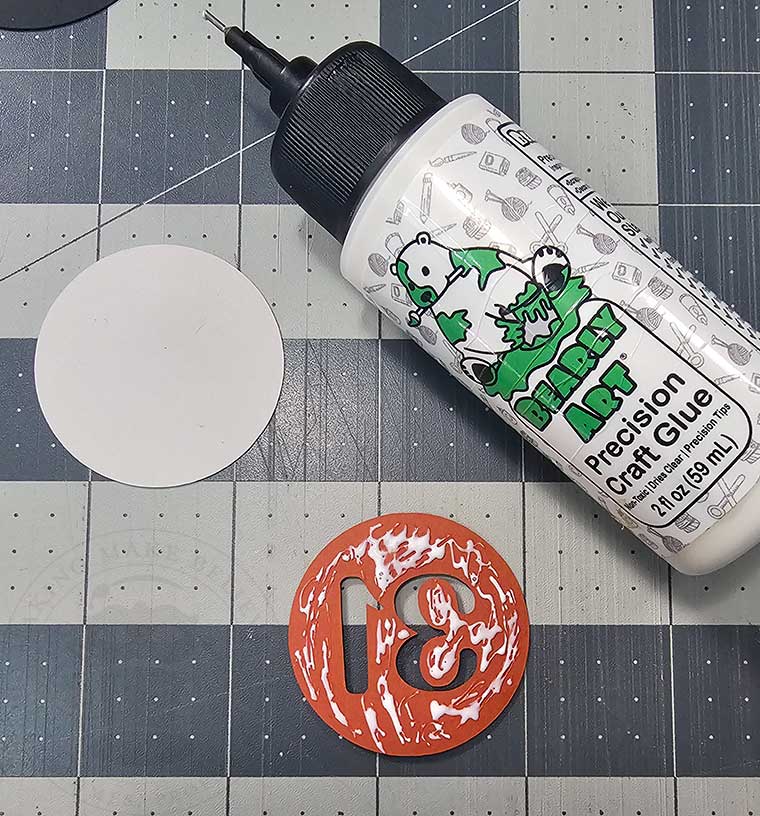
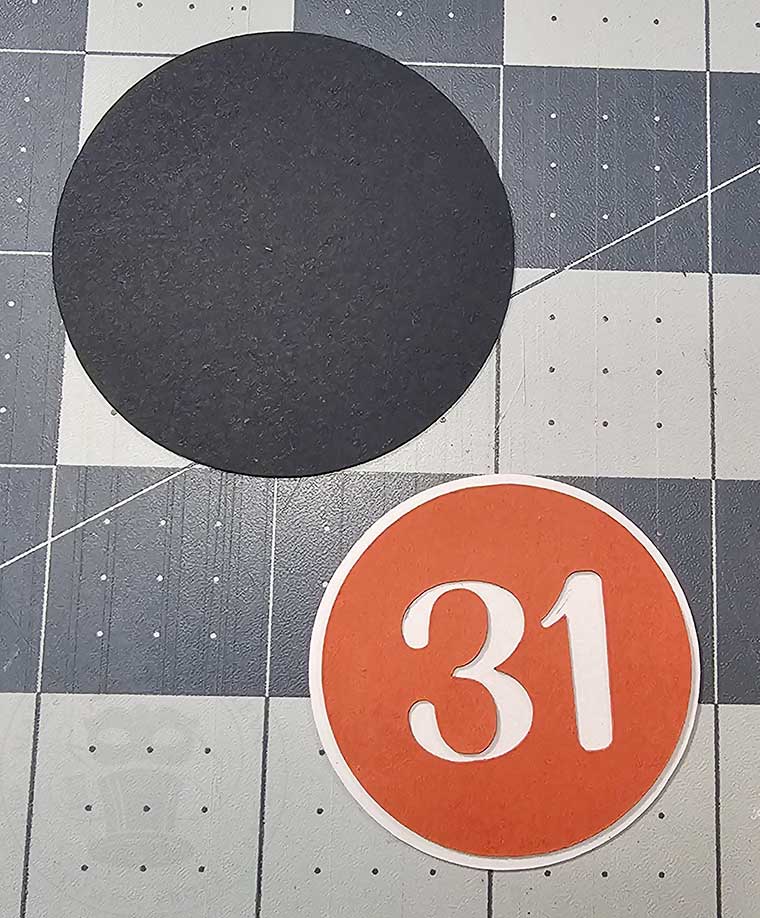
Now glue your stack onto the black circle.
For the Jack and Bonehead medallions, glue the cutouts onto the larger circles.

Glue a medallion to the front and the back (if desired) of the cupcake wrapper.
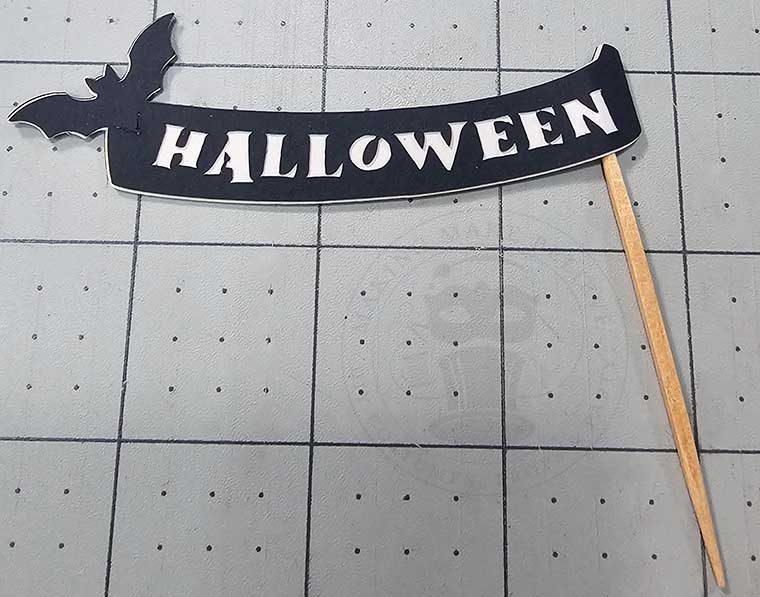
To assemble the Halloween banner pic, apply tiny dots of liquid glue to the back of a black cutout banner, then attach it to the off-white solid banner.
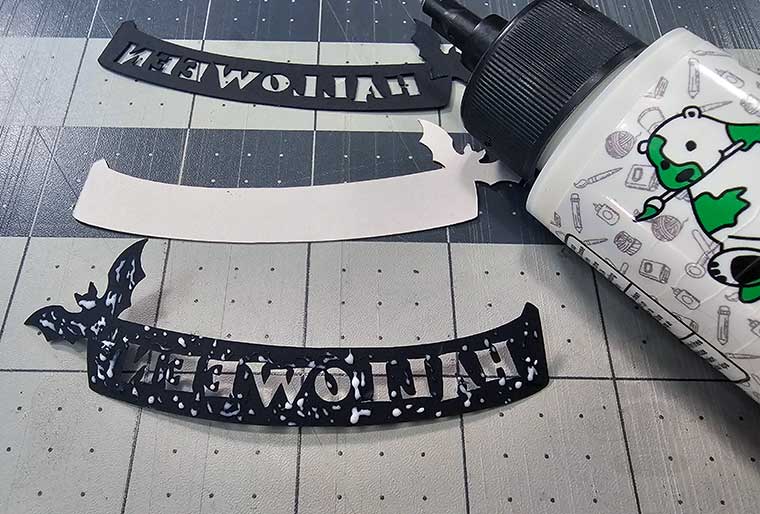

Flip the banner over and glue a toothpick along the edge of the banner opposite the bat.
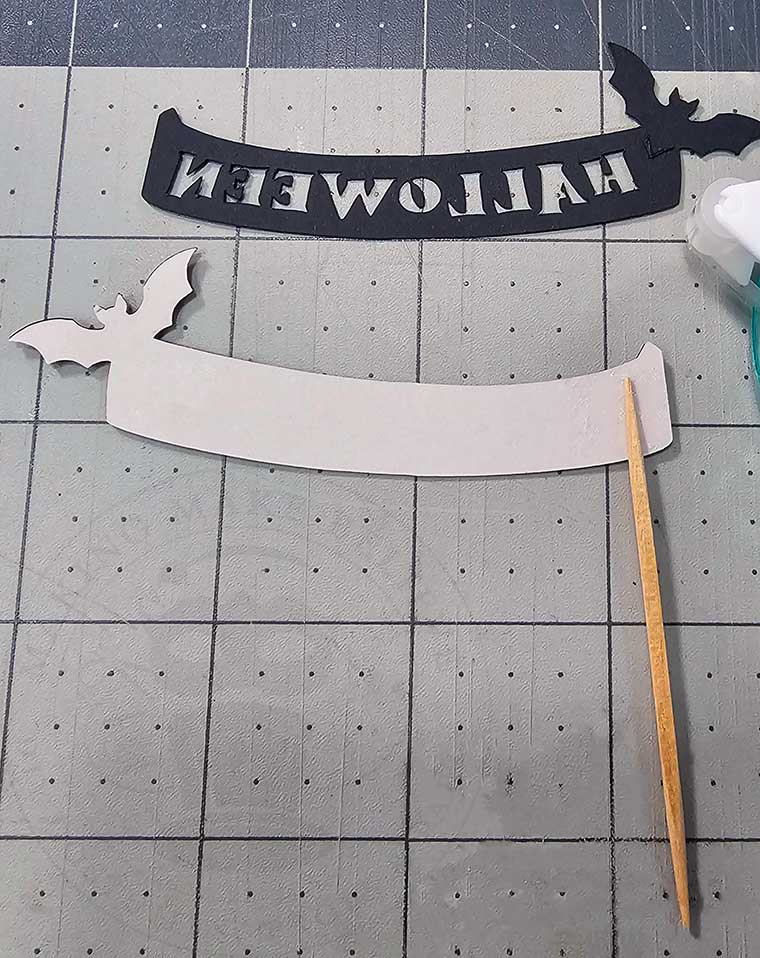
Then, adhere the second black cutout banner to the opposite side.
For the bat pick, simply glue a toothpick in between two of the bat cutouts.
For a custom approach, write your monstrous message on a solid banner

Need it super quick? No worries! Slip your cupcakes into store-bought black cupcake liners, then top each with a cupcake pick.
You can also use the medallions as toppers by simply sandwiching a toothpick between two large circles and gluing a spooky element to each side.
All that’s left is to whip up some cupcakes (or pick some up from the bakery – I won’t tell) and dress them in their finest frightful frockery.
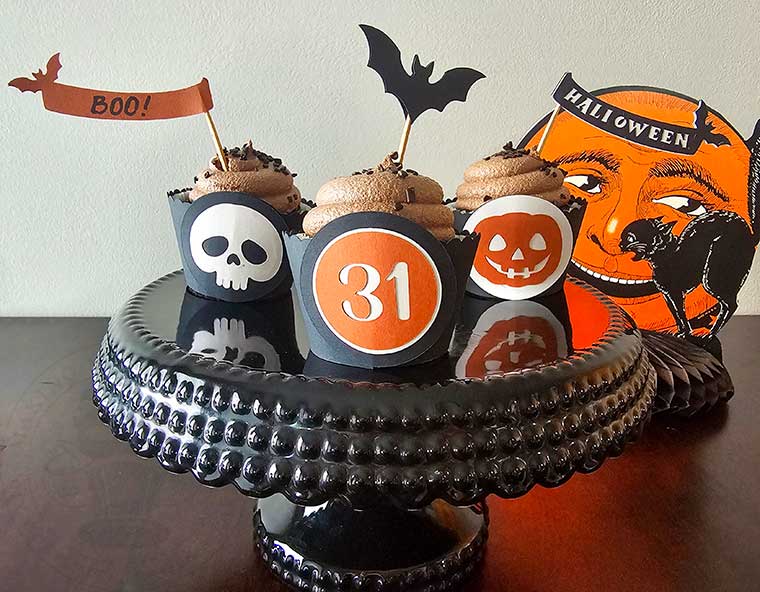
DIY these Halloween cupcake wrappers and picks and you’ll be the envy of all the other bewitching bakers!
Until next time – stay spooky.
