
The flittermouse. The flying fox. The bat. However you name it, this winged creature has etched out a permanent spot in the Halloween hall of fame – equal parts eerie and fascinating, with just enough mystery to keep us cautious.
Their connection to Halloween isn’t random. Seasonal bonfires and autumn gatherings historically drew clouds of insects, which naturally invited bats to the party. Over time, their nighttime habits and preference for shadowy hideouts helped cement their stature as one of the season’s most familiar Halloween icons.
Pop culture only deepened the intrigue. From gothic literature to classic horror films, bats became the icon of all things dark and dramatic, especially after the image of the vampire bat took hold in pop culture through the telling of Dracula.
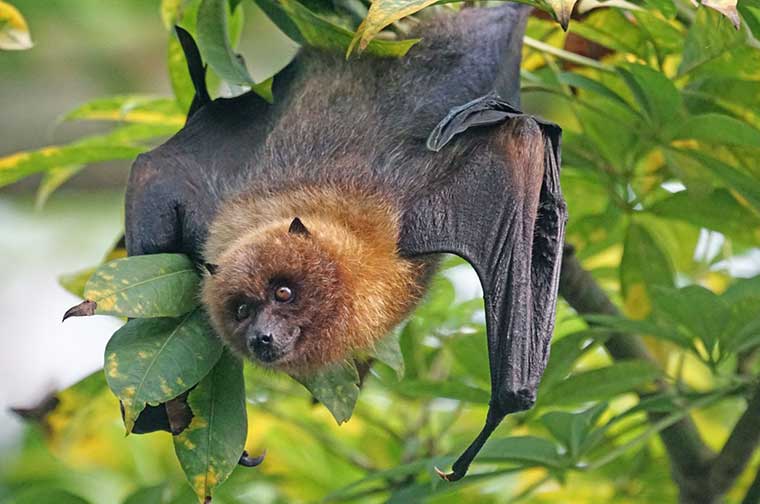
But step outside the mysterious mood lighting for a moment, and bats tell a different story. They’re not villains – they’re vital. These small, fur-covered flyers play a major role in controlling insect populations (your summer self says thank you), and many species are surprisingly charming up close – more woodland creature than the fuel of nightmares.
So today, in honor of National Bat Appreciation Day, we’re giving these misunderstood icons their due – a little less fear, a little more appreciation, and just the right amount of Halloween admiration, all wrapped up in a project that’s as effortless as it is eye-catching.
We’re keeping things simple and stylish with felt and paper, crafting quick bat masks that come together without fuss but still deliver on that unmistakable Halloween presence. They’re perfect as last-minute costume accents, party favors, or a small handmade surprise for the trick-or-treaters who appreciate a little extra flair.
Equal parts practical and playful, this is one of those projects that proves Halloween magic doesn’t have to be complicated to make an impact. If that sounds bat-tastic to you, then let’s get started.

Commemorating National Bat Appreciation Day? If you’d like to keep these three mask templates and assembly guides in your personal archive, save this post to your Halloween Pinterest board so it’s available the next time you’re crafting for the colony.
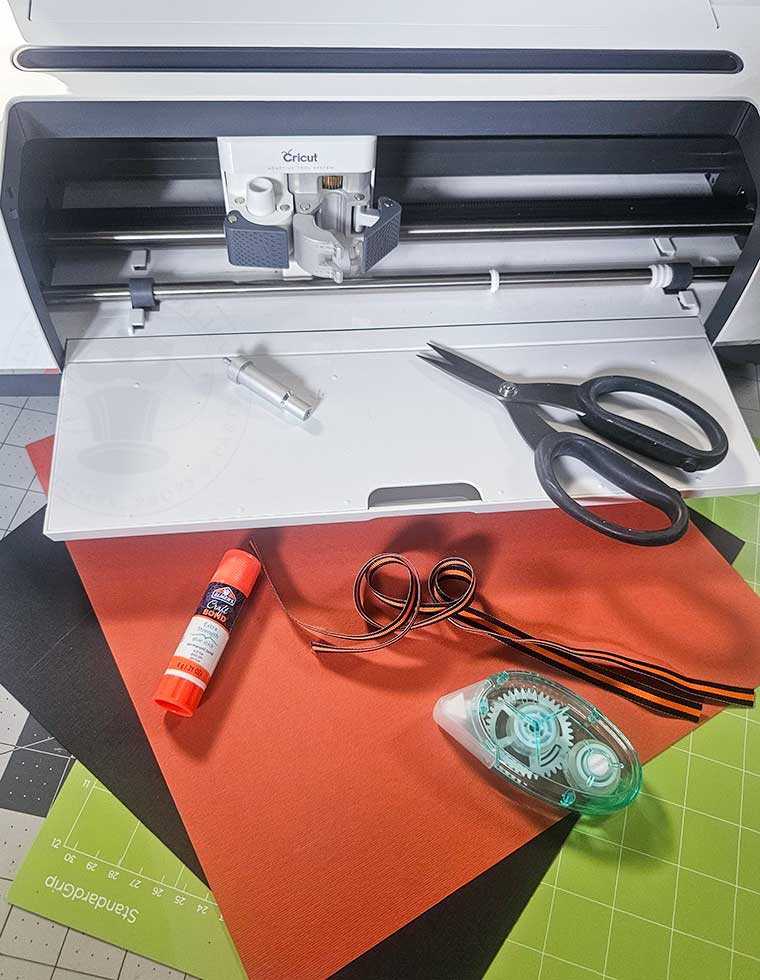
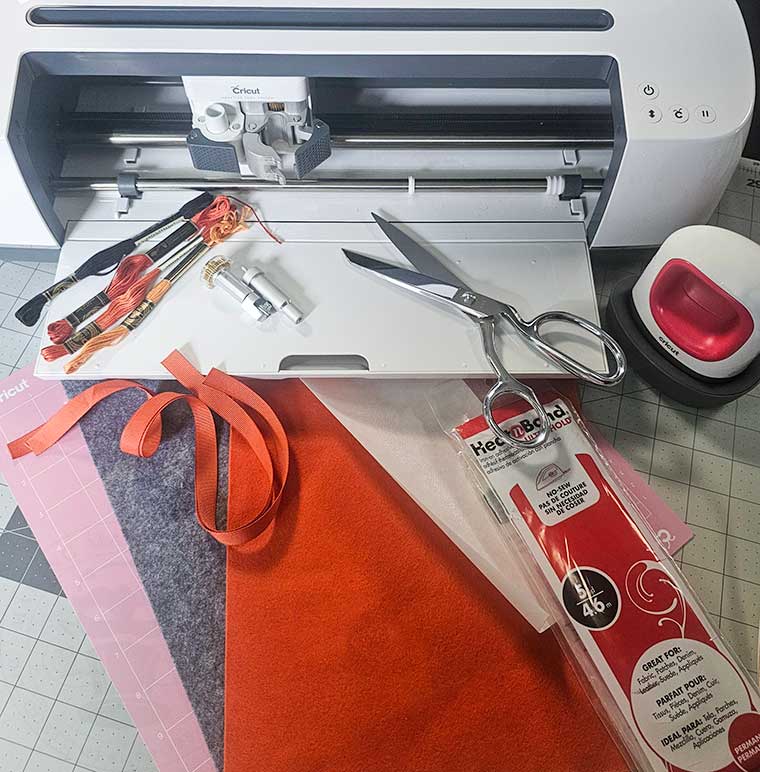
For this project, we will need a cutting machine or scissors plus:
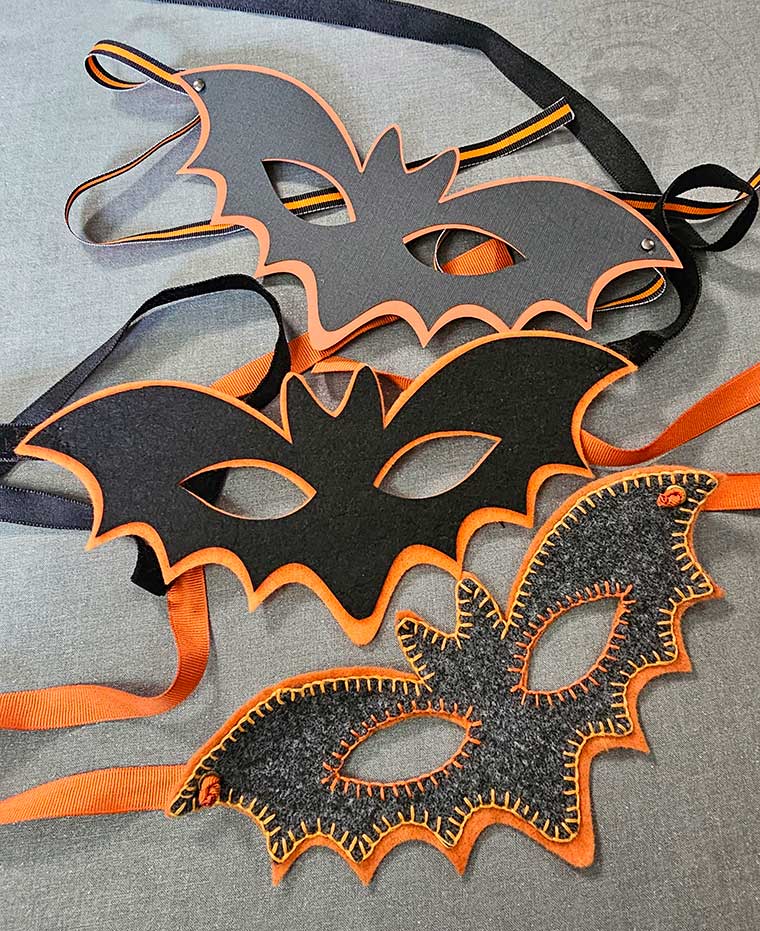
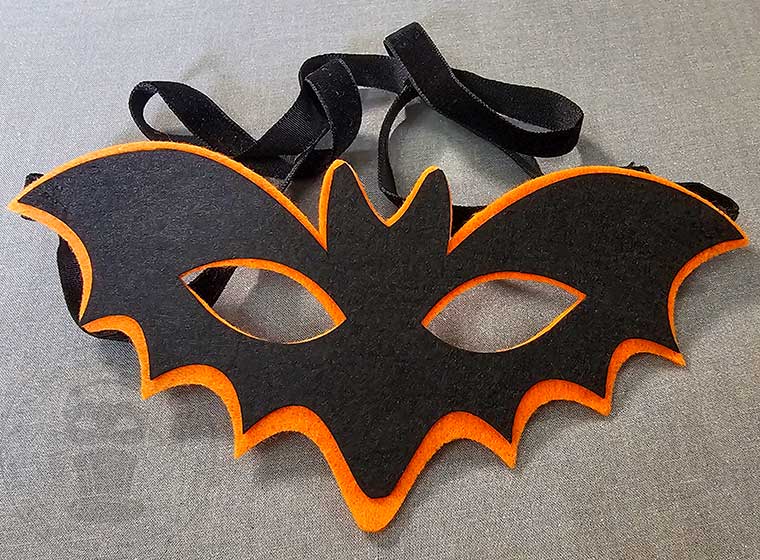
Version I – Super Quick Felt
Craft felt square
Adhesive craft felt square
Fabric blade for cutting machine
Ribbon for ties
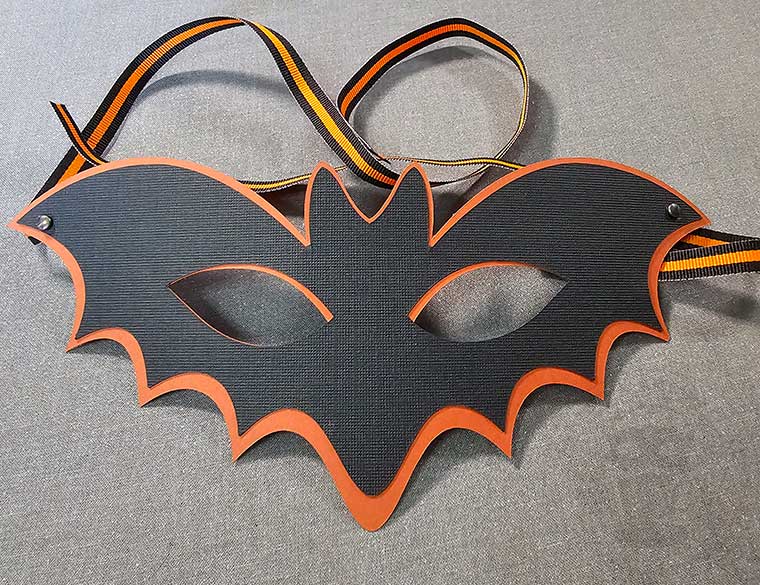
Version II – Quick Cardstock
Cardstock in two colors
Fine-point blade for cutting machine
Adhesive – I prefer a glue stick or double-sided tape roller for a fast fix
Ribbon for ties
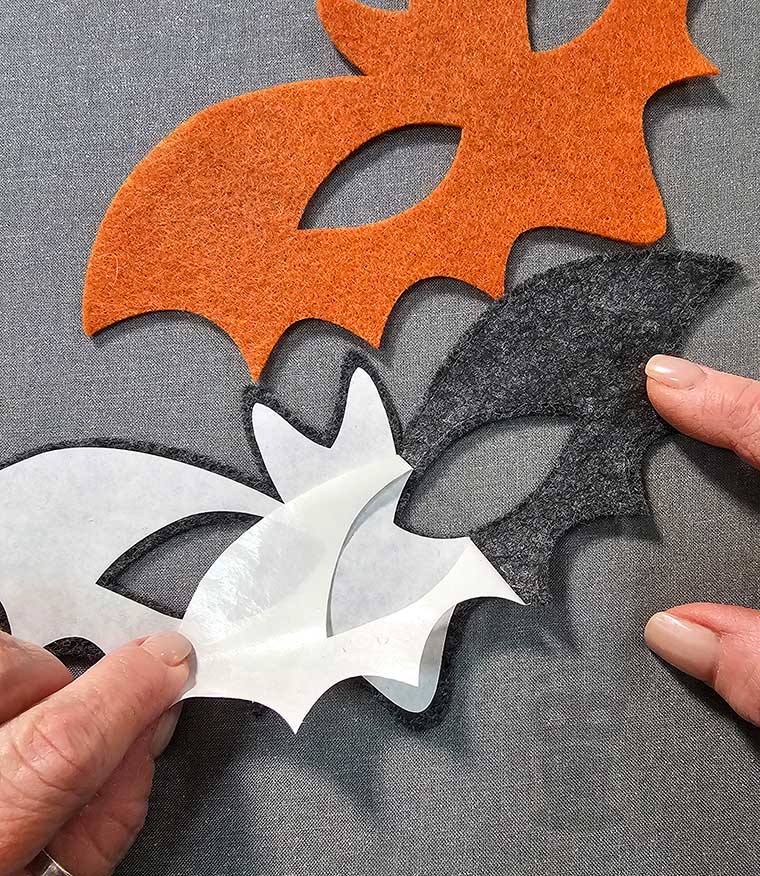
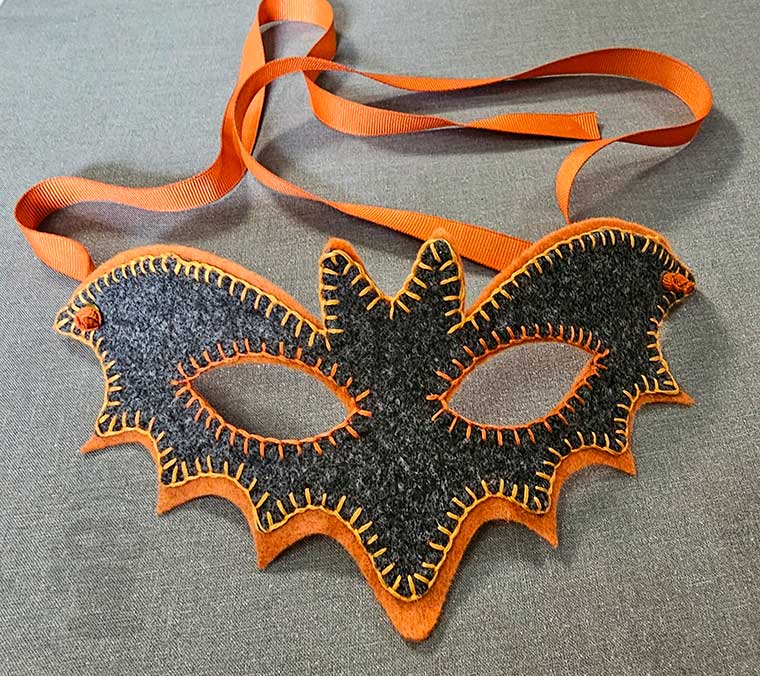
Version III – Spirited Slow Stitch
Craft felt in two colors
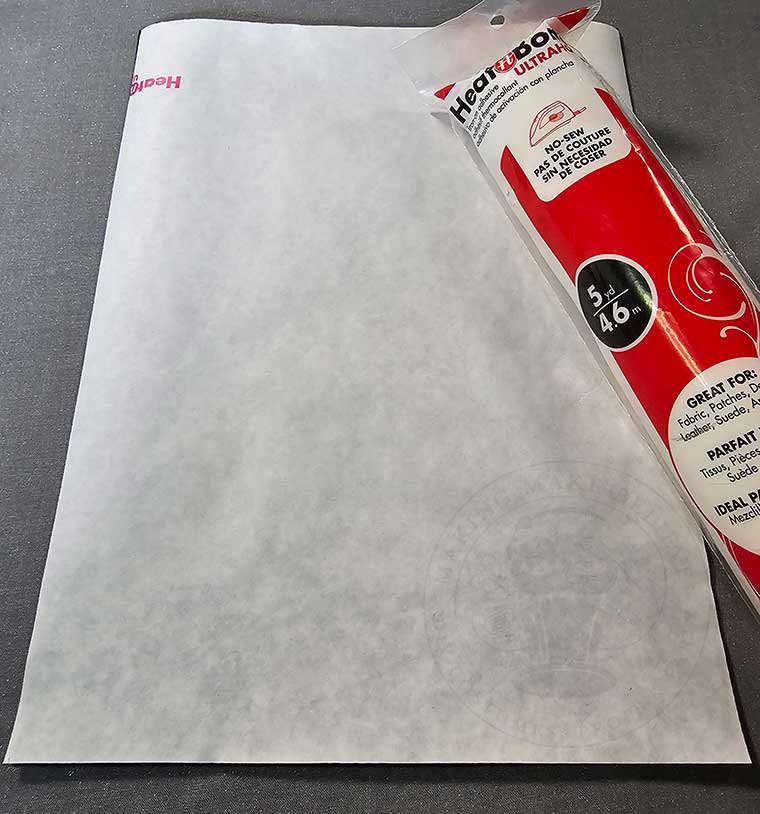
Headnbond Ultra interfacing
Iron and ironing pad
Fabric and fine-point blades for cutting machine
Embroidery floss, beads, and a needle (optional embellishments)
Ribbon for ties
We will also need the National Bat Appreciation Day Mask from the Haunted Library. Select the SVG for machine cutting or the PDF for hand cutting.

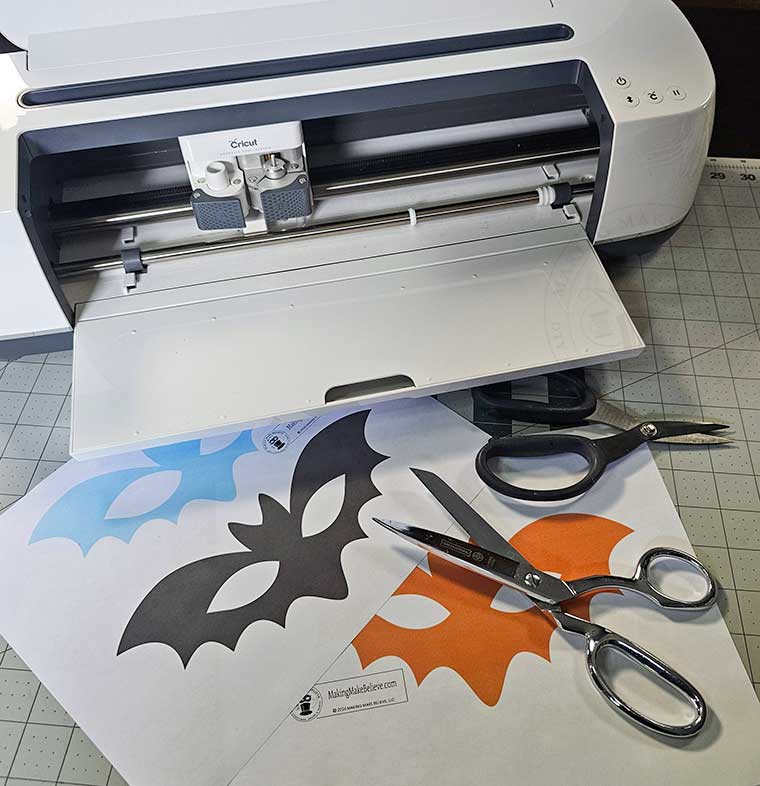
Whether you prefer to cut your masks with a cutting machine like a Cricut or with scissors, this project comes together quickly and easily.
For hand cutting, download the PDF, print the template, cut it out, and trace it onto felt or cardstock. Then cut out your mask pieces.
For machine cutting, upload the SVG into your favorite design software, such as Cricut Design Space, and see the recommended mats, blades, and cut settings for each version below.
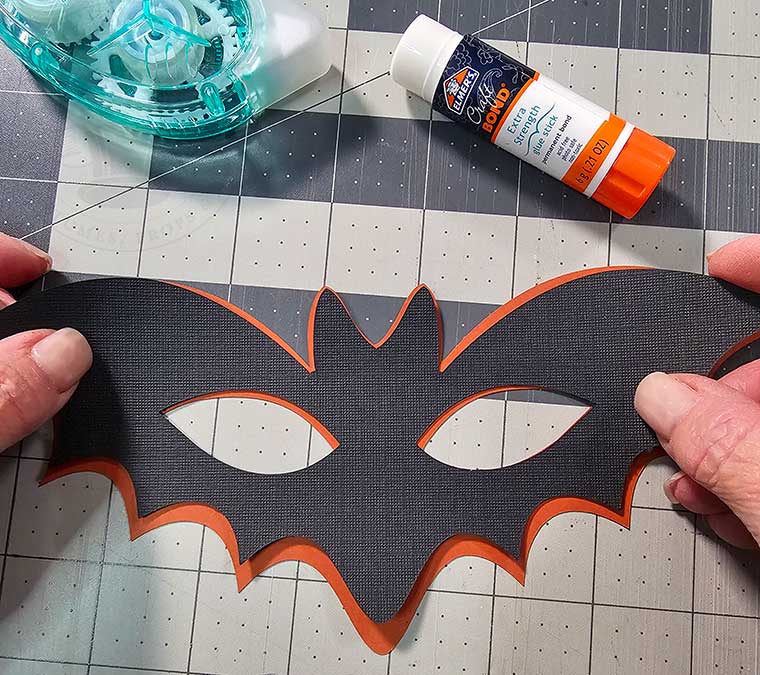
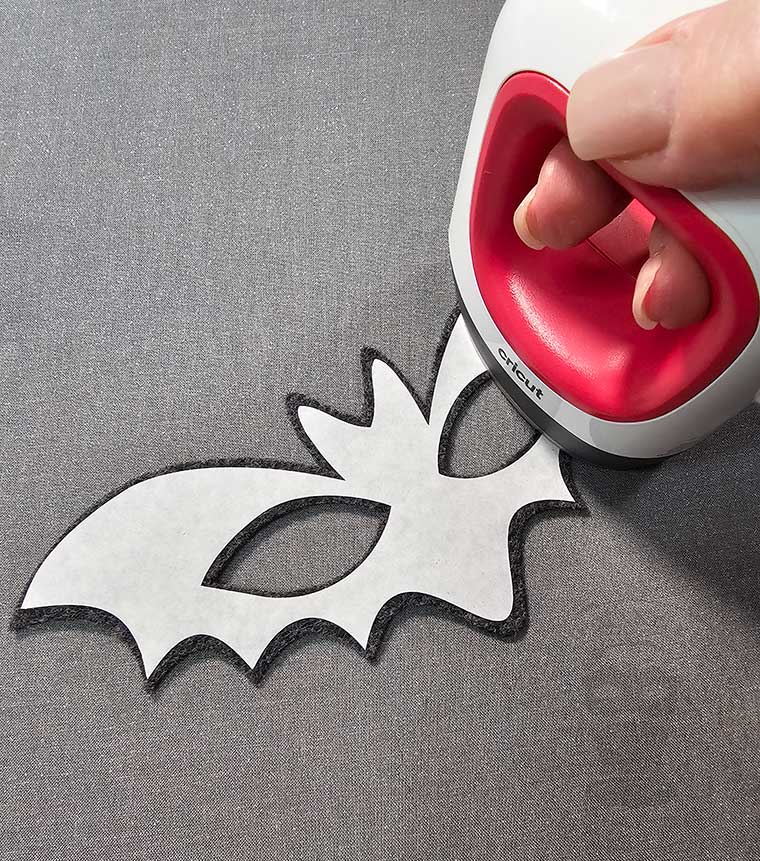
Got a costume need that requires a fast fix? You can be flying high with this version of our National Bat Appreciation Day Mask.
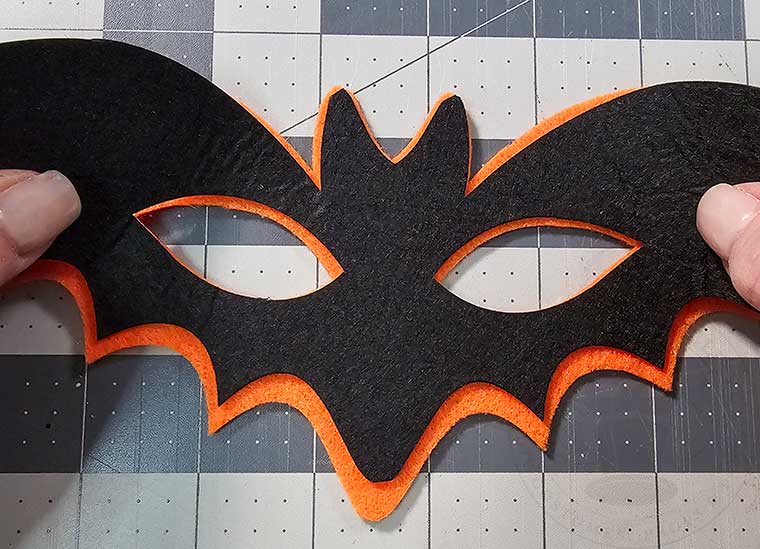
To begin, cut the bat mask base from craft felt. I used the Fabric Grip mat, a Rotary Blade, and the Cricut Acrylic Felt setting to cut this piece.

To cut the bat mask top, place the adhesive felt onto a Fabric Grip or Strong Grip Mat with the adhesive side down. Select the Felt, Wool Bonded setting and cut using a Rotary Blade.
Note that only the bat mask top should be cut from adhesive felt.
Peel the paper off the adhesive felt and, aligning the outer corners and base of the eye cutouts, stick it onto the base.

To finish this bat mask, skip to the Frightful Finish Line section below.
Got a costume emergency and no felt? No problem!
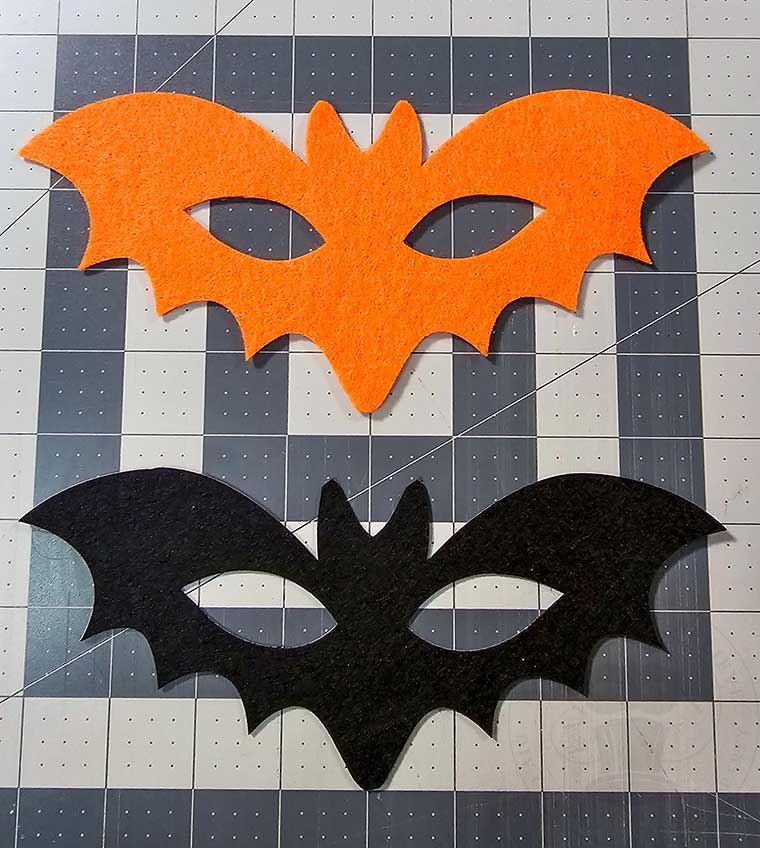
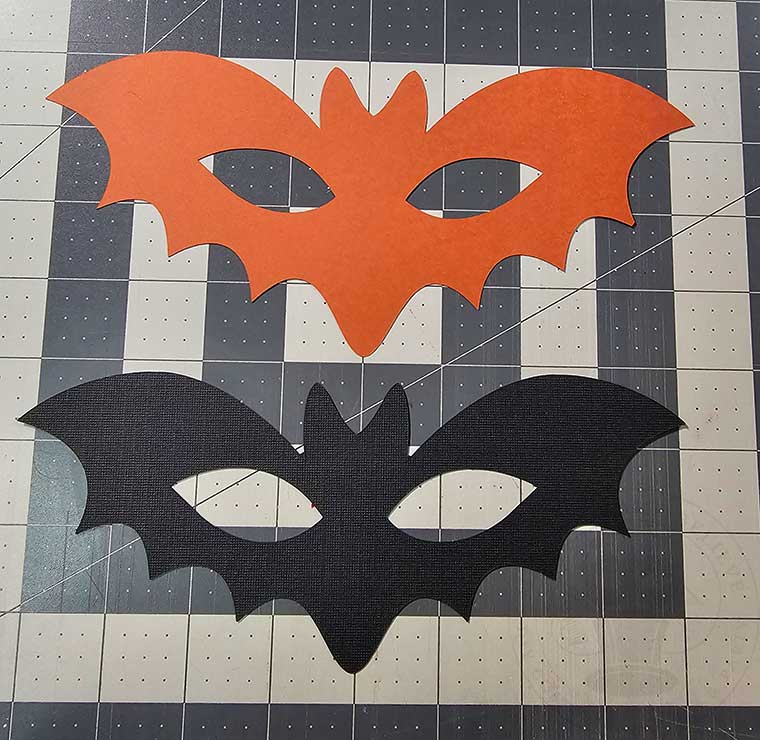
To begin, cut the top and base pieces for your bat mask, each from a different color of cardstock. I use a Standard Grip mat, Fine Point Blade, and the settings that match my cardstock weight (light, medium, or heavy).
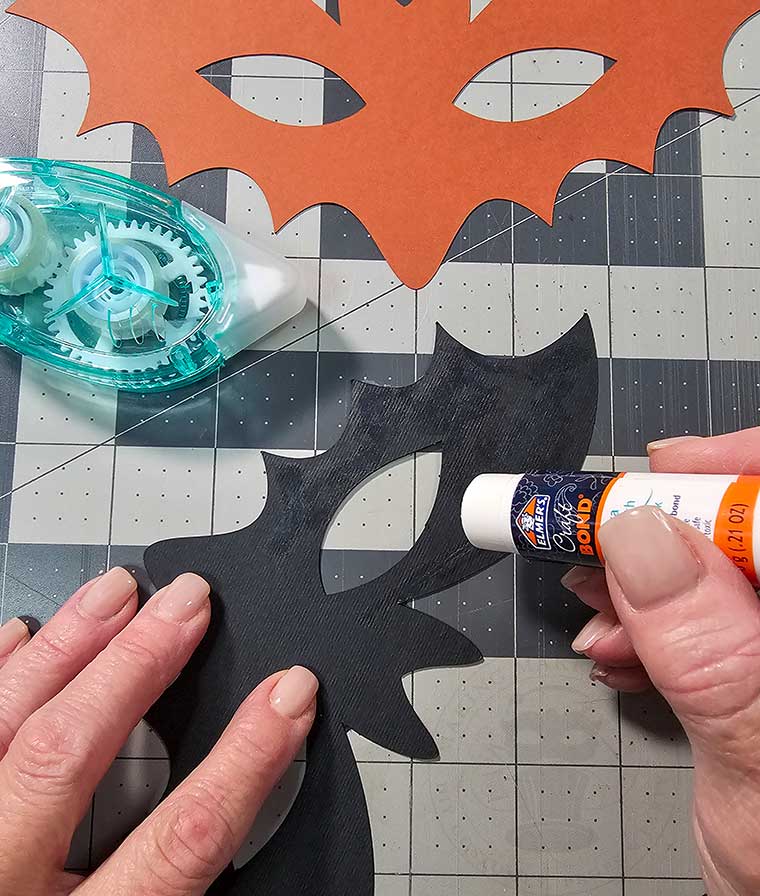
Spread adhesive onto the back of the bat mask top and, aligning the outer corners and base of the eye cutouts, stick it onto the base.
To finish this bat mask, skip to the Frightful Finish Line section below.
If time is not of the essence and you want to take this National Bat Appreciation Day Mask to the next level, try this version.
Cut the bat mask base from craft or wool felt using the Fabric Grip mat, a Rotary Blade, and the Cricut Acrylic Felt setting.
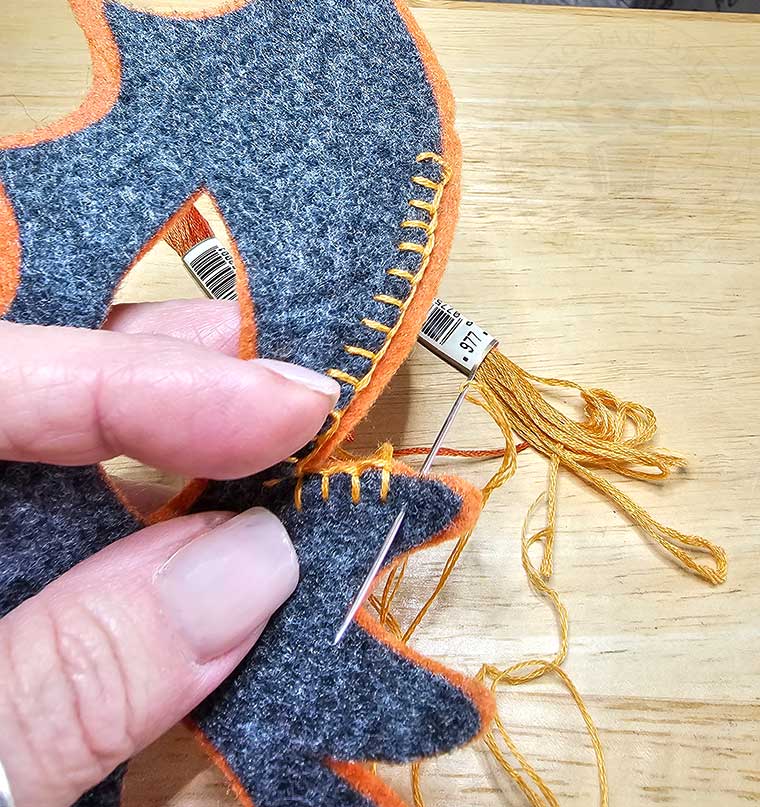
For a sturdier mask, I like to add Headnbond Ultra interfacing between the layers.
Begin by setting your iron to medium heat with no steam, and cut a square of Heat ‘n Bond the size of your felt square.
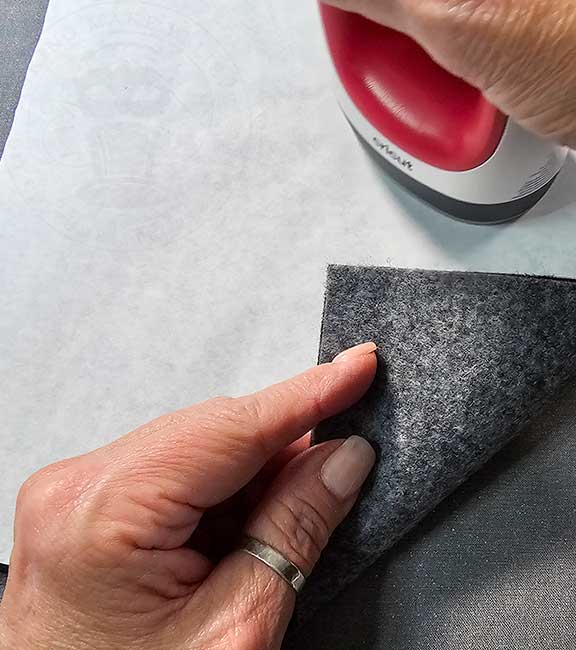
Place the adhesive (rough) side of the Headnbond down onto the felt you want to use for the bat mask top and press for a few seconds.
If you are using acrylic craft felt instead of wool felt, it is best to keep the iron moving in a circular motion to prevent the fabric from melting.
To cut your felt with the Heatnbond attached, place the felt on the Fabric Grip mat paper-side up. Use the Rotary Blade and the Felt, Wool Bonded setting.
An interfacing template is included in the download so you can embroider your mask prior to applying the Headnbond. The interfacing template piece is slightly smaller than the bat mask top, so you will have less bulk around the edges should you want to add any decorative stitching or other embellishments.
To cut the interfacing template, I placed the Heatnbond paper side down on a Standard Grip mat and. I used the Fine Point Blade, and the Light Cardstock settings.
To attach the pieces, remove the paper backing of the Headnbond.
Then, aligning the outer eye corners and the base of the eye cutouts, lay the top on the base and press again with the iron to adhere the pieces together.
If you want to go one step further in celebrating, consider adding decorative embroidery, beading, or blanket stitching to your mask.
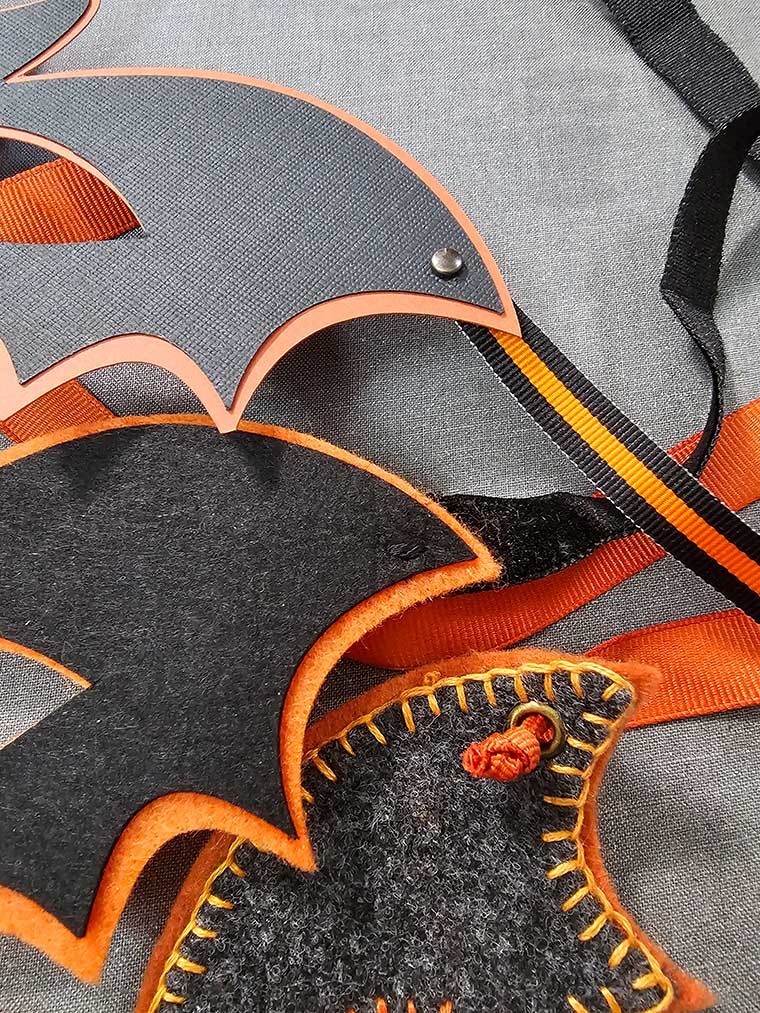
To finish your mask and make it wearable, attach a 17 – 19” length of ribbon to each side.
Options for attaching the ribbon include stitching it into place, installing grommets, or securing it with brads.
Now you are set to celebrate National Bat Appreciation Day in fang-tastic style!
Until next time – stay spooky.