
This past weekend our city hosted its annual Smoky Hill River Festival, a three-day celebration packed with art, music, food, and enough creative inspiration to send any maker straight back to their craft table.
The festival grounds transform into a winding maze of creativity. Booth after booth overflows with pottery, embroidery, jewelry, fine art, handmade soaps, mixed media pieces, and clever upcycled clothing. For anyone who loves making things with their own two hands, it’s basically creative overload – in the best possible way.
And then there’s the food.
Food trucks and tents snake through the grounds, luring you in with the kind of indulgent creations you rarely see anywhere else. Gator on a stick, burgers piled high with mac and cheese, deep-fried butter (yes, really), and homemade sodas tempt you at every turn.
I played it a little safer and opted for vegetarian tacos followed by a scoop of old-fashioned homemade ice cream – still decadent enough for a festival evening.

Opening night kicks off with the legendary Festival Jam, where more than a dozen bands fill the air with music. Performances continue all weekend long, creating the perfect soundtrack for wandering through the creative chaos.
One thing you can always count on during the festival: you’re going to get damp. Sometimes it’s rain. Sometimes it’s humidity thick enough to rival a haunted swamp.
This year it was the humidity. 😅
So after browsing every booth, collecting a few artistic treasures, and sampling the food trucks, we retreated to the air-conditioned comfort of home.

After soaking in all that artistry, I felt the sudden urge to sharpen my SVG-making skills.
I’m still relatively new to creating SVG files. When I first started this blog, I took a course to learn the basics. Even though I’ve owned Adobe Illustrator for years, I actually began experimenting in Inkscape, which felt far less intimidating.
Here’s a little sneak peek of what I’m currently working on.
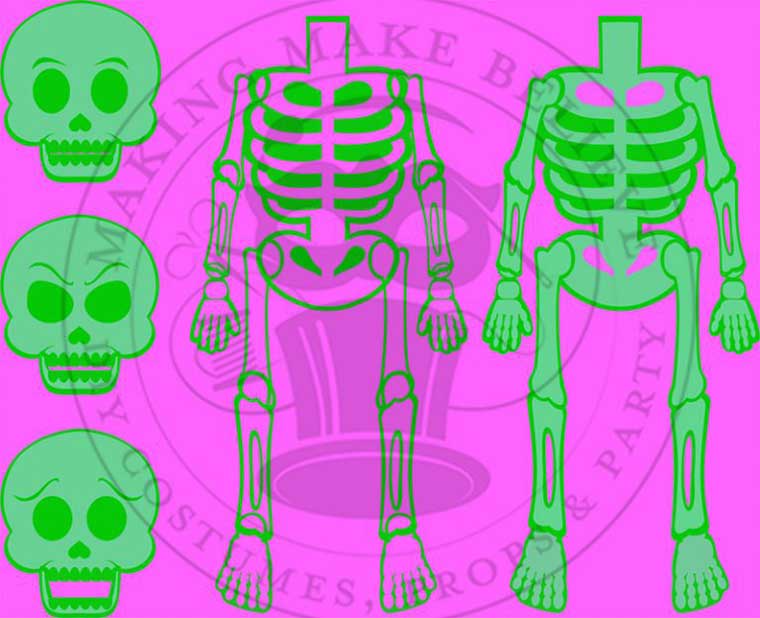
I still need to test the cuts and make sure everything behaves properly, but if all goes well I plan to release the free files for this DIY Jointed Skeleton early next month.
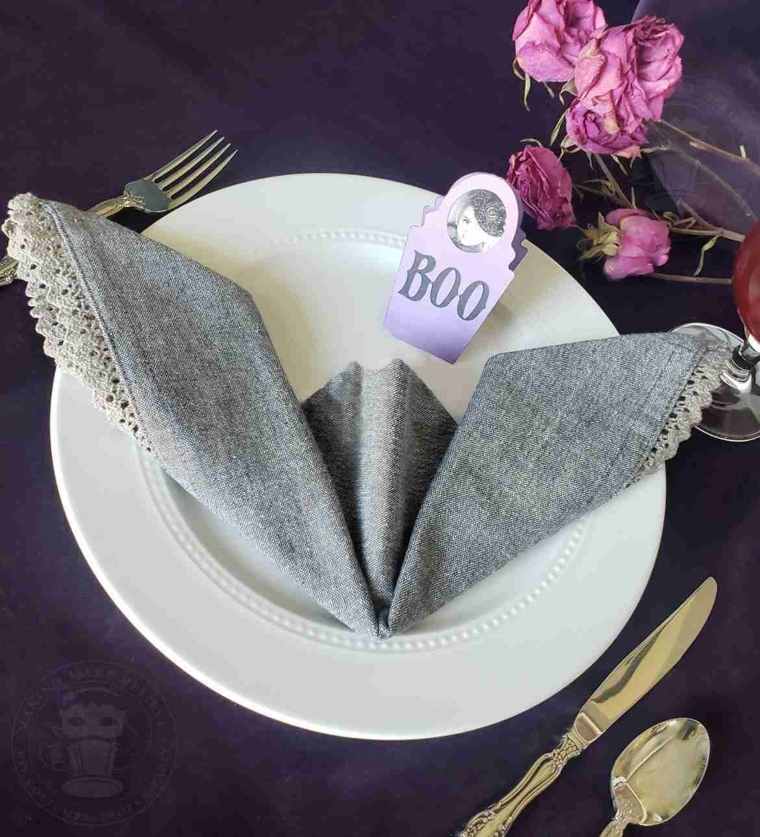
Next week I’ll also be sharing more Portrait Tombstone pieces – including the eerie place card shown here.
And speaking of spooky table details…
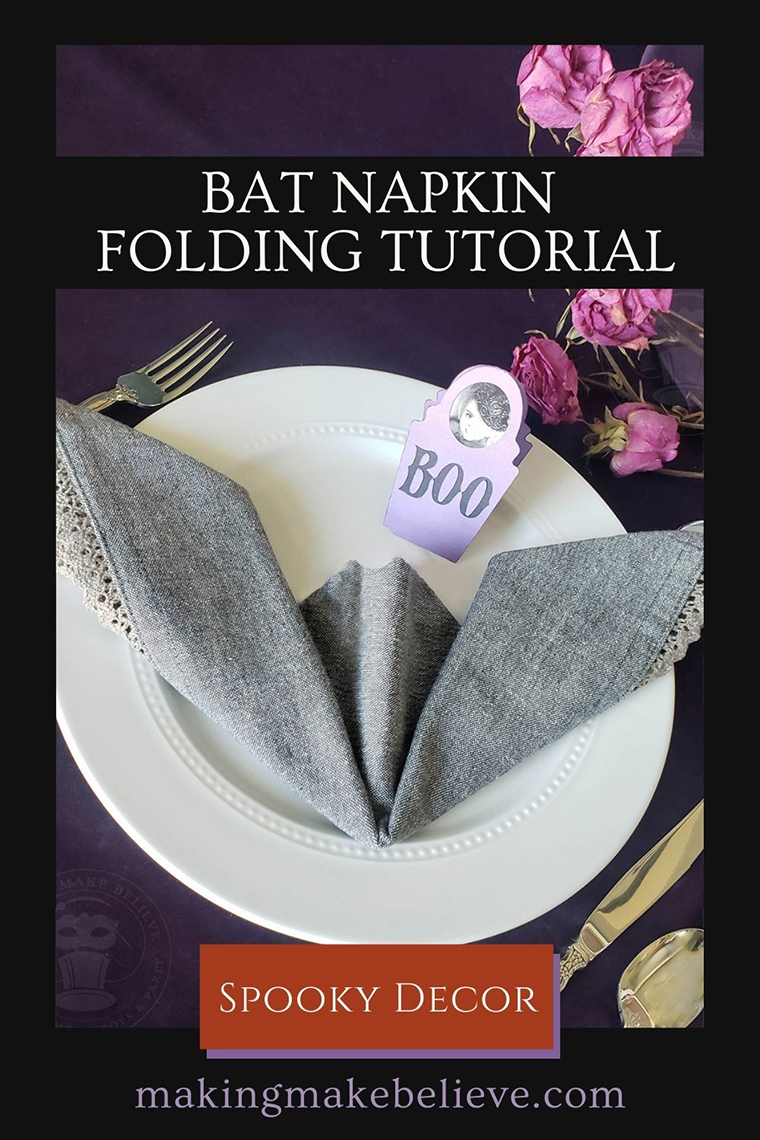
What do you think of that bat napkin?
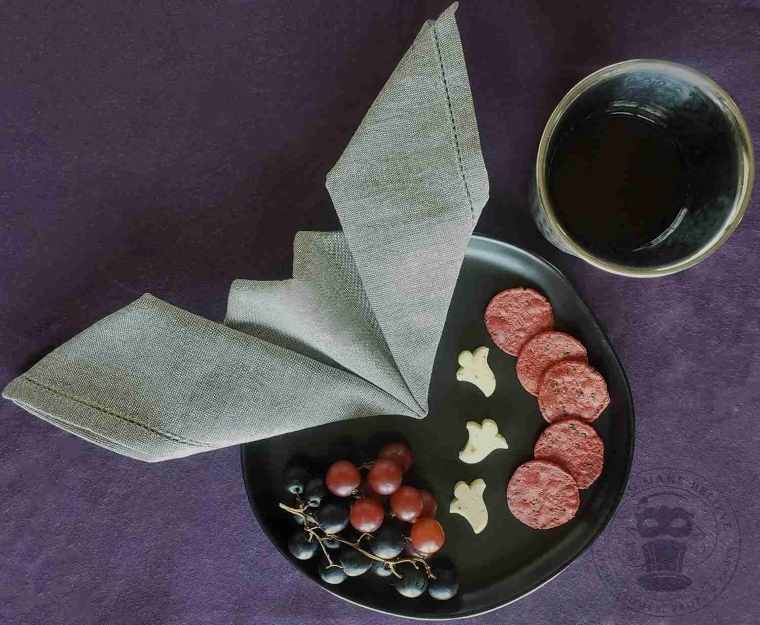
These little creatures of the night add the perfect haunted flourish to a Halloween dinner party table – and the best part is they’re incredibly easy to fold.
Let me show you how.
Be sure to save this Bat Napkin Folding Tutorial to your Halloween Party Ideas board on Pinterest so you can easily find it when planning your next haunted dinner party. 🦇
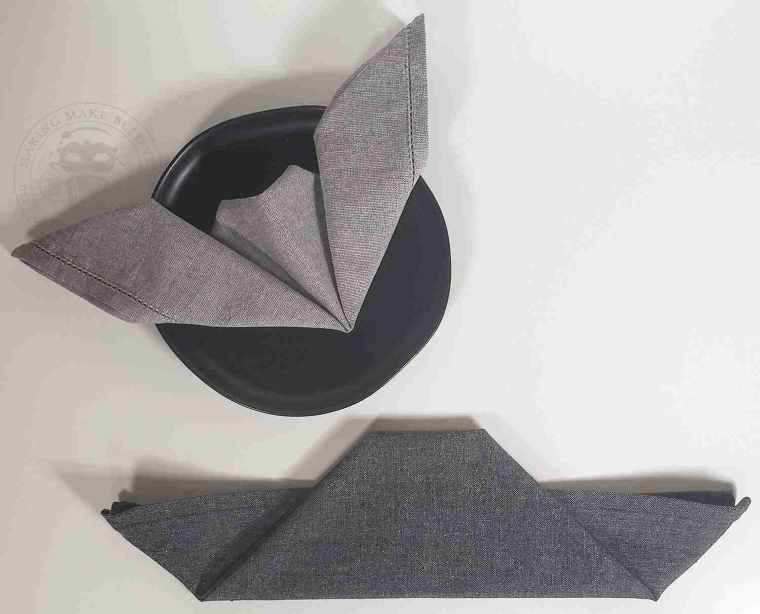
Looking for a simple way to add a spooky flourish to your Halloween table? This bat napkin fold is a quick and easy way to transform an ordinary cloth napkin into a charming little creature of the night.
Perfect for Halloween dinner parties, spooky brunches, haunted house gatherings, or gothic fall tablescapes, this bat napkin adds an eerily elegant touch to your place settings.
All you need is a square cloth napkin (about 18 inches) and a few simple folds.
Start by ironing your napkin so it’s crisp and wrinkle-free. Clean, sharp folds will help your bat wings hold their shape and make the finished napkin look more dramatic on your Halloween table. And you know I love some haunted drama!
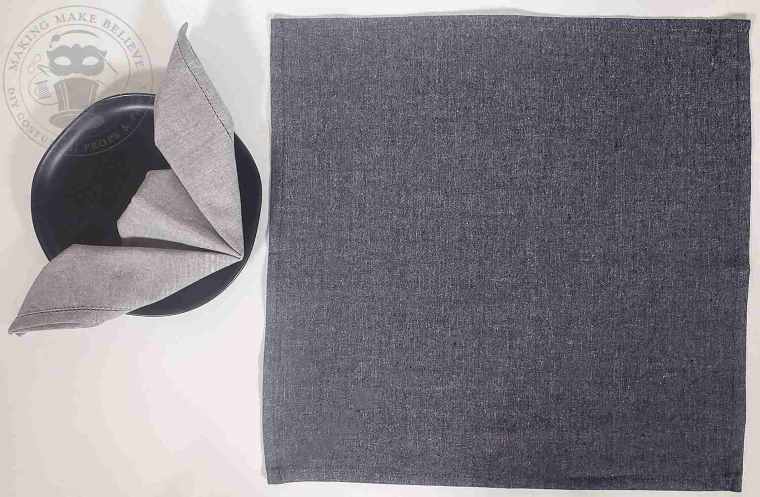
Lay your square napkin flat and fold it diagonally in half to form a large triangle. Smooth the fold with your hand to keep everything nice and crisp.
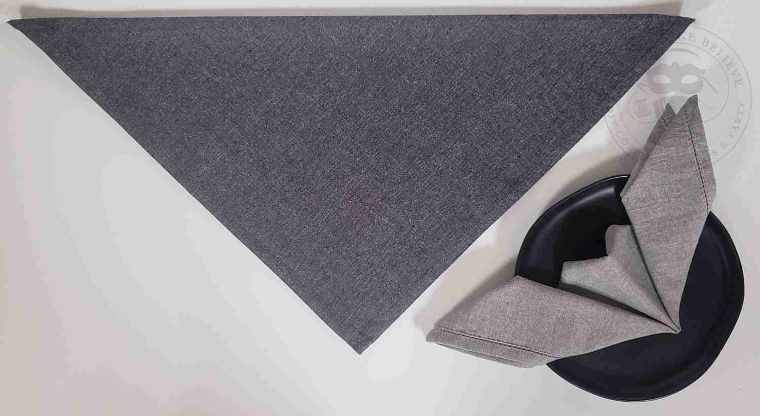
Fold the triangle in half again to create a smaller triangle. This step helps form the base structure of your bat.
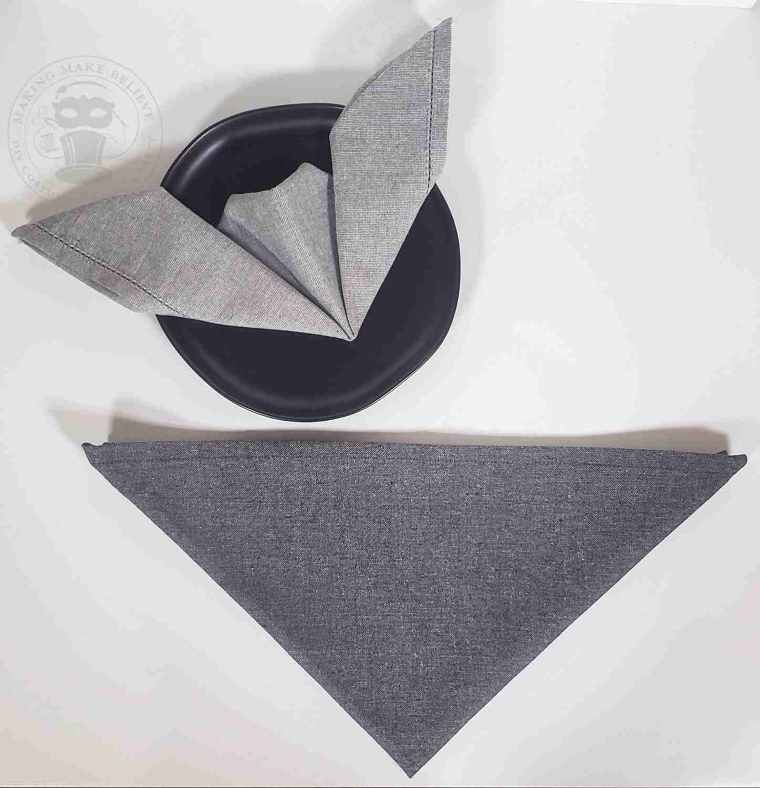
Take the pointed tip of the triangle and fold it up and over the top edge by about 2–3 inches. This fold sets up the shape needed to form the bat’s head.
Tuck about 1½ inches of the folded point underneath toward the back of the napkin. This creates a small raised section at the top that will become the bat’s head.
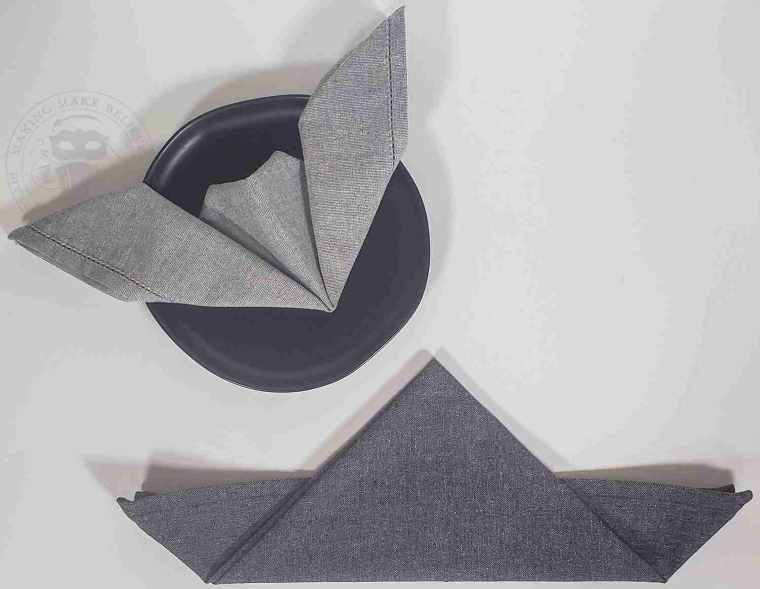
Locate the center along the bottom edge and hold it gently with your finger. Lift the left corner upward to form the first bat wing.

Repeat the same fold on the right side, lifting the corner upward to form the second wing. Smooth both wings so they lie flat and symmetrical.
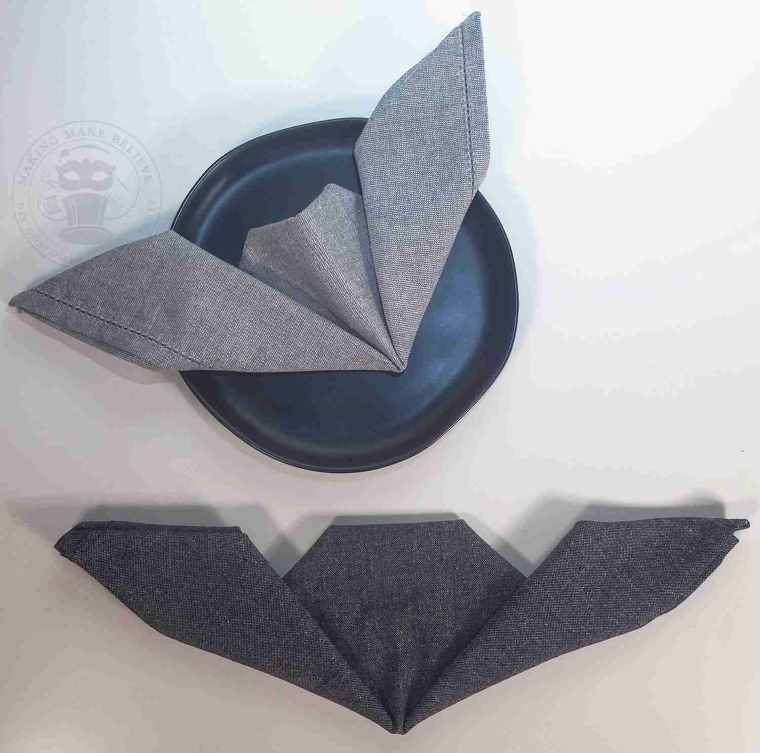
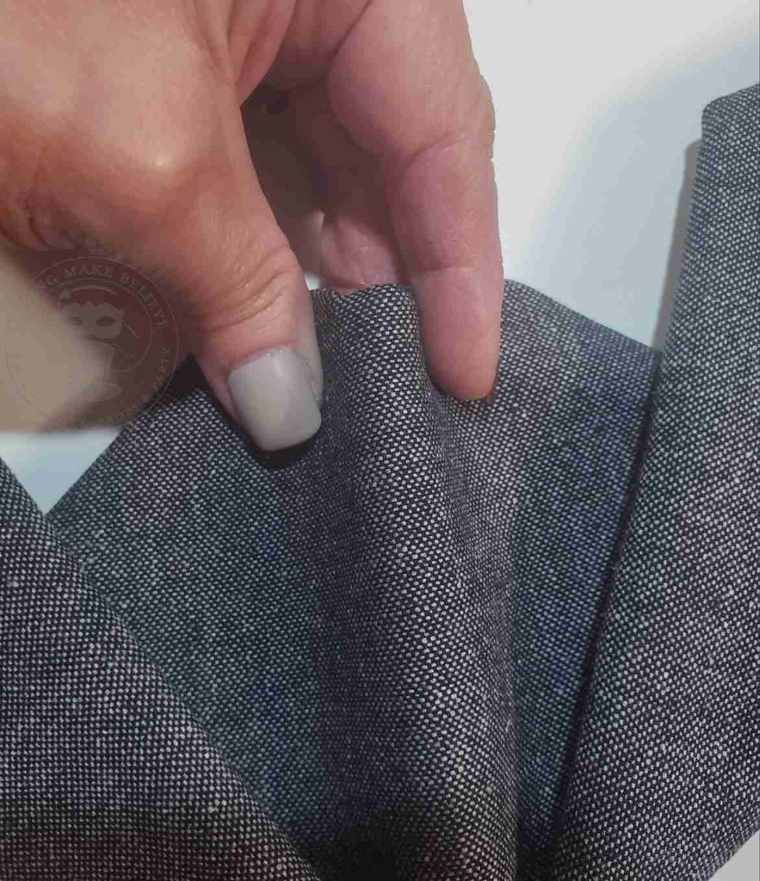
Gently pinch the center of the top section between your fingers to create two tiny bat ears. This eerie little element brings your spooky bat napkin to life.
Your Halloween bat napkin fold is now ready to perch on your table. These spooky little bats make a fun addition to:
Halloween dinner party place settings
Gothic fall tablescapes
Haunted house gatherings
Spooky charcuterie displays
They’re quick to fold and add the perfect eerie flourish to your Halloween decor.
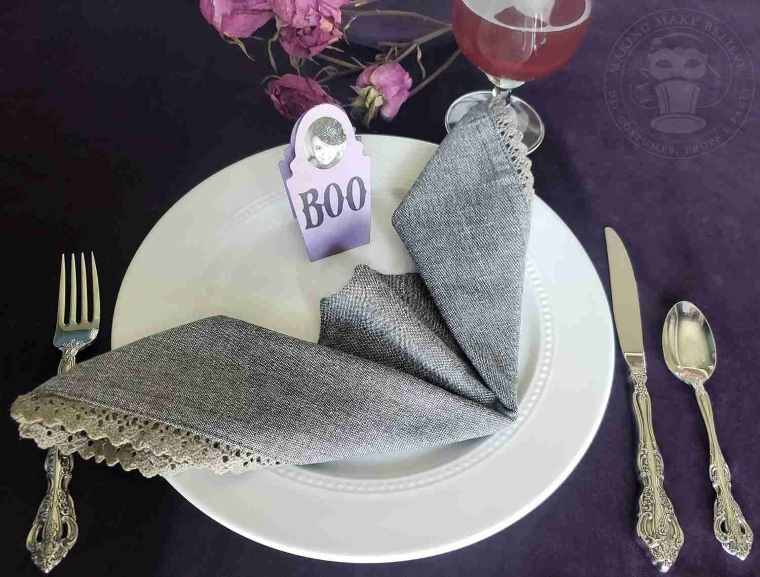
So, what do you think? Will these bat napkins make an appearance at your next frightful feast?
Until next time, stay batty.
