
It’s the most wonderful time of the year!
We are at that point where the holidays pile up on top of each other.
Christmas is closing in quickly, and then it’s just a blink before we get ready to pop the champagne and celebrate the new year.

Whether your plans include a night on the town or a quiet evening at home, consider adding a bit of mystery to welcome in the new year.
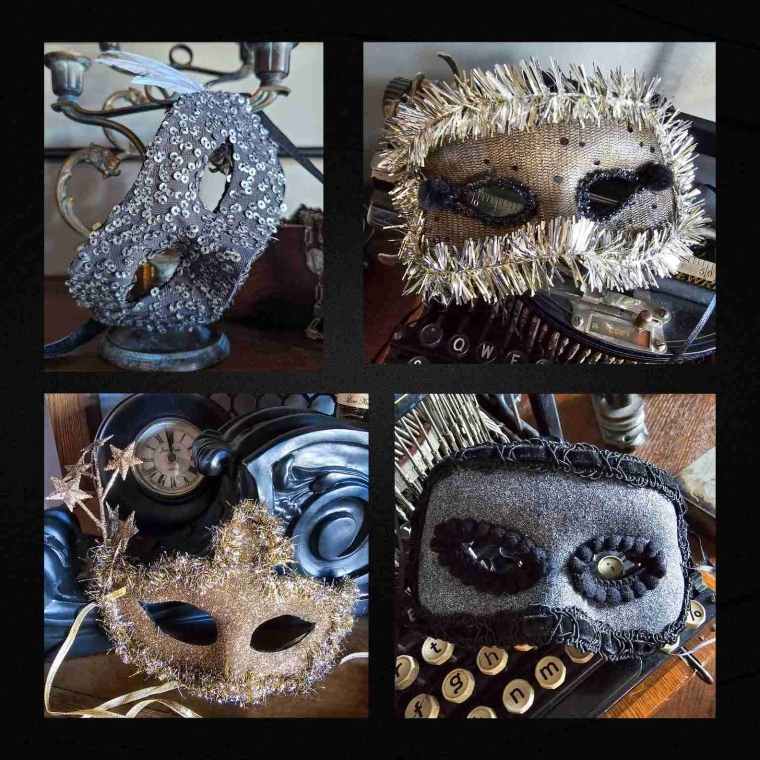
One of my favorite NYE accessories is the masquerade mask. Even when not attending a party, I like to sprinkle a few around as decor.
While the NYE standard tends to be shiny and bright, I want to create a more moody vibe, so I’m crafting my masks from tarnished silvers, muted golds, and basic blacks.
Time is ticking, so let’s get started.

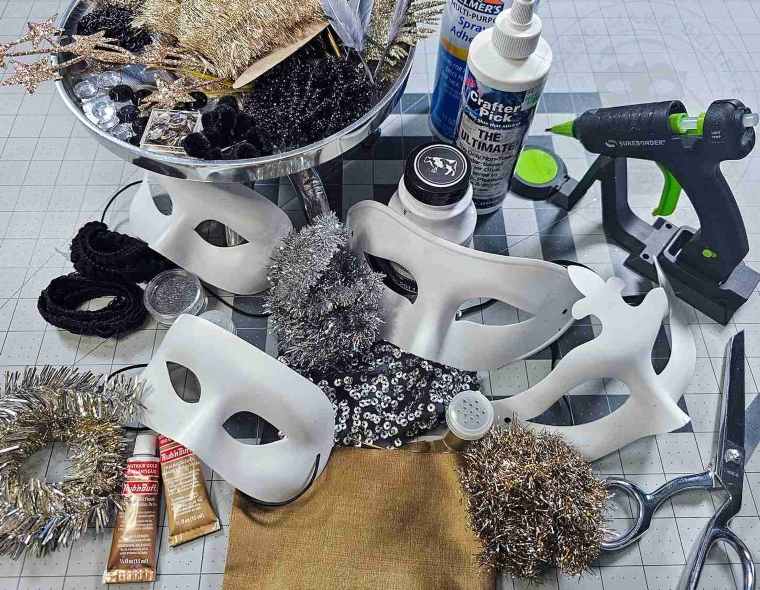
For this project, we will need:
Masquerade mask blanks – I grabbed these from Hobby Lobby
Adhesives such as hot glue, spray adhesive, or craft glue
Craft or spray paint and paintbrush
Ribbons and trims
Fabric scraps
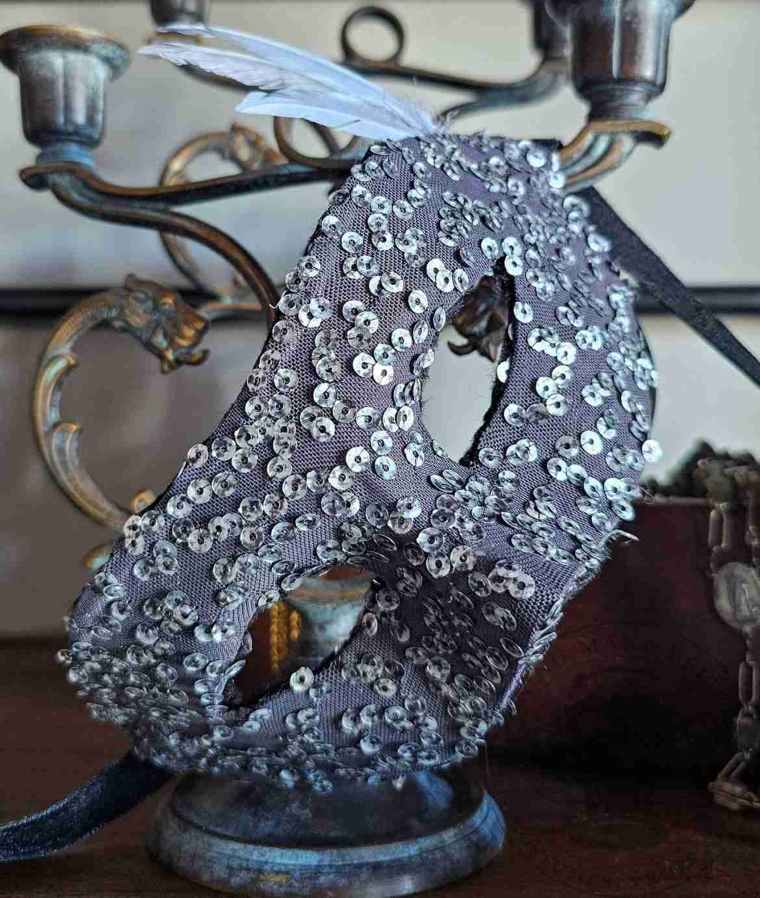
Assorted embellishments such as craft gems, felt, feathers, sequins, florals, pom poms, glitter, etc.
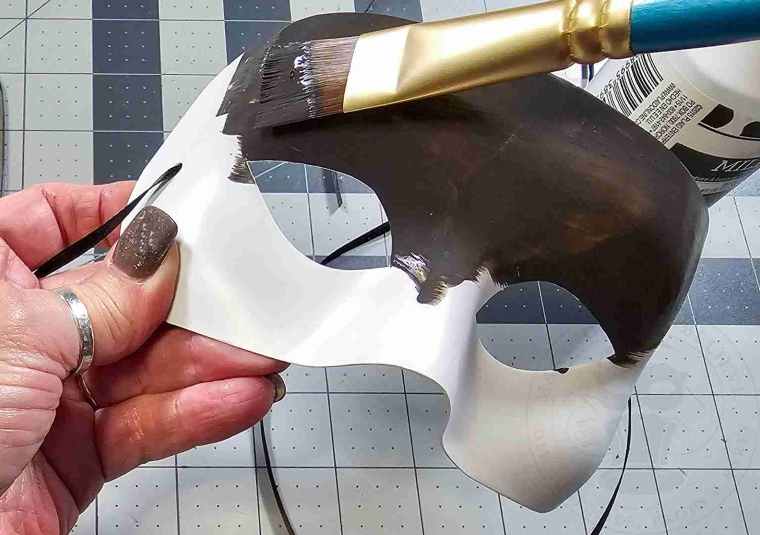
For the first masquerade mask, let’s start off super simple.
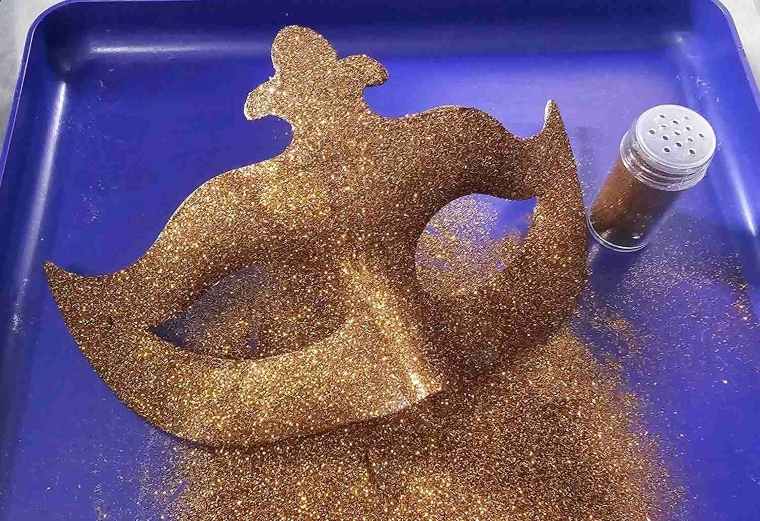
First, apply a coat or two of paint to the mask. I selected an craft paint that coordinates with the glitter I want to use.
Allow the paint to dry, then working in sections, apply a thin coat of craft glue to the mask and douse it with glitter.
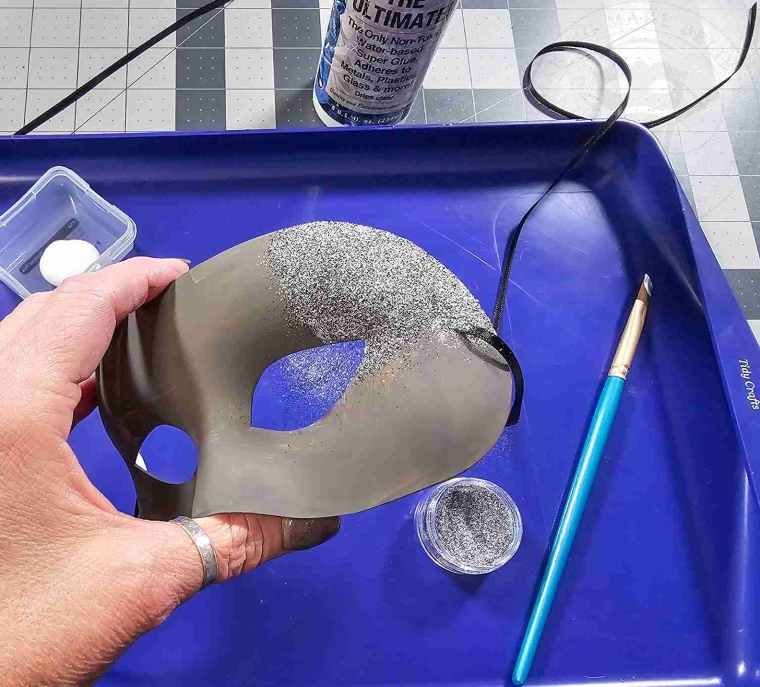
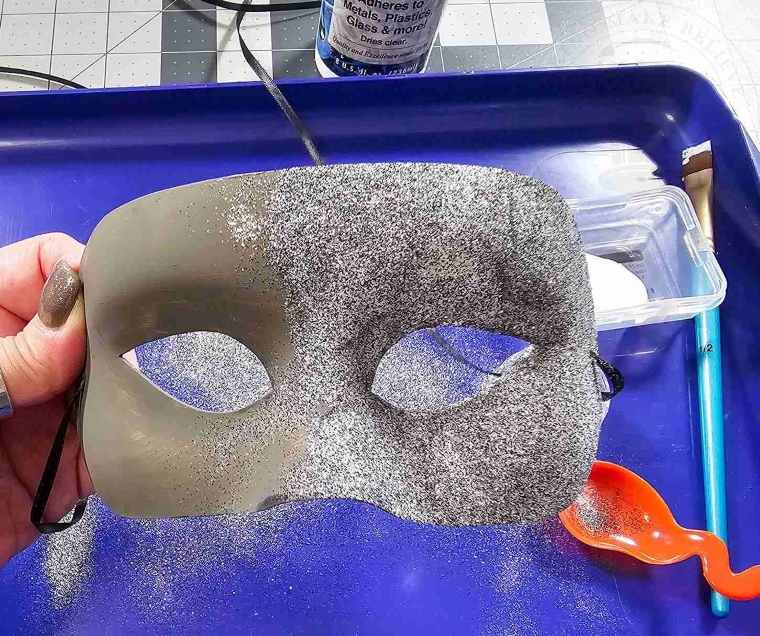
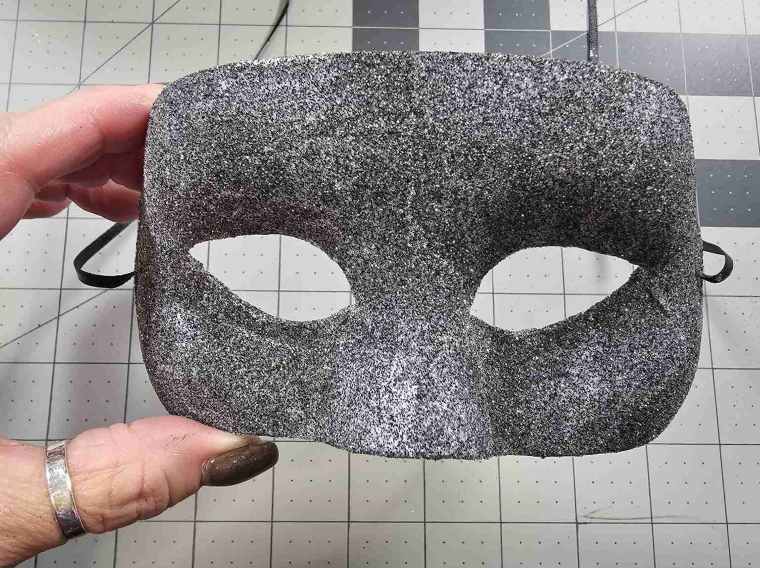
Allow the glue to dry, then add a second coat if desired.
Shake off any loose or excess glitter.
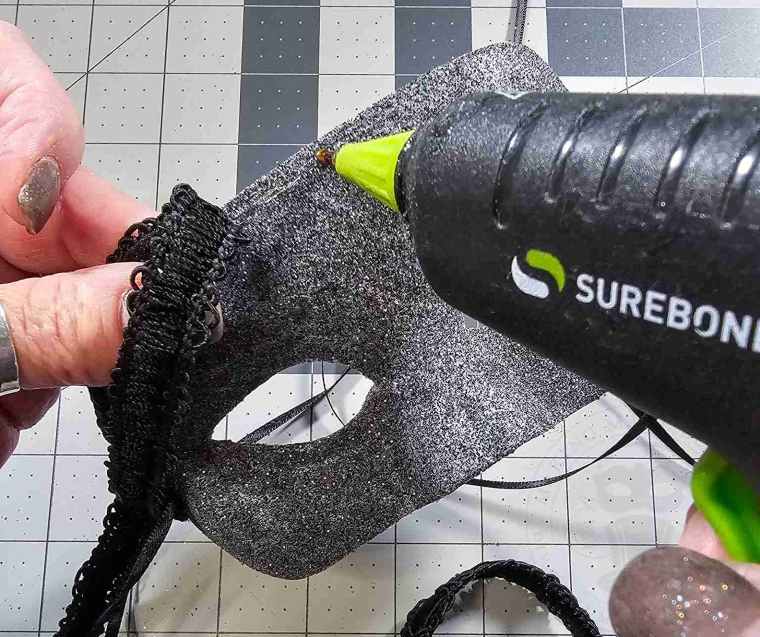
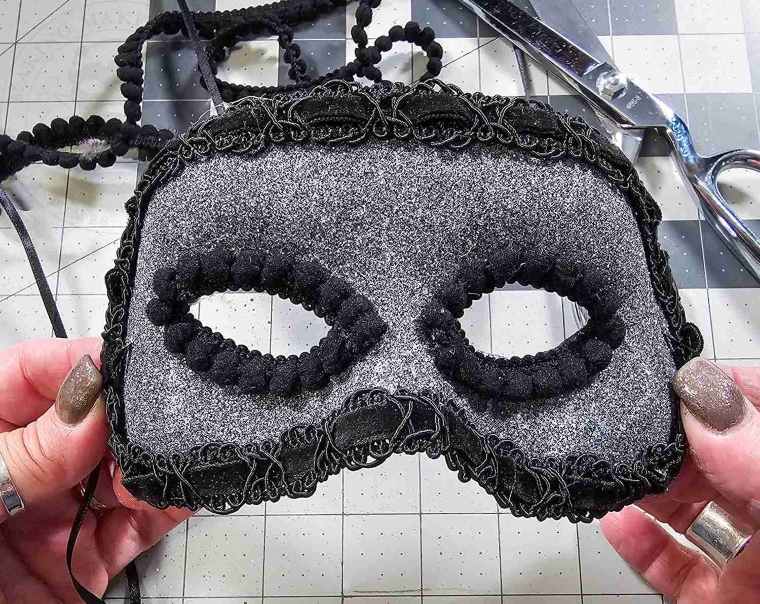
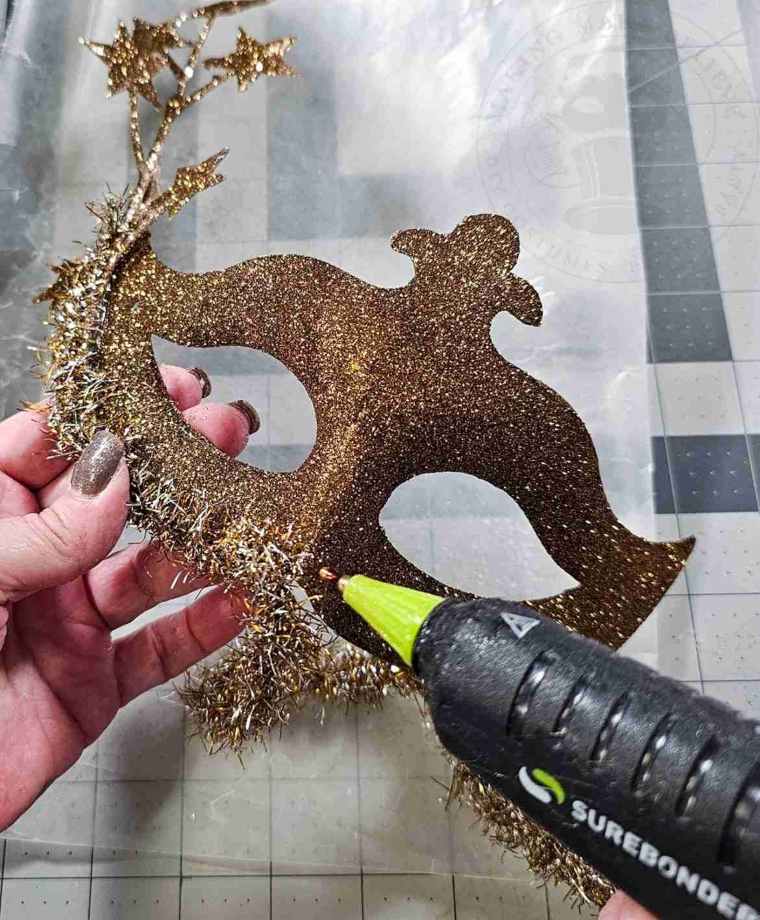
Once the mask is dry, replace the elastic band with a thin ribbon. This step is optional but elevates the look.
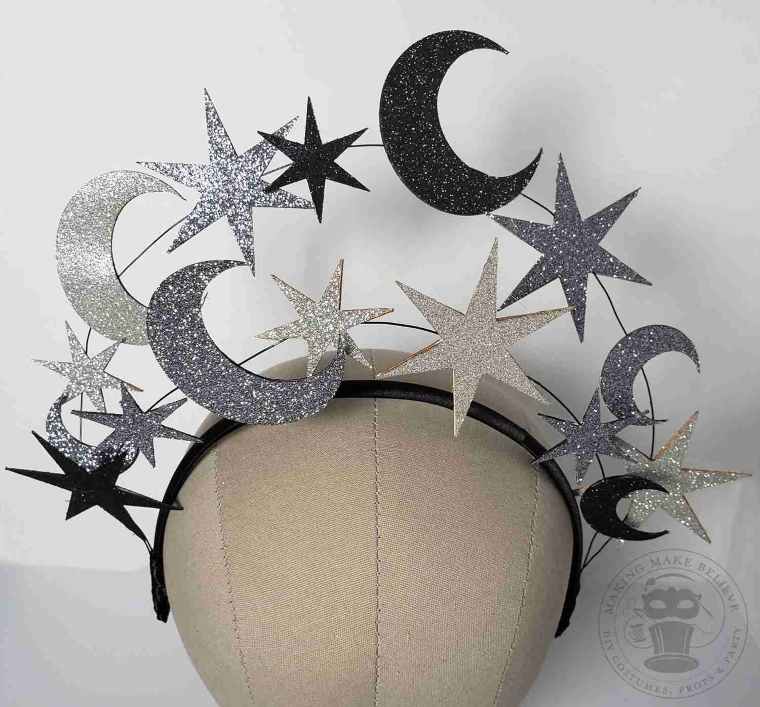
Embellish as desired.
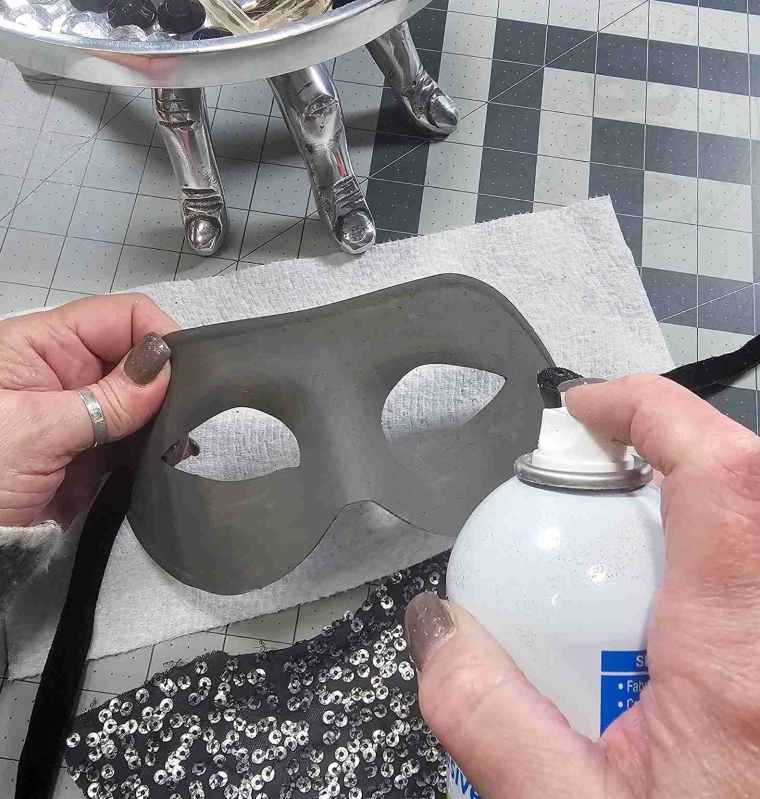
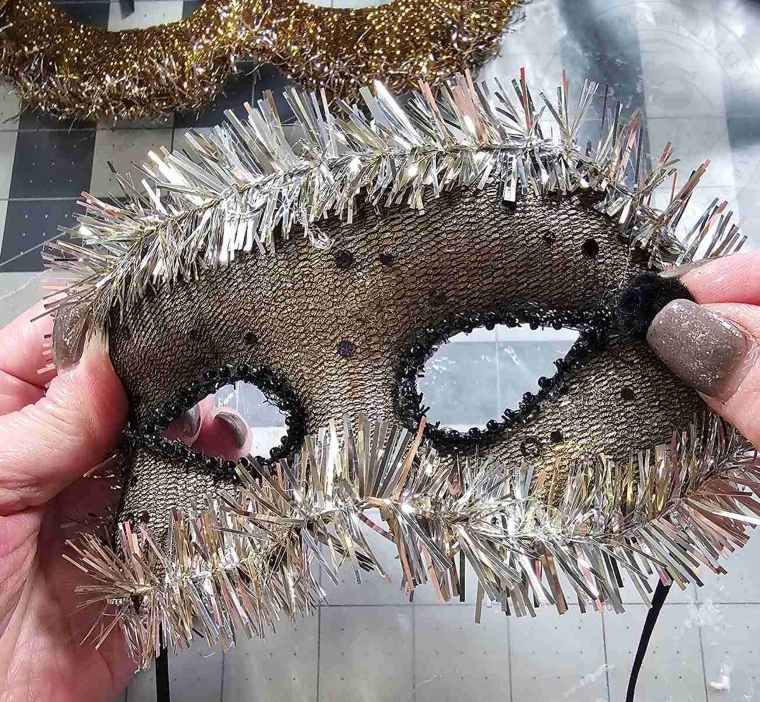
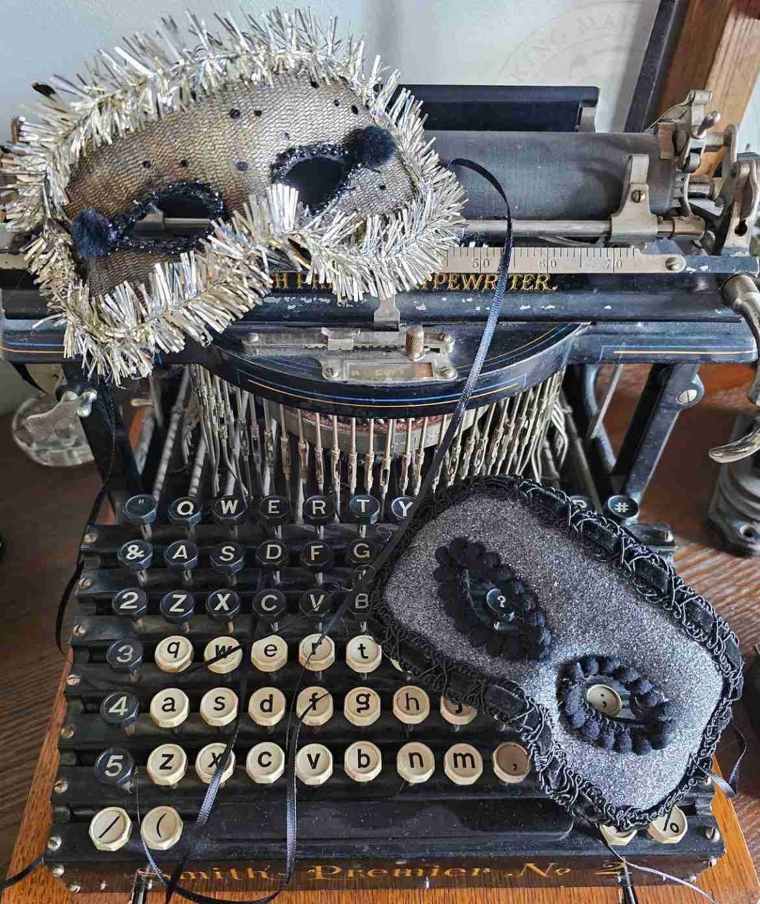
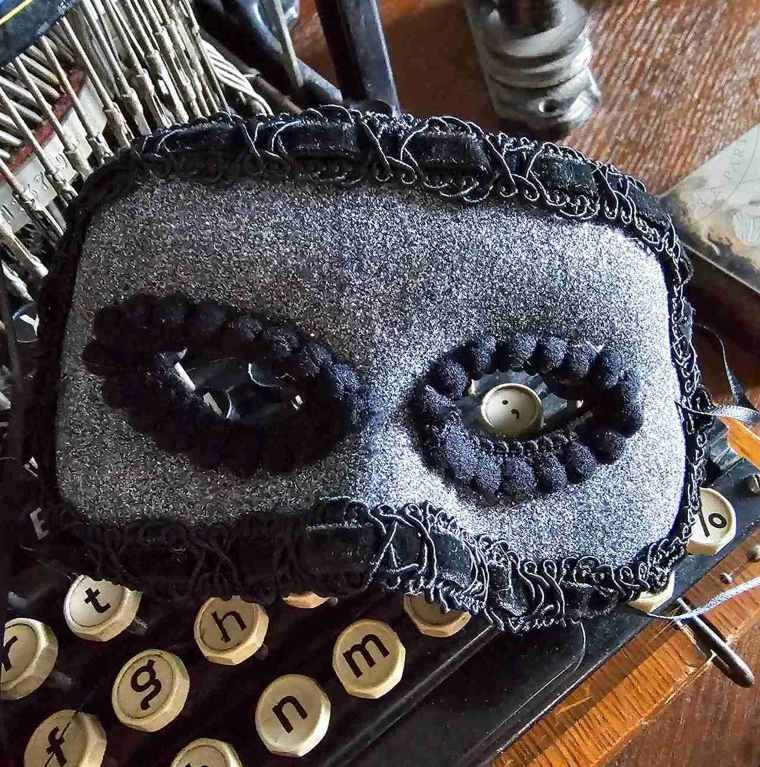
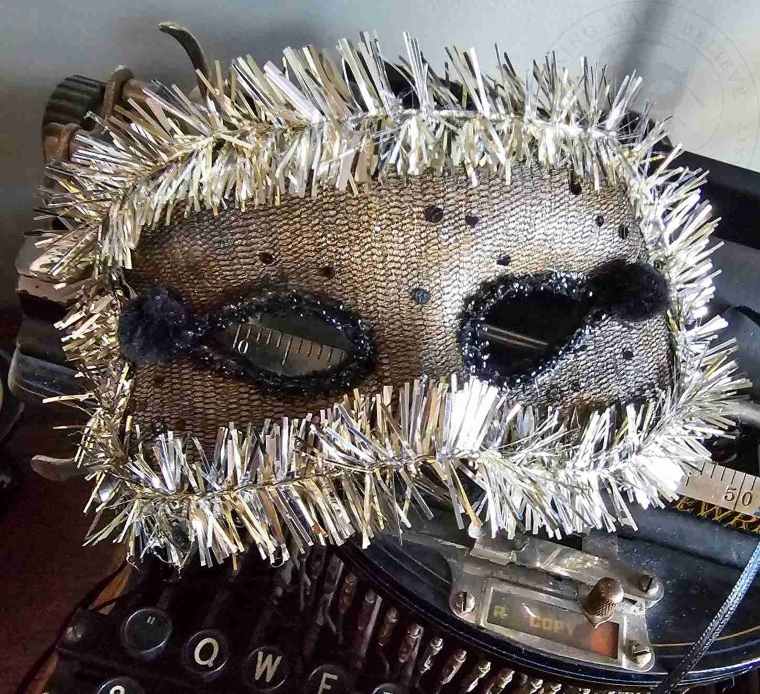
First, replace the elastic band if desired, and then cut the fabric an inch or two larger than the size of your mask.
Working in sections, apply a thin layer of glue to the mask and lay the fabric over the glue.
Clip the fabric up to the edge of the mask to help it conform to the shape if needed, especially around curves and the nose area.
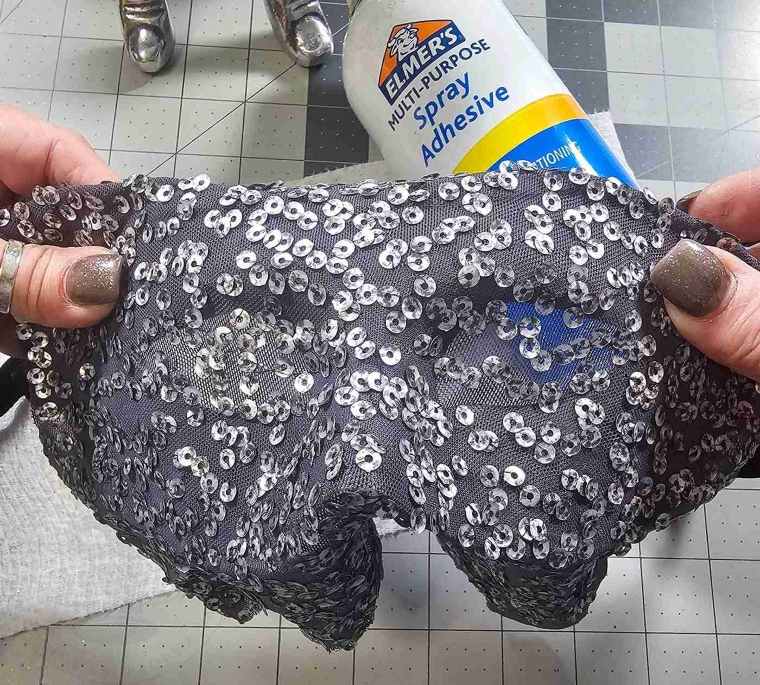
Once the glue has dried, trim the fabric to about 1/4 – 1/2 inch around the mask.
Fold the extra fabric over the back side and glue.
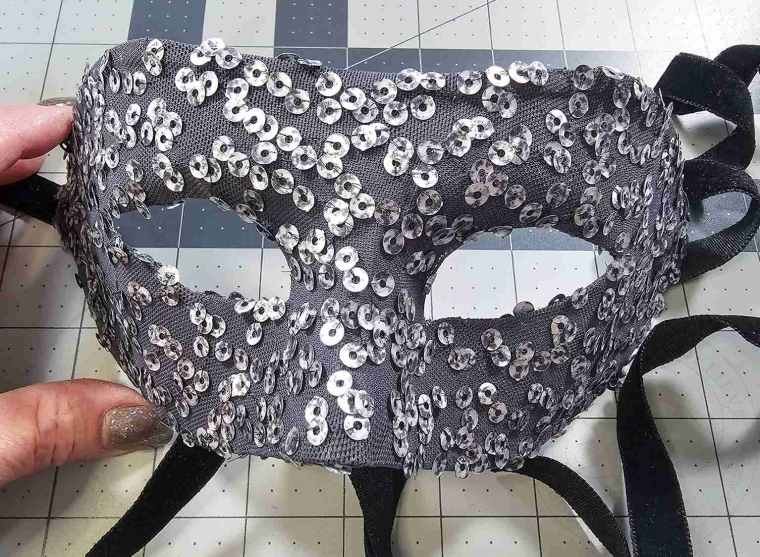
Embellish as desired.
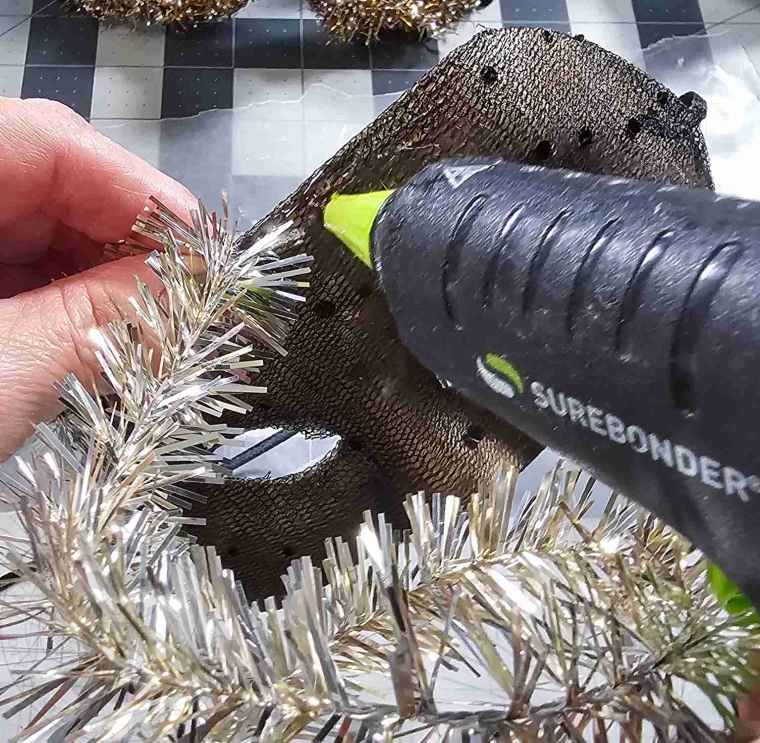
I selected three small feathers and hot glued them to the upper side edge.
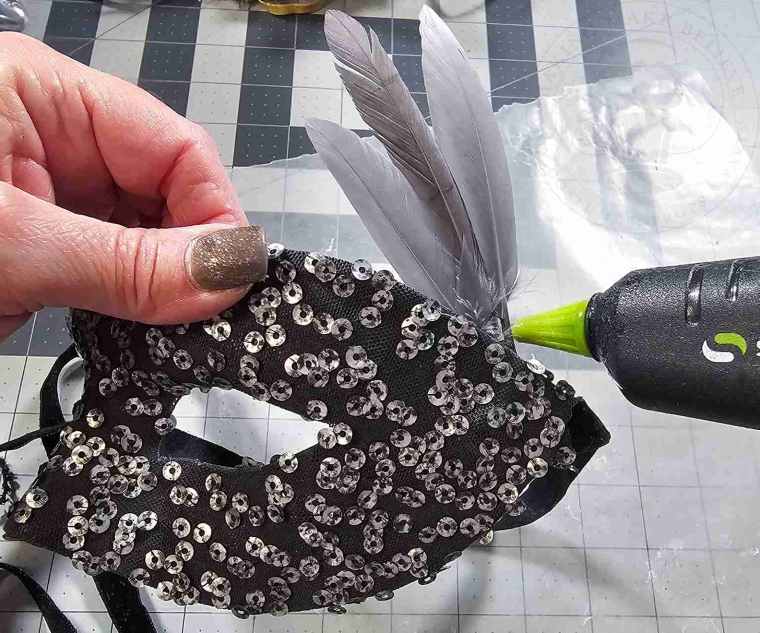
I made a second mask with this method and added tinsel garland and beaded trim.
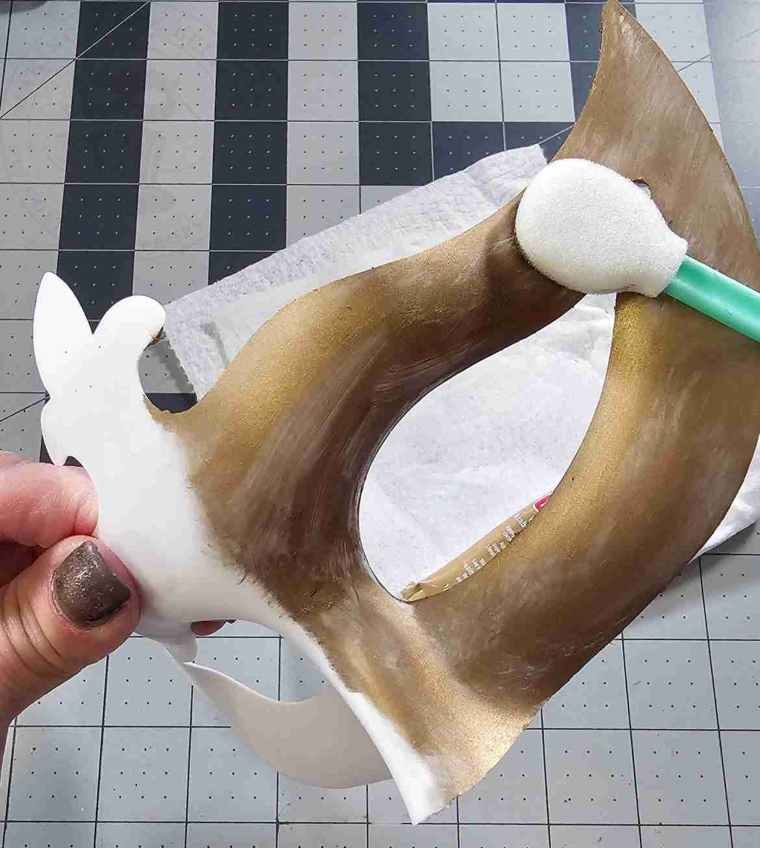
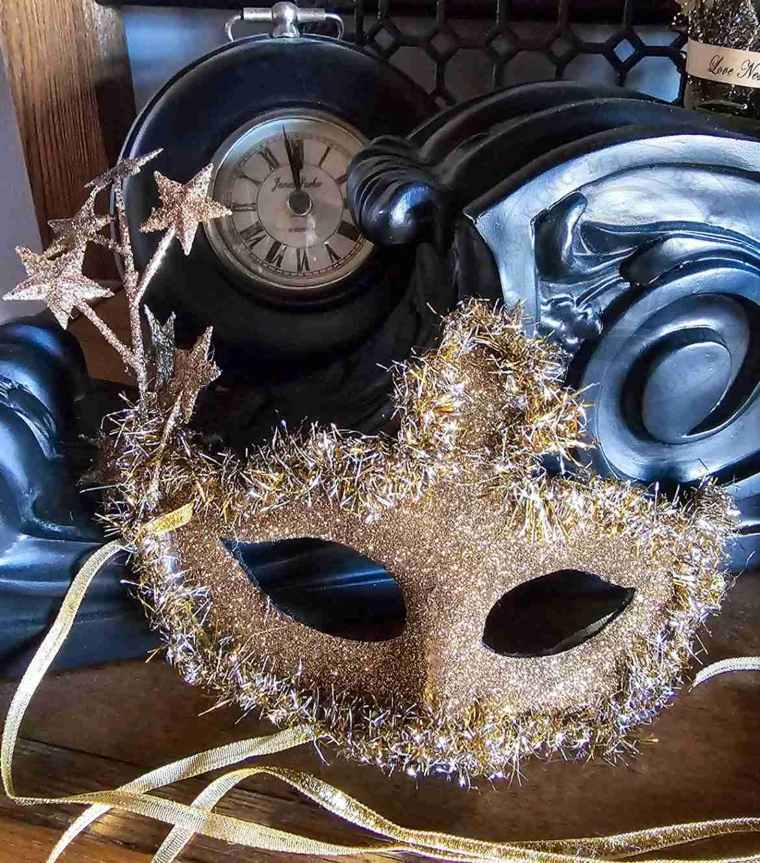
For the last mask, I used Rub’n Buff to color the mask.
Allow the mask to dry.
Working in sections, apply glue and glitter to the mask until the entire piece is covered.
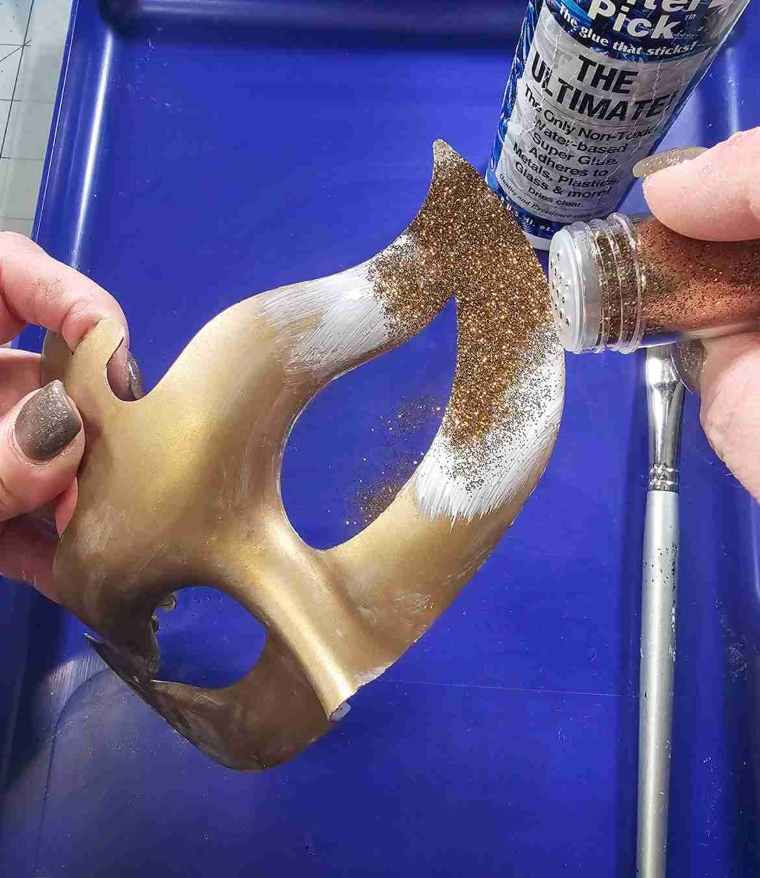
Once the glue has dried completely, embellish as desired.
For this mask, I added some large glitter stars and tinsel trim.
If you’re feeling extra, add felt to the backside of your masks.
This will hide any pieces attached to the back and elevate the look and comfort for the wearer.
Now you are ready to ring in the new year with your moody DIY masquerade masks!
I hope you are having a most wonderful time of the year, and I wish you and yours a very merry Christmas.
Until next time – stay spooky.
