
1.7K


and then this
May is barely half over, and I am already spying Code Orange. I don’t know whether to cringe or be excited.
Now, don’t get me wrong. I love seeing the Halloween goodies start rolling out.
When I had my online shop, I sold Halloween wares year-round. When I hosted a large annual Halloween party, I planned for Halloween year-round. And, with Making Make Believe, I craft Halloween year-round.
But I wonder, is Halloween going to be in stores year-round? And, if so, will the season maintain its mystery and magic?
I don’t have an answer for that. But, one thing I do know is that Dollar Tree has yet to put out their spooky florals, which means I either need to pay up for black botanicals or get creative.
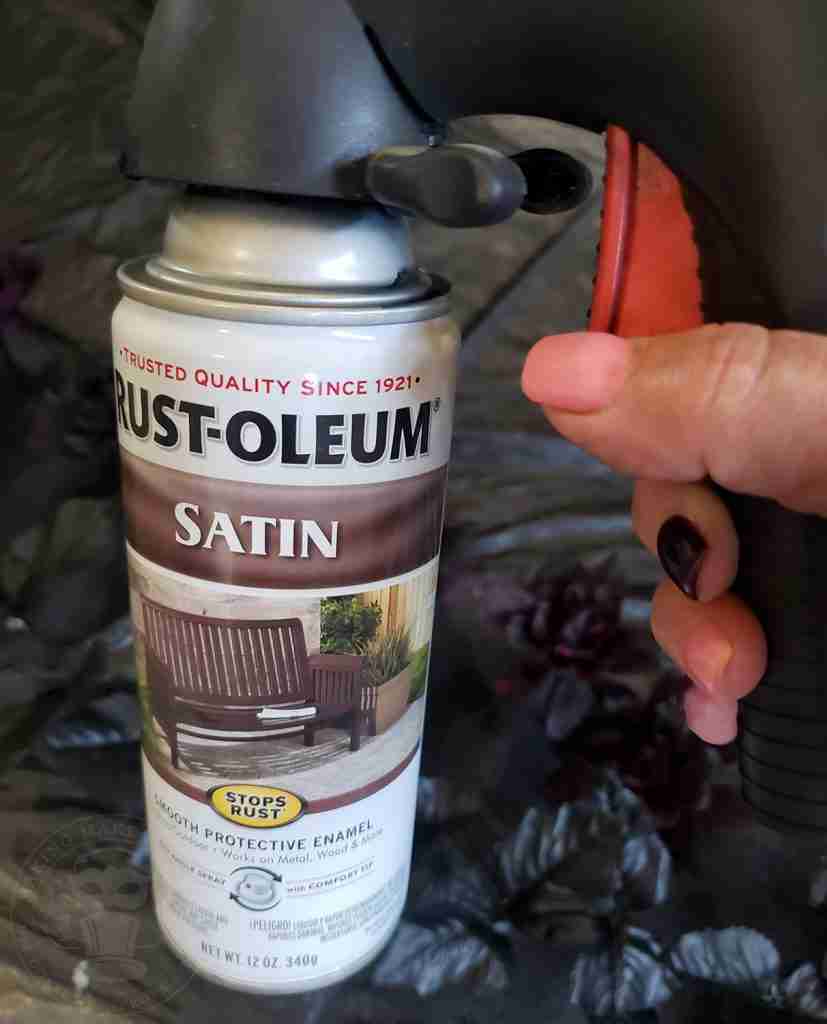
We will use spray paint to transform inexpensive blooms from pretty in pink to bewitching in black.
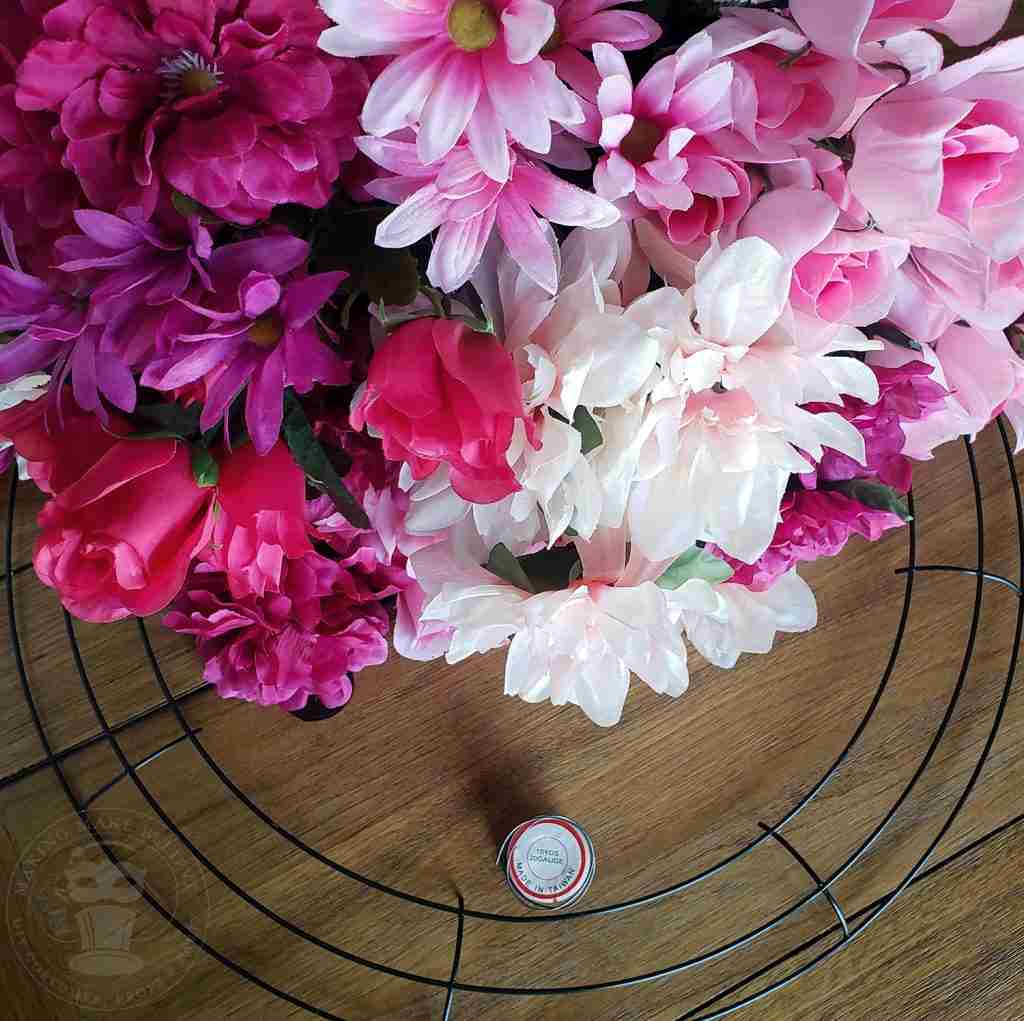
To determine how many flowers I would need, I laid my form on the floor and began laying floral bundles on top until I felt I had enough. I ended up buying 20 bunches.
If you don’t have wire, be sure to pick that up at Dollar Tree too.
I used leftover party picks and scrap foam to elevate my flowers for painting. But you can also lay the flowers out on cardboard, drop cloth, or newspaper.
Using short bursts, I painted each bloom using a circular motion to keep the paint from getting too heavy, as I wanted some of the original color to peek through.
Cover with as much spray paint as you like, and then allow the florals to dry completely.
Once all of your flowers and leaves are dry, you can begin to reassemble.
Instead of reassembling the bunches with the same flowers, I added random flowers to each stem for variety and to add interest.
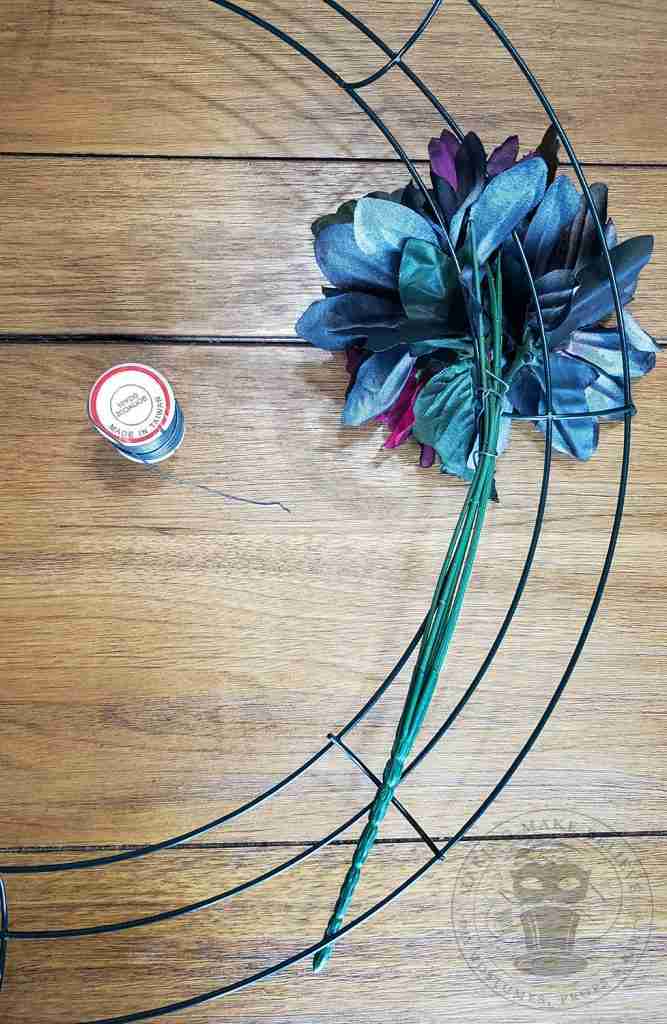
Next, I began to wire the bunches onto the wreath form.
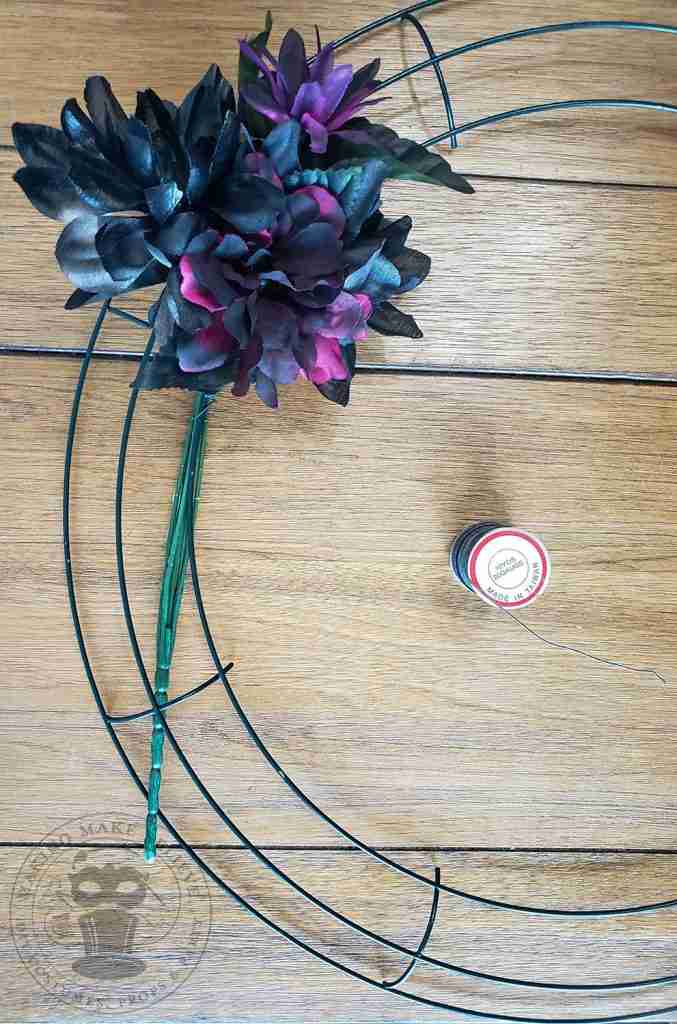
I continued adding and shaping as I went.
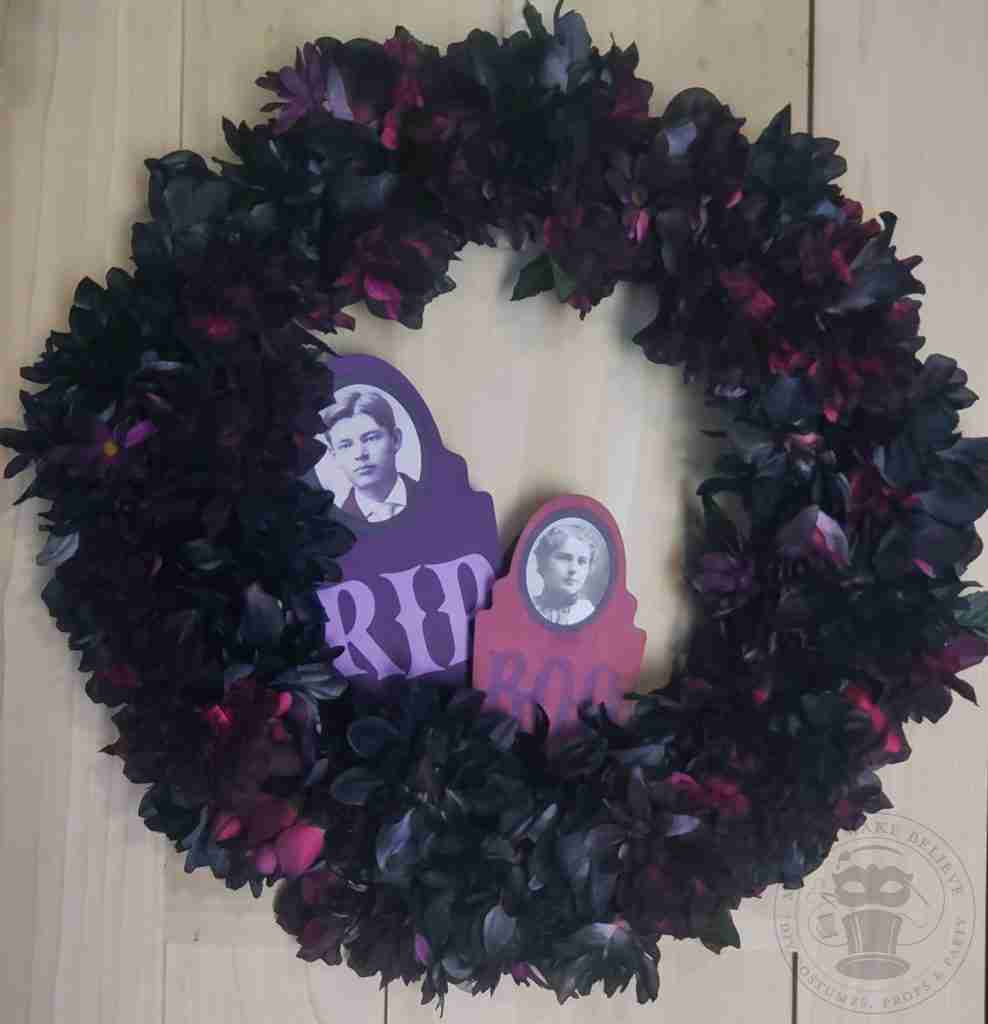
Eerily elegant, yet so simple to make.
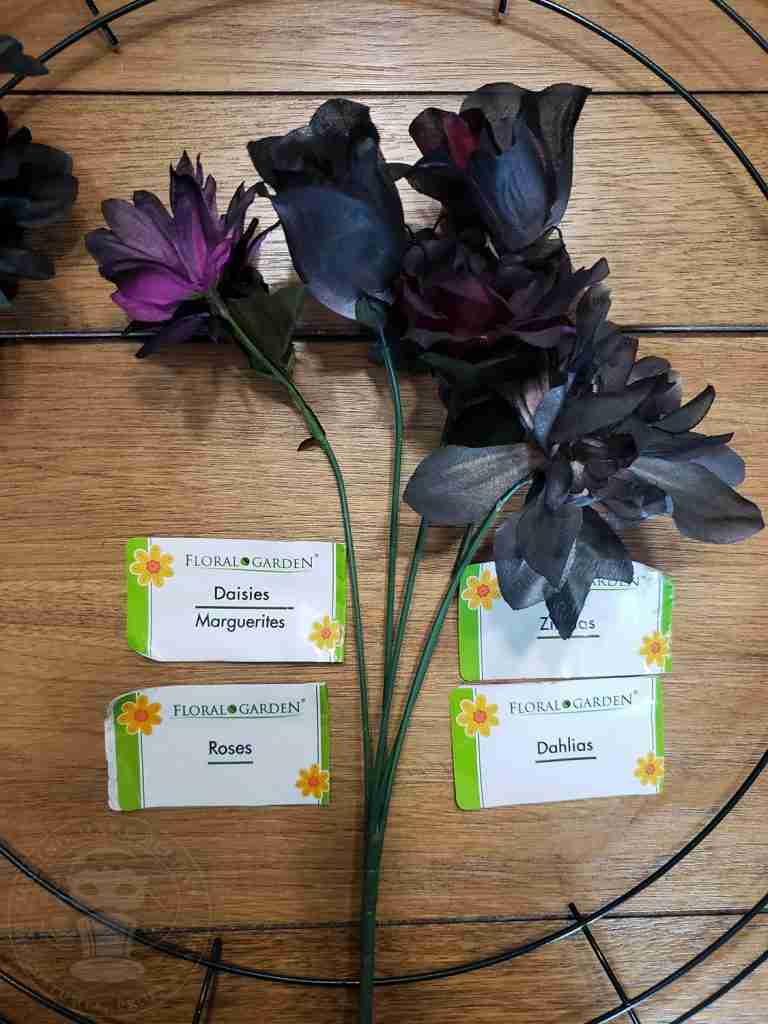
The pink daisies, roses, zinnias, and dahlias are now dressed for Halloween, and this wreath is ready to be embellished.


Easy DIY Halloween Wreath
As an Amazon Associate I earn from qualifying purchases. This post may contain affiliate links for your convenience. Click here to read our disclosure policy.Code Orange Alert!
While out and about last week getting supplies for this easy DIY Halloween wreath, I noticed this:
and then this
May is barely half over, and I am already spying Code Orange. I don’t know whether to cringe or be excited.
Now, don’t get me wrong. I love seeing the Halloween goodies start rolling out.
When I had my online shop, I sold Halloween wares year-round. When I hosted a large annual Halloween party, I planned for Halloween year-round. And, with Making Make Believe, I craft Halloween year-round.
But I wonder, is Halloween going to be in stores year-round? And, if so, will the season maintain its mystery and magic?
I don’t have an answer for that. But, one thing I do know is that Dollar Tree has yet to put out their spooky florals, which means I either need to pay up for black botanicals or get creative.
Let’s Get Crafty
There are several ways to add or change the color of faux florals for your projects. I’m working on a post with examples to give you some comparisons, but for today we’re going to start out simple by using a readily available item most of us have in our garage.
We will use spray paint to transform inexpensive blooms from pretty in pink to bewitching in black.
One Stop Wreath
As luck would have it, the Dollar Tree has everything we need. I picked up an 18″ metal wreath form. Several sizes are available, and any will do, so choose whatever size works best for you. Next, I grabbed some bundles of flowers. We’re coming up on Memorial Day and the Fourth of July, so Dollar Tree is loaded up on Patriotic and Spring blooms. This selection is perfect for my wreath as my color scheme is plums and berries (it sounds like I’m making a salad), and they had a lot of pink-toned choices.
To determine how many flowers I would need, I laid my form on the floor and began laying floral bundles on top until I felt I had enough. I ended up buying 20 bunches.
If you don’t have wire, be sure to pick that up at Dollar Tree too.
Fast and Easy DIY Halloween Wreath
There are a couple of different ways you can paint your flowers. You can assemble your wreath first and spray your flowers after you have attached them to the wreath form. This method is quicker, and you won’t be handling all of the painted flowers. This works well if you want to dust the flowers with a bit of color instead of more full coverage.Transform Inexpensive To Enchanting
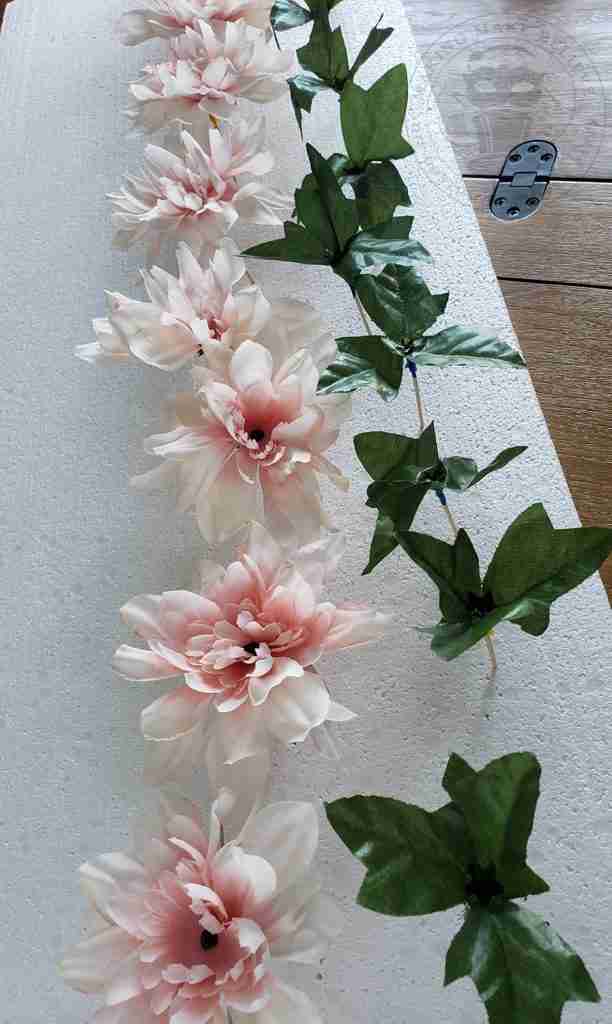
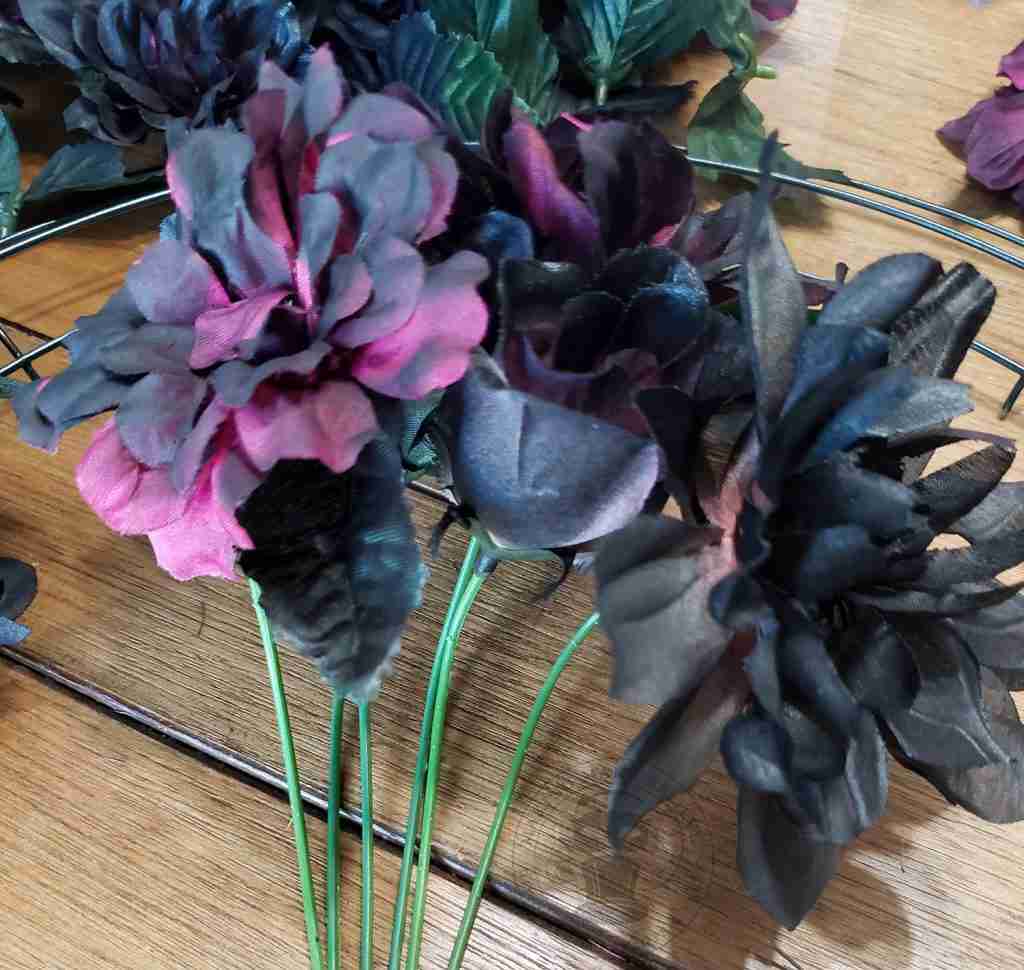
The method I’m using takes more time, but I wanted better paint coverage. First, I removed all of the flowers and leaves from their stems.
I used leftover party picks and scrap foam to elevate my flowers for painting. But you can also lay the flowers out on cardboard, drop cloth, or newspaper.
Using short bursts, I painted each bloom using a circular motion to keep the paint from getting too heavy, as I wanted some of the original color to peek through.
Cover with as much spray paint as you like, and then allow the florals to dry completely.
Once all of your flowers and leaves are dry, you can begin to reassemble.
Instead of reassembling the bunches with the same flowers, I added random flowers to each stem for variety and to add interest.
Next, I began to wire the bunches onto the wreath form.
I continued adding and shaping as I went.
Eerily elegant, yet so simple to make.
The pink daisies, roses, zinnias, and dahlias are now dressed for Halloween, and this wreath is ready to be embellished.
Who Says Custom Can’t Be Inexpensive?
No one will ever know that this wreath was created from a bunch of inexpensive flowers and a can of spray paint.
These Tombstone Portrait files will be available in the Haunted Library next week!
So, what do you think? Will this easy DIY Halloween wreath be hanging on your front door this year? Let me know on Instagram or Facebook. Until next time, keep it crafty!