1.5K


DIY Halloween Decor from a thrifted frame.
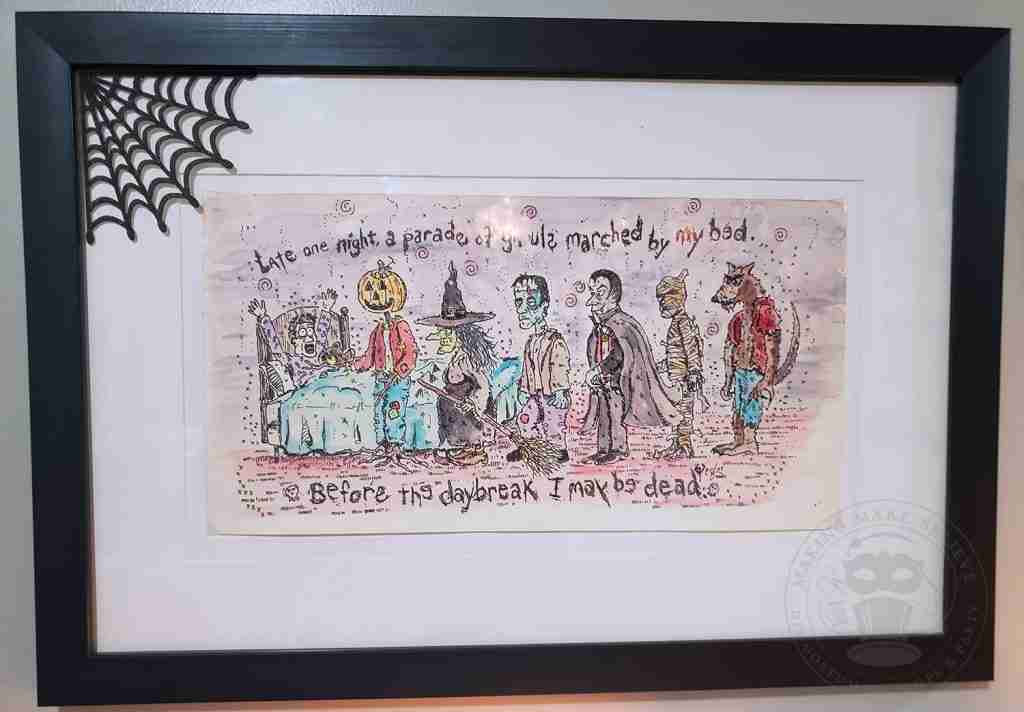
As I was sitting in the office the other day, I took notice of the artwork on the wall right next to my desk. It’s a frightfully fun watercolor piece I purchased from an independent artist on eBay years ago. Like all of the office artwork, it is housed in a simple black frame, which I love, but I got to thinking maybe I could creep things up a bit.
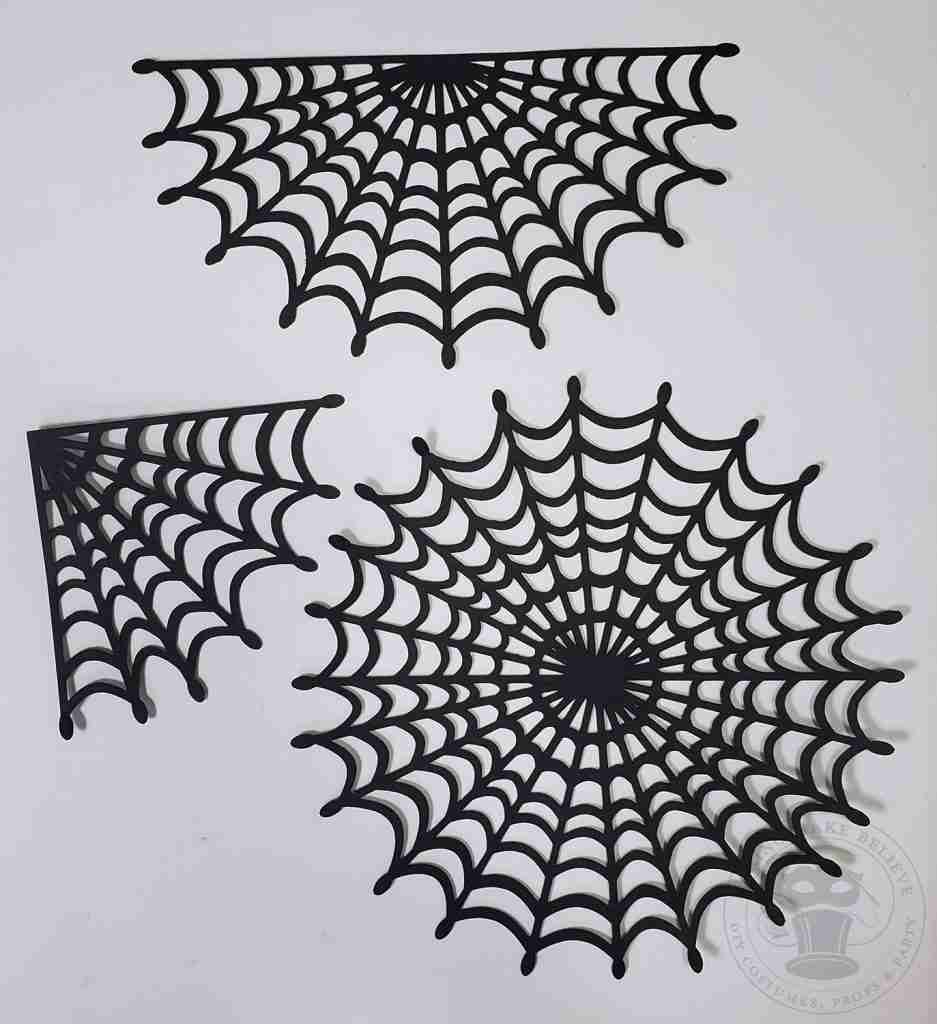
So I dropped whatever I was doing (I can’t even remember – hope it wasn’t important) and cracked open Inkscape. My new task was to craft some SVGs to make removable vinyl spider webs.
Of course, I couldn’t craft just one version, so I made three variations of the web. I then grabbed some removable black glitter vinyl and viola – my monster watercolor now sports an eerily elegant web.
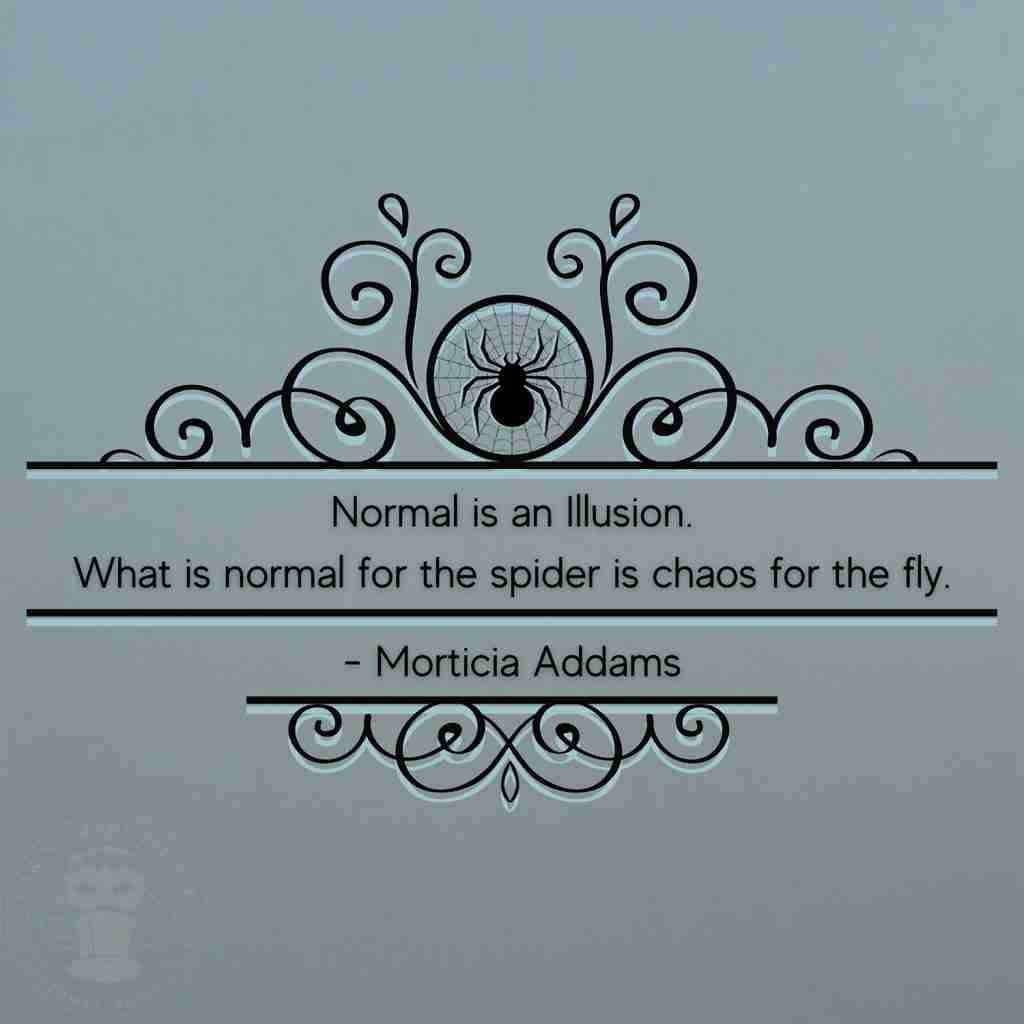
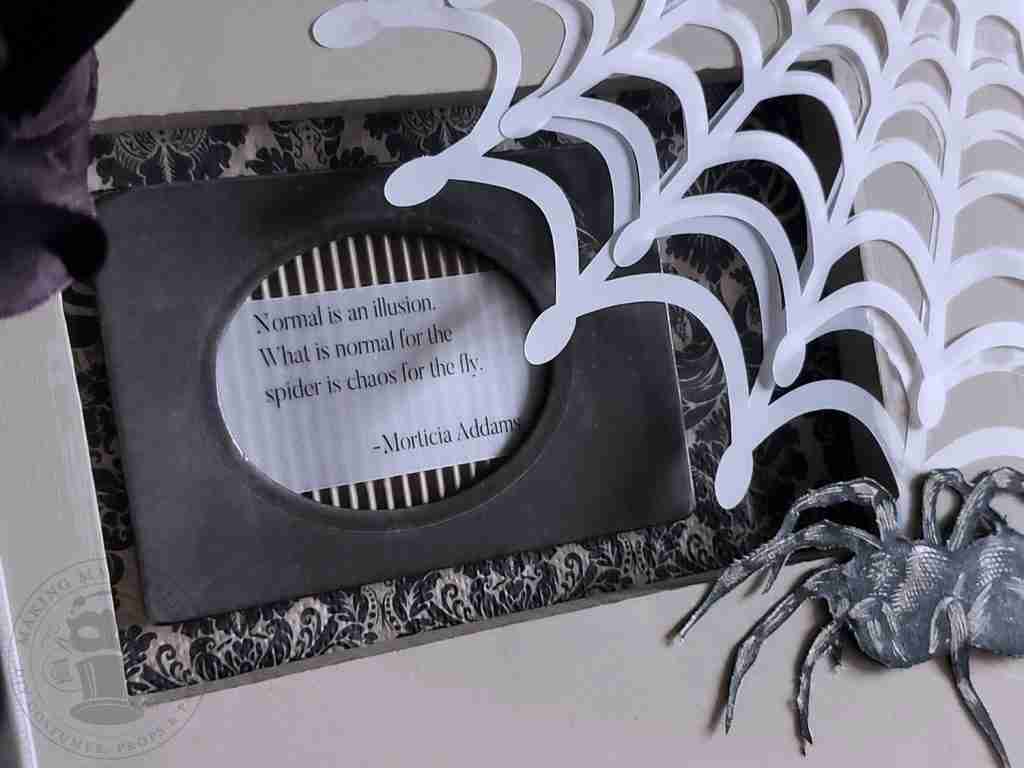
As I was working on this little project, I was reminded of one of my favorite quotes, which just so happens to be attributed to Morticia Addams.
I love adding little touches of mystery into my haunted scenery and, since I already had the webs, I figured I might as well take this opportunity to use them to whip up some DIY Halloween decor.
I decided to frame the quote, which I thought would be fast and simple since I am swimming in frames. But unfortunately, I wasn’t finding the right piece in my stash. So – off to the thrift!
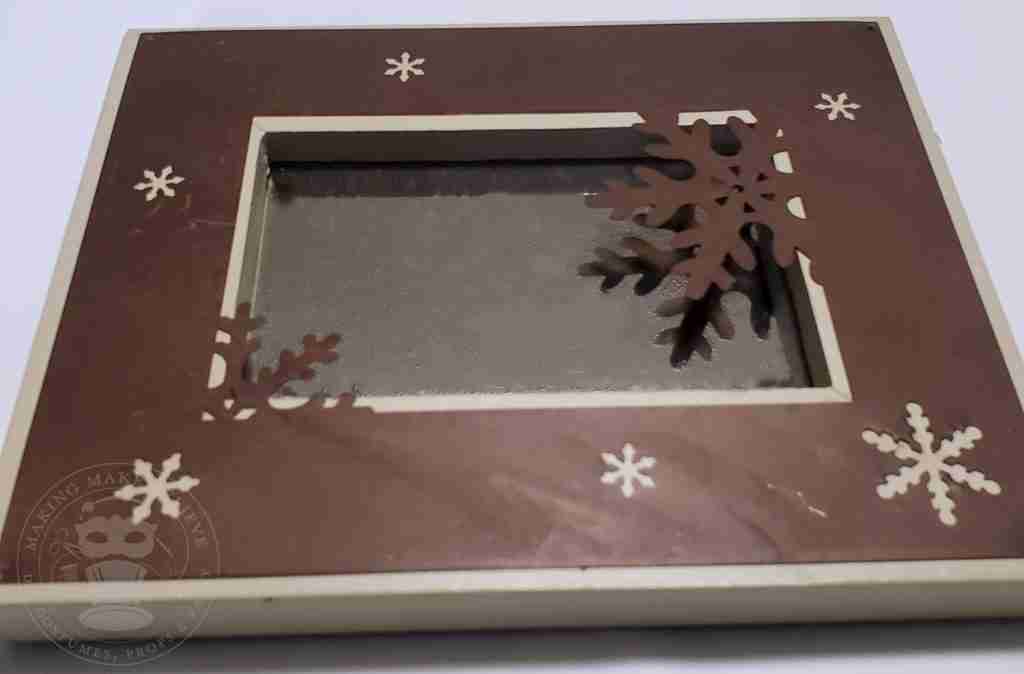
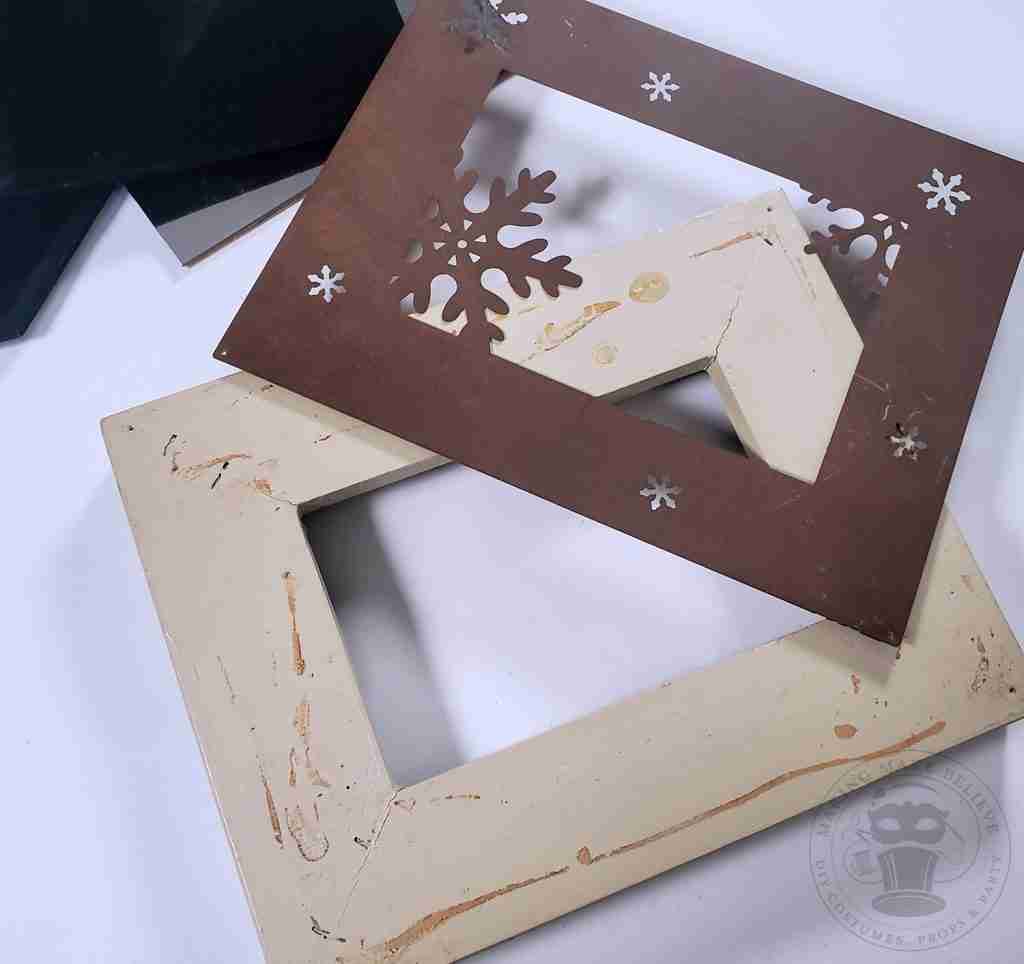
My timing couldn’t have been better. I came home with several frames (and a book, a vase, and other miscellanea), including this sad little piece that set me back a mere 9¢.
The worn wooden frame surrounds a small mirror and is topped off with a rusty metal snowflake scene. The only saving grace on this piece is the deep inset, and it can display on a table or hang on the wall. I might have let it be if it hadn’t been tossed into the super discount bin pricing it less than a dime.
So, let’s transform this sad little frame.
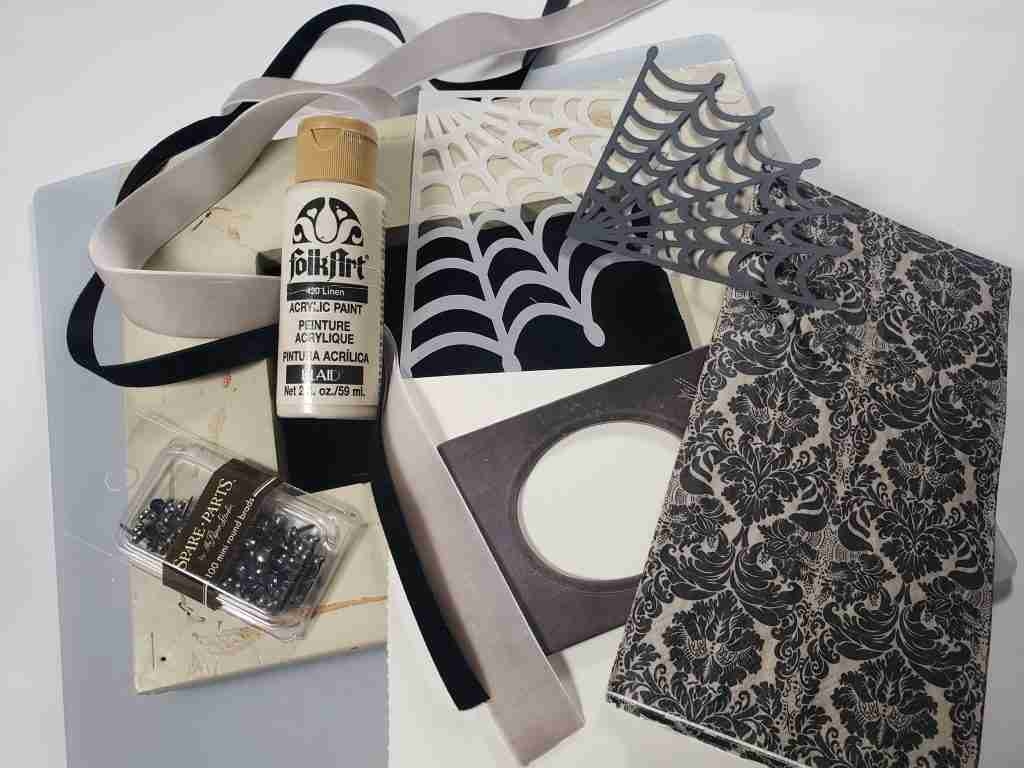
We will need
Acrylic craft paint and paintbrush – I’m using Driftwood by Americana
Velvet ribbons – I grabbed this one, and this one from my stash
Mini round brads
Decorative napkins – I got mine from JoAnn’s a few years back
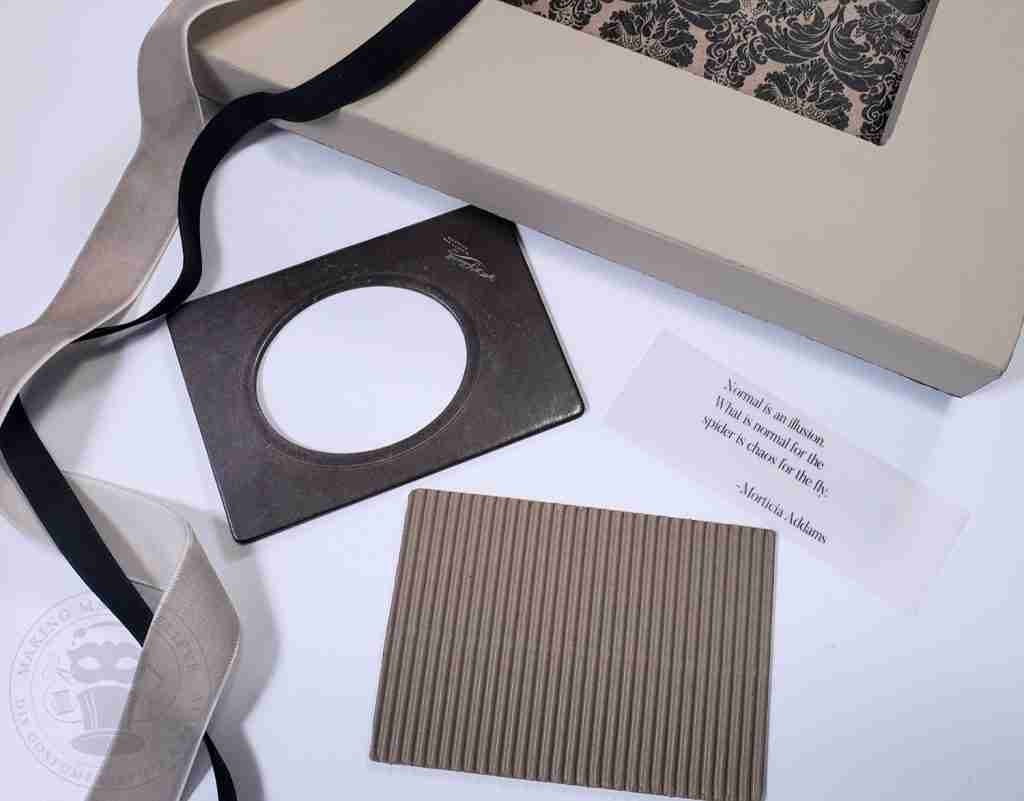
A small oval frame from Tim Holtz
Printable vellum and Regular vellum papers
Corrugated paper from my scrap bin
Hot glue
Zig glue pen
Scissors
Double stick tape
We will also need the spider web cut files (SVG for machine cut and PDF for hand cutting) and the quote PNG file, all of which are available for free in the Haunted Library.
First, I removed the back, mirror, and the rusty winter scene, which exposed a poorly made frame and adhesive.
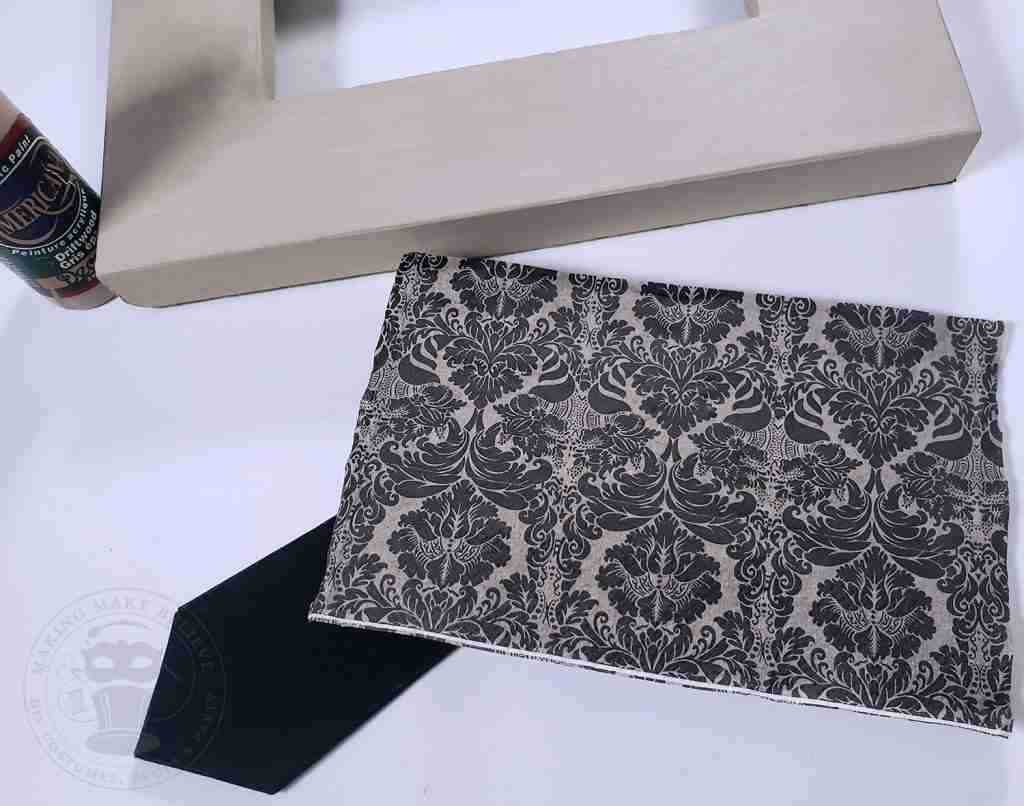
After a bit of filling and sanding, I gave it a quick couple of coats of paint.
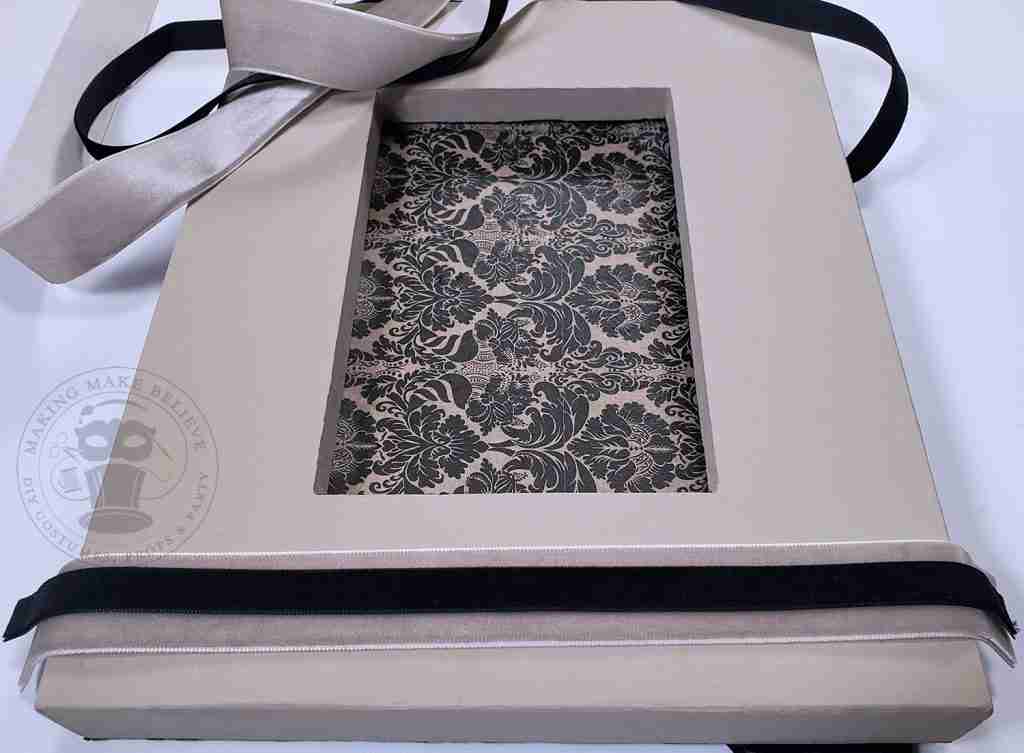
While I set that aside to dry, I cut my decorative napkin a bit larger than the frame insert. Then, using double-stick tape, I attached the napkin to the insert.
I cut the velvet ribbons to fit the height of the frame, plus enough to fold over the top and the bottom edges for a clean, finished look.
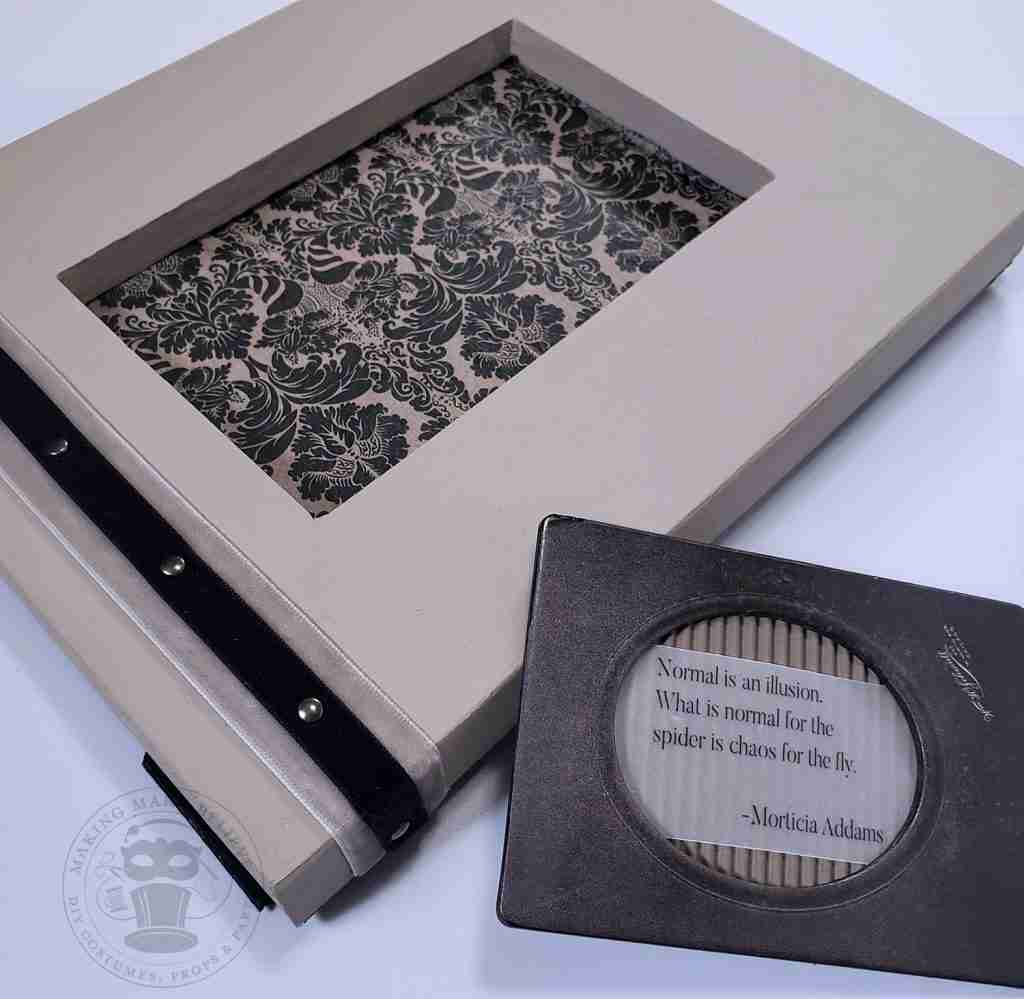
Next, I placed the thinner ribbon down the center of the wider ribbon and connected the two using the mini round brads.
I then hot glued the ribbon onto the frame.
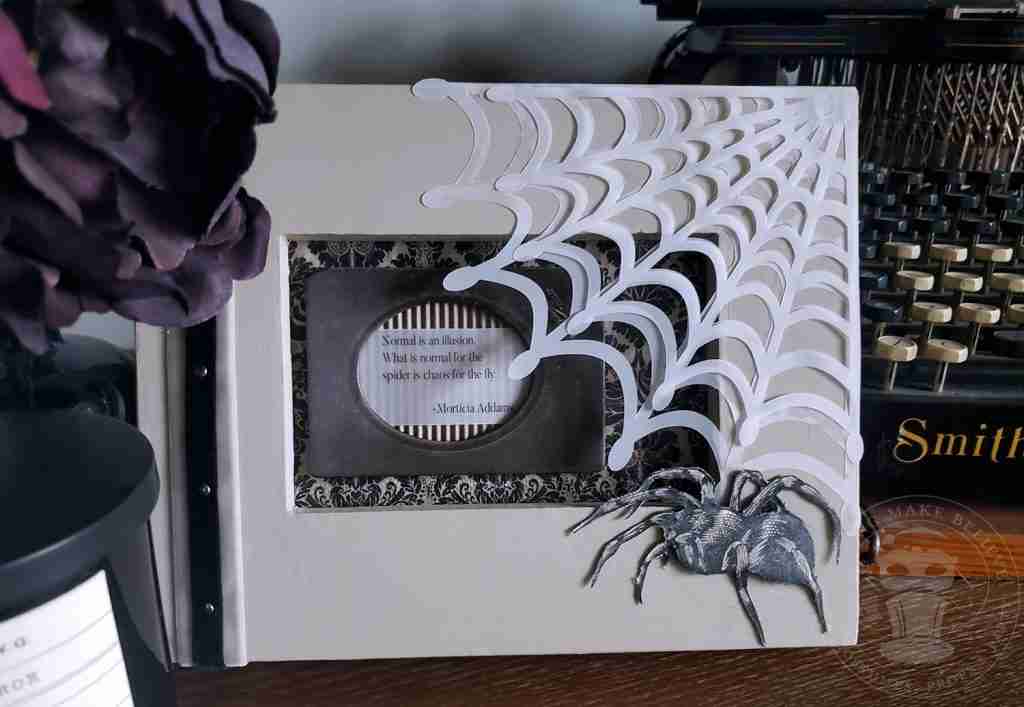
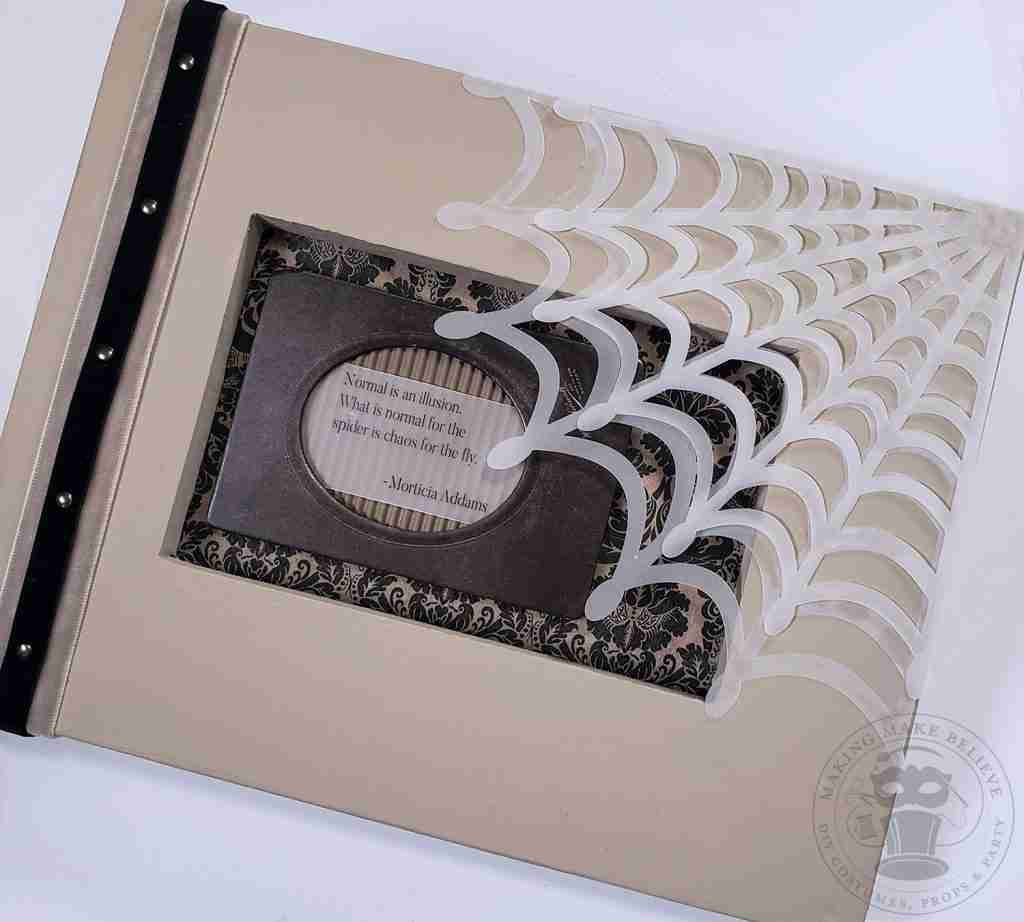
Next, I cut my corrugated scrap paper to the same size as my oval frame. Then, I measured the frame’s opening, sized my quote to fit, and printed it onto printable vellum.
I used double-stick tape to adhere the vellum quote onto the corrugated paper, and then I used hot glue to attach the oval frame on top.
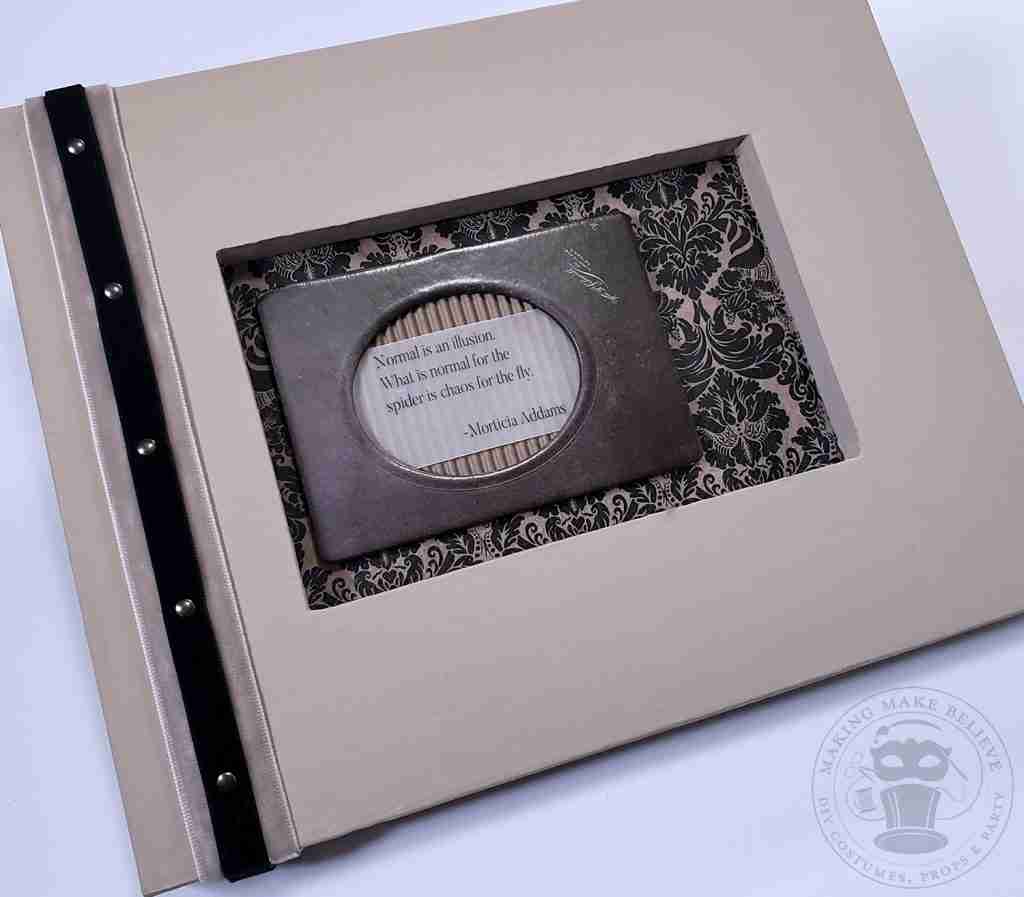
I placed the small oval frame onto the inset and glued it into position using hot glue. (I want my webs to extend over the opening of the wooden frame, so I offset the quote.)
Now we’re ready for the web.
You can choose from three web options: quarter-size, half-size, and full-size.
I am using the quarter-size web. I cut one approximately 6 inches wide and one about 5 inches wide.
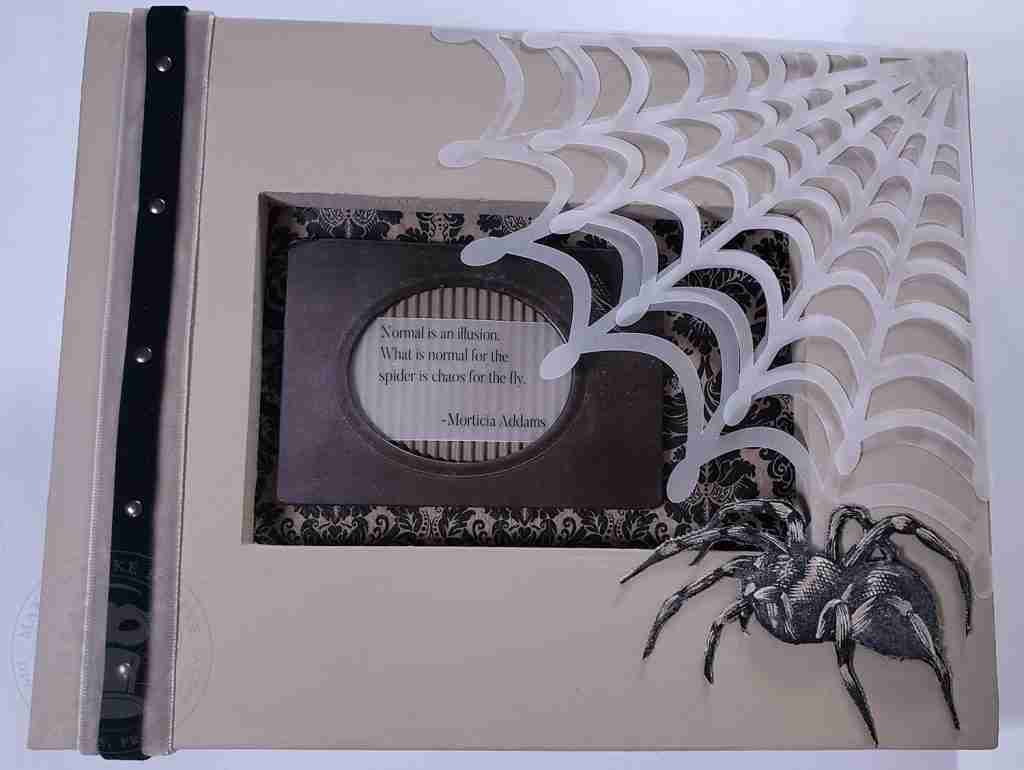
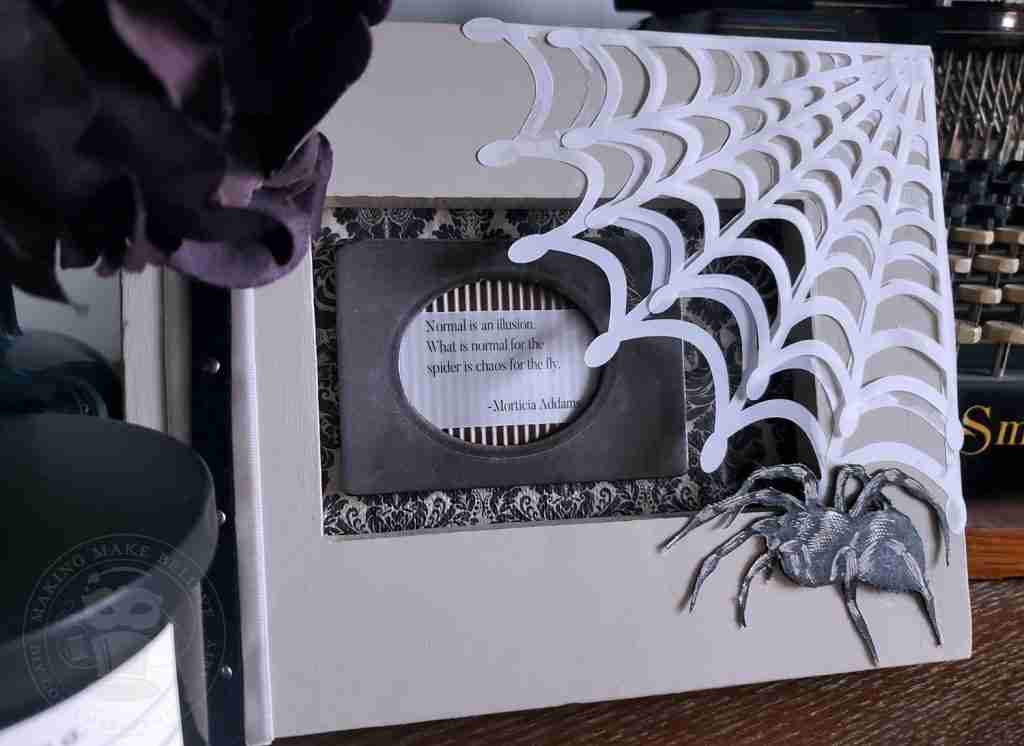
Using the Zig glue pen, I glued the larger web to the frame beginning at the upper right corner. I then attached the smaller web for added dimension.
I felt like the frame still needed something, so I went on the hunt for a spider. The winning arachnid came from the fabric stash – Alexander Henry’s Seance. (You may remember this fabric from another thrifted frame project.)
I altered the spider and beefed it up slightly to give it a more 3D look. I may add a tutorial on this later, but you can simply cut a spider from fabric or paper and adhere it to the frame.
And, that’s it! Now, this creepy quote is ready to tuck into my Halloween display.
Other than my 9¢ frame, I used scraps and bits from my stash, so this DIY Halloween decor was super budget-friendly.
Until next time, keep it thrifty.

Check your email for the Haunted Library password.
Don’t miss a moment of the mischief.
Add hello@makingmakebelieve.com to your address book.
Join us and get access to our Haunted Library stocked with templates, printables, cut files, and exclusive content. Plus, you’ll receive Eerie Emails just for our subscribers.
*Stay as long as you like. Unsubscribe at any time.