2K


Simple DIY Halloween Gift – Pumpkin Peat Pot
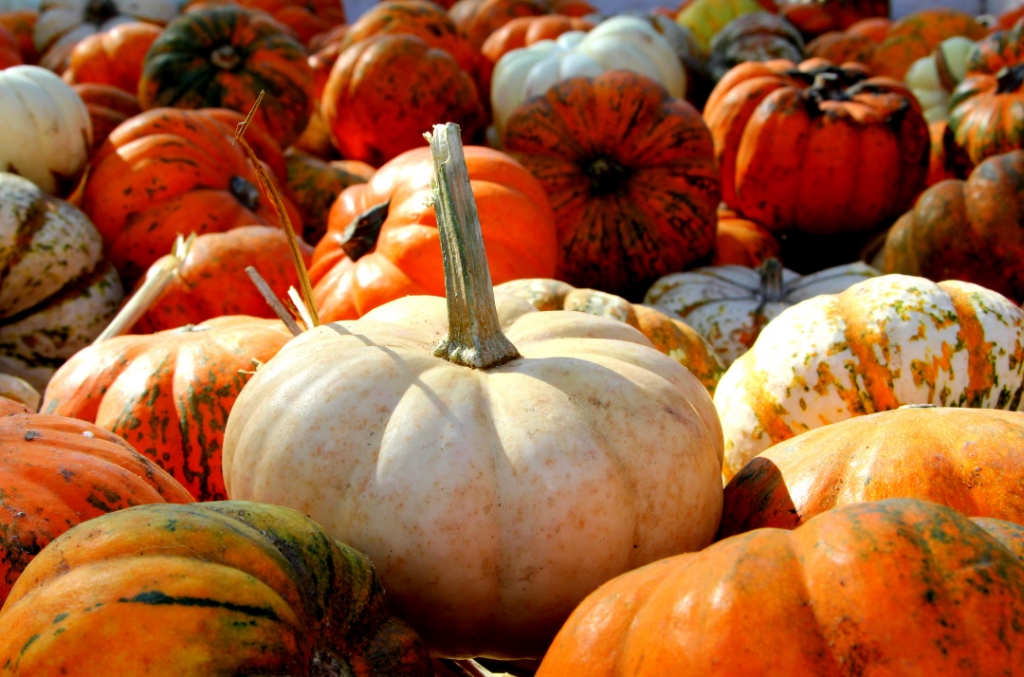
It’s nearly 70° today in middle America, and after a few days of temps in the single digits, I have hope that we are well on our way to Spring. I was further encouraged by the displays of seed packs in local stores. Soon, people will start seeds, ready the garden, and plan their harvest.
By people, I mean other people. In my adult life, I have not had a garden. I have entertained the thought, but then I recall my childhood and quickly change my mind.
Growing up, we had two very large gardens on the property, a huge strawberry patch, and numerous fruit trees. This bounty was great if you wanted a snack while playing outside, but it also came with a bounty of chores. My sisters and I would dread it when the yellow bucket was tossed our way. The bucket meant you were tasked to pick (and pit) cherries. Or, heaven forbid, when Mom was making dinner, we were sent out to pull up some potatoes and grab a few ears of corn. Oh, the horror, right?
As a child, these chores interrupted my fun, but they also instilled in me an appreciation of where our food comes from and the work involved.
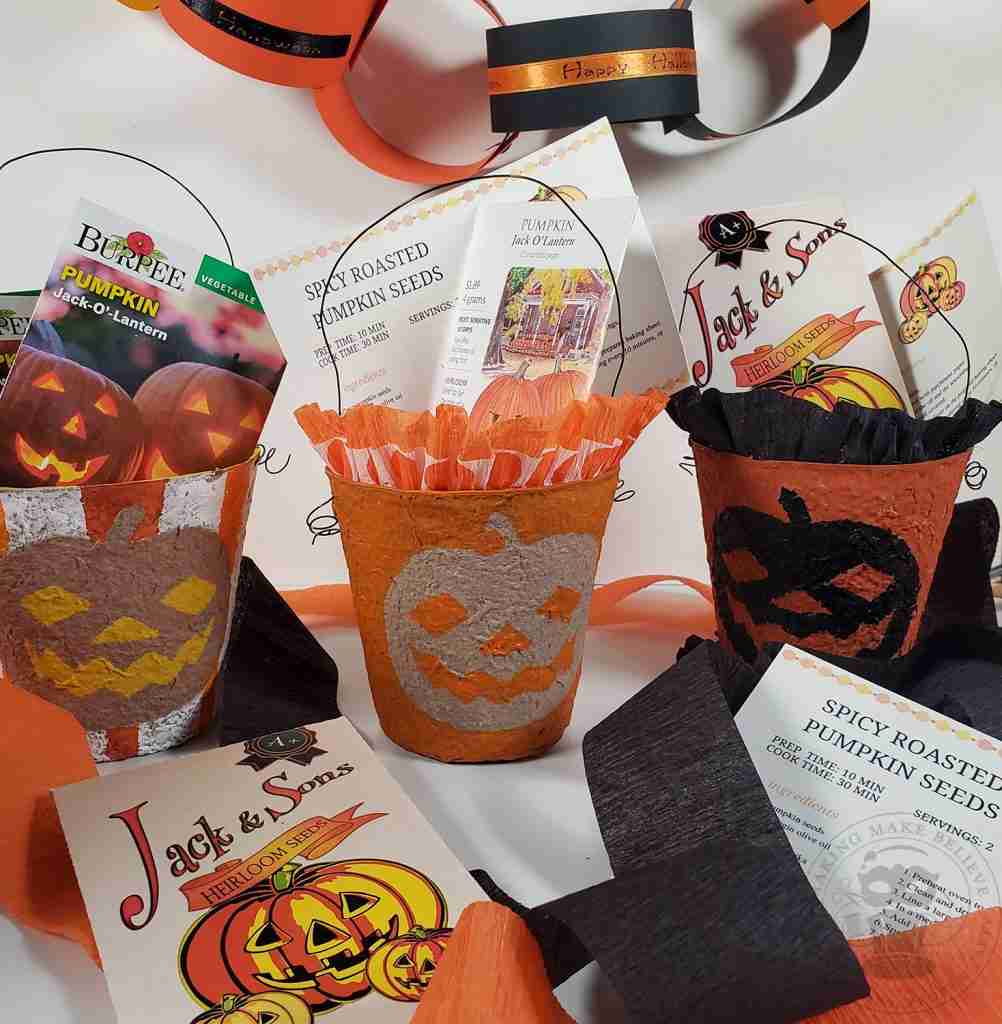
A crafty gift idea came to mind as I perused the wide variety of seed packs, and the next thing you know, I’m grabbing peat pots and pumpkin seeds. With some paint and some printables, I whipped up a DIY Halloween gift that gives off Autumn vibes from Spring to Fall.
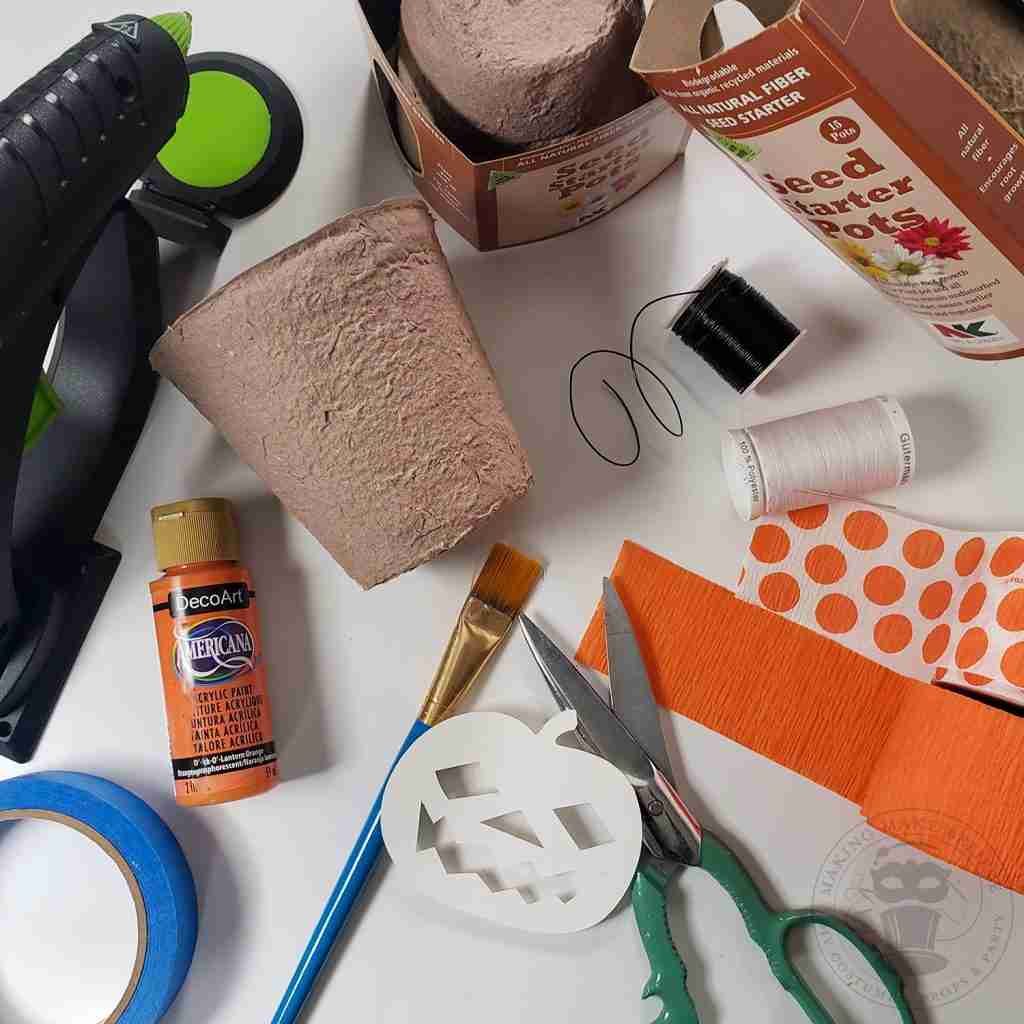
Here’s what we need:
Peat pots, aka seed pots – I grabbed both 4 inch and 3 inch sizes
Scissors or cutting machine
Craft paint
Paintbrush or foam brush
Crepe paper
Hot glue
Wire
Painter’s tape (optional)
Needle and thread or sewing machine (optional)
We will also need the free pumpkin Jack O’ Lantern stencil from the Haunted Library. Choose from an SVG cut file for machine cutting and a PDF for cutting by hand.
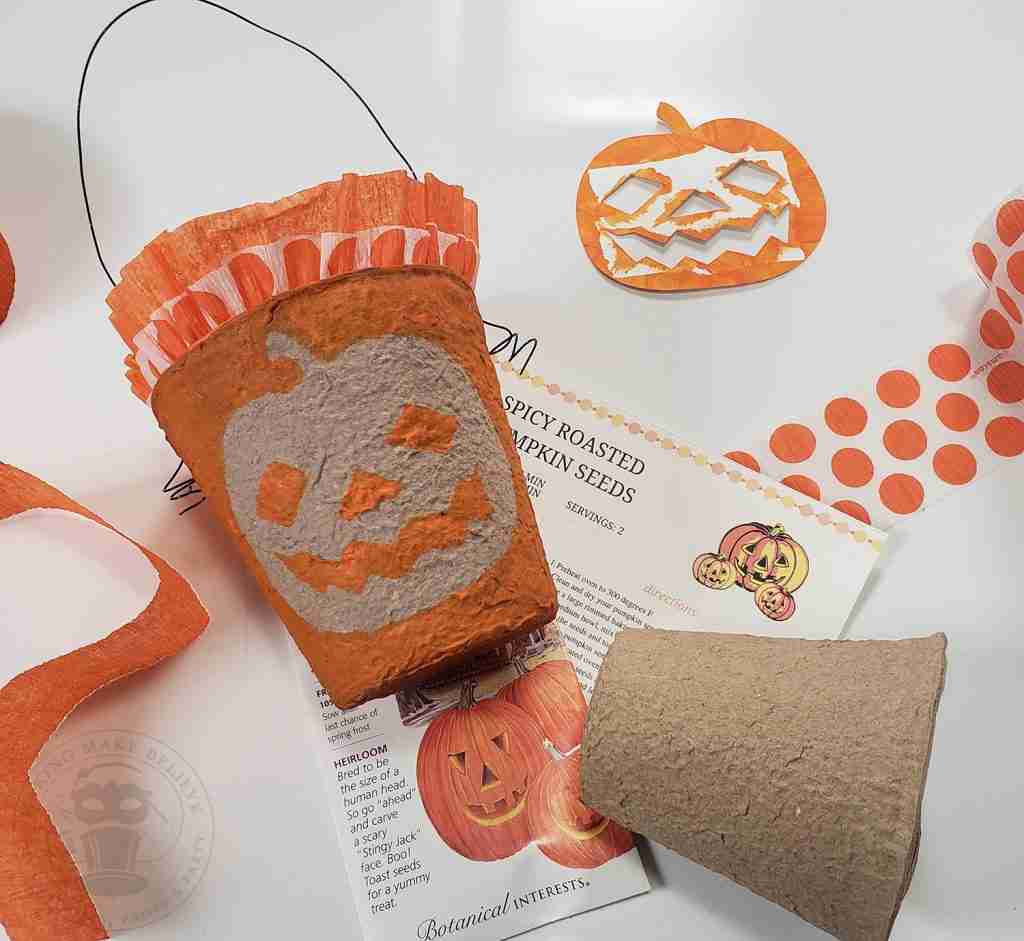
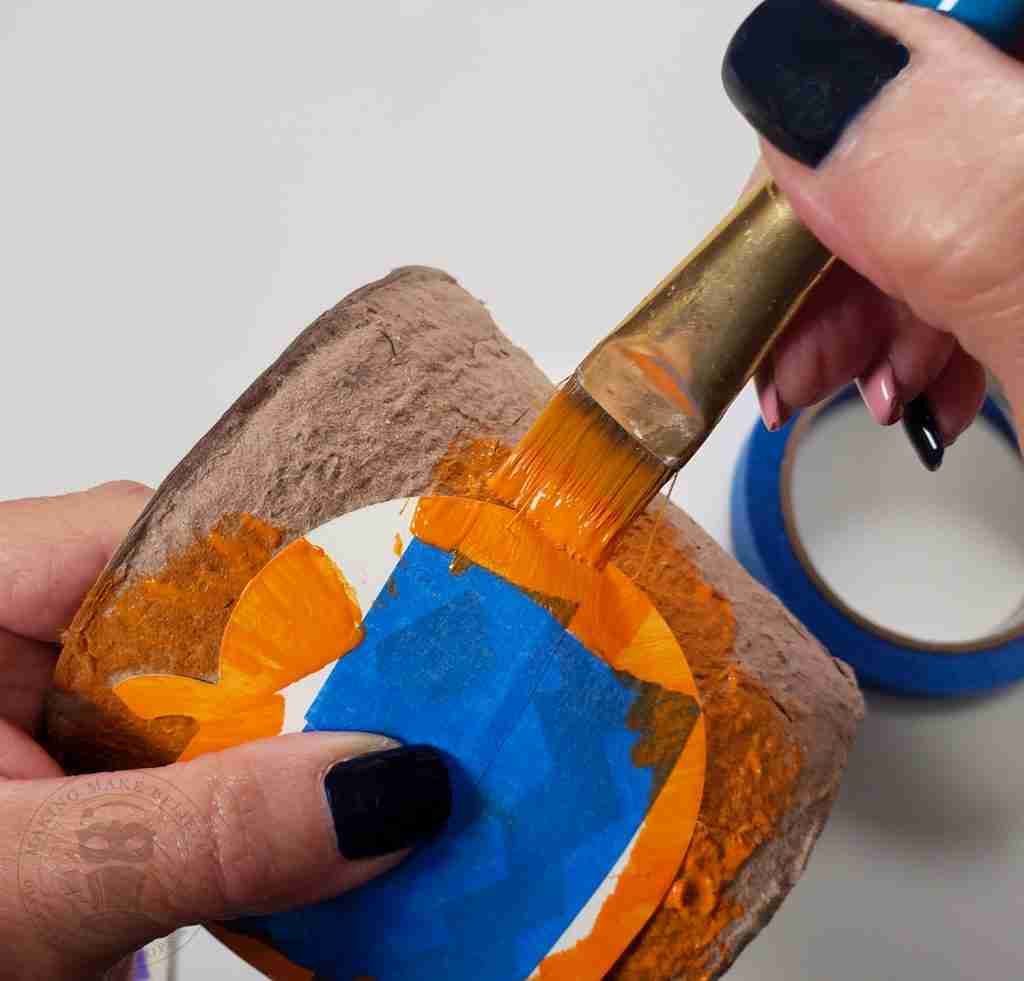
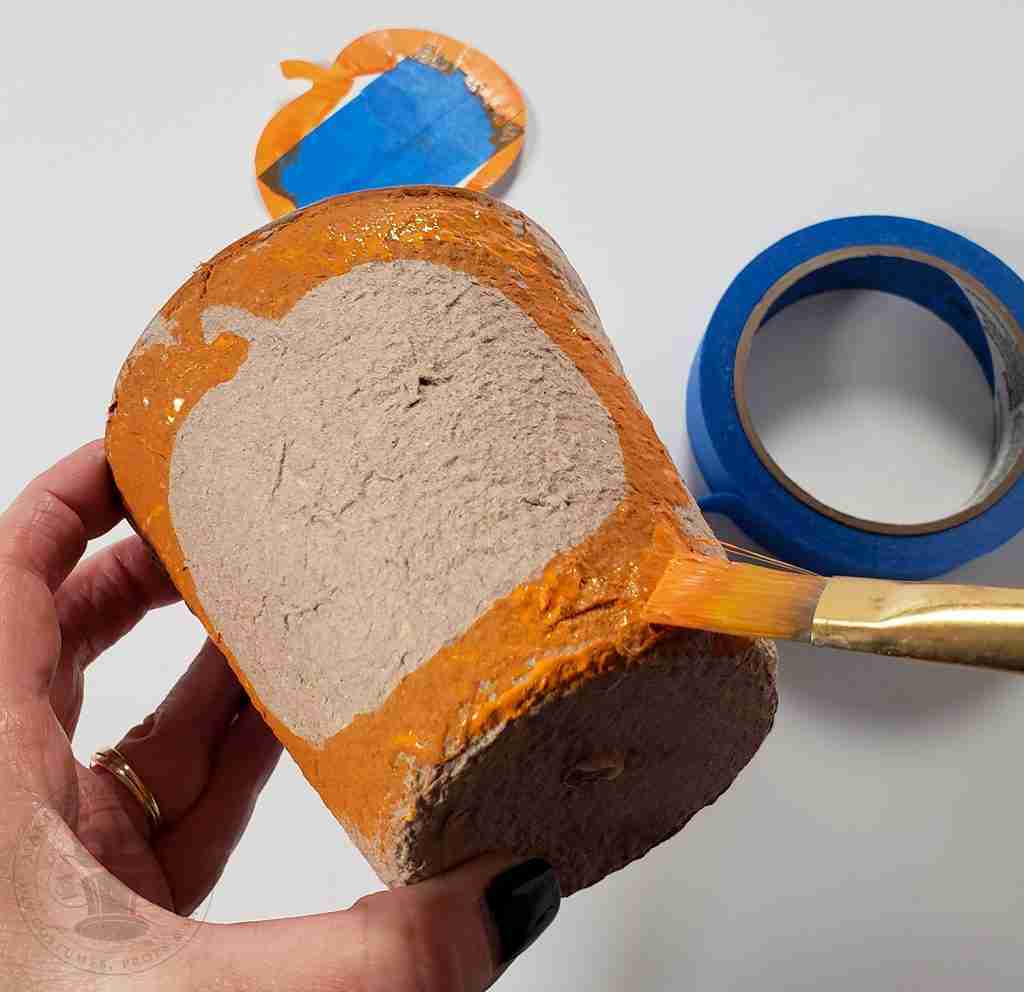
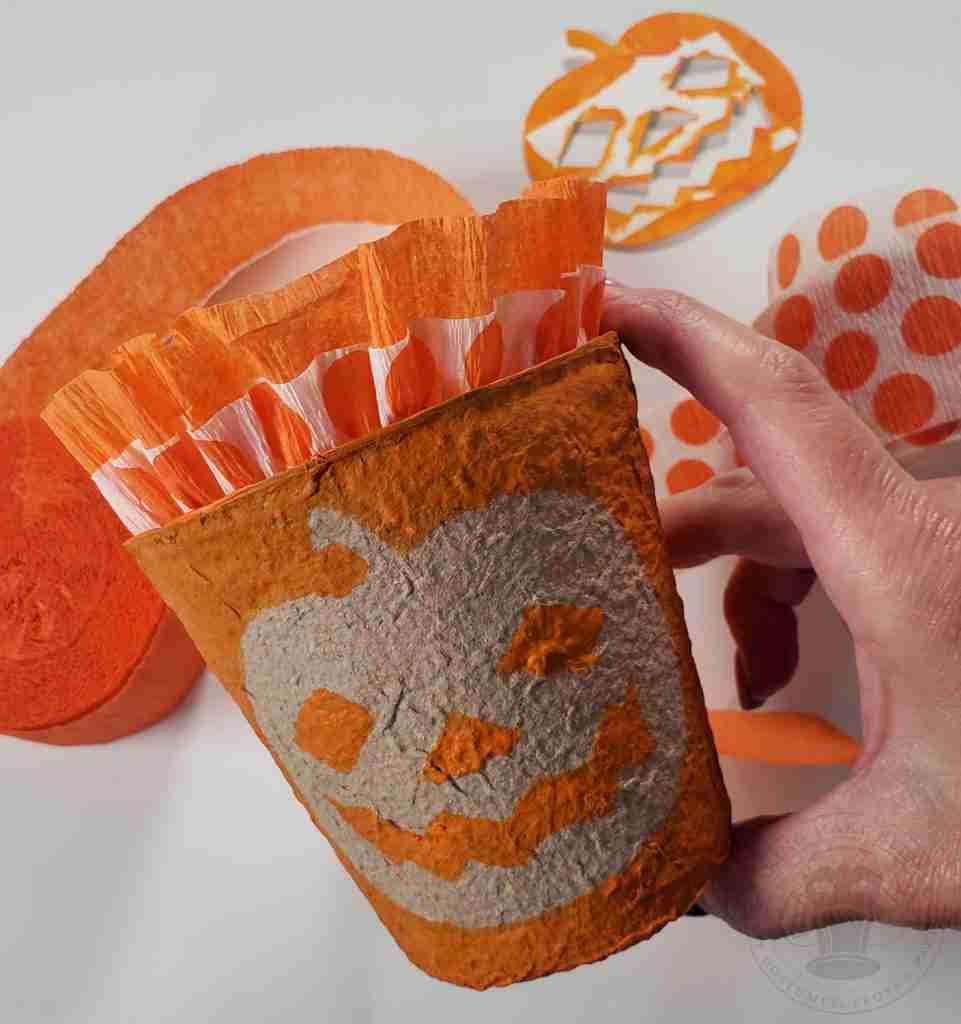
First, size your stencil to fit your seed pot and cut it out.
Hold your stencil in place and brush paint outward from your stencil onto the pot. Cover the pumpkin face with painter’s tape if you don’t want to paint the facial features or if you want them to be a different color.
Once you have the pumpkin outline, you can set aside the stencil and paint the rest of your pot. I choose to paint the bottom and interior of my pot, but this is optional.
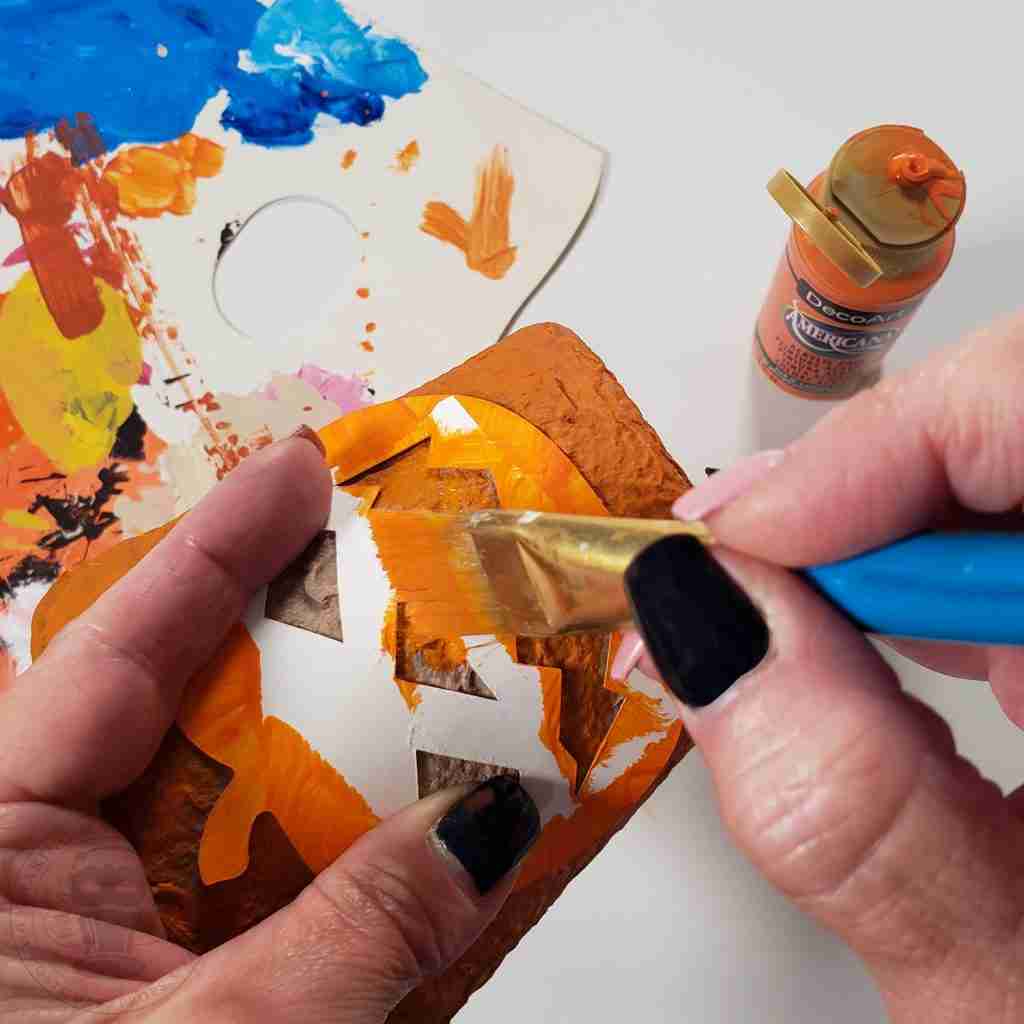
To add the face, put the stencil back in place and paint in the features.
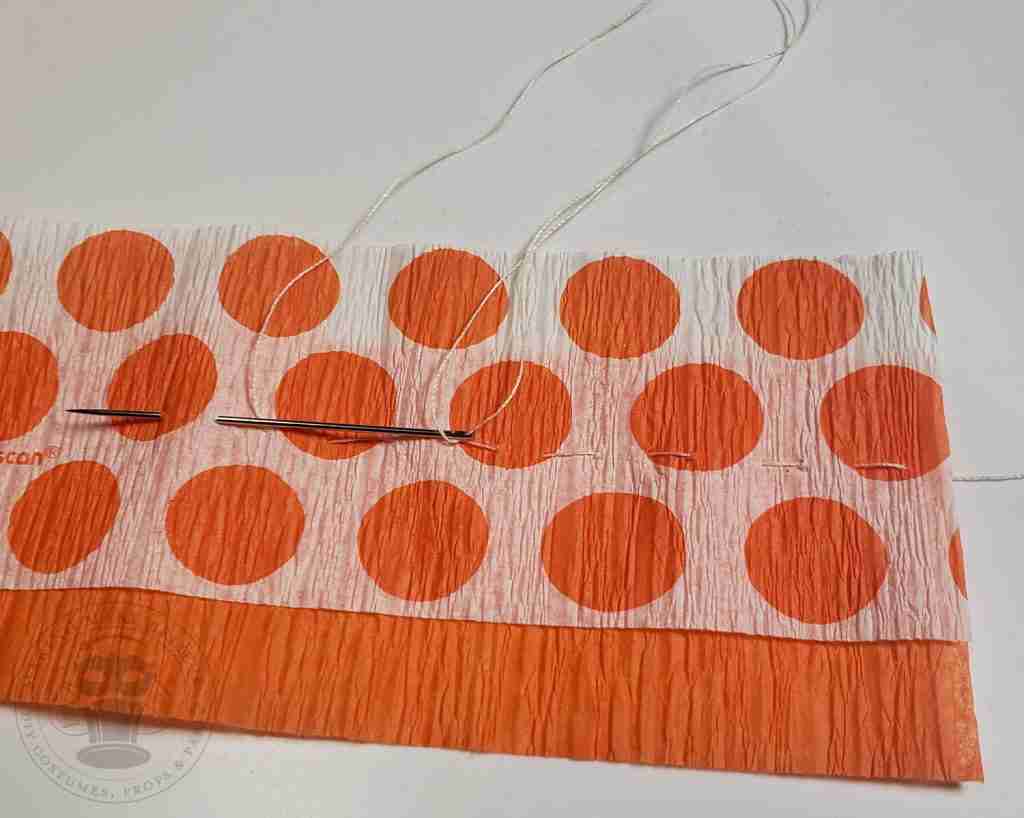
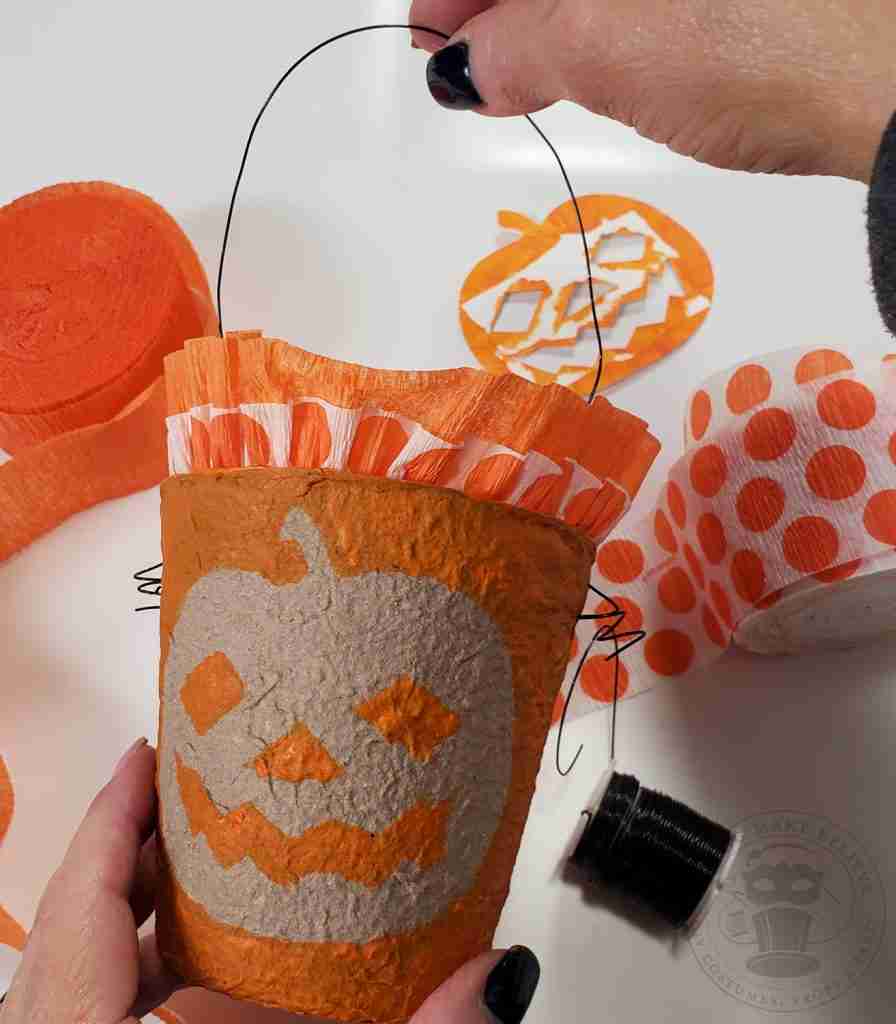
Next, cut a length of crepe paper approximately twice the distance around the top of your pot. Use the needle and thread to run a straight stitch along the crepe paper, leaving a long tail at the start and the finish.
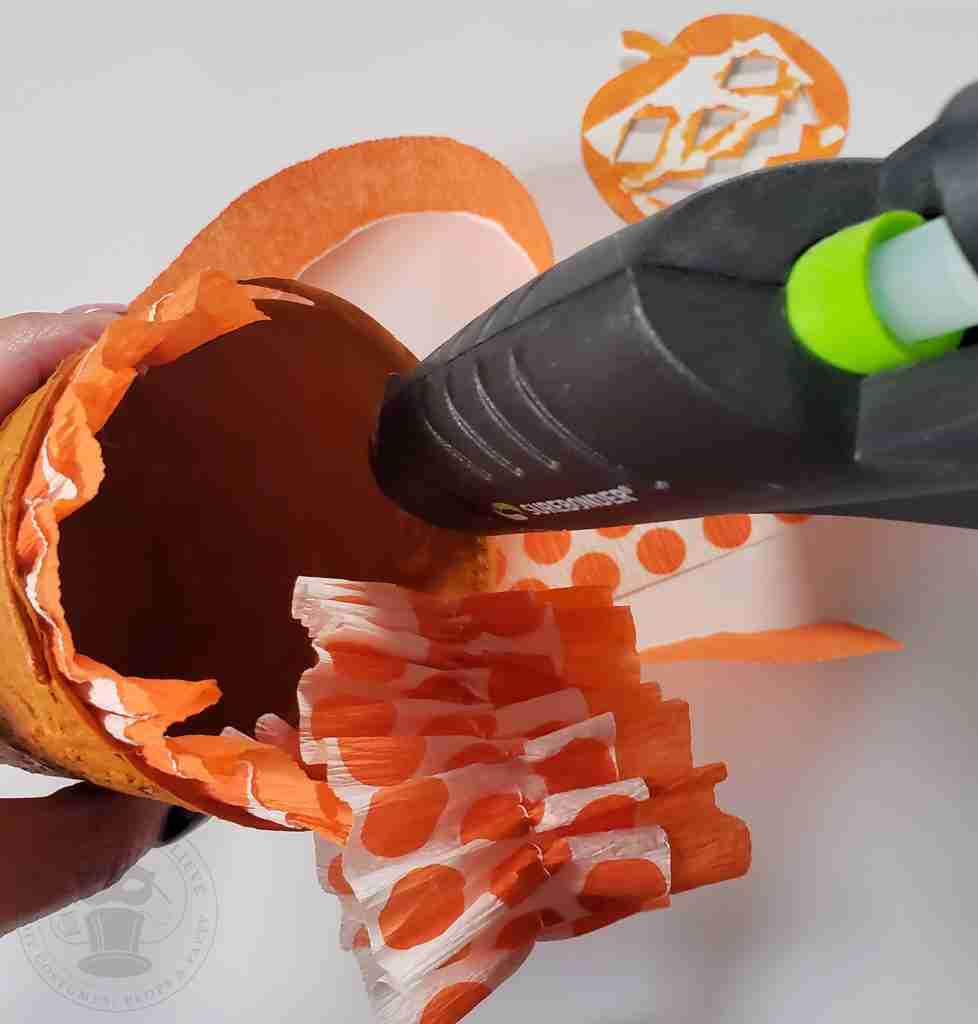
Gently gather the crepe paper until it fits around the interior top of the pot and glue it in place.
To add a handle, mark each side of your pot and make a small hole. Then, thread the wire through each side.
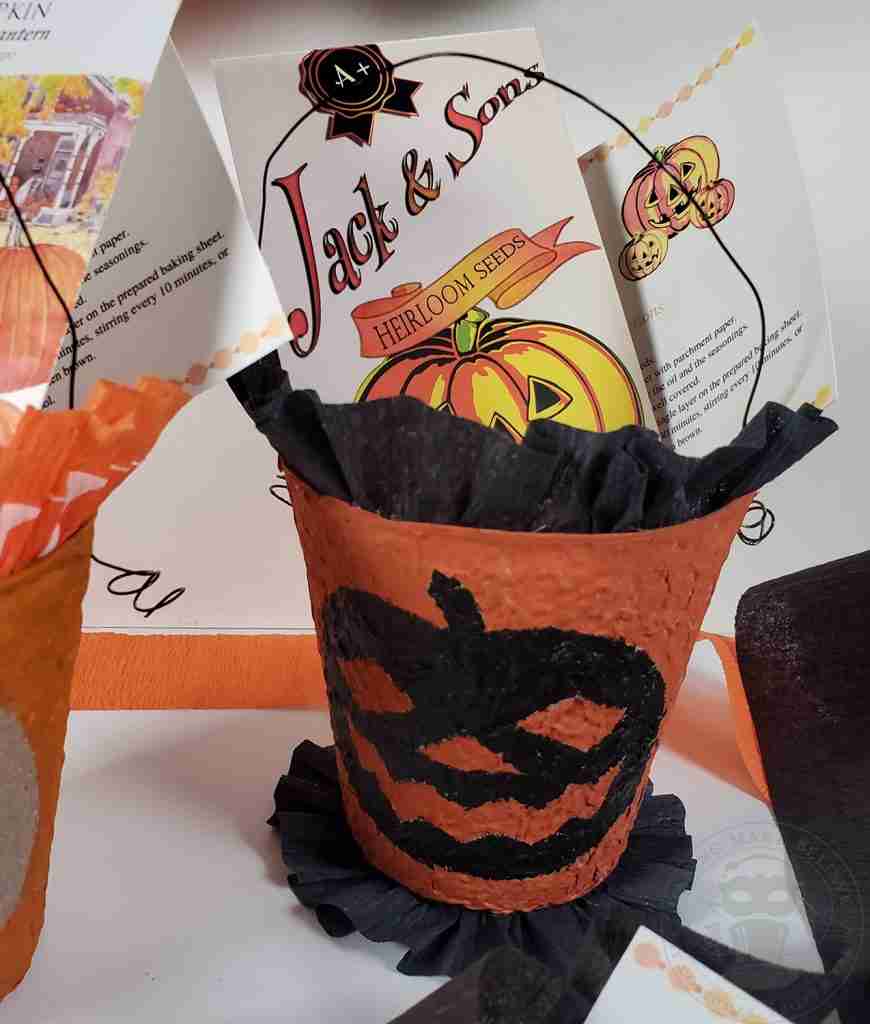
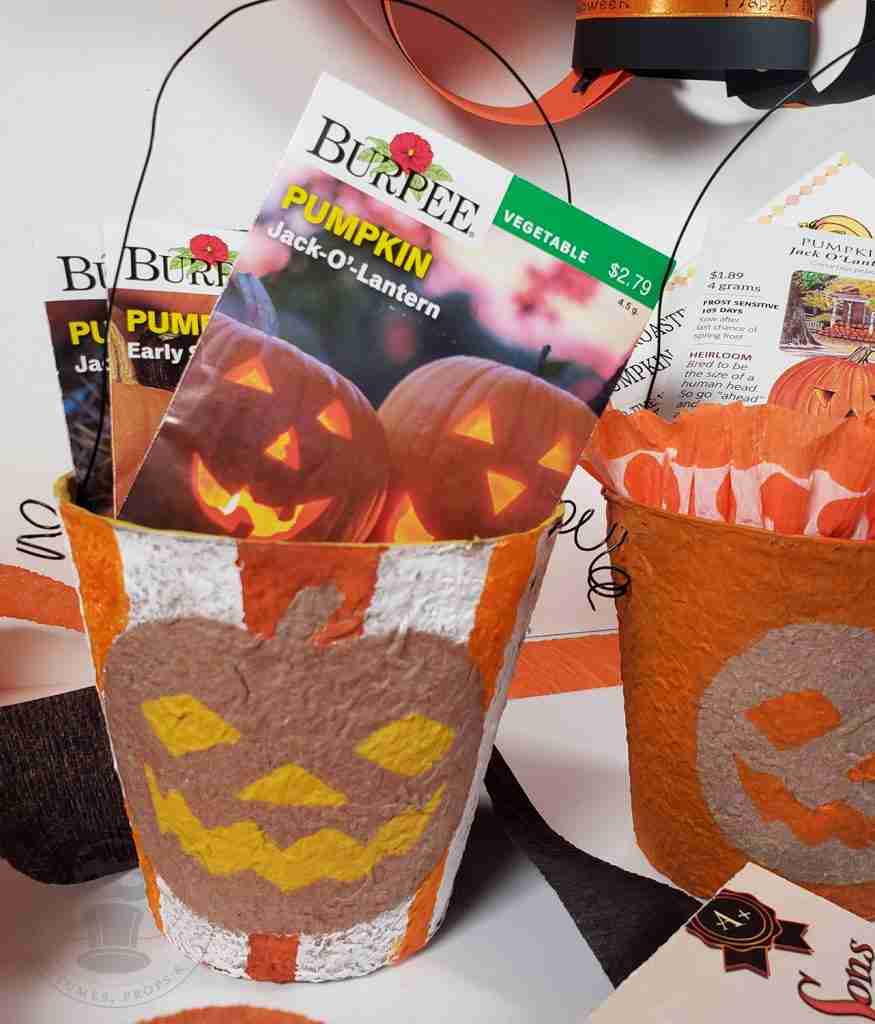
Finally, fill with goodies. I’ve added pumpkin seeds, of course, along with a smaller seed pot, so the recipient has a plain, unpainted pot to start their seeds.
Feeling extra? Add our vintage-style Jack & Sons seed pack and a recipe card for roasted pumpkin seeds.
I hope these inspire you to craft up some Halloween this Spring. But – don’t wait too long. Pumpkin seeds need to be sown April to June, depending on your location.
Ok, I’m out of here. I’ve got to go read up on starting pumpkin seeds. Wish me luck!
Join us and get access to our Haunted Library stocked with templates, printables, cut files, and exclusive content. Plus, you’ll receive Eerie Emails just for our subscribers.
*Stay as long as you like. Unsubscribe at any time.