10.1K


How To Make A Clown Collar Neck Ruffle
I’m working on my 2023 project list, and, as I mentioned before, the list is long and still growing.
Last year, Making Make Believe featured more Halloween-specific projects, but this year the focus is costumes. (Don’t worry, there will also be plenty of Halloween hijinx.)
As you may have noticed, I am somewhat obsessed with collars, as several costumes feature collars, and the blog has two tutorials for crafting this accessory – see here and here. Well, make that three tutorials.
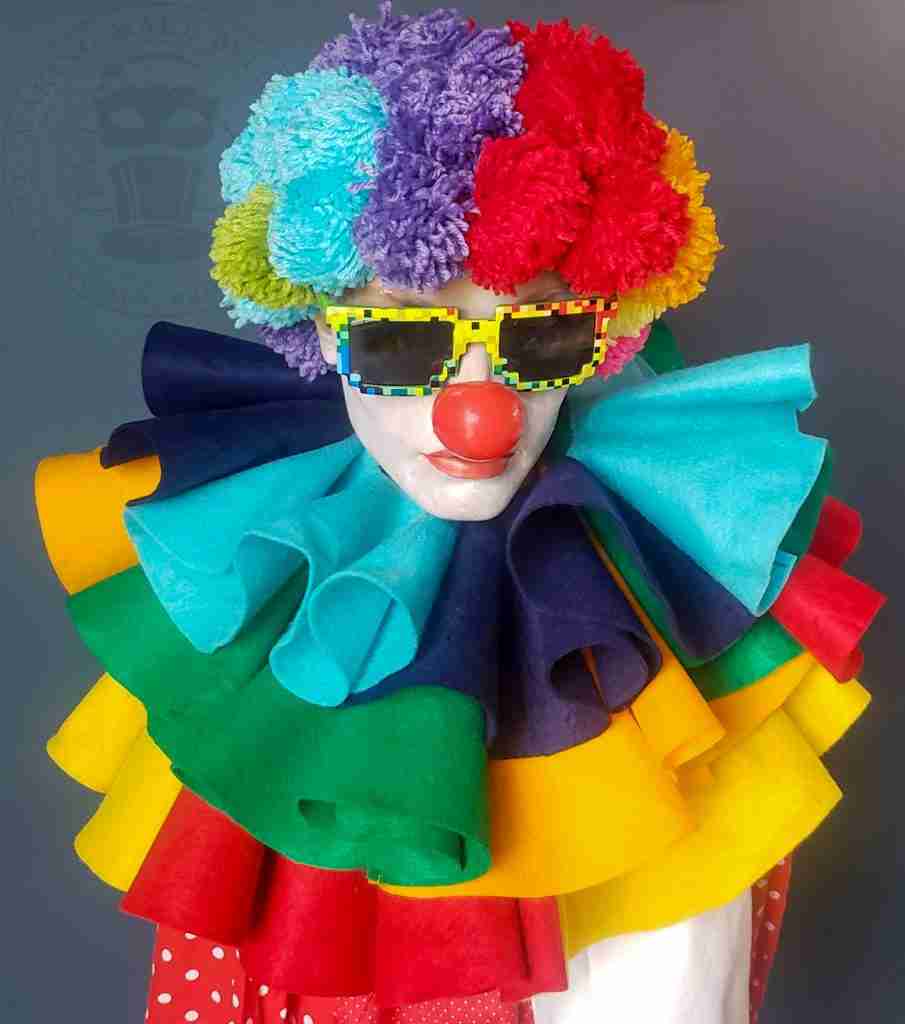
Today, I want to show you how to make a clown collar neck ruffle that you can fully customize, and, as a bonus, you can stack collars for oodles of ruffles. Oh, and did I mention that you can craft it from inexpensive felt?
We will need:
Craft felt – I’m using two colors, but you can use a single color or four different colors
Scissors or rotary cutter
Fabric marker or tailor’s chalk
Sewing pins or clips
Ribbon
Sewing machine, needle, or hot glue
Thread
This pattern is a simple circle, so you can craft your own. However, if you want a shortcut, download the Clown Collar Stackable Neck Ruffle templates from the Haunted Library.
The PDF includes three ruffle sizes – 20″, 16″, and 12″.
To assemble your pattern, print it out, cut, and tape it together.
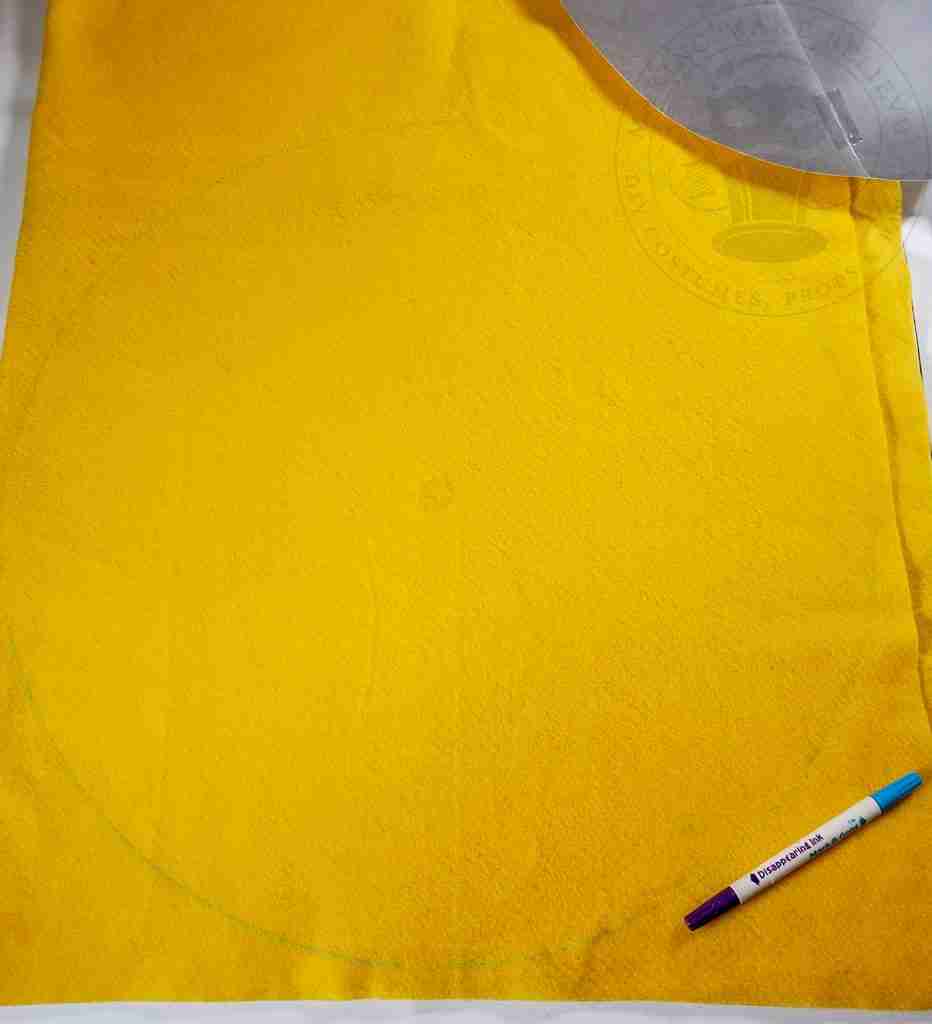
First, lay out the felt and place the pattern. I’m holding down my pattern with glass weights, but this is not necessary.
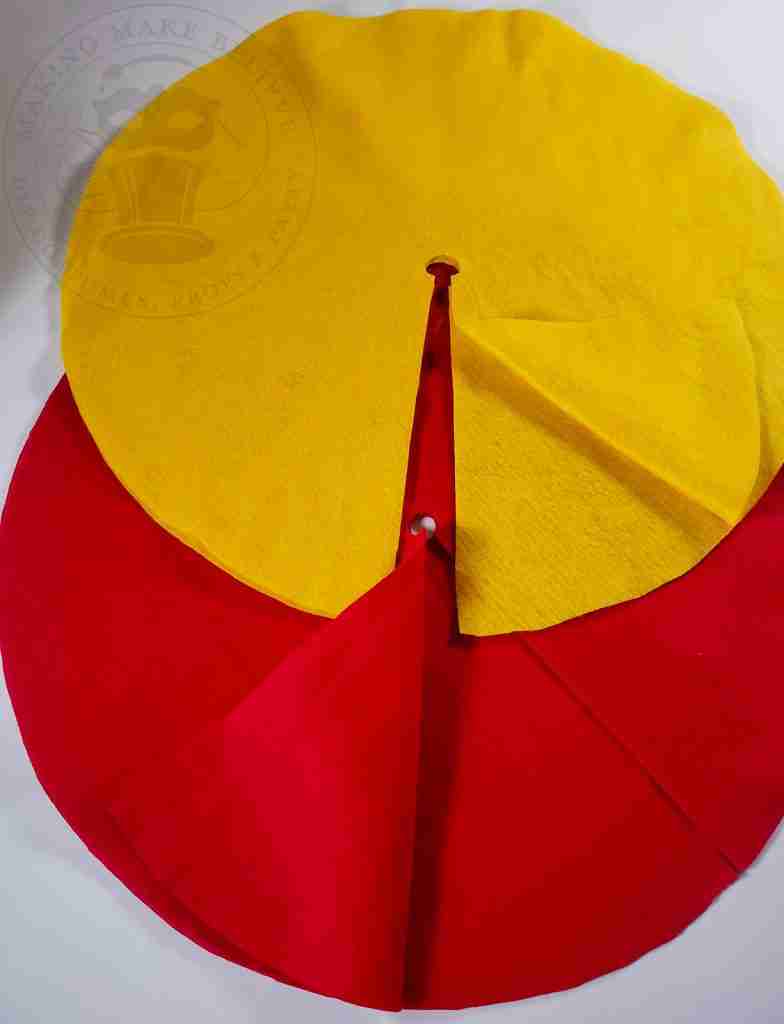
Next, transfer the pattern to your fabric using a marker or tailor’s chalk. Don’t forget to mark the small interior circle and the slit (indicated by the dashed line.)
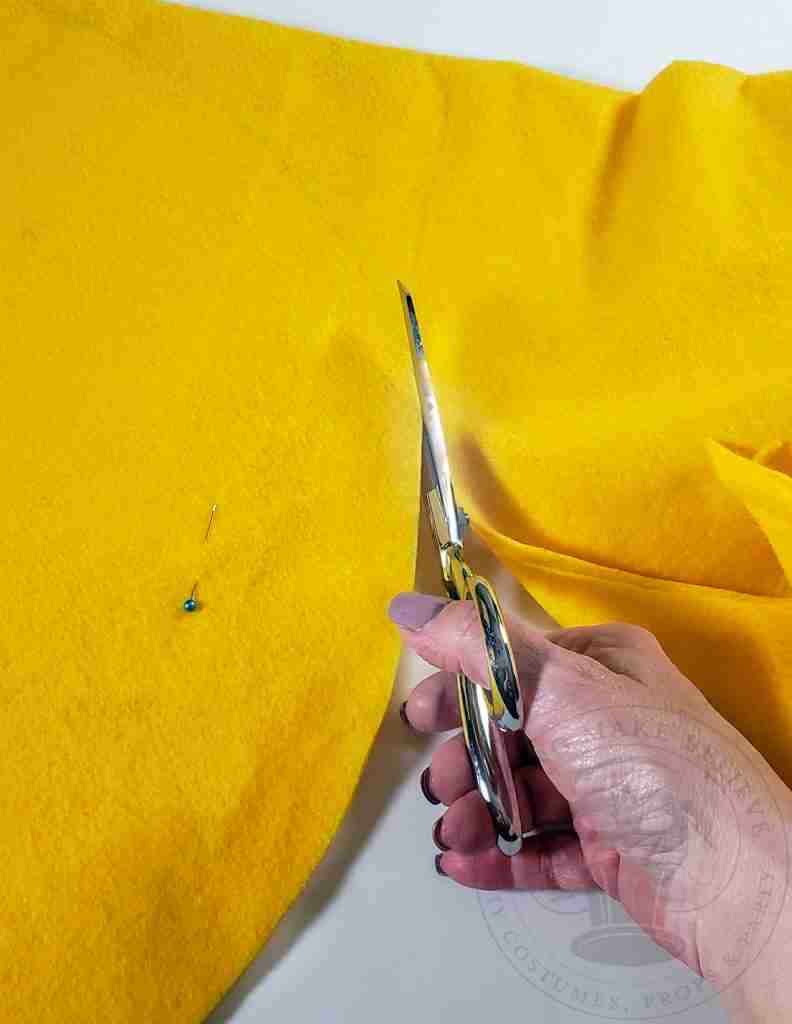
Cut out the pattern from your fabric.
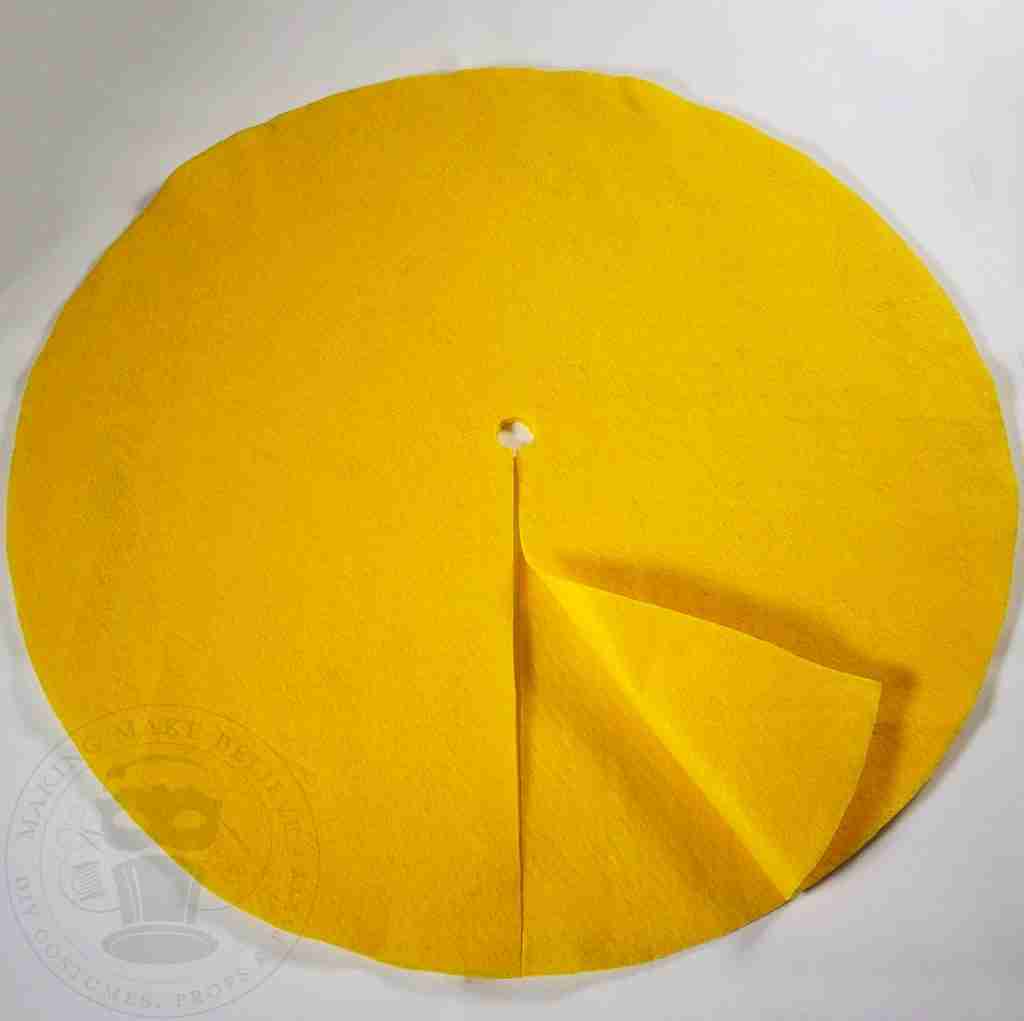
Cut the slit and the small interior circle.
For each collar, we will need four circles. My collar features two colors, but you can use a single color or make each circle a different color.
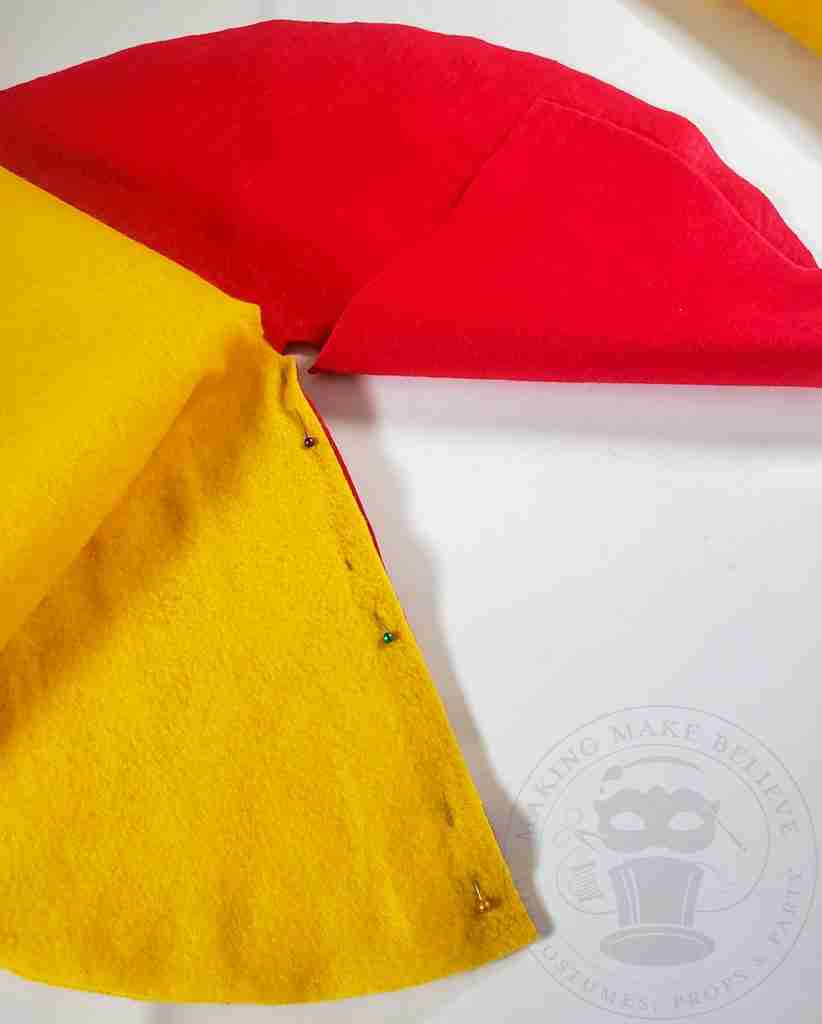
With the right sides together, attach one circle to another along the slit.
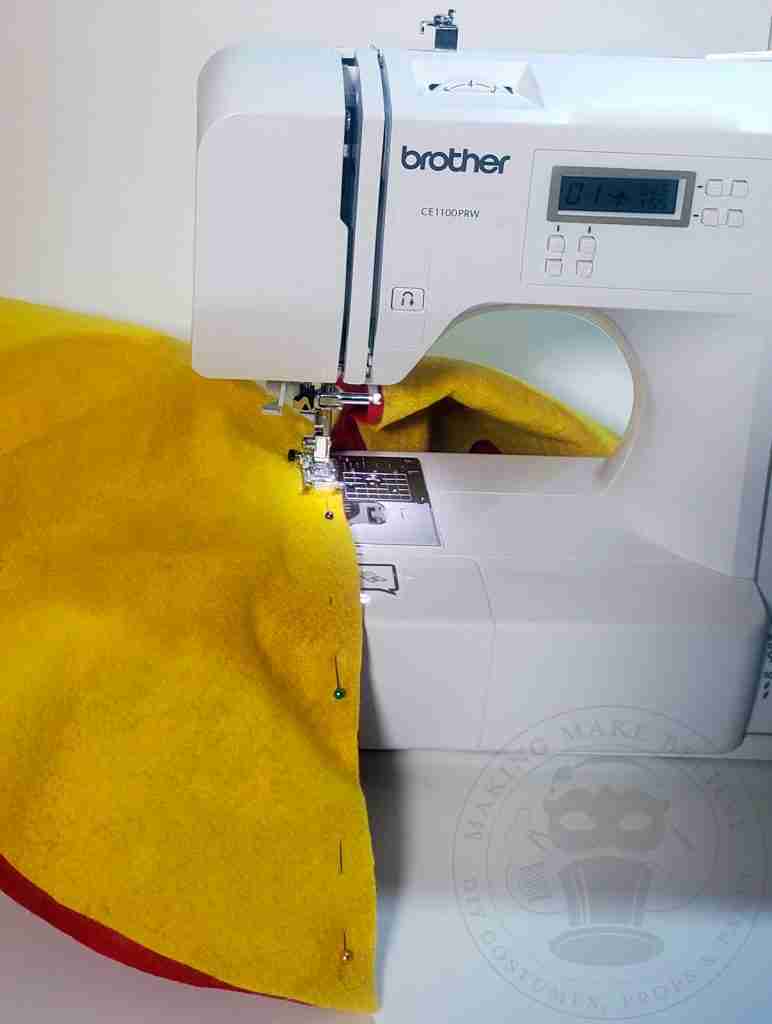
Using the sewing machine, stitch the pieces together.
Alternatively, sew this project together by hand or use hot glue to secure the edges.
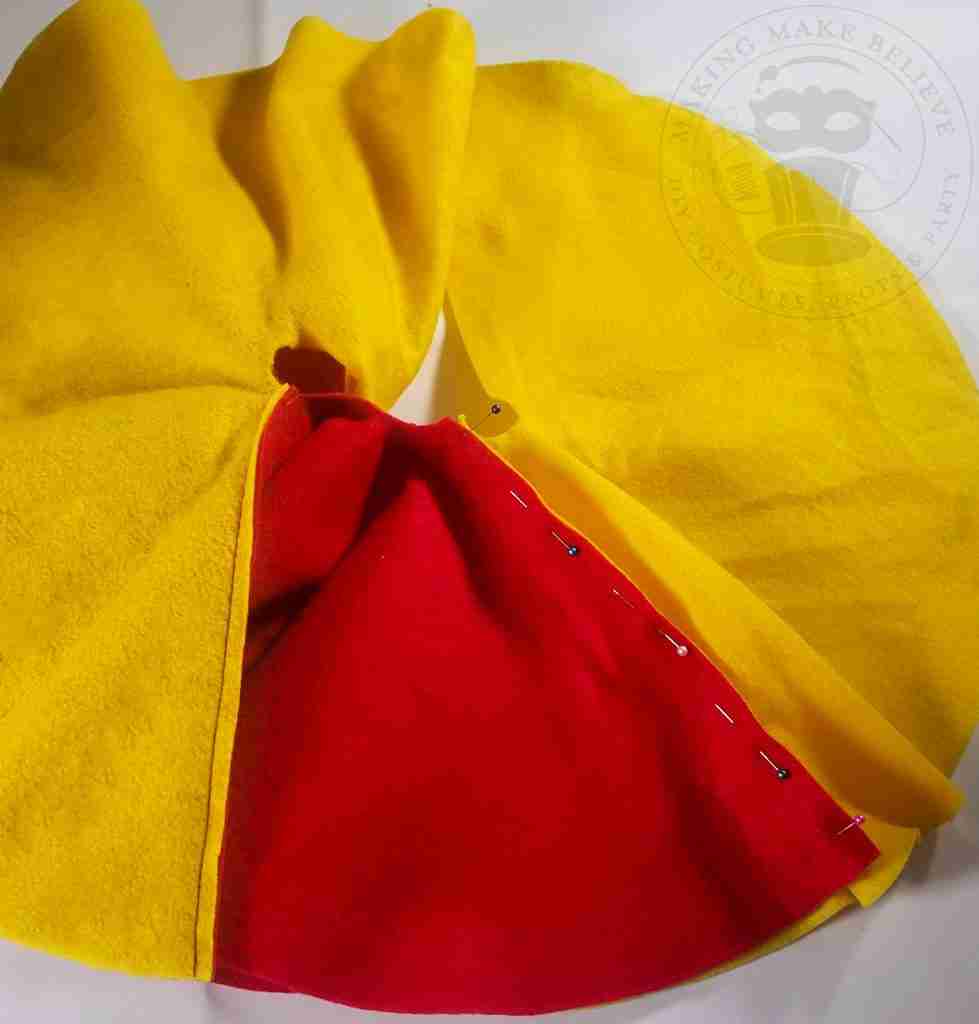
Again, with the right sides together, attach the next circle to the previous.
Attach the final circle.
Now all your circles are connected, and you have two adjoining edges left open. Do not connect these. Instead, attach a length of ribbon at the neckline (small circle opening) to serve as a tie for your collar.
That’s it! A super-simple way to get lots of ruffles quickly.
If you want even more ruffles, add more collars.
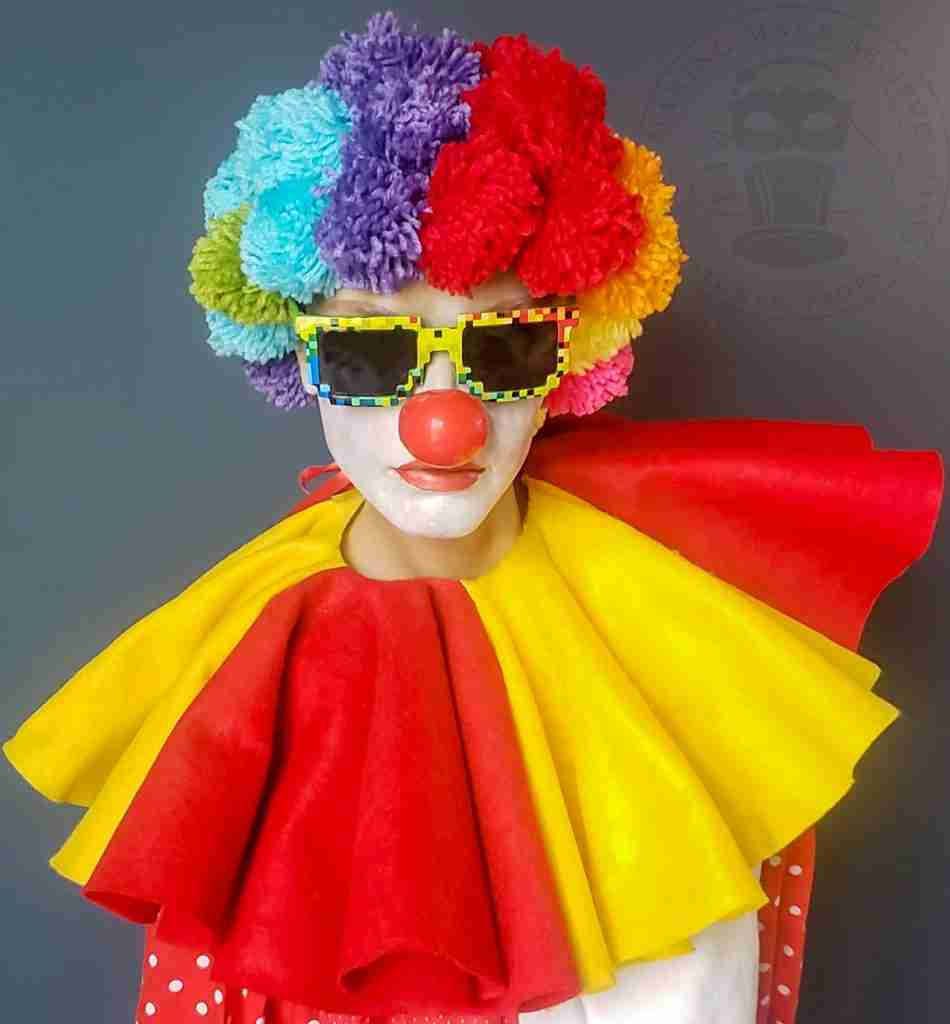
Costume shown with one collar – 20″.
Costume shown with two collars – 20″ and 16″.
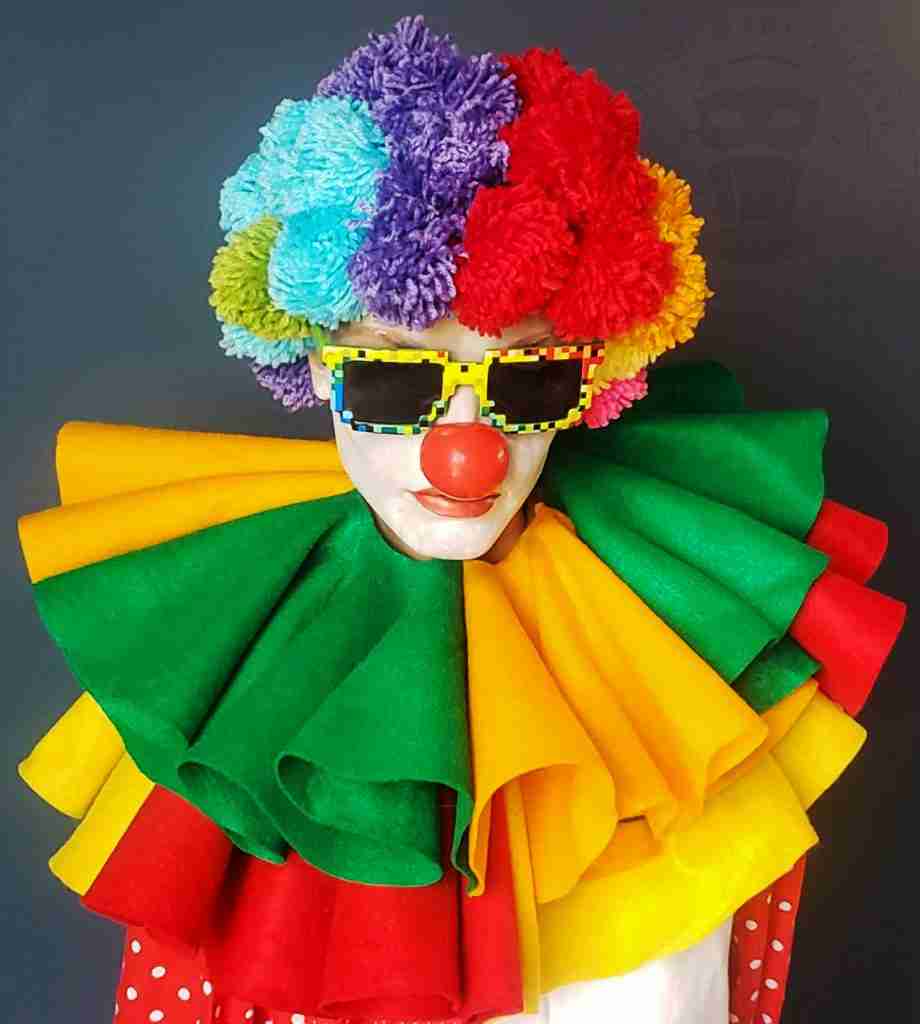
Costume shown with all three collars – 20″, 16″, and 12″.
If the clown isn’t on your list, you can still use this collar, as it pairs well with any costume that needs ruffles.
What character do you have in mind that could use some fancy frills?
Until next time, keep in costume.

Check your email for the Haunted Library password.
Don’t miss a moment of the mischief.
Add hello@makingmakebelieve.com to your address book.
Join us and get access to our Haunted Library stocked with templates, printables, cut files, and exclusive content. Plus, you’ll receive Eerie Emails just for our subscribers.
*Stay as long as you like. Unsubscribe at any time.