3.5K


From Straw Hat To Scarecrow Hat
My typical Halloween style is creepy with a side of kooky and a splash of vintage, all wrapped up in a haunted mansion. My go-to colors are black and orange, with the occasional green and purple sprinkled in.
I never considered adding pastels until a few years ago when they became a thing in Halloween decor. Ghoulies and ghosties – light and bright – inspired me to make this skull pillow that now sits on the black wingback chair in the office.
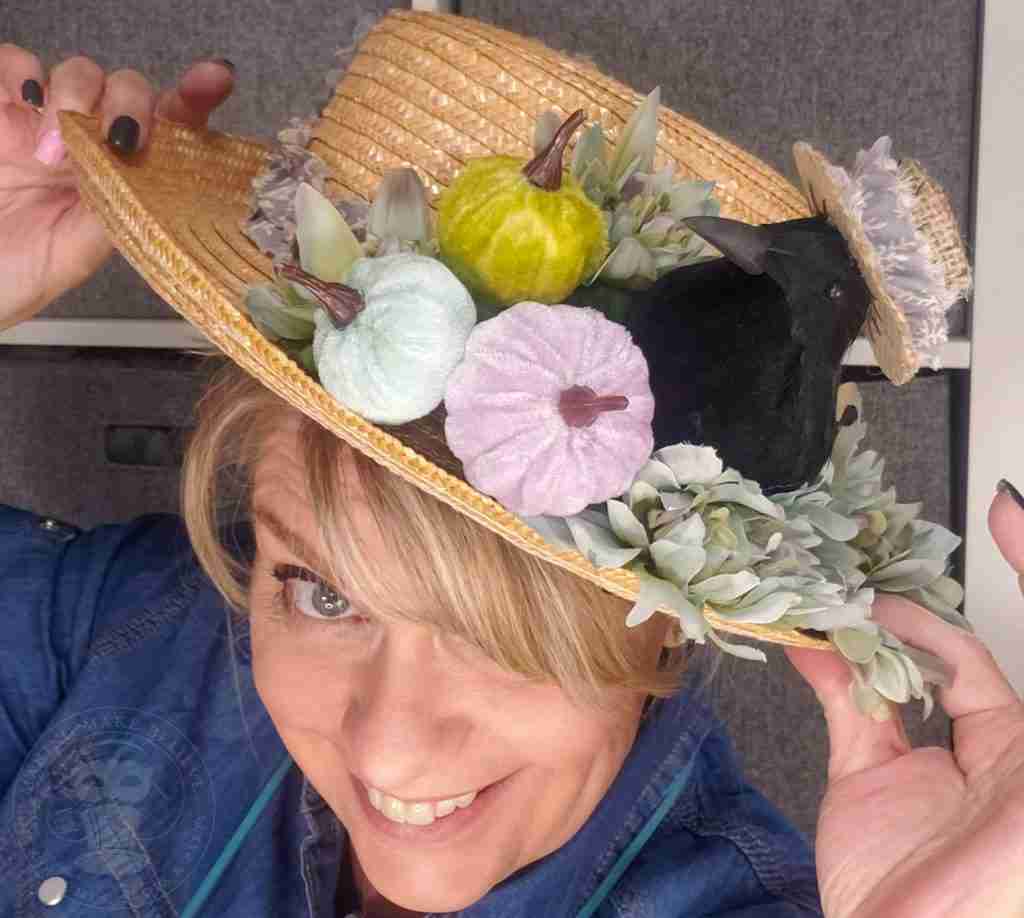
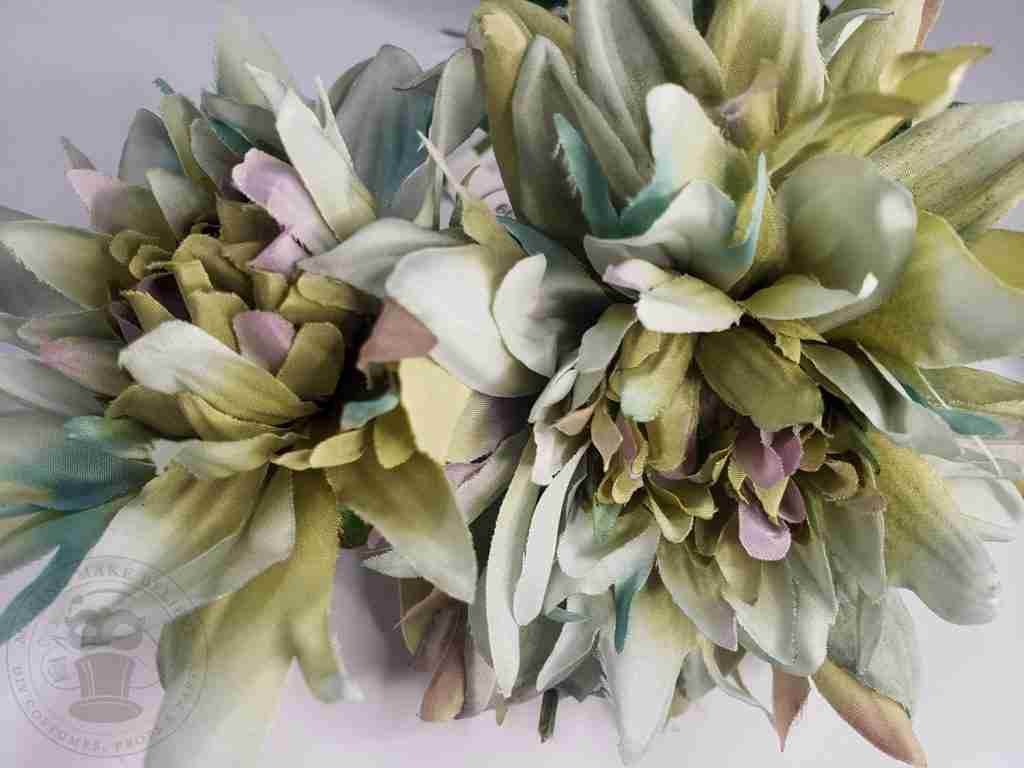
While I’m no longer limiting myself to only a few colors, I find that I prefer a more subtle, muted approach. So, when I saw these two-toned green dahlias, I knew I would have to use them with a thrifted find I snagged a few months ago.
On a trip to the local thrift, I noticed a couple of straw hats sitting on top of the clothing racks. Though not typically what I use when crafting this costume, I thought they’d be perfect for a cute scarecrow hat. So, I scooped them up.
There’s no wrong way to make a scarecrow hat. You can make yours tattered and rough, sweet, or sassy.
Today I’m going for the cute and sweet variety so let’s get started.
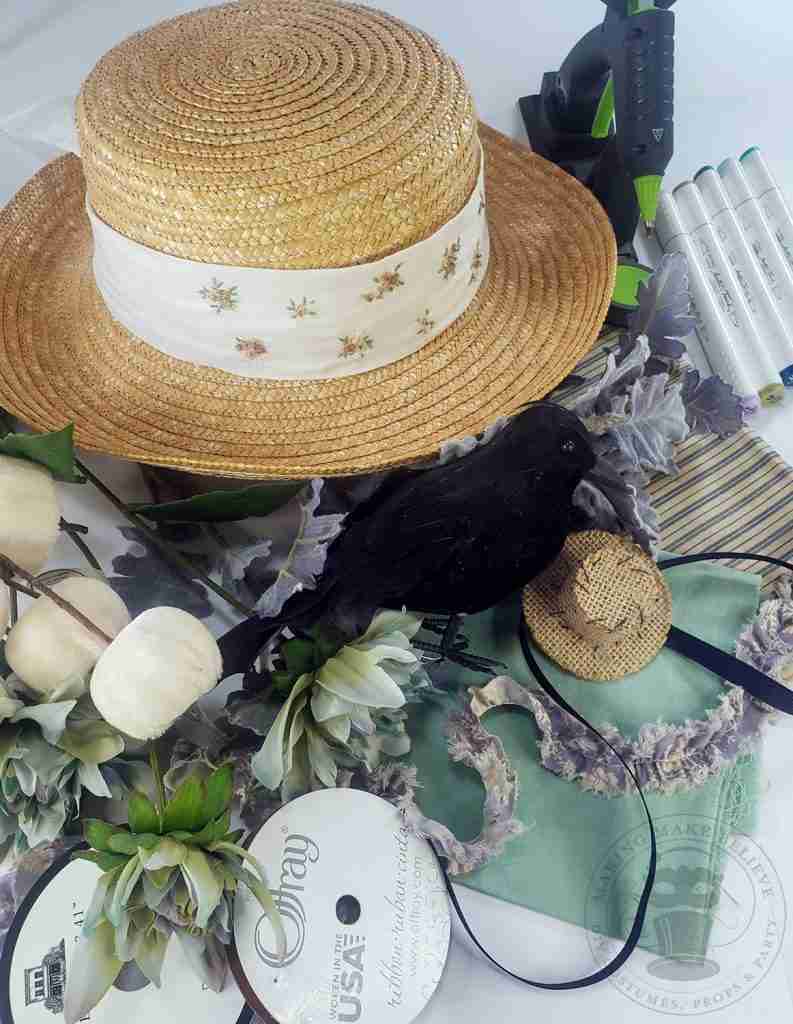
We will need:
Straw hat
Florals
Faux pumpkin stem
Ribbon
Fabric scraps
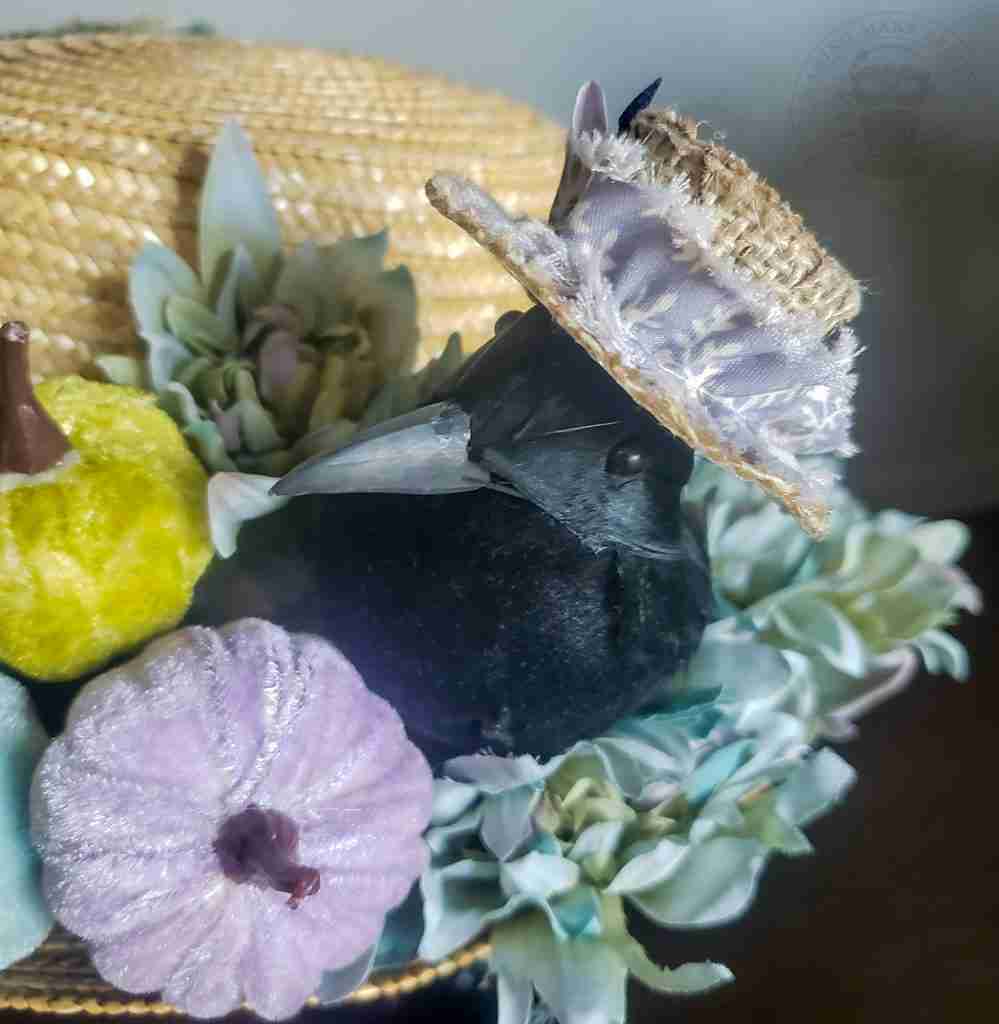
Small crow
Small hat for your crow
Hot glue gun
Alcohol ink markers (optional)
Scissors
Wire (optional)
Needle with thread or embroidery floss (optional)
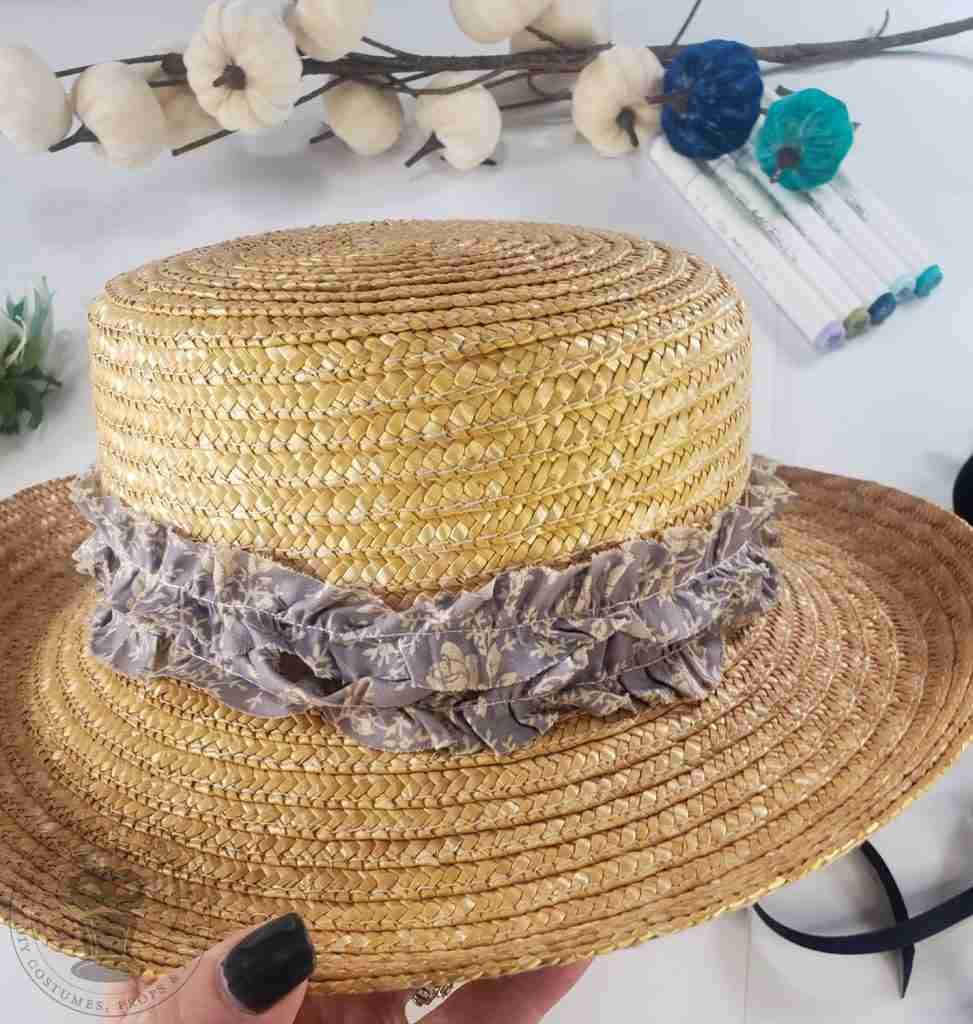
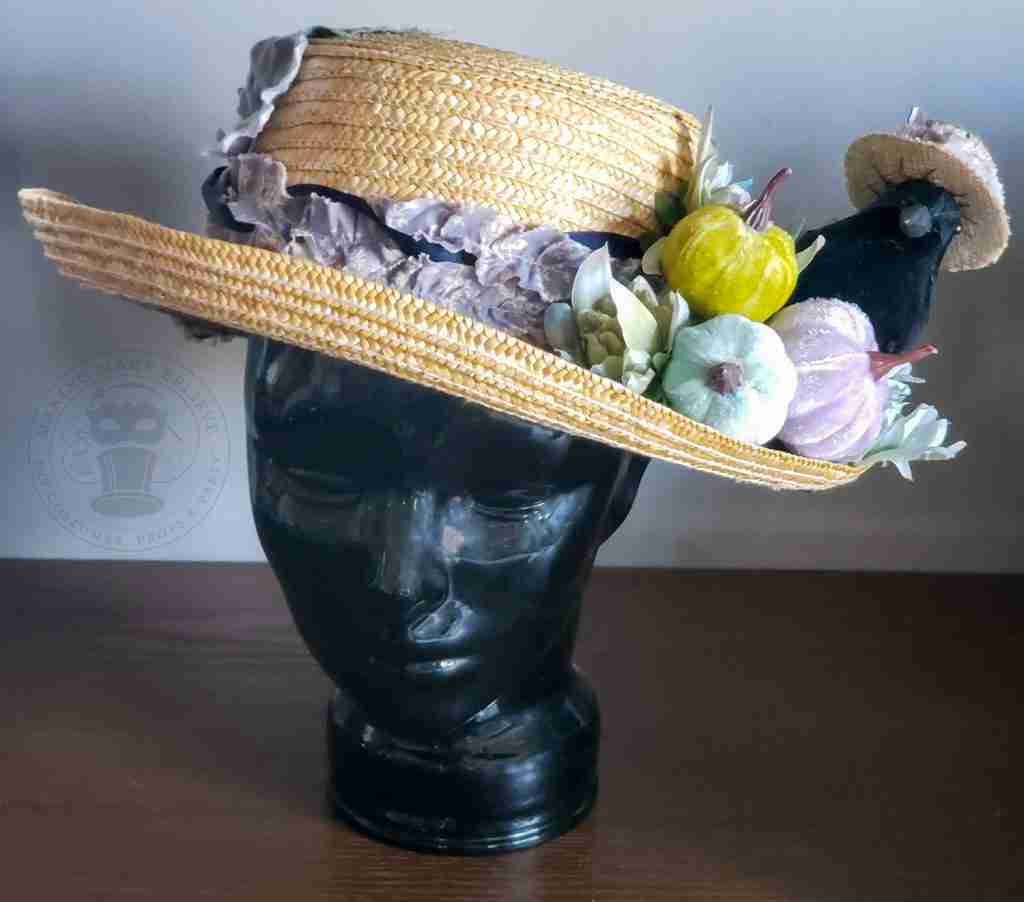
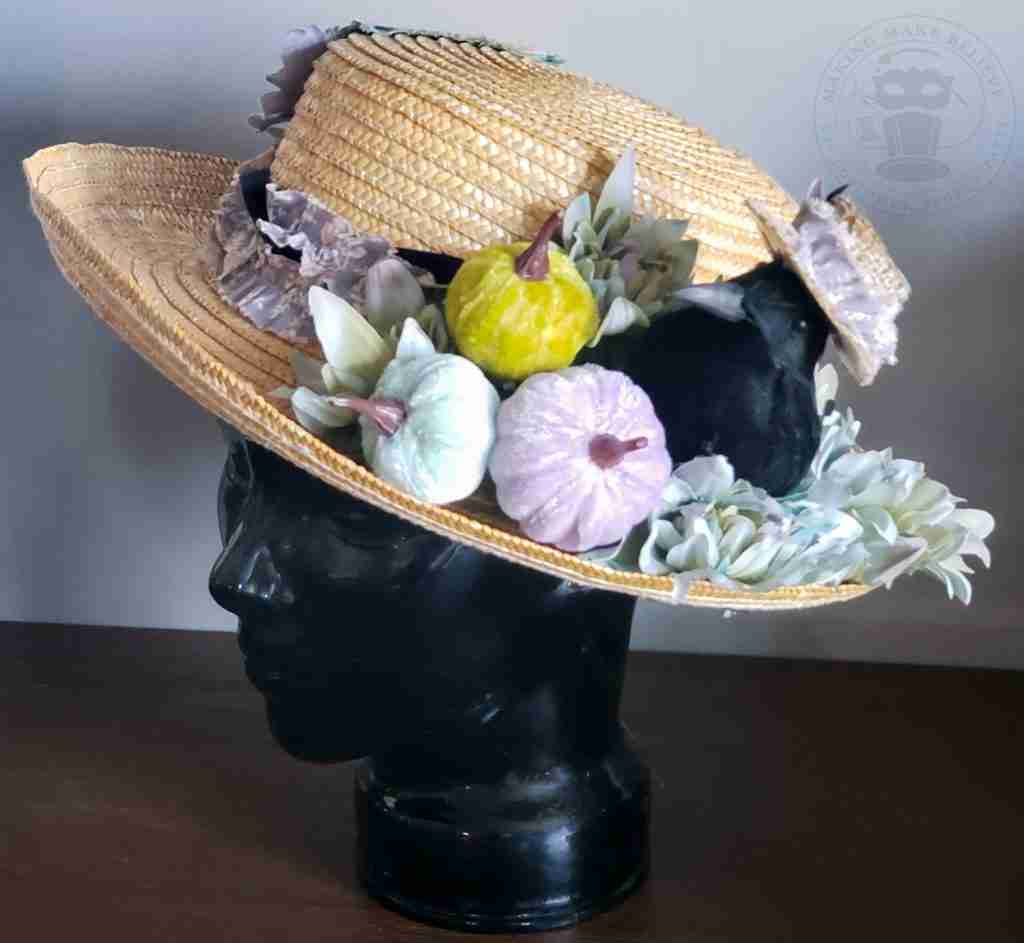
To begin, I decided to add some color to my white pumpkins. You can see how this simple trick here. Hint – this is where the alcohol ink makers come in.
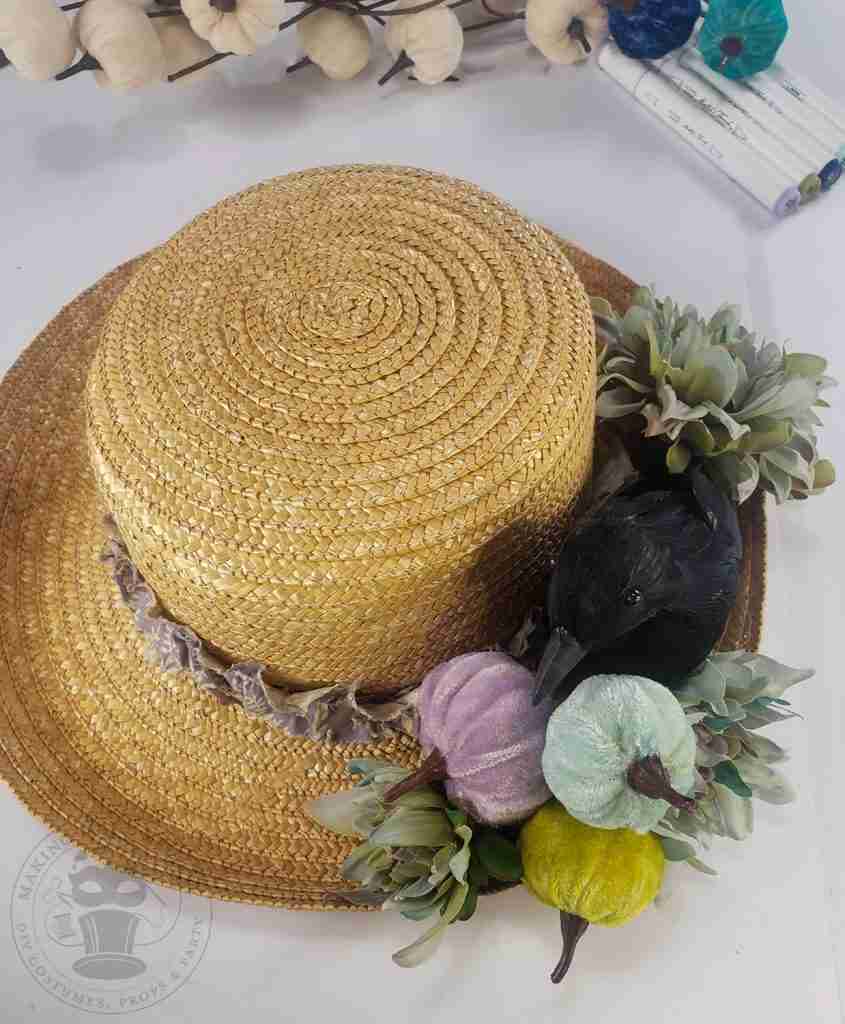
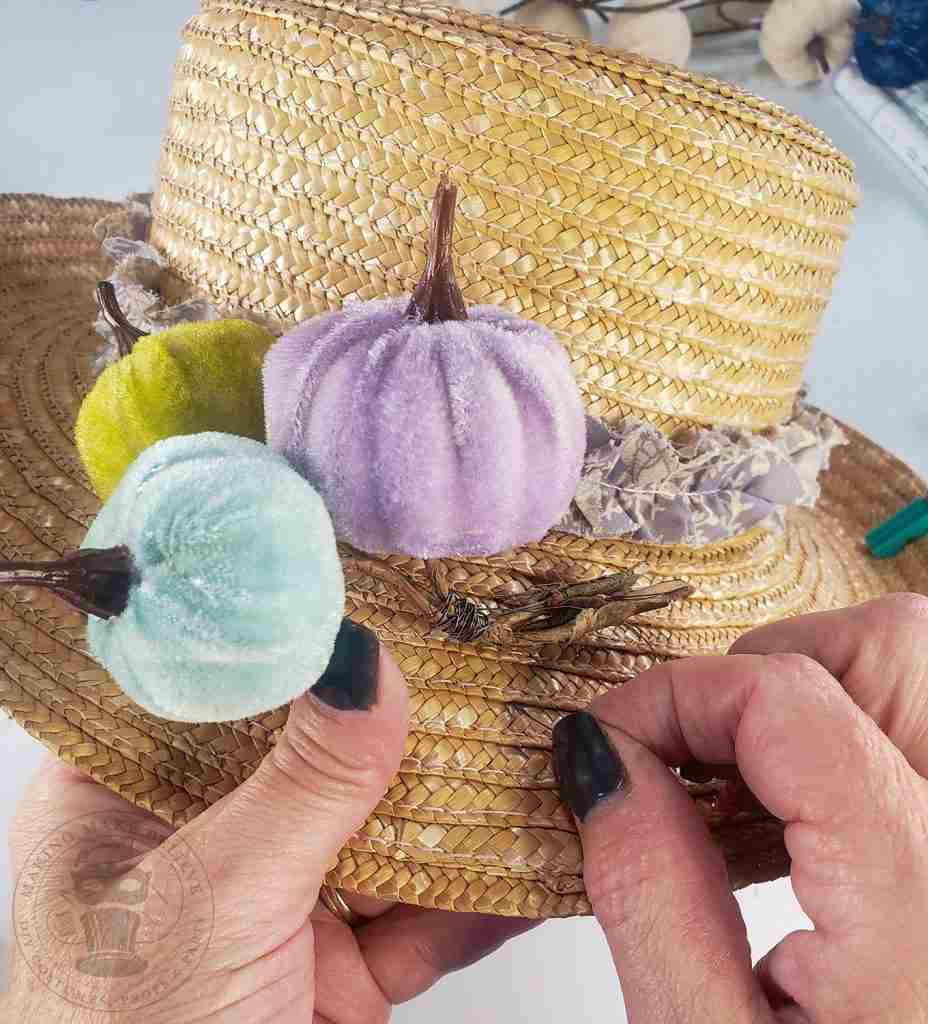
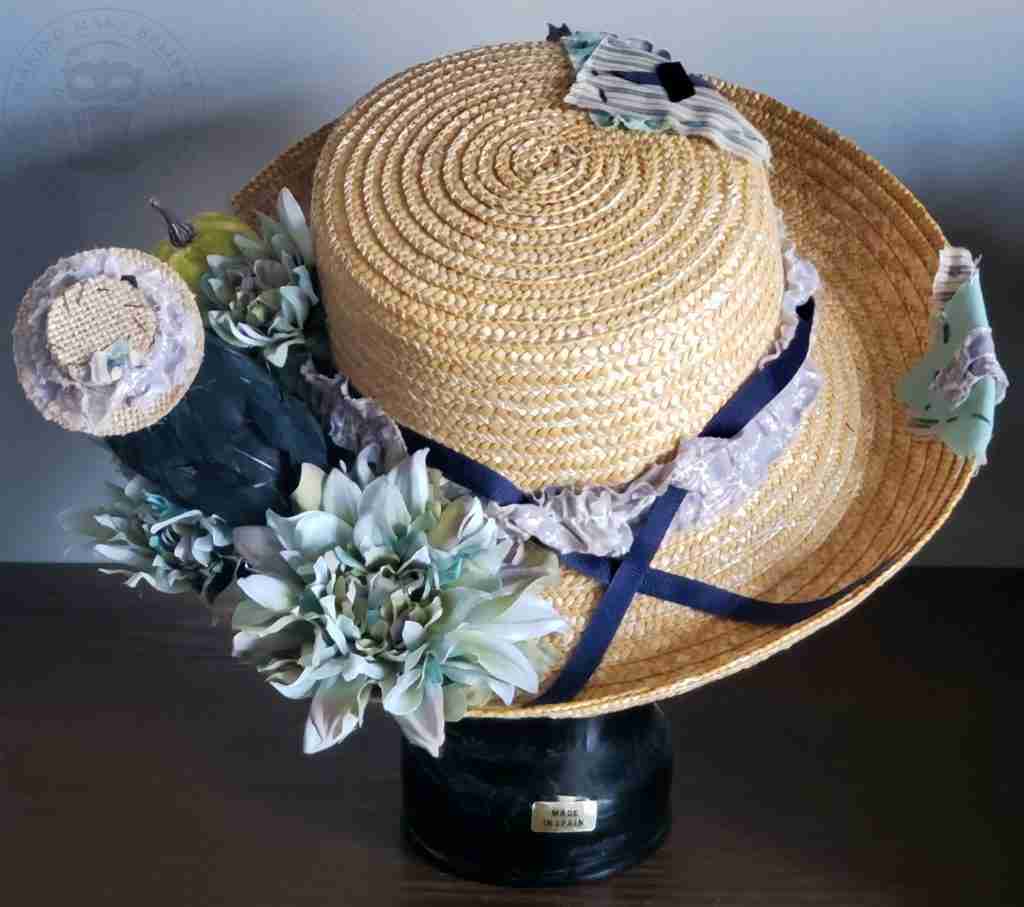
First, I wrapped the ribbon around the hat in place of the original hat band and secured it at the back using hot glue.
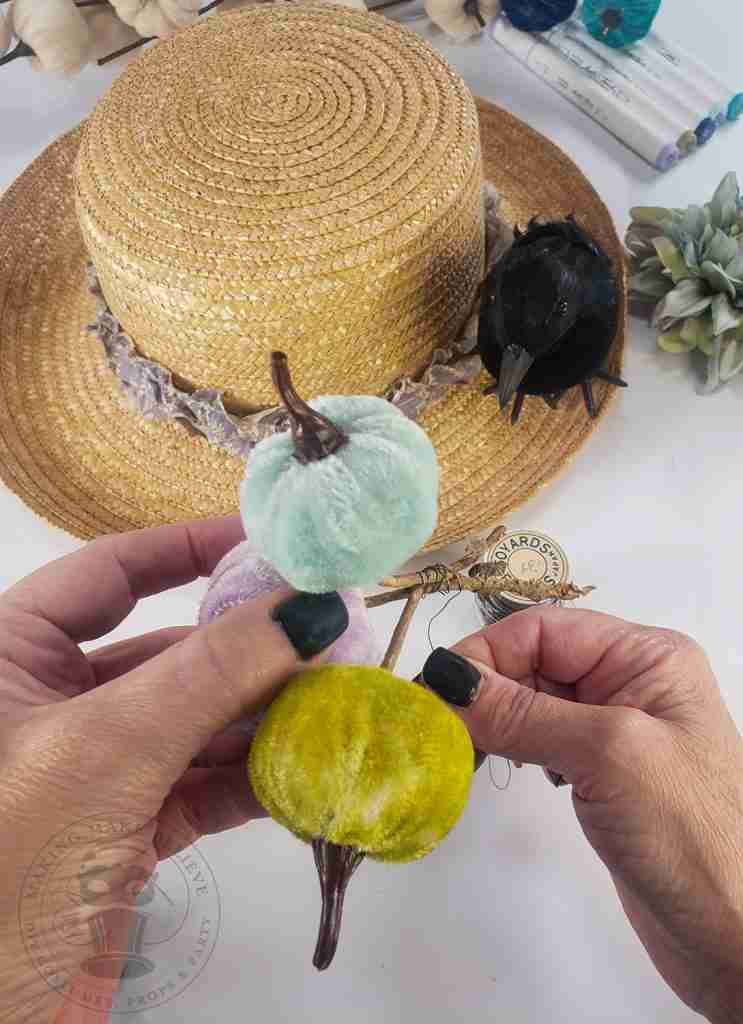
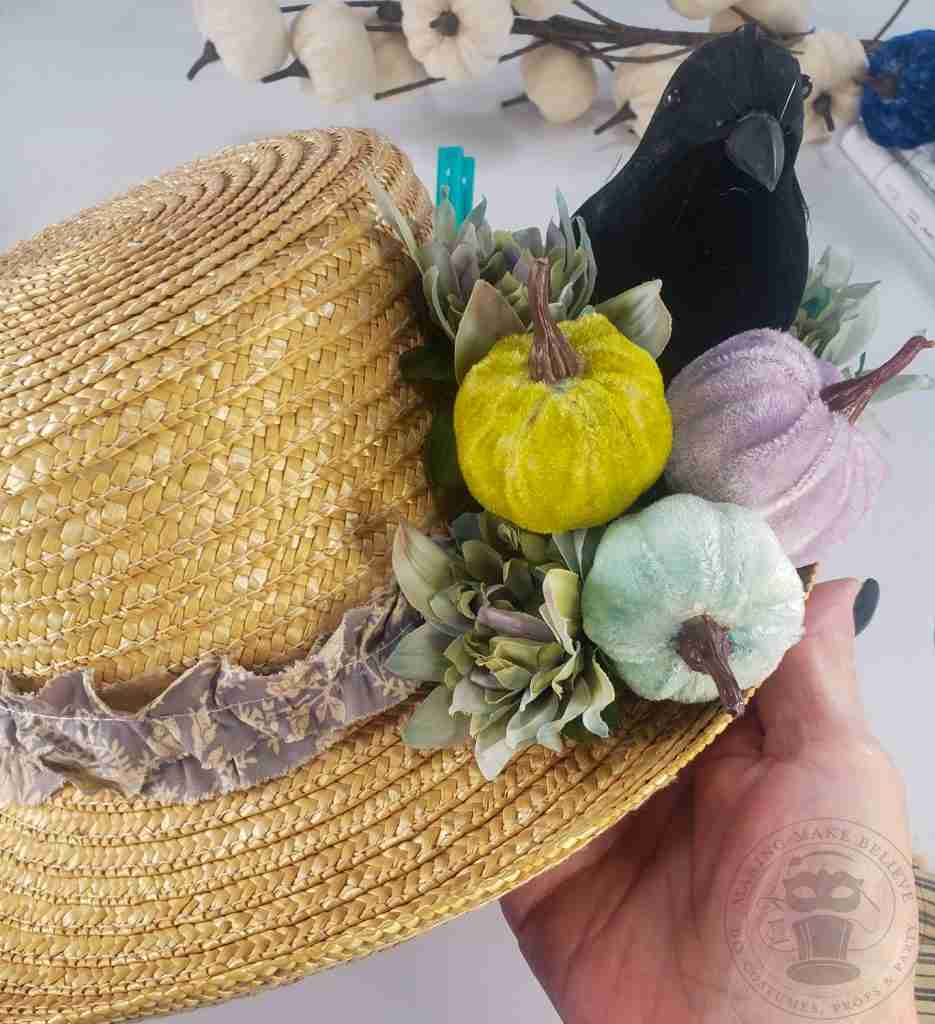
Next, I took some fine wire and wrapped the stems of my colored pumpkins together.
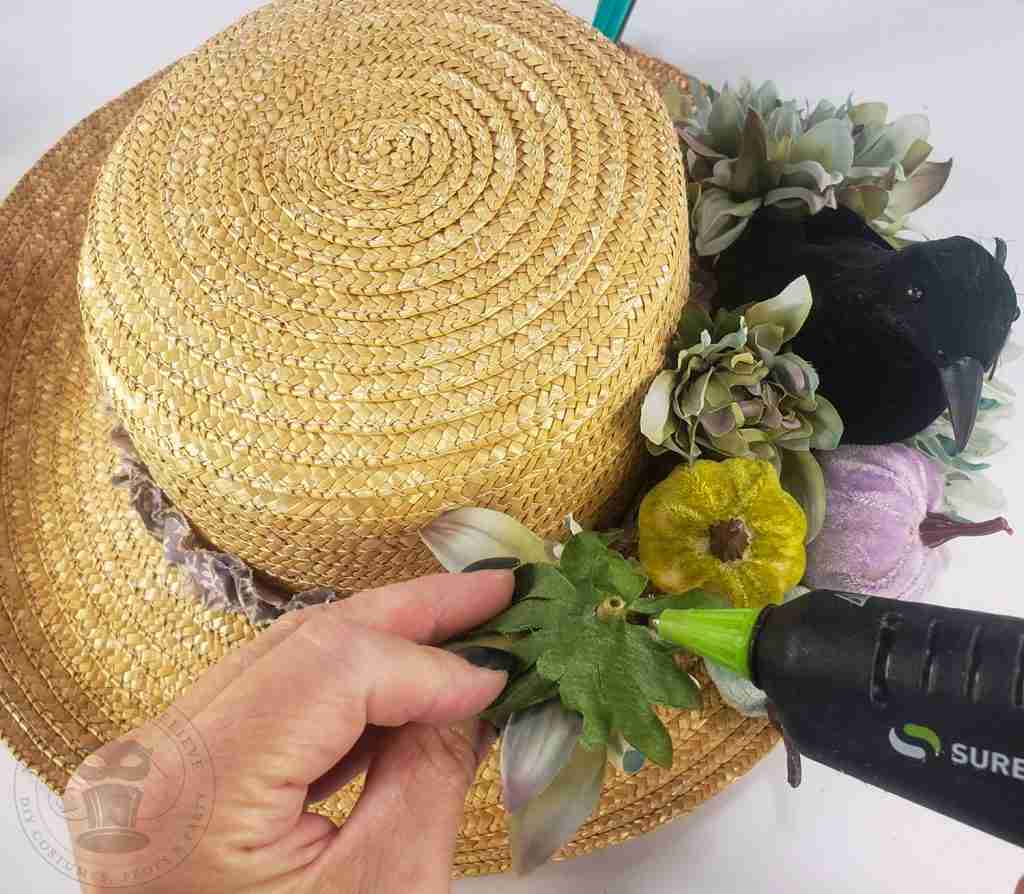
I did a rough layout of where to place things before I started securing the embellishments onto the hat.
What’s that blue clothespin all about?
My hat looks the same in the front as in the back. So I used the clothespin to indicate the back of the hat.
I wired the pumpkins into place by poking the wire through the hat to the underside of the brim.
Next, I used the wire in the crow’s feet to wire her into place.
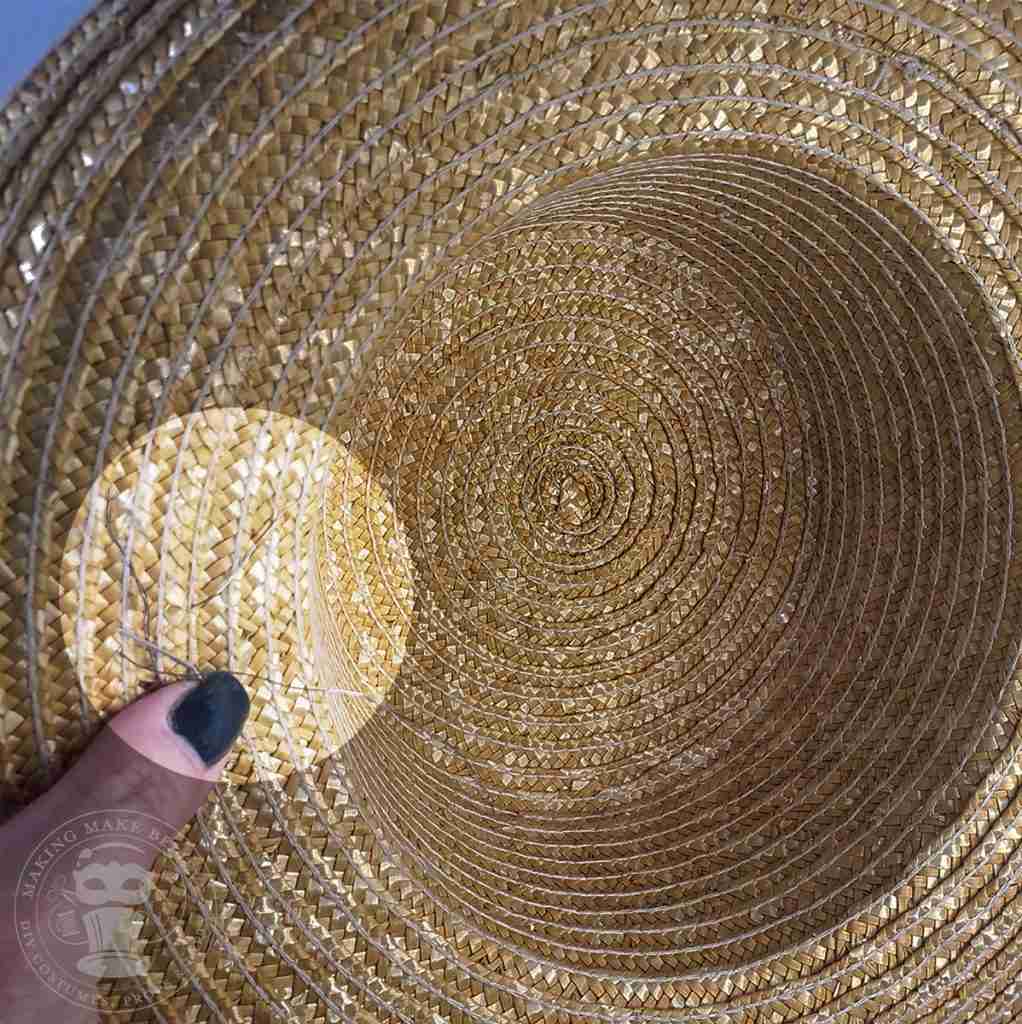
I twisted together all of the wire on the underside of the hat, and I’ll be covering it here in a bit so it won’t poke the wearer.
Next, I pulled the flowers off the stems, and hot glued them around the crow and the pumpkins.
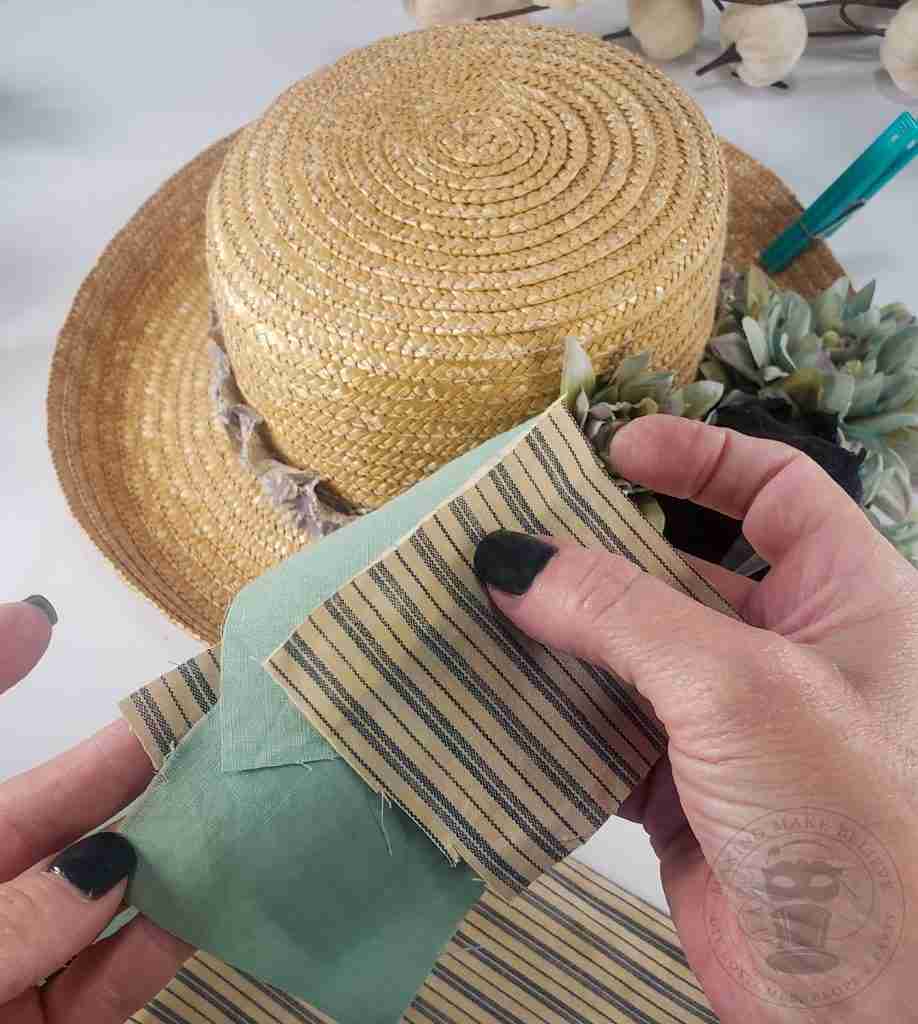
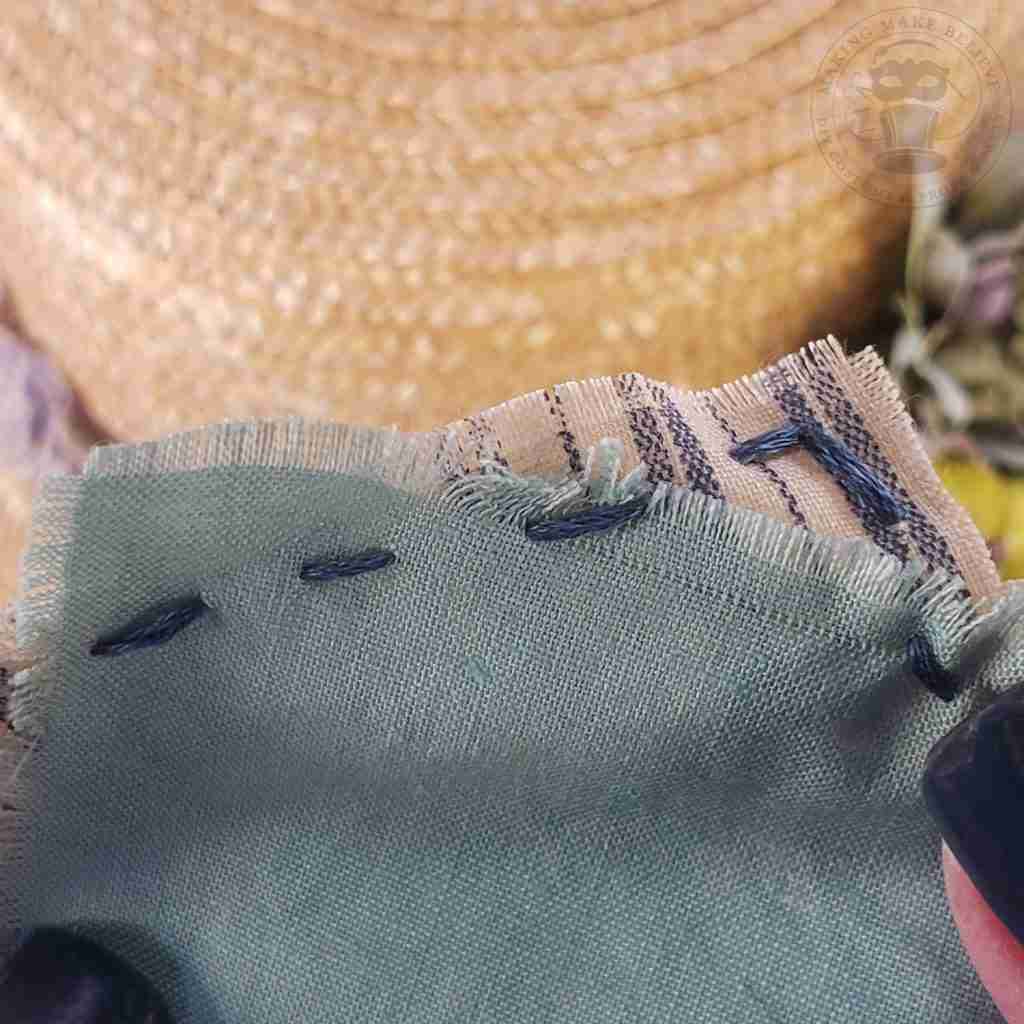
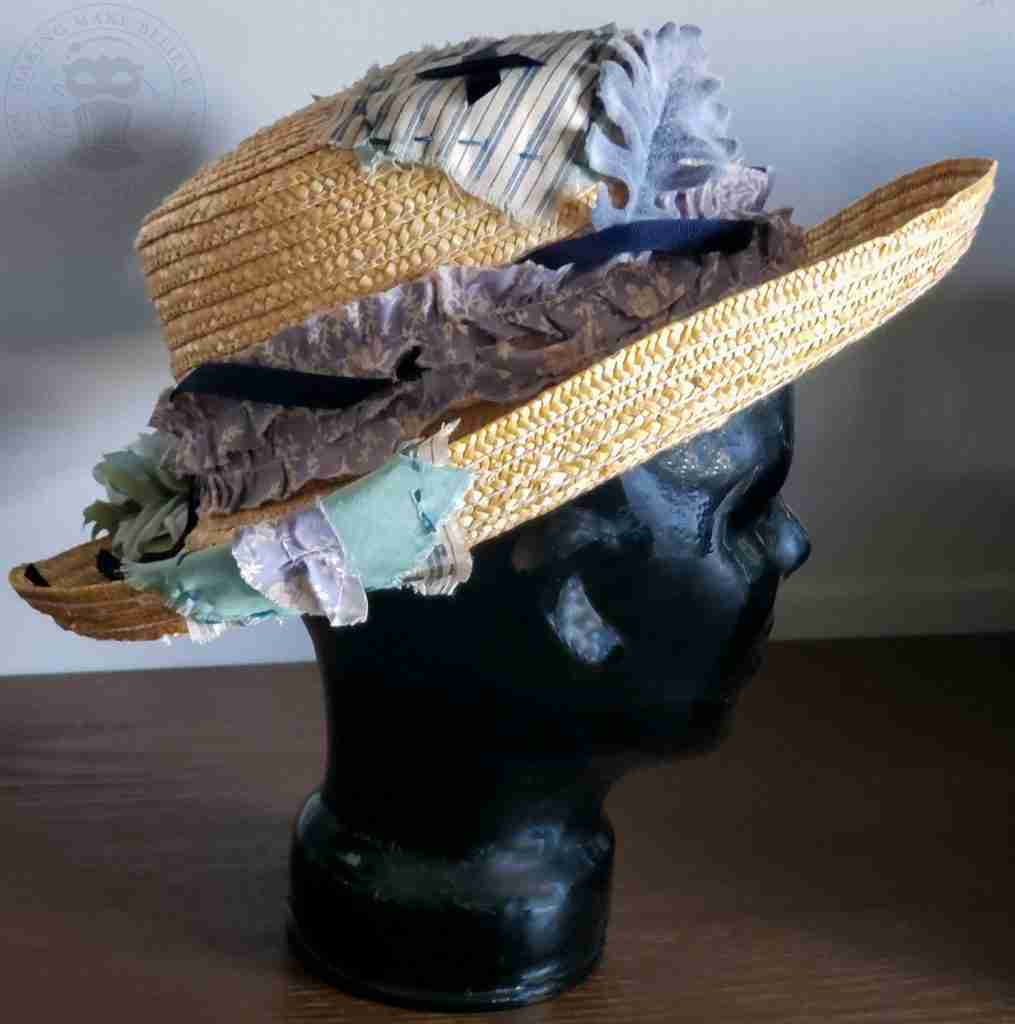
I cut four 3″ squares from two different fabrics to make patches for the scarecrow hat.
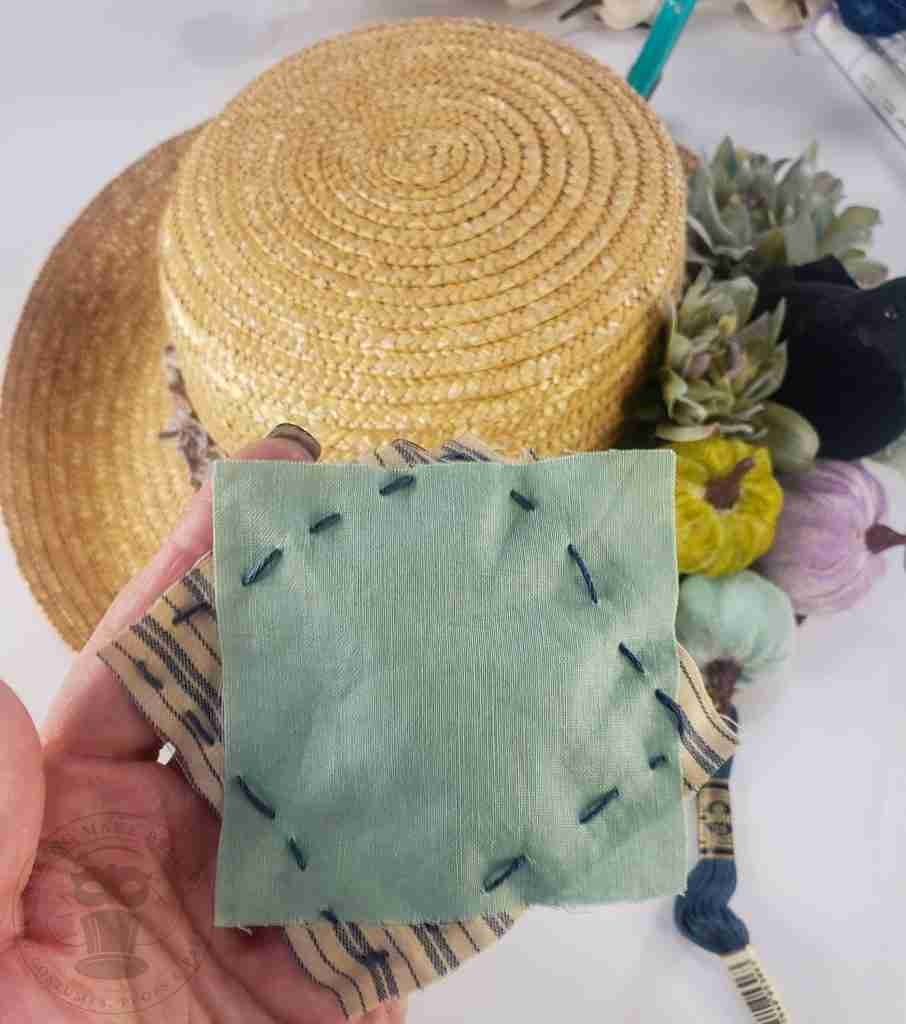
I stacked two coordinating fabrics together at an angle. The fabric can then be glued together, or, if you want to be extra, roughly stitch the pieces together using a needle and embroidery floss or thread.
To add a lived-in look to the patches, fray the edges.
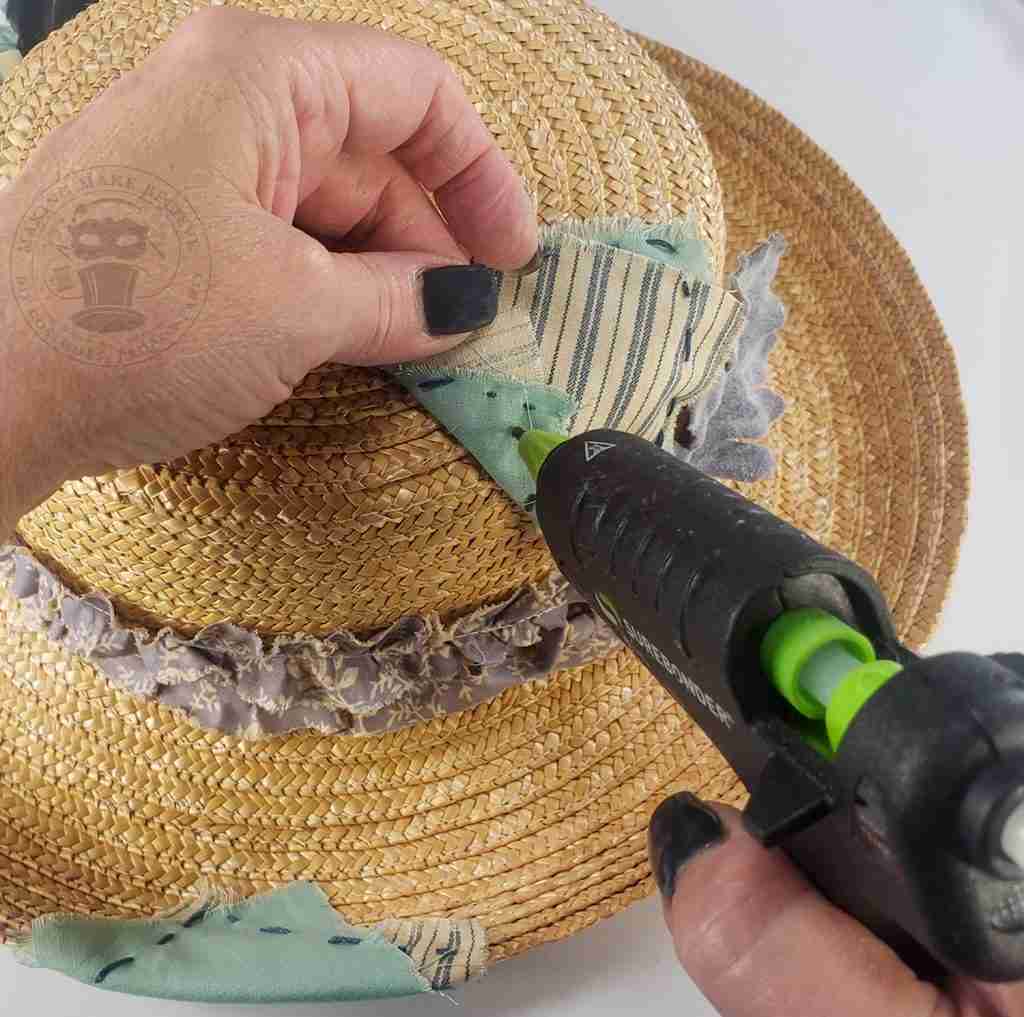
Then, glue the patches to the hat.
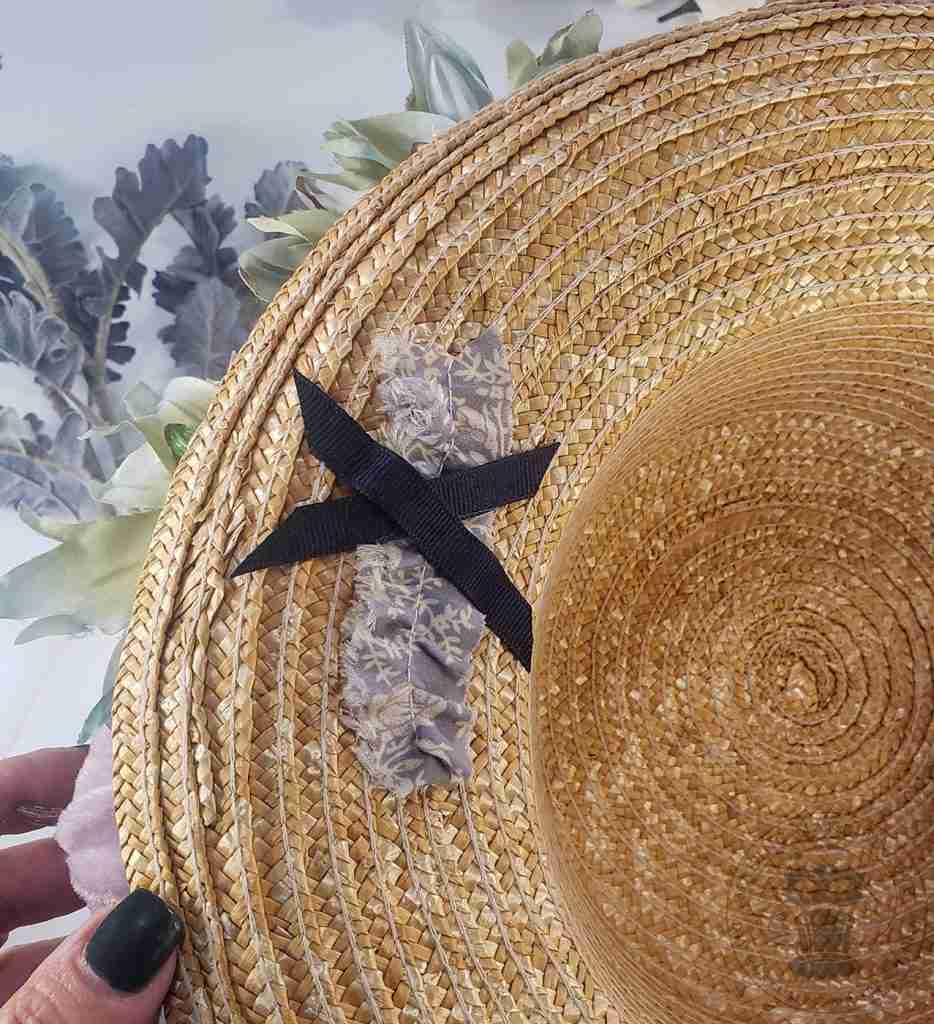
On the underside of the hat, I placed a patch made from fabric and ribbons which I glued over the twisted wires. The patch will offer protection from being poked and gives the piece a cleaner look.
Speaking of extra, remember that small hat we have for the crow? Well, now is the time to embellish it.
I added a ribbon about the hat’s base and a mini patch on top to mimic the scarecrow hat on which he sits.
I thought I was done, but I decided to throw on some of the navy ribbon too.
I think this scarecrow hat would make a charming costume accessory, but it also will look great as a Fall decor piece.

Check your email for the Haunted Library password.
Don’t miss a moment of the mischief.
Add hello@makingmakebelieve.com to your address book.
Join us and get access to our Haunted Library stocked with templates, printables, cut files, and exclusive content. Plus, you’ll receive Eerie Emails just for our subscribers.
*Stay as long as you like. Unsubscribe at any time.