1.3K
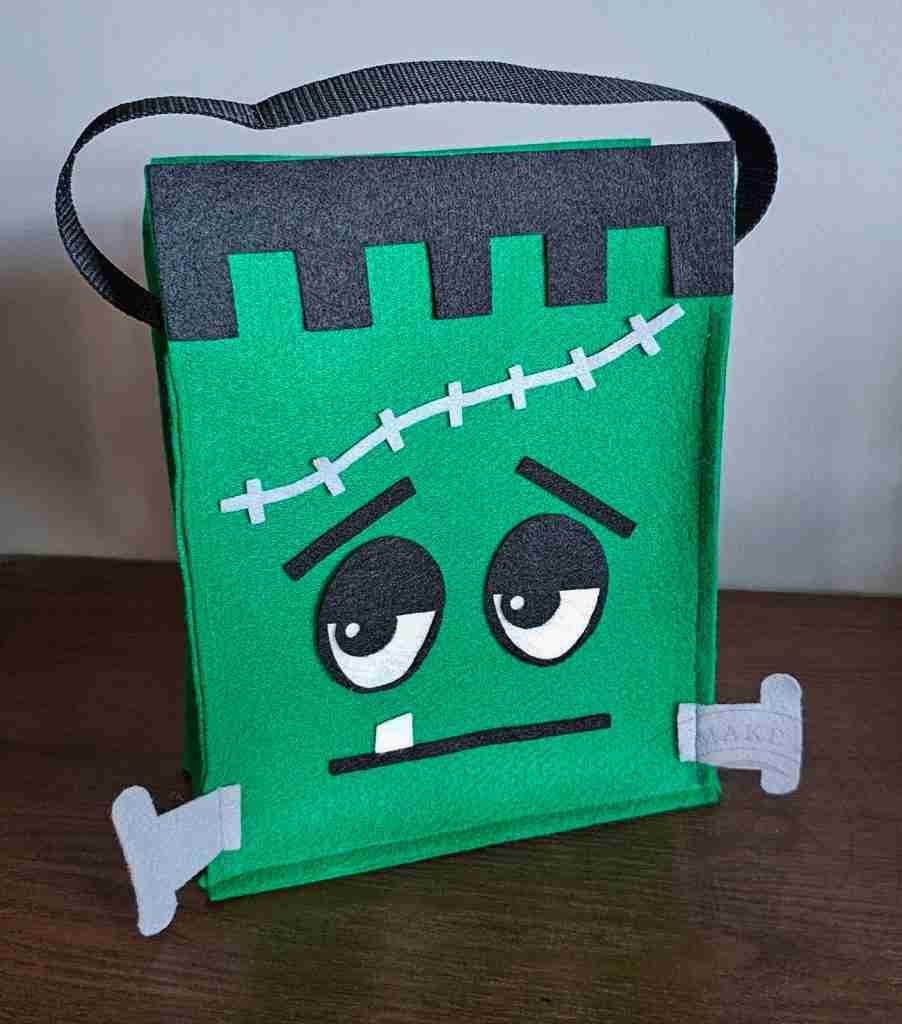







Frankenstein Trick or Treat Sack
One of my most favorite books in my library is Mary Shelley’s Frankenstein, also known as The Modern Prometheus.
While the story is rife with serious lessons on responsibility, ambition, obsession, and ethics—to name a few—some versions of the 200-year story have been tweaked and toned down so that even the youngest among us can learn a thing or two from Frankenstein’s monster.
Over the past 100 years, there have been over 65 Frankenstein movies, ranging from the serious to the hysterical and portraying the monster from sinister to silly.
Have you seen them all?
While I haven’t seen even half of the Frankie movies, I enjoy this monster in all its many forms, so today, we’re recreating this beloved character (see what I did there?) into a fun and friendly Boo Bag.
Before we begin, I want to note a few things about the materials for this project.
The material list calls for 2 mm craft felt, which is thicker than standard craft felt sheets and will make your trick-or-treat sack more sturdy.
To make it even more durable, cut a piece of heavy cardstock or thin cardboard to line the inside bottom of your sack.
I list specific colors for the trick or treat sack, but feel free to experiment with your Frankie monster. Faux fur hair and googly eyes are some fun options.
Lastly, this project can be machine or hand-stitched. While hand sewing may take a bit longer, it may be easier than navigating your machine into tight spaces of bulky felt.
Ok, let’s get started.
For this project, we will need:
4 sheets of 9″ x 12″ 2mm green craft felt
Scrap piece of black craft felt
Scrap piece of grey craft felt
Scrap piece of white craft felt
16-17″ piece of belting trim
Scissors or cutting machine with fabric blade – I use the Cricut Maker
Adhesive – I like Beacon Felt Glue
Sewing machine and thread
Straight pins or clips (not shown)
We will also need the Frankie Boo Bag template from the Haunted Library. Choose the PDF file to hand cut or the SVG file for machine cutting.
To begin, if machine cutting, upload the Frankie Boo Bag template into your design software, such as Cricut Design Space.
To cut by hand, open the PDF template using your favorite PDF reader (Adobe, FoxIt, etc.).
Print your template, ensuring the pages are set to print at Actual Size. The base piece will exceed the print area, so select the Poster option under Page & Size Handling.
Cut two of the Frankie base, two sides, and one bottom from the green 2mm felt.
Next, cut Frankie’s two eyeballs and one tooth from white craft felt.
Cut one scar and two neck bolt pieces from the grey craft felt.
Lastly, cut the the hair, mouth, two eyes, and two brows from black craft felt.
Align the hair along the top edge of the front base and glue it into place.
To assemble, glue or stitch each eyeball together by placing the black eye pieces onto the white eyeballs.
Set aside the neck bolt pieces and layout out the facial elements onto the front base as desired.
Glue or stitch each element into place.
To assemble, stack the front onto the bottom and stitch together using a 1/4″ seam allowance. (The seam will be to the outside.)
Next, stack the back onto the bottom and stitch together.
Mark the center of the bottom and one side and align the pieces.
When the centers are aligned, there will be 1/4″ of felt on each side that overhangs the bottom seams.
Beginning at the seam, stitch the side and bottom pieces together, leaving the 1/4″ overhang at both ends.
When the side is attached to the bottom, it should look like this:
Repeat for the opposite side.
Pin or clip the side piece to the front, add the bolt piece, and stitch from the bottom to the top.
Next, clip the side piece to the back and stitch from the bottom to the top.
Repeat for the opposite side.
Lastly, prepare the handle by trimming the ends of the belting trim and carefully heating the ends to avoid fraying.
Pin the belting to the center of each side of the bag.
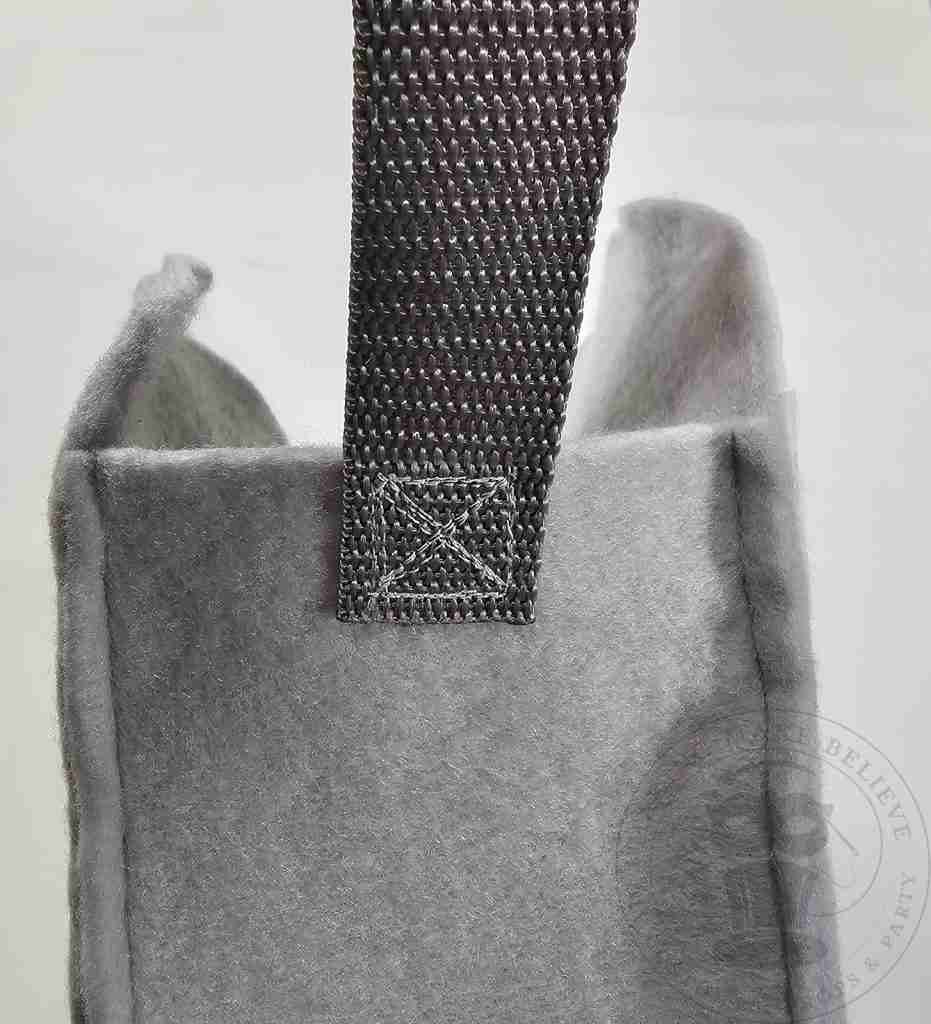
Stitch down, across, up, and over to form a square, then reinforce the union by stitching an “X” in the center.
Repeat this two to three times to ensure the handle is well attached.
Demo shown on a grey felt to make it easier to see.
Our trick-or-treat sack is ready for Halloween!
This bag is the third creation from our ghoulish group of trick-or-treating sacks.
Check back to see which character is up next, and, in the meantime, check out the Spider Boo Bag and the Mummy Boo Bag.
Until next time – stay spooky.

Check your email for the Haunted Library password.
Don’t miss a moment of the mischief.
Add hello@makingmakebelieve.com to your address book.
Join us and get access to our Haunted Library stocked with templates, printables, cut files, and exclusive content. Plus, you’ll receive Eerie Emails just for our subscribers.
*Stay as long as you like. Unsubscribe at any time.