1.7K


Spooky Style – Haunted Hangers
Years ago, I purchased an off-the-rack costume for one of our boys. I think it was a cape of some sort. I don’t remember the exact costume piece, but I do remember that it came on an unusually shaped hanger that featured a grim reaper.
I still have the hanger, and even though it is oddly shaped, too tall to fit under the closet shelving, and not particularly sturdy, I refuse to part with it. I love that the costume manufacturer included this haunted touch with the costume.
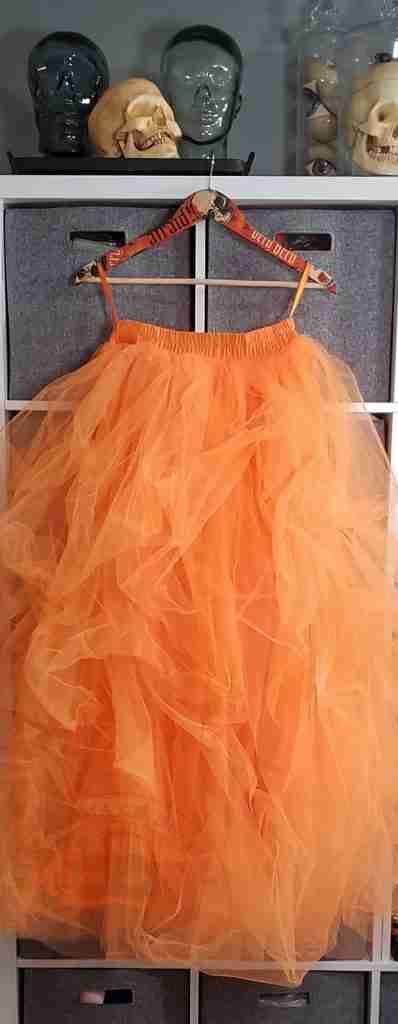
This random treat inspired me to add some spooky style to the costume closet, so I created these haunted hangers, and I love how they turned out.
Let me show you how these came together with just a few inexpensive supplies.
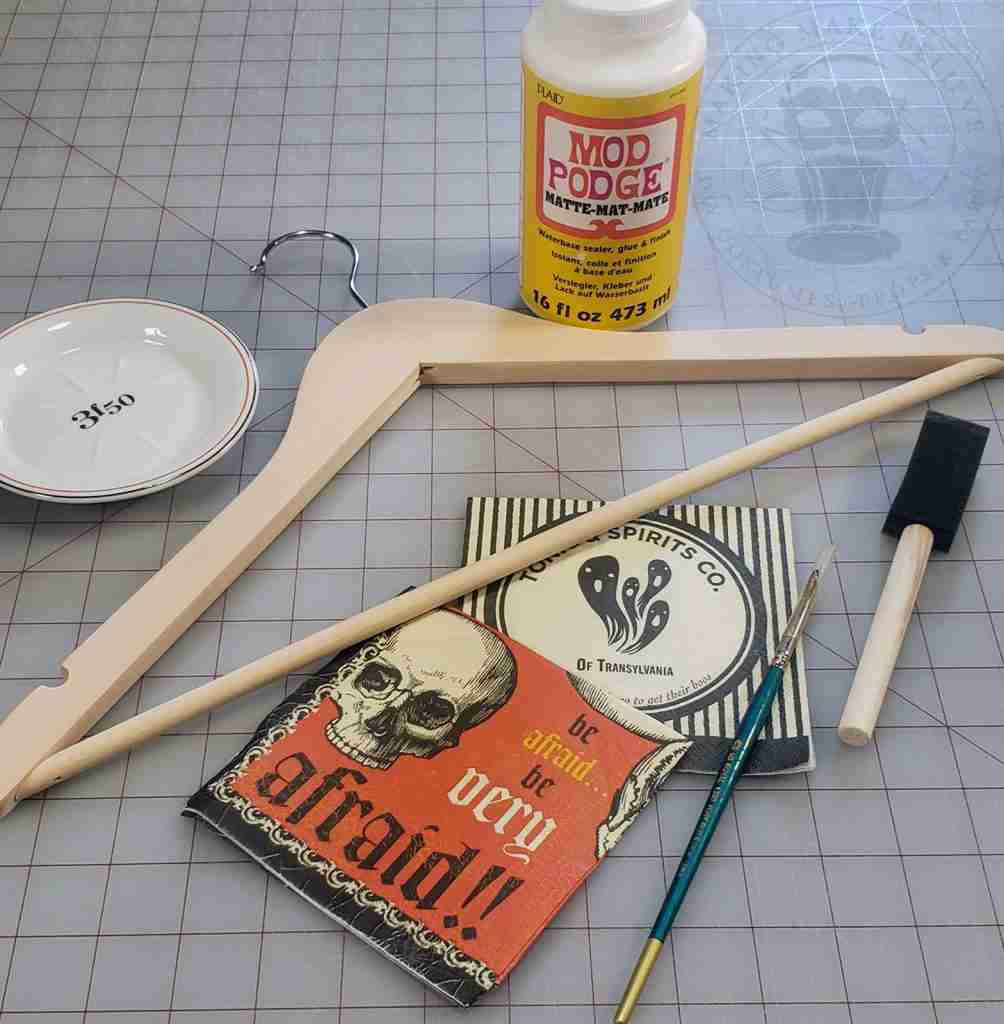
We will need:
Wooden hangers*
Mod Podge
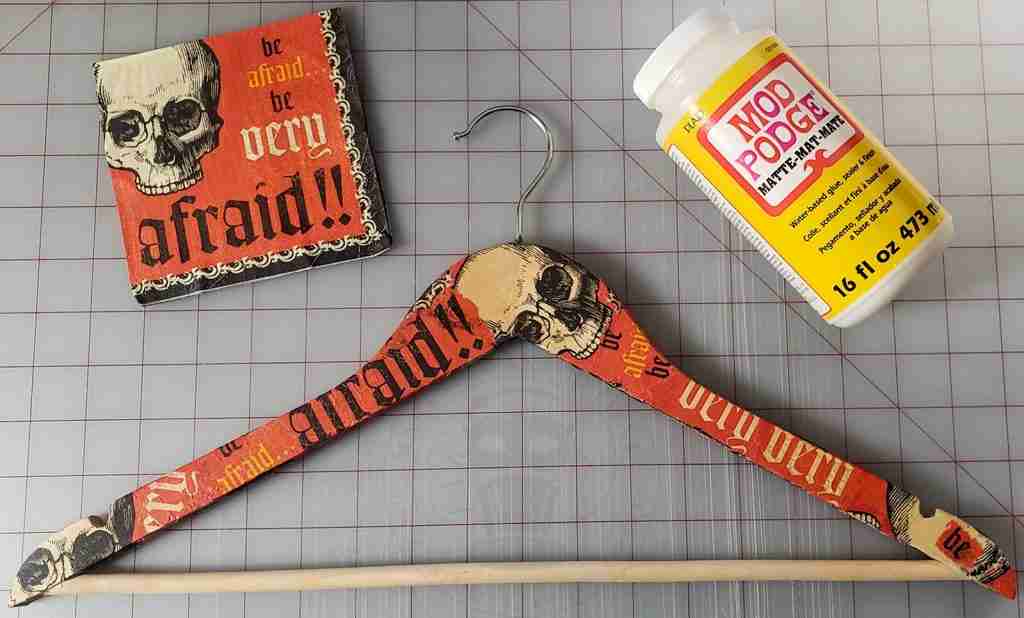
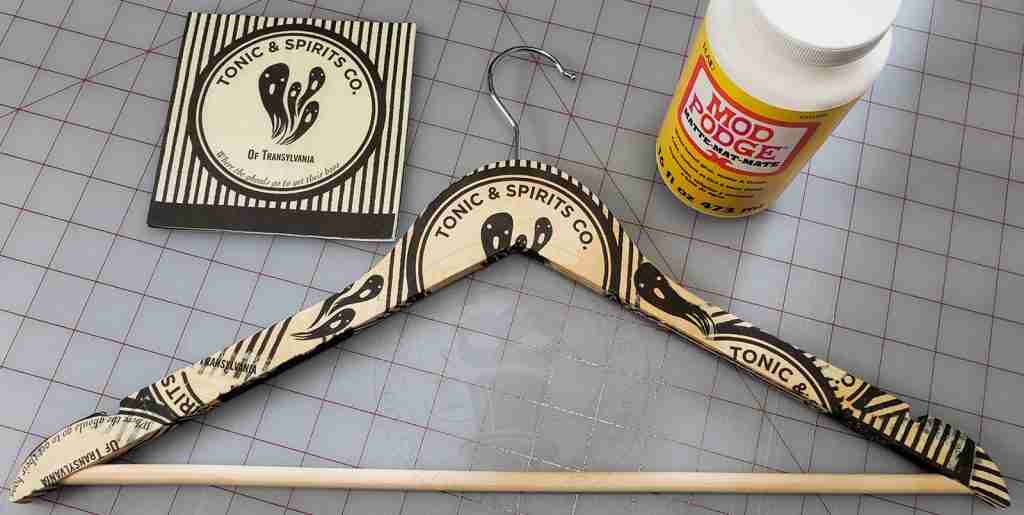
Halloween napkin
Foam brush
Small paint brush
Small dish with water
*I decided to purchase new, unfinished hangers for this project. You can use any wooden hanger you want; just be aware that the finish will show through, so if your hanger is dark-toned, it will affect the overall look.
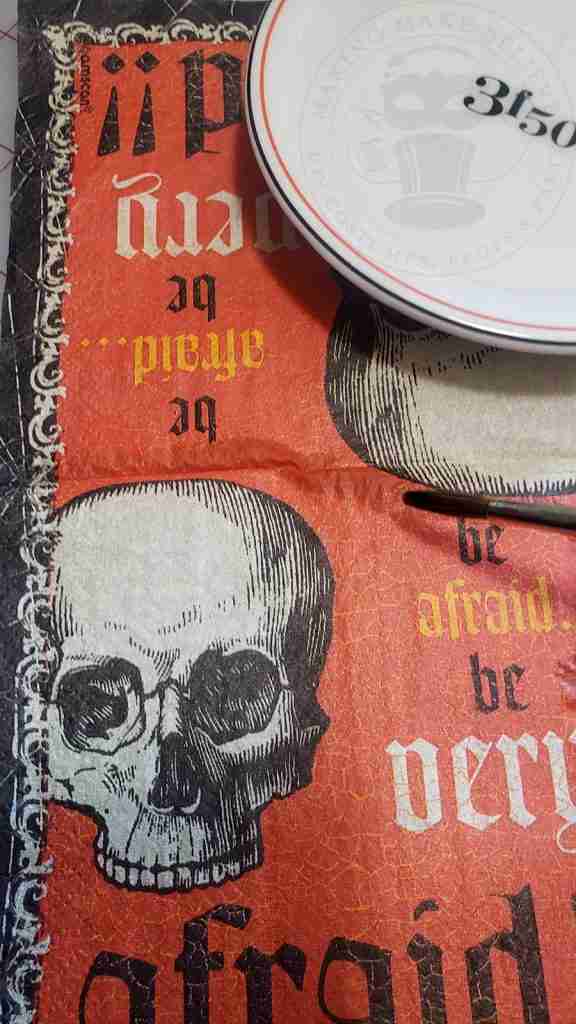
Separate the layers of your napkin. For this project, we will only be using the top layer.
You can use a small pair of scissors to separate the words and images of the napkin.
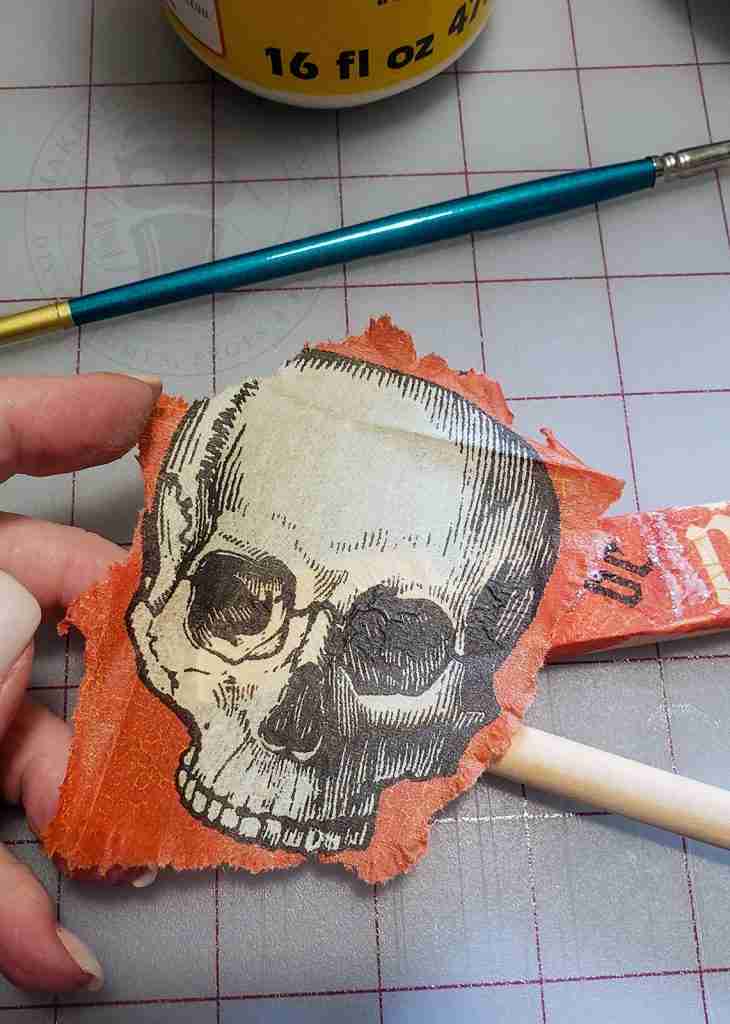
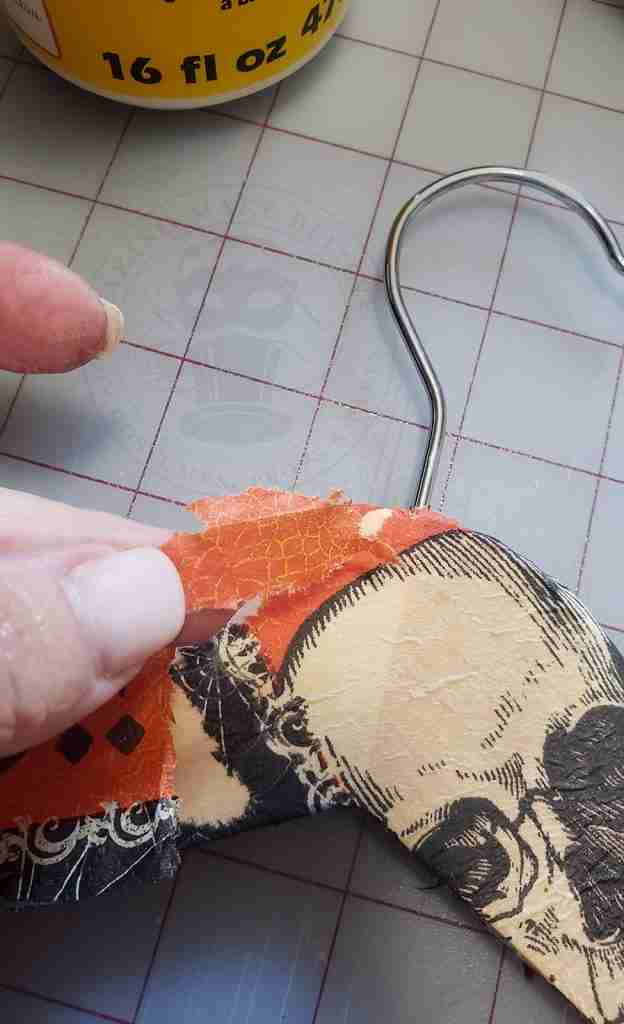
I’m not fond of straight edges when I decoupage, so I like to dampen a small paint brush and make a water line on the napkin. Then I gently tear the napkin along the water line, which gives me a ragged edge.
First, determine how you want the elements in your napkin to lay on the hanger. You can be as specific or as random as you like.
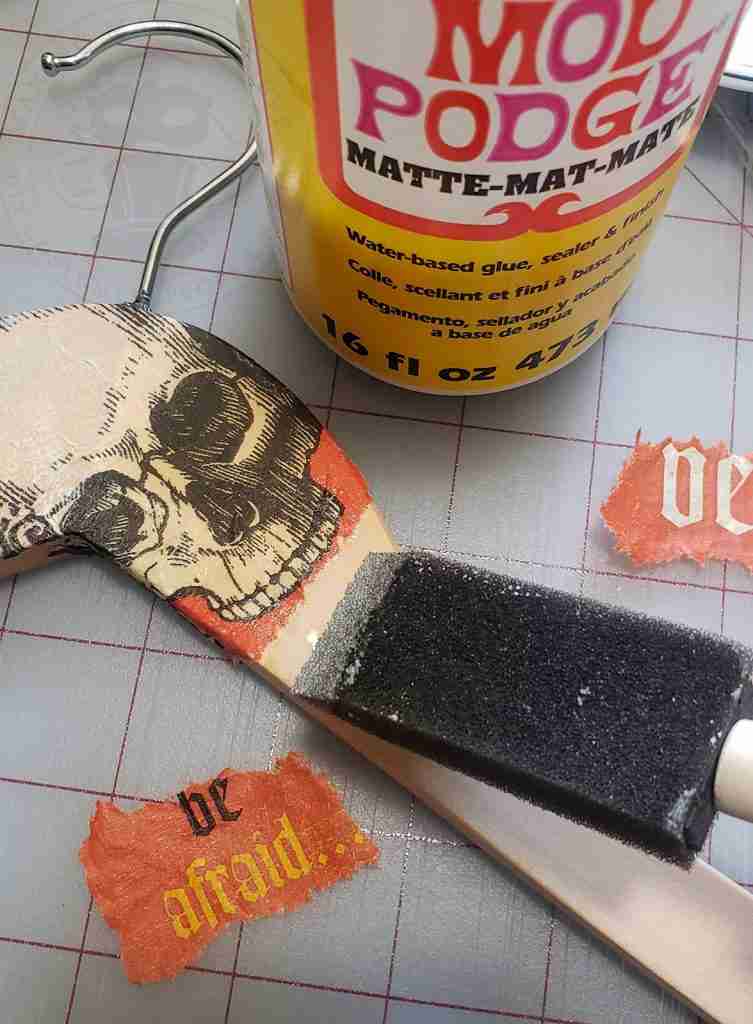
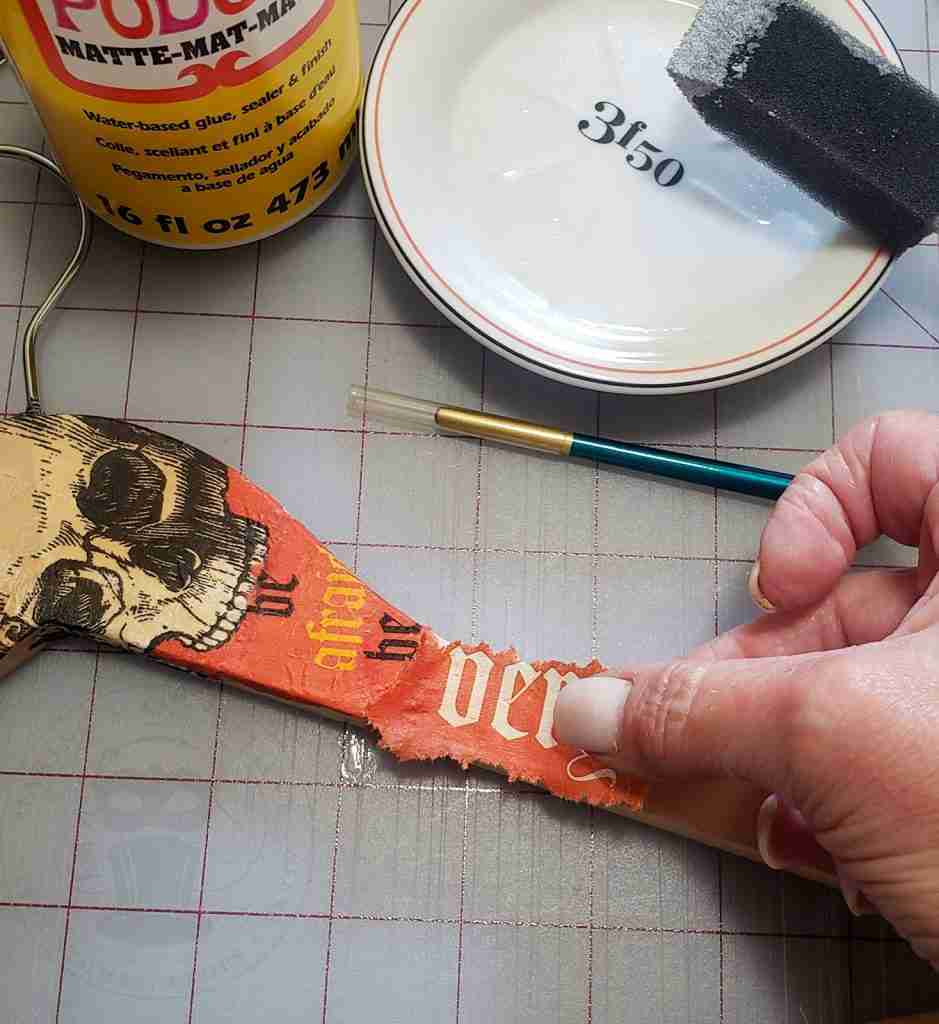
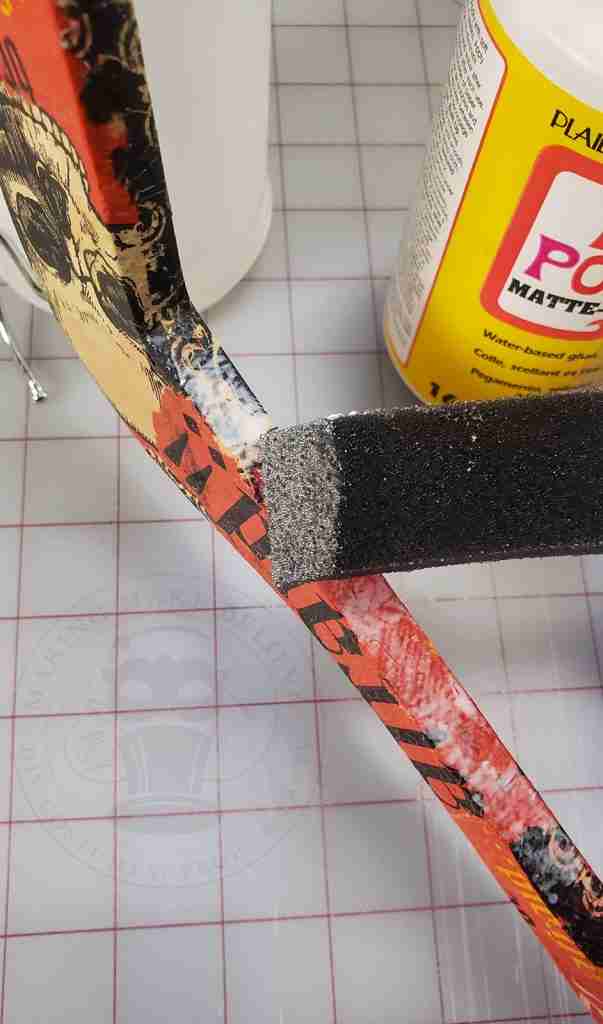
To begin, dilute a bit of Mod Podge and spread it onto the hanger. Place your piece onto the Mod Podge and smooth it into place.
I like to dampen my finger and smooth the piece down but keep in mind that you will have wrinkles or creping. There are methods you can use for a smoother application, but I love the weathered look, so I just went with it.
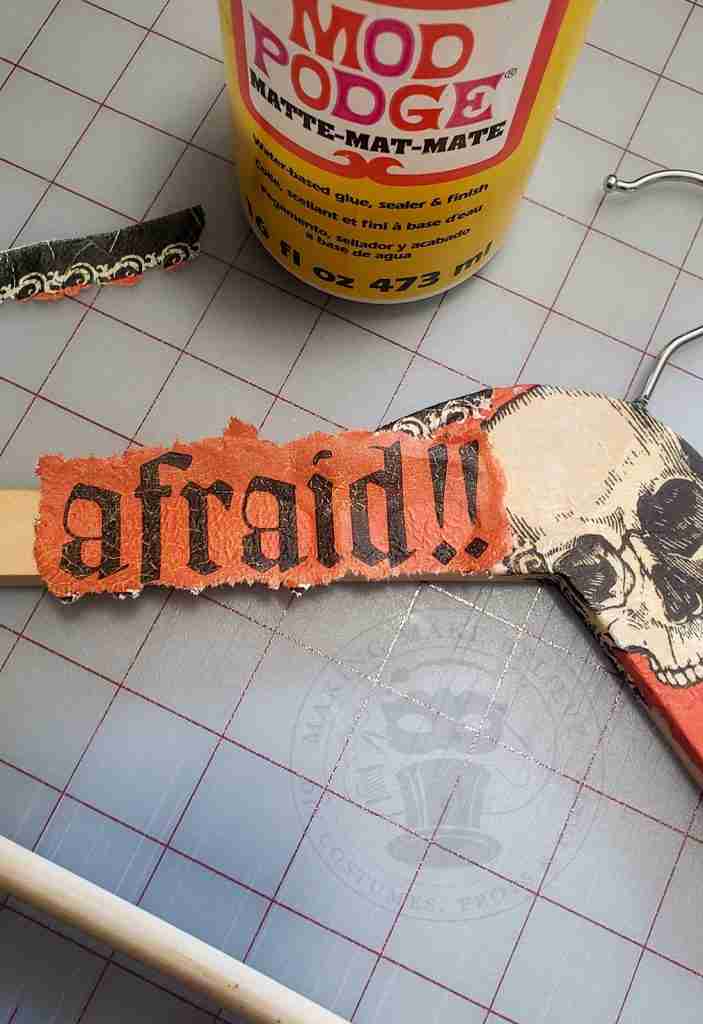
Overlap as much or as little as you like and use small bits to fill in where needed.
Continue adding pieces until you have covered the entire hanger, and remember to do the underside.
I repeated the design on the opposite side, but each side can be unique.
Now, let the piece dry completely. I left mine overnight.
Finally, add 2-3 layers of Mod Podge or, if you prefer, spray with a clear coat to seal.
Have I mentioned that I love how these turned out?
I’m off to hang up these costumes in spooky style, but before I go, I want to mention a couple of things.
I love a super quick project; however, this is not that. You can do this fairly quickly if you aren’t picky about placement. But – you’ll forgo the fun of creating the layout and seeing your design come to life.
I recommend taking your time and enjoying the process.
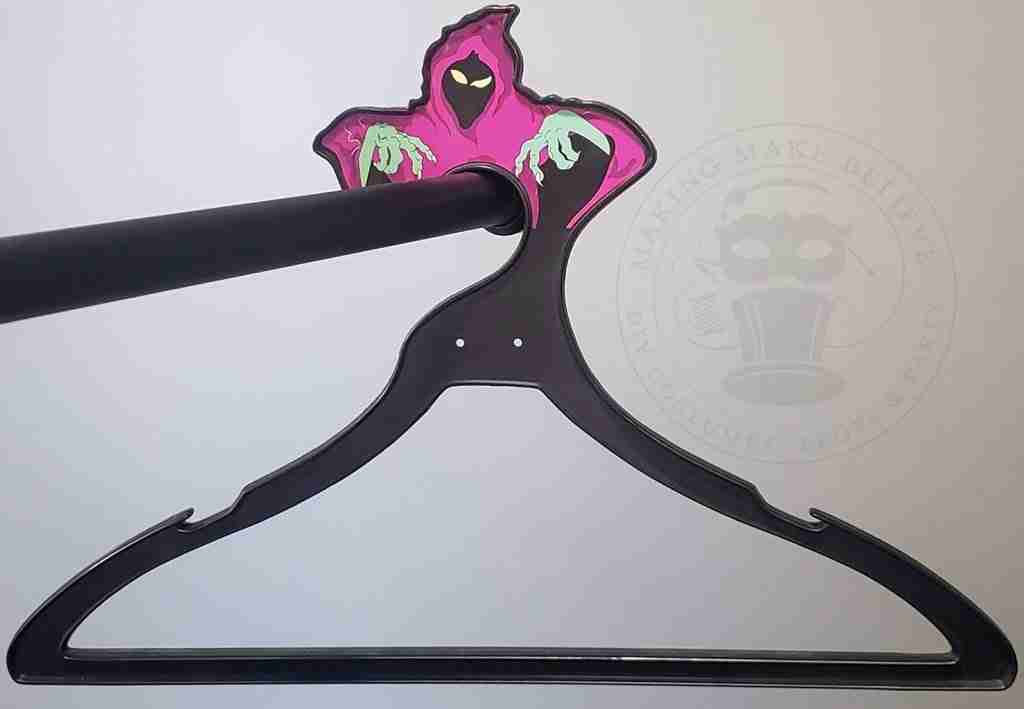
If you need a quicker version of this project, check out these Haunted Hangers.
Until next time – happy haunting!

Check your email for the Haunted Library password.
Don’t miss a moment of the mischief.
Add hello@makingmakebelieve.com to your address book.
Join us and get access to our Haunted Library stocked with templates, printables, cut files, and exclusive content. Plus, you’ll receive Eerie Emails just for our subscribers.
*Stay as long as you like. Unsubscribe at any time.