July is on the horizon, and you know what that means. Time to break out the Halloween props and freshen them up for the season.
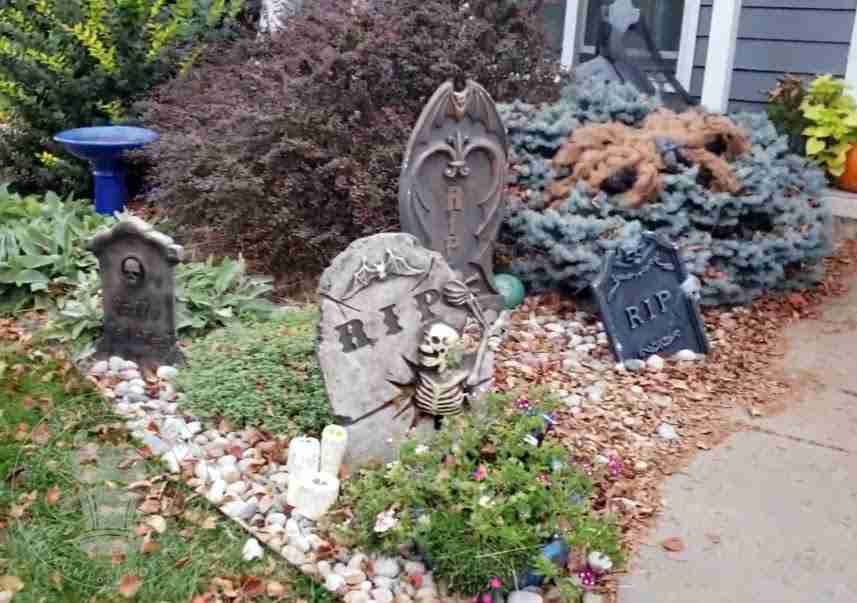
We like to do a haunted graveyard theme in our front yard for Halloween. Tombstones, skeletons, and spider webs are the staple props we use nearly every year. We then sprinkle in some bats, bones, pumpkins, spiders, and we place flickering candles near the tombstones.
We made these graveyard candles for our yard well over ten years ago, and they are in desperate need of some attention. Since I have them out anyway, I thought I’d share how to make them.
I spent a lot of time in online Halloween groups where haunters shared ideas, tips, and inspirations to create their own props. It was in one of these groups that I learned how to craft these candles. I love to give credit where it’s due, but, unfortunately, I don’t recall who had the original idea. (If anyone remembers, let me know.)
I do remember going to Lowe’s to get the supplies for these and asking a gentleman who worked there where I could find the Great Stuff Foam. As he led me across the store, he started a conversation asking about my project. I’m sure he expected that I needed this for home repairs instead of Halloween, as he gave me a weird look when I told him that I was making graveyard candles.
Ok, so now that you know where to get your Great Stuff, let’s get this project going.
We will need: PVC pipe (diameter is whatever you want your candles to be), pipe cutter or hand saw, Great Stuff Foam Gap Filler, craft knife or box cutter, hot glue gun, glue sticks, spray paint, battery-operated tealight, and a wooden dowel (optional).
First, cut your PVC pipe to the length you want for your candle. I have various widths and heights in our graveyard, which I think adds a more realistic look to the display.
Next, spray some foam into the center of your pipe. Great Stuff is an expanding foam, and that is no joke. This stuff grows, and it will spill out the top and bottom of your pipe. I learned to start in the middle and add to the ends as needed.
I cheated here as this half-full candle was in our stash and is unfinished. I probably ran out of foam, so I’m just adding to what was there.
Here you can see how the foam expanded out of the top end of the pipe. Once this has cured, cut the excess off both ends of your pipe.
Now, hollow out an area big enough to hold your tealight at the top.
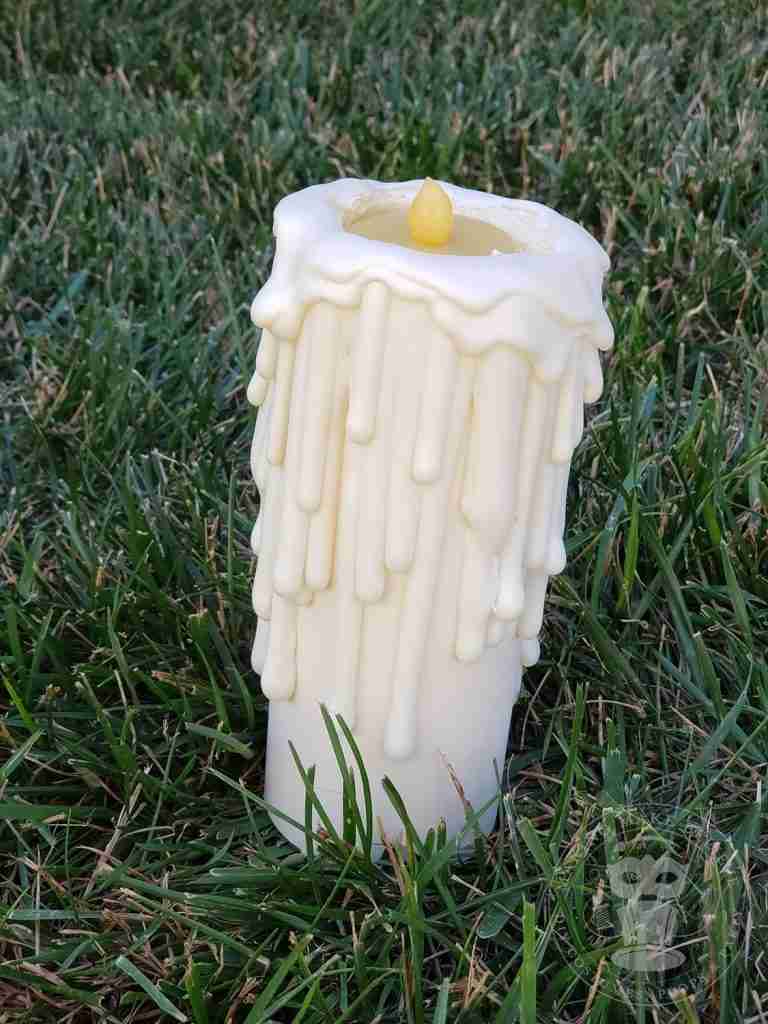
Next, we need hot glue and lots of it. Using the glue gun, drip glue down the sides of your pipe to emulate dripping wax. Keep building up the glue to get the look you want.
Give everything a good coat of spray paint and allow it to dry.
And, now we’re ready to add the candle to our display. Turn on the flicker tealight and set it inside your candle. Place the wooden dowel in the ground leaving a few inches exposed, and slide your candle onto the dowel.
Your haunted house is ready for Halloween.
Graveyard candle shown with our zombie crow and spooky lighting.
I love the way these look, and, as you can see, these graveyard candles do hold up well over time. A fresh coat of paint and some new tealights and these are good for another ten years.
What do you think? Are you going to add some creepy candles to your yard haunt? Let me know on Instagram or Facebook.
Join us and get access to our Haunted Library stocked with templates, printables, cut files, and exclusive content. Plus, you’ll receive Eerie Emails just for our subscribers.
*Stay as long as you like. Unsubscribe at any time.