3.4K


DIY Halloween Party Hat
While I’ve enjoyed crafting several Valentine-inspired costume accessories for the holiday season, I’m feeling a bit of Halloween withdrawal and the need to scare up a bit of fun.
It’s my birthday month, and I’m celebrating all of February. As such, proper attire is in order, but – what to wear, what to wear?
A tiara? A sash? No, I’ll go with something more in character with my spooky side – a Halloween-themed party hat.
As always, my creative process is all over the place.
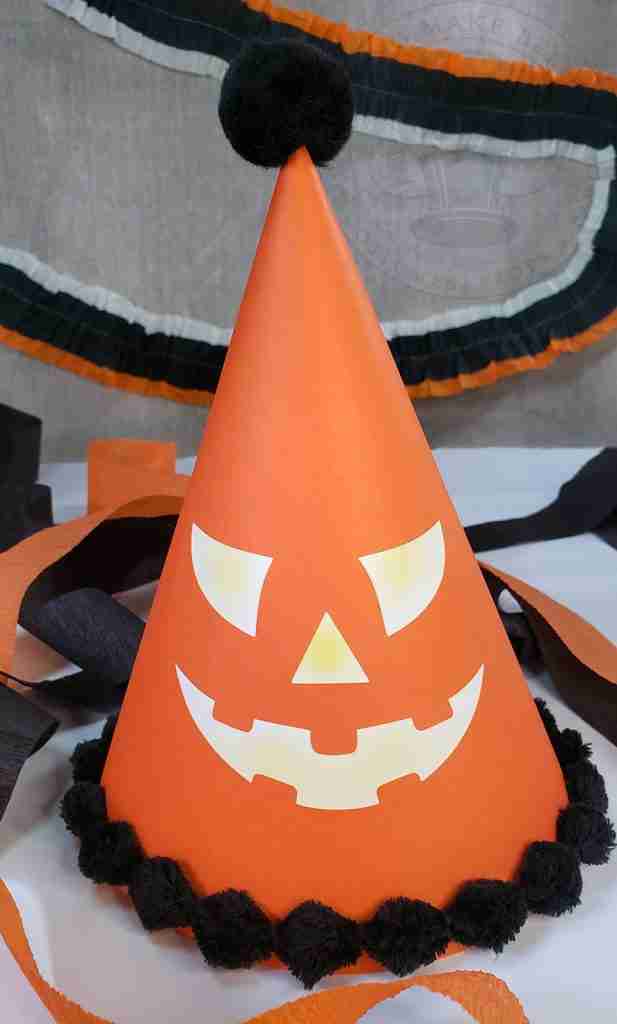
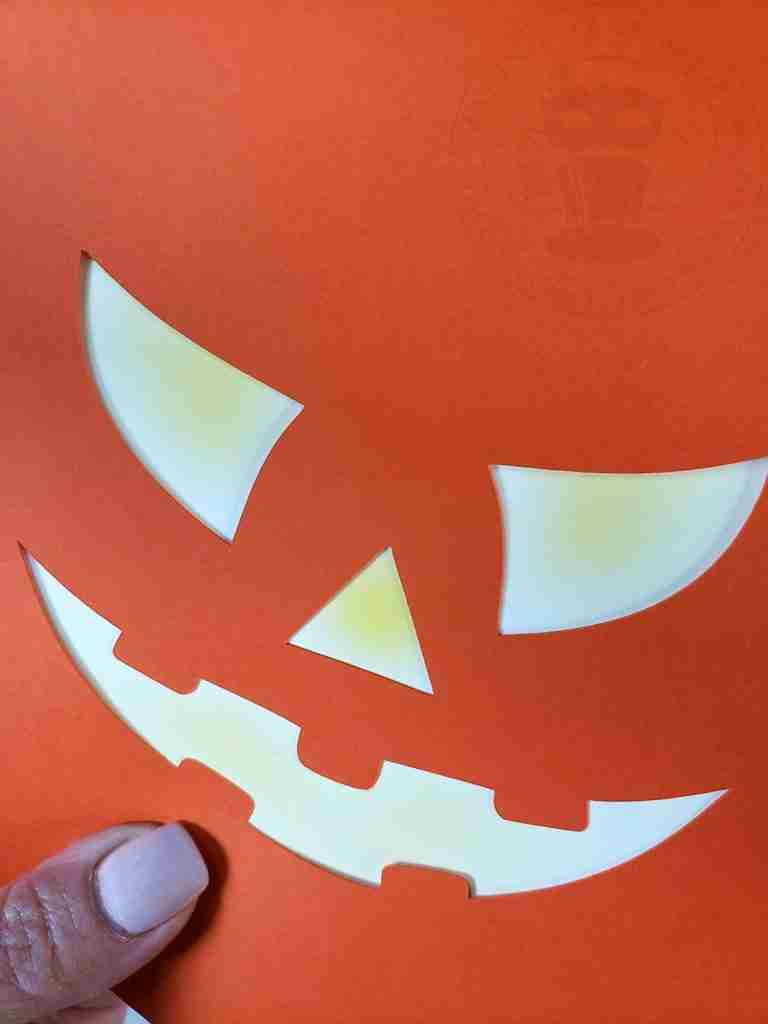
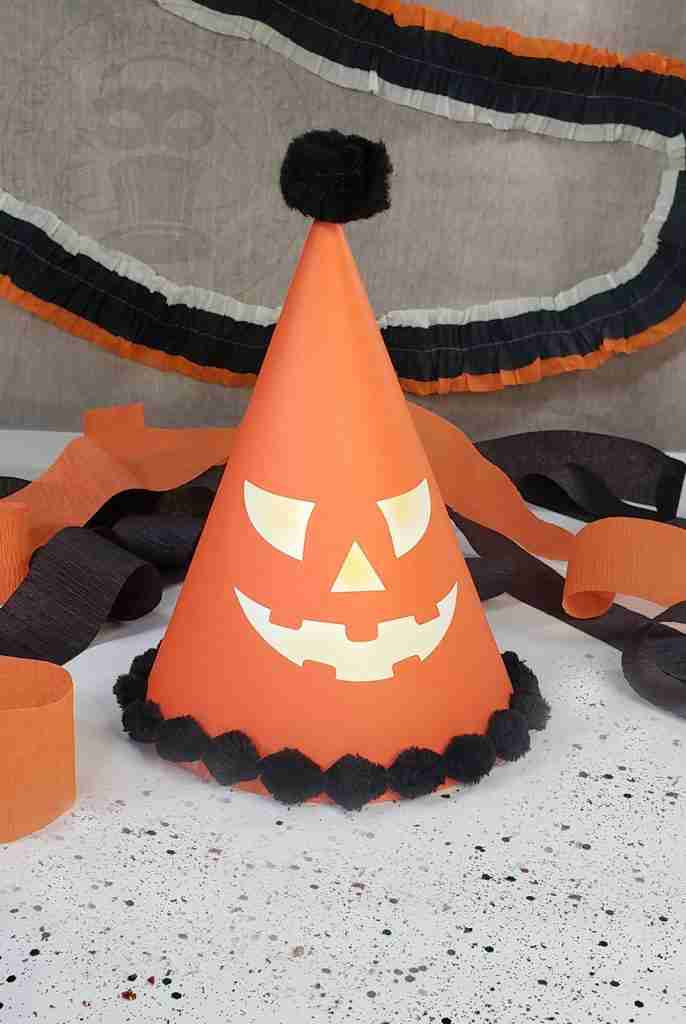
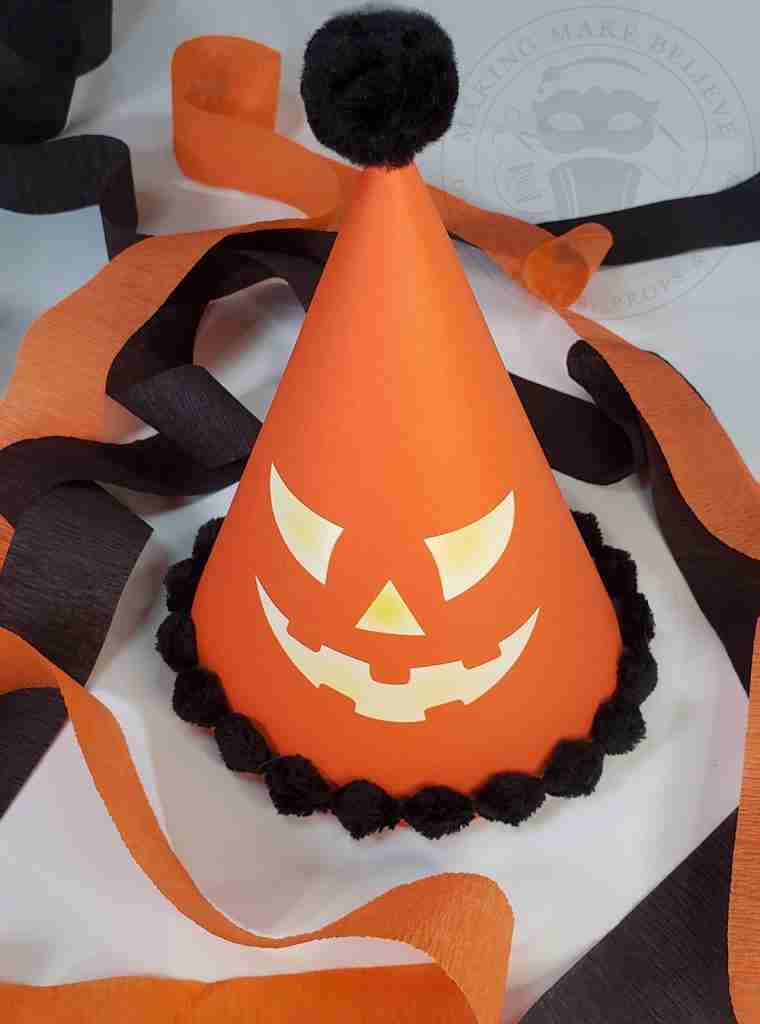
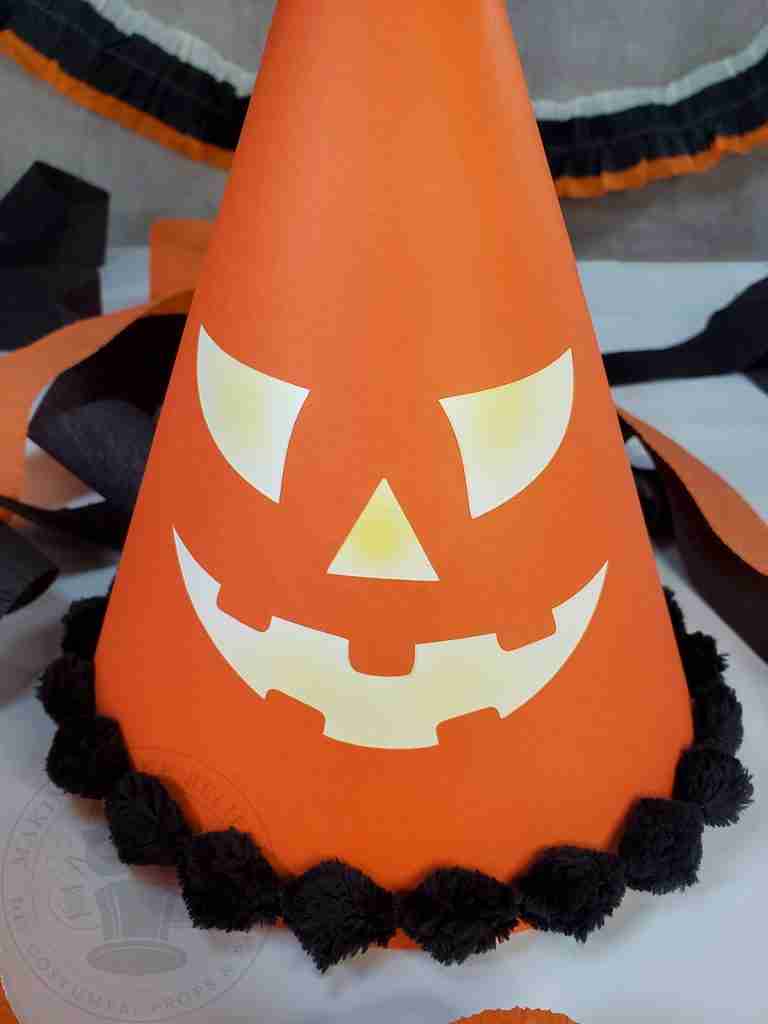
I went from printable party hats (likely coming soon) to hats with clever sayings (also likely coming in the future). Finally, I landed on a grinning jack hat. And inspired by the paper inserts of vintage paper mache jacks, I added a glow face background just for fun.
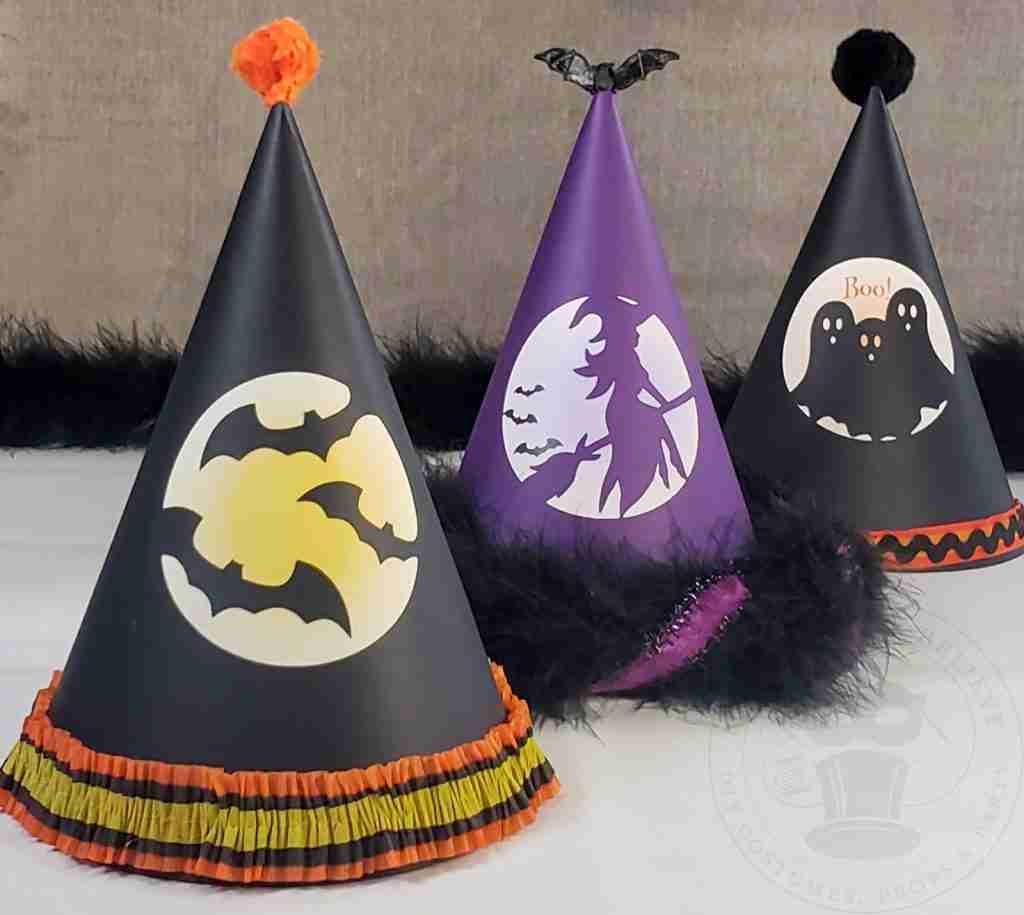
And as usual, I could not limit my designs to just one, so I ended up with several hats. Perfect for one who is celebrating all month, right?
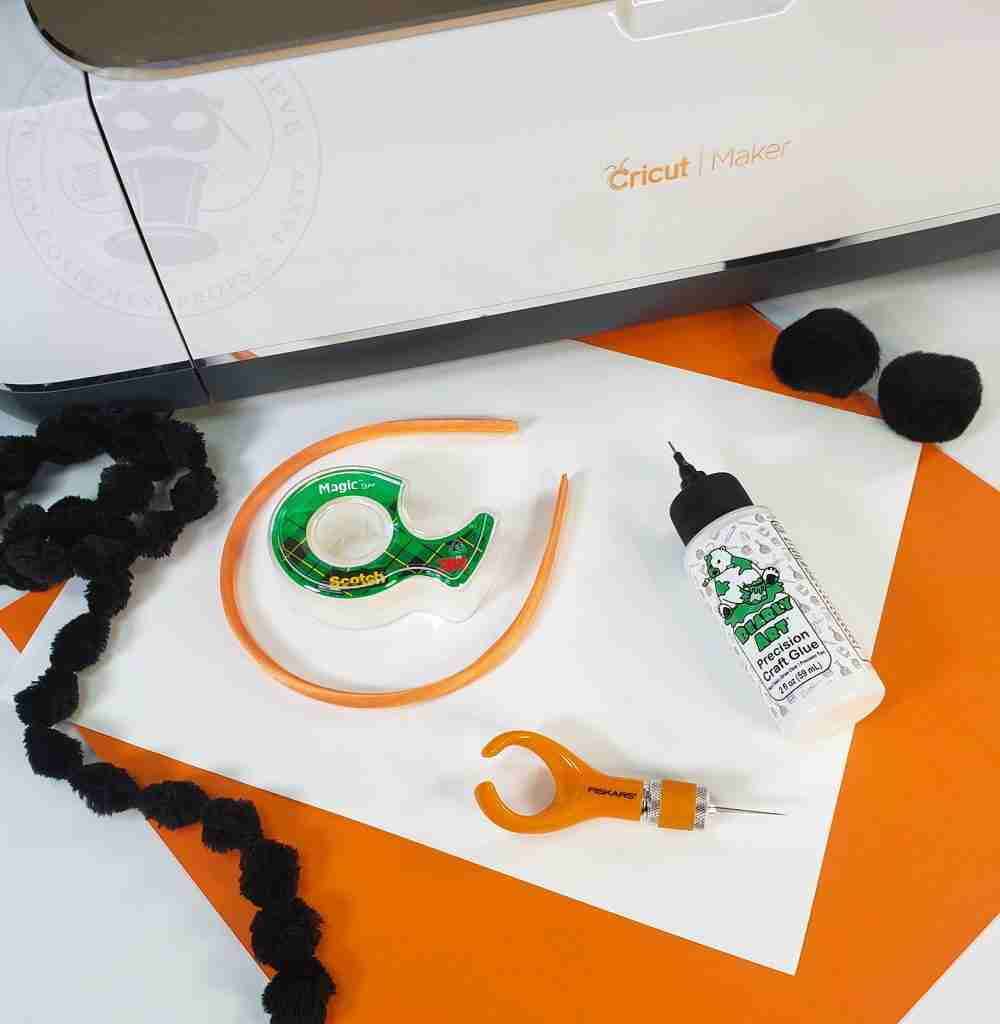
For this project, we will need:
Cardstock – white (if printing glow insert) or yellow (for plain insert)
Orange 12 x 12 cardstock
Printer (optional)
Cutting machine, X-Acto Knife, or finger blade
Tape
Glue – I’m using the Bearly Art Precision Craft Glue
Embellishments (optional)
Headband, hairpins, or elastic band
We will also need the Jack O’ Lantern Party Hat cut file from the Haunted Library. Choose the SVG file for machine cutting or the PDF file for hand-cutting.
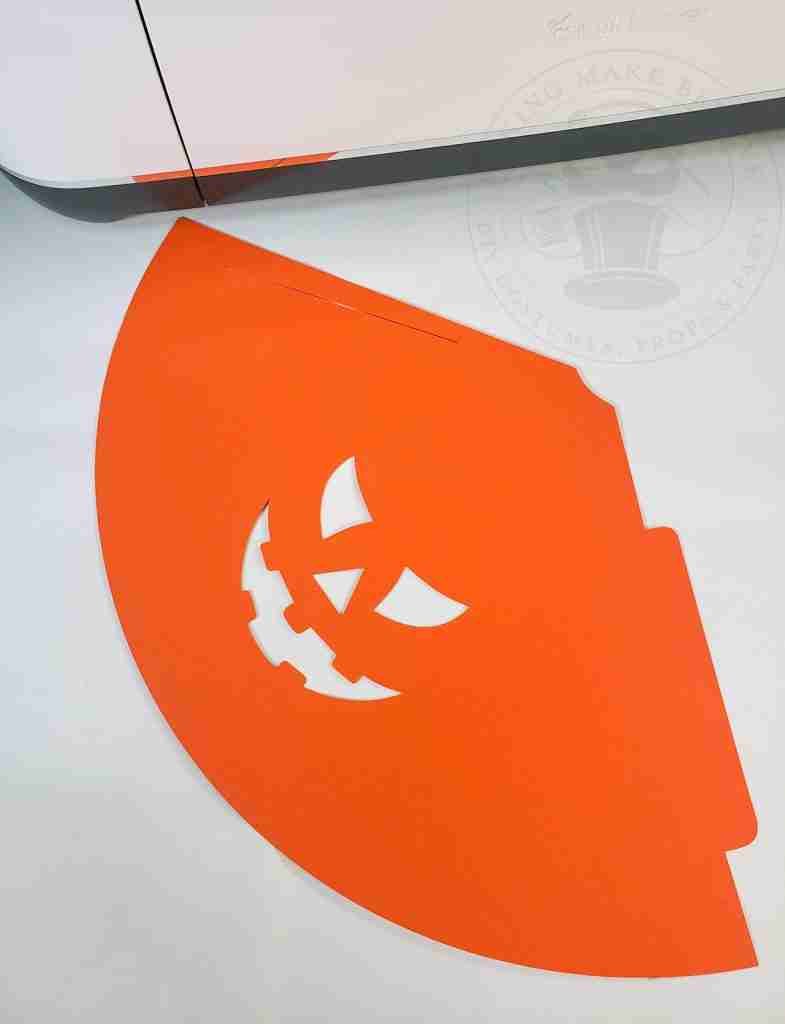
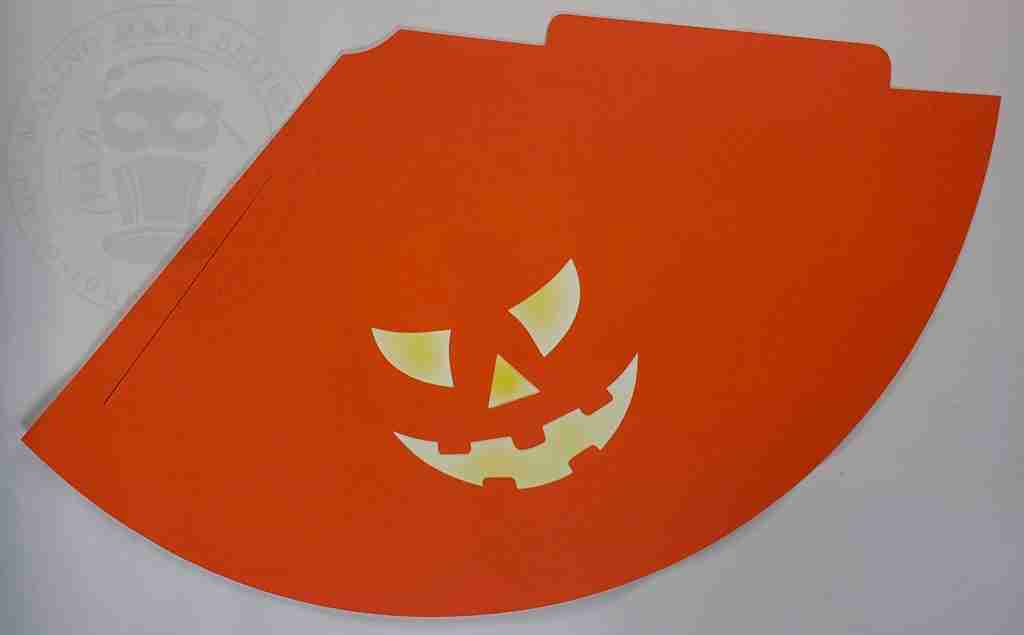
First, cut the Cone Party Hat from the orange cardstock.
Upload the template into your design software, such as Design Space for Cricut Maker. Before cutting, ensure the measurements of your hat are set to 10.775 inches by 11.5 inches.
If you are hand-cutting, print your template from the PDF file, transfer it to the orange cardstock, and cut it out.
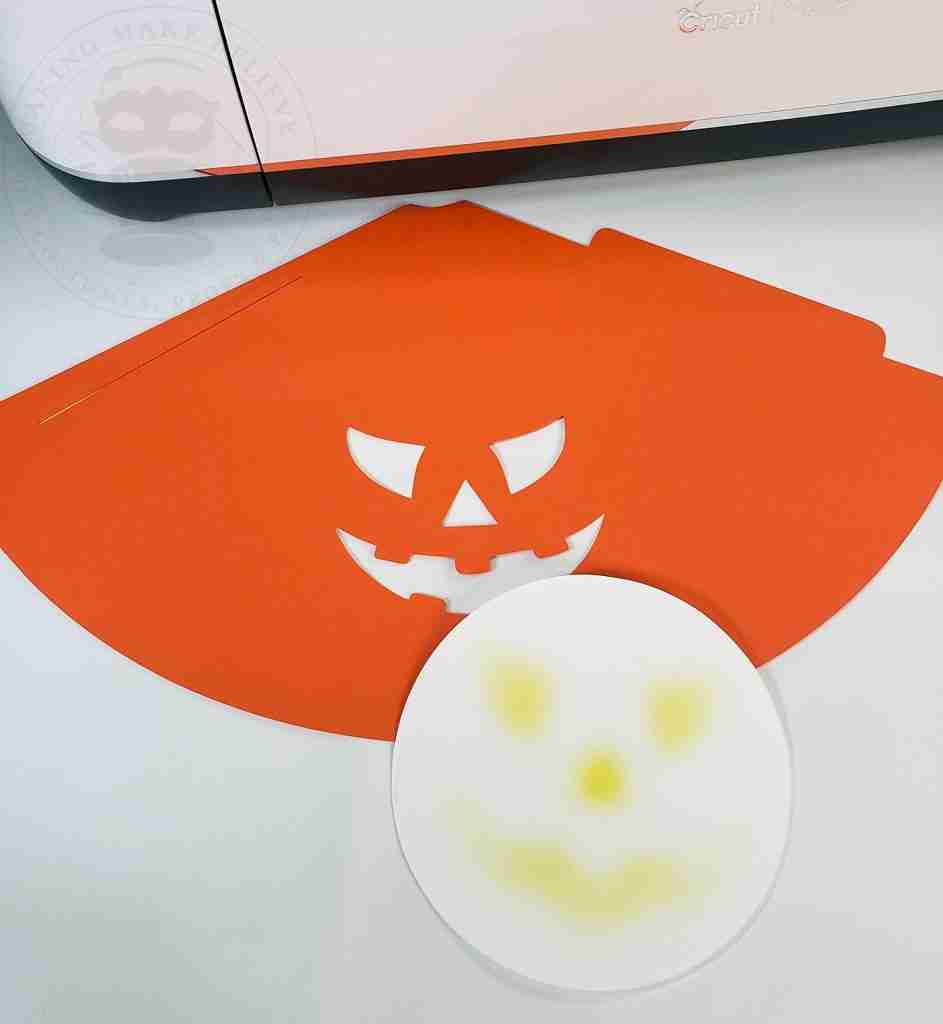
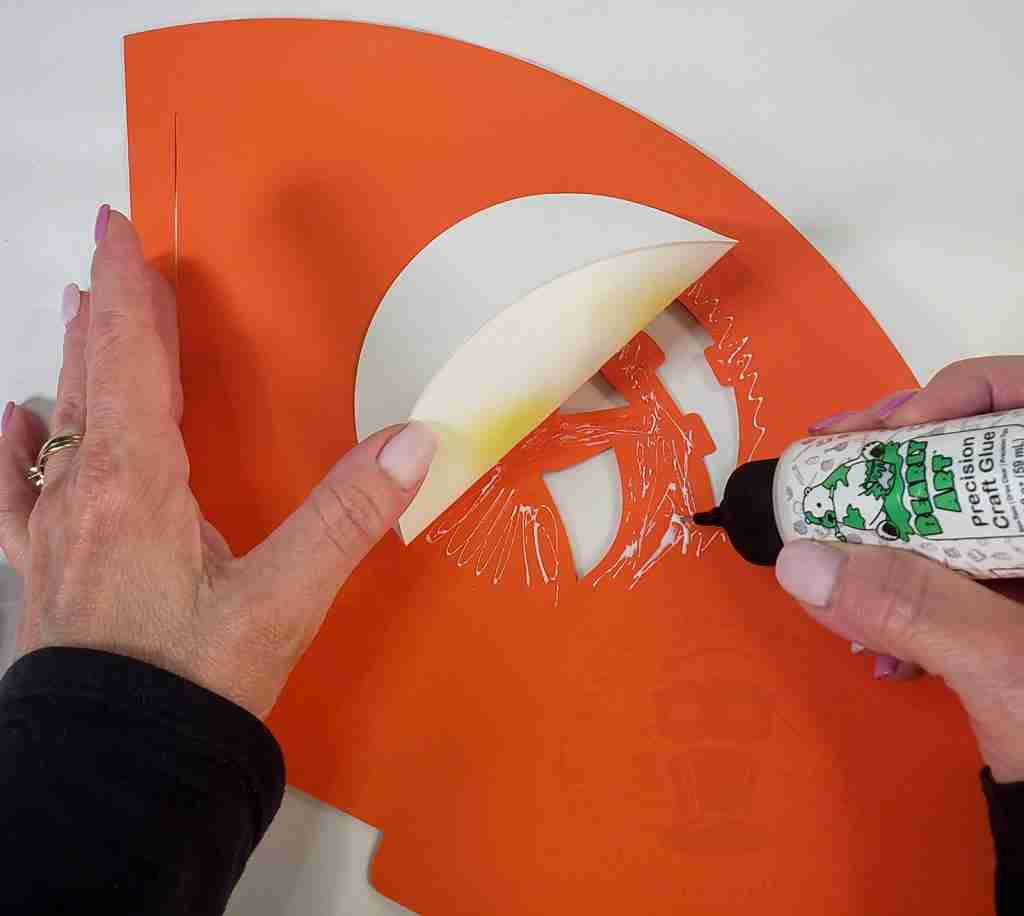
Next, let’s make the Glow Face Insert.
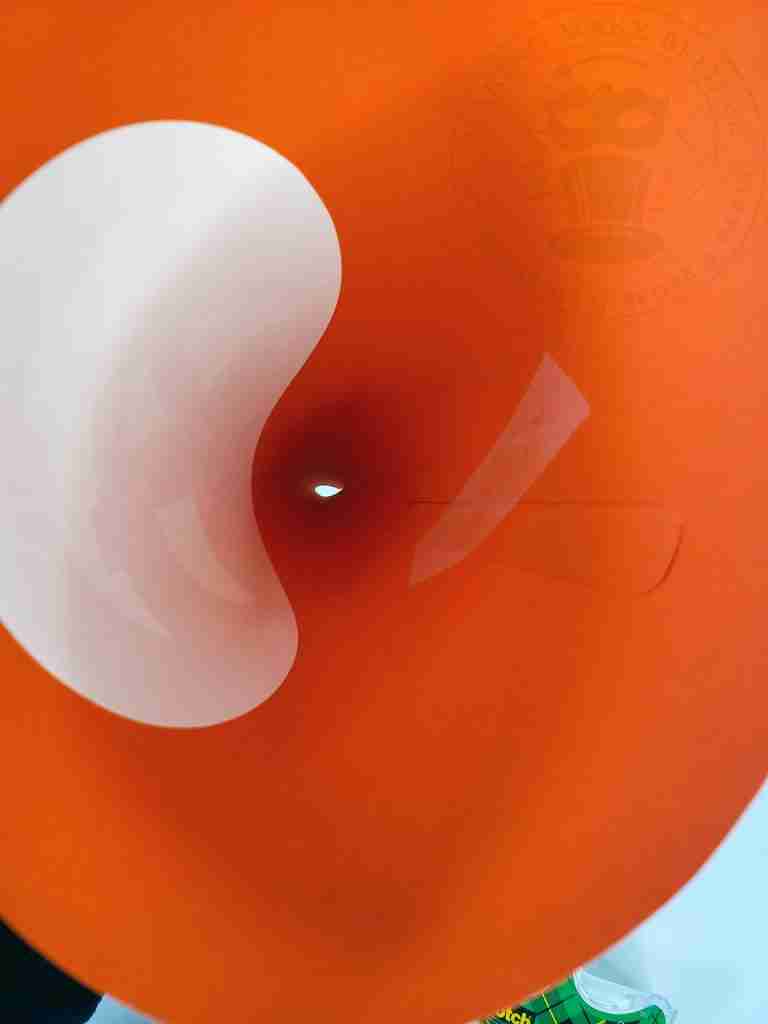
If necessary, resize the Glow Face to 5″ x 5″, print onto the white cardstock, and cut it out. You can use your cutting machine’s Print Then Cut feature or hand cut.
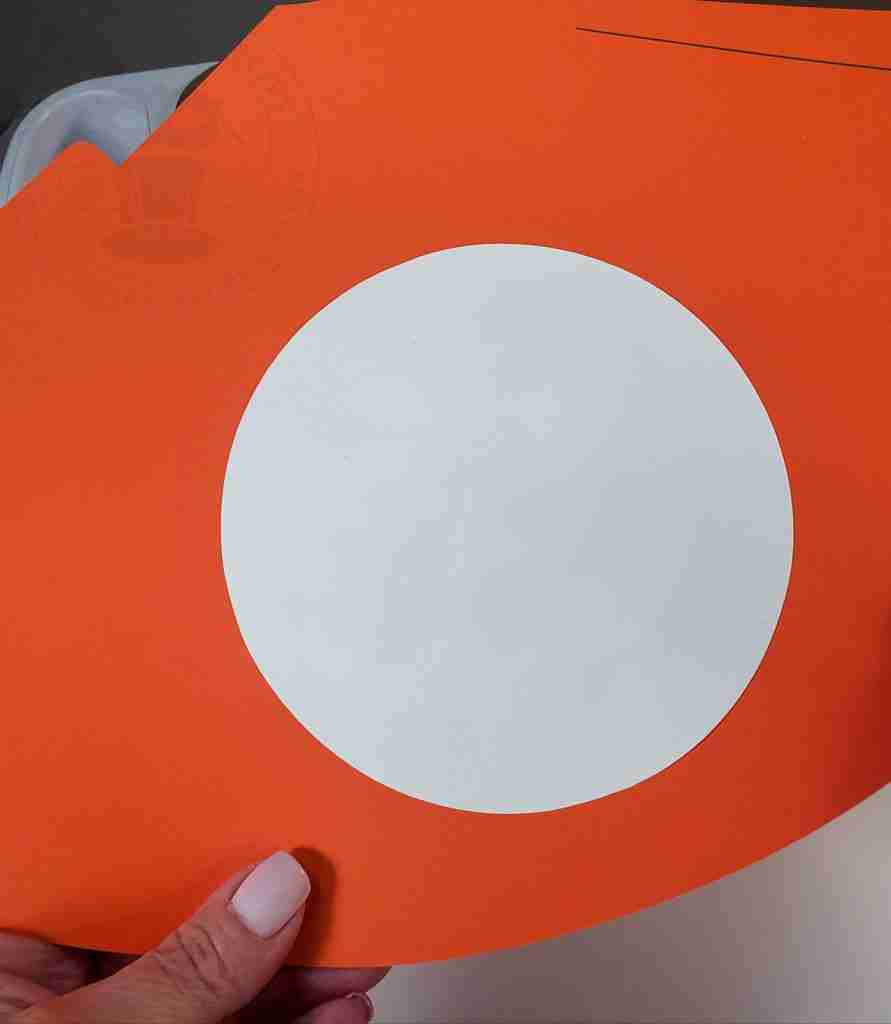
If you prefer not to print the Glow Face, cut a 5″ x 5″ circle from yellow cardstock.
Glue the Glow Face (or yellow cardstock circle) onto the backside of the cone hat aligning the Glow Face with the Jack O’Lantern cut-out.
Allow the glue to dry before continuing.
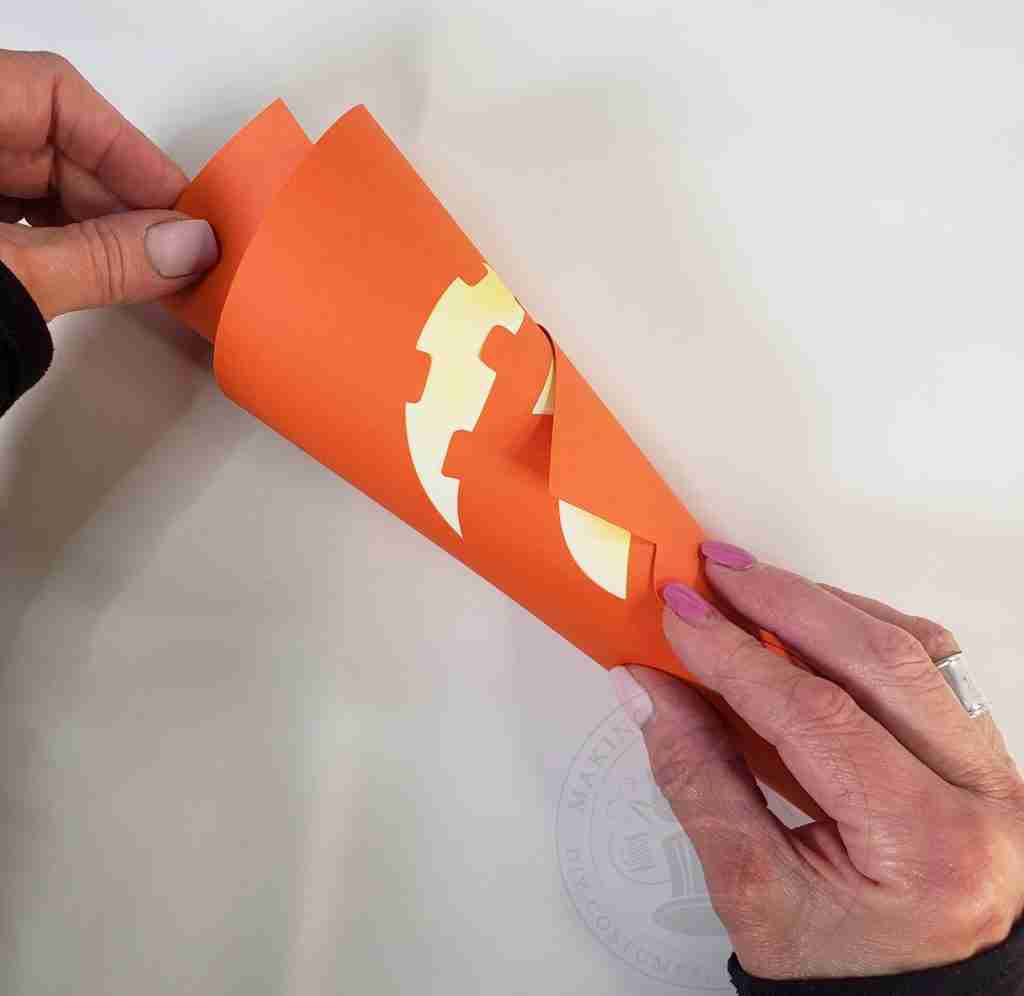
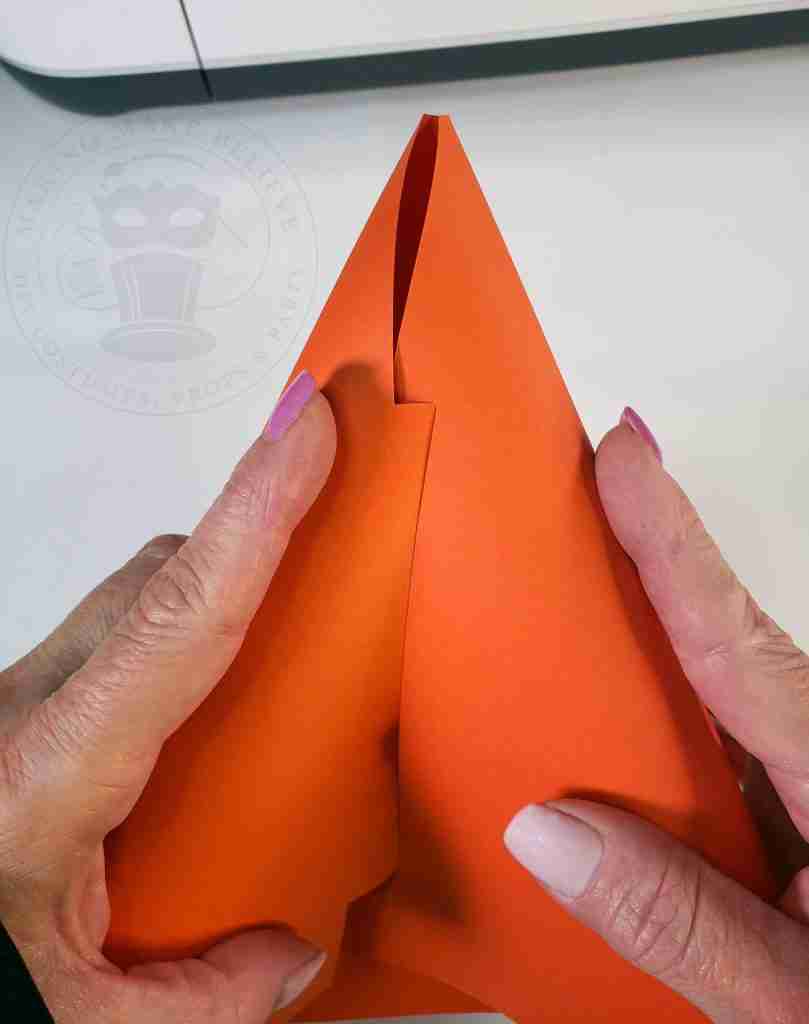
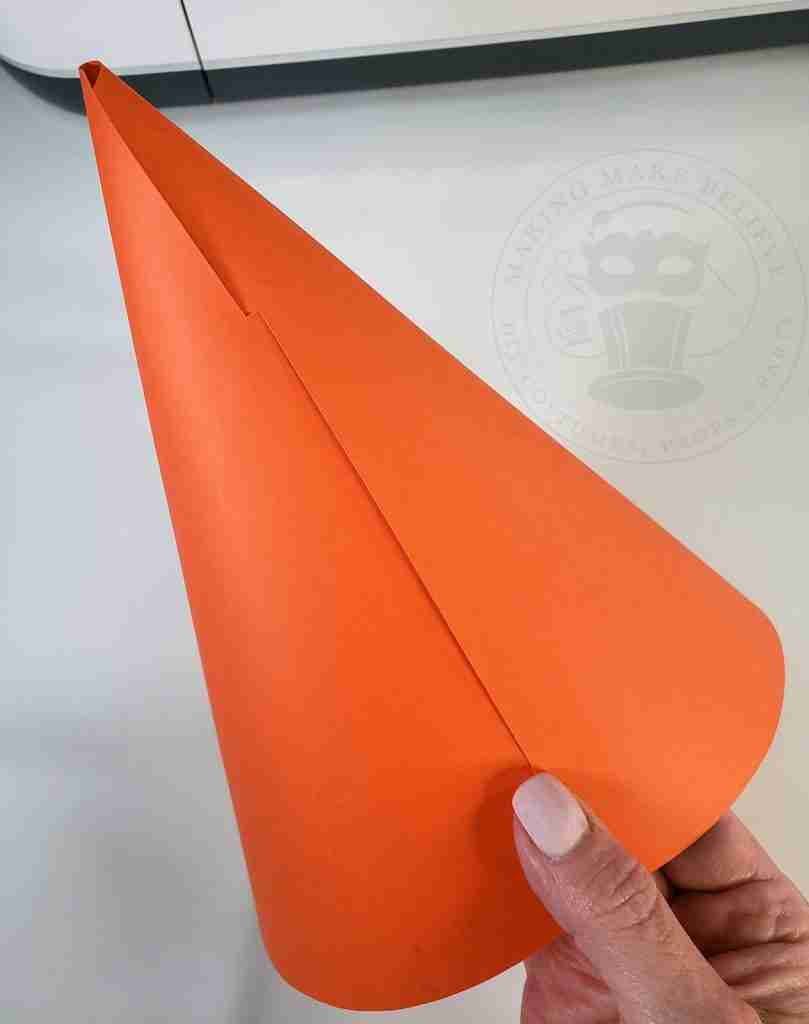
Form the hat by gently rolling it into a tight cone to condition the paper to bend.
Next, slide the tab into the slot, and tape it inside to secure it.
Finally, embellish if desired.
To wear, you can add an elastic band, glue it onto a headband, or attach using hairpins.
I recommend light to medium-weight cardstock for this project.
To help the cardstock form more easily, gently curl your hat along the edge of a table.
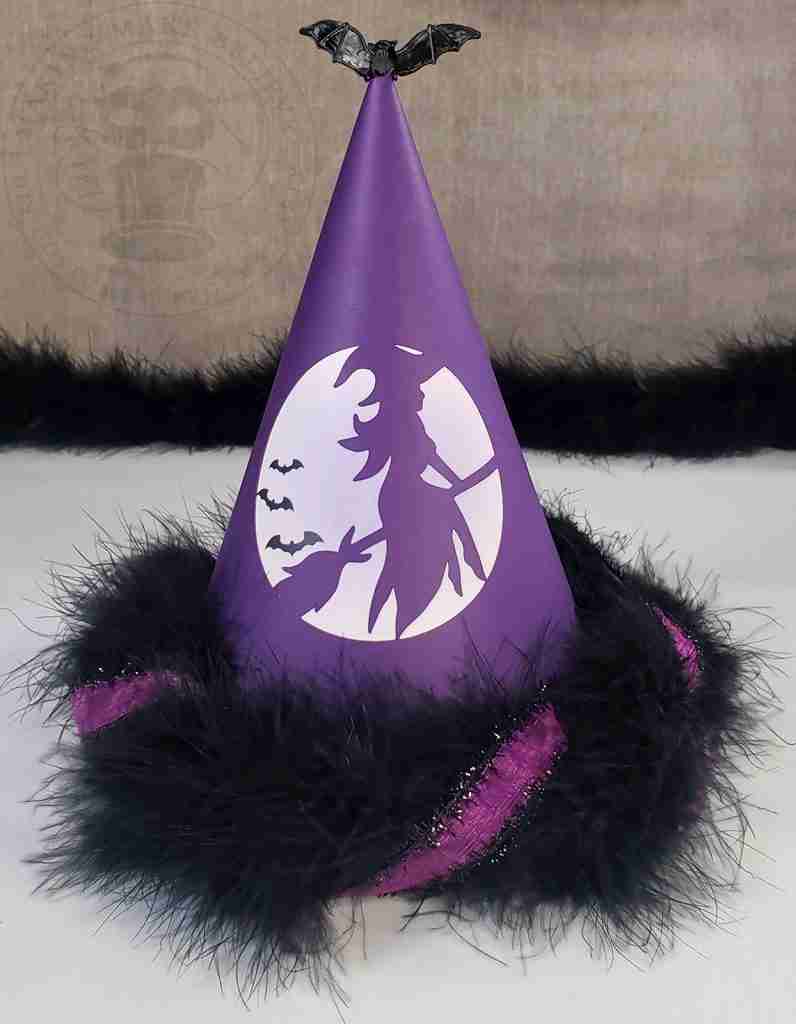
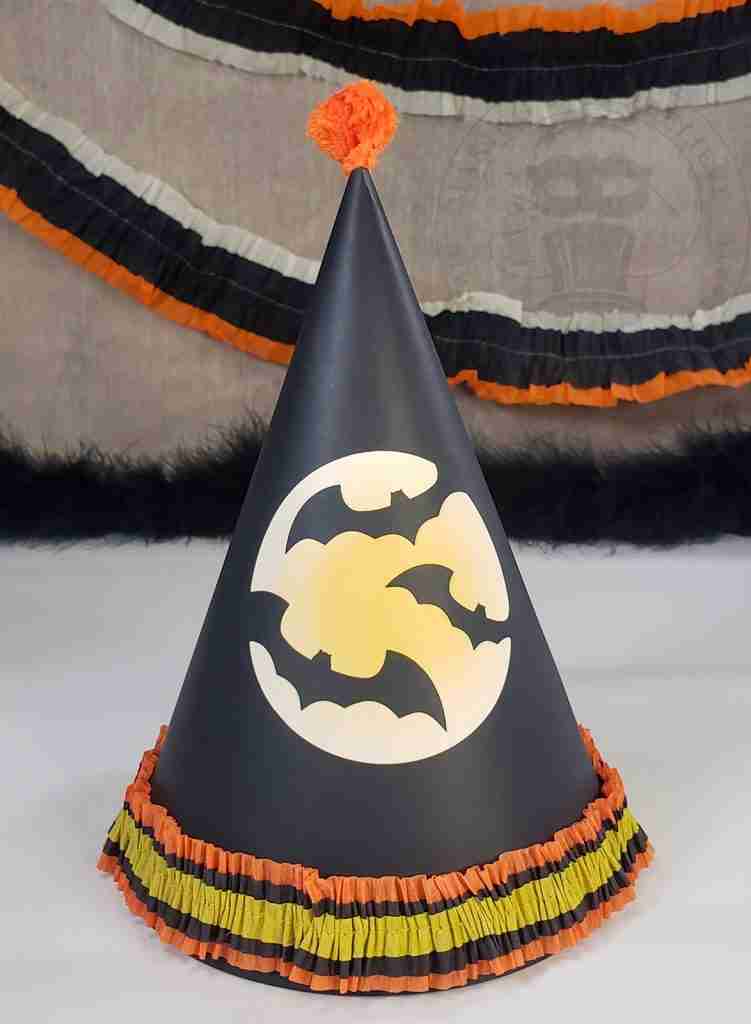
I designed three additional party hats – one with bats, a flying witch, and a trio of ghosts. Each design features a coordinating moon insert background.
These DIY Halloween party hat pattern files are available in Making Make Believe Shop.
The files include the SVG with Print Then Cut and PDF cut files for the hats and the moon insets, plus a step-by-step photo tutorial. and embellishment ideas.
So, what do you think? Does this DIY Halloween party hat get you in the spirit?
Until next time, Halloween dreams.

Check your email for the Haunted Library password.
Don’t miss a moment of the mischief.
Add hello@makingmakebelieve.com to your address book.
Join us and get access to our Haunted Library stocked with templates, printables, cut files, and exclusive content. Plus, you’ll receive Eerie Emails just for our subscribers.
*Stay as long as you like. Unsubscribe at any time.