
The Halloween countdown clock has been activated. With Fright Night just a month and a half away, it’s high time to unleash the skeleton crew, gather up a few grinning Jacks, and stockpile enough sweets to keep the spirits satisfied.
Are you ready? I most certainly am not!
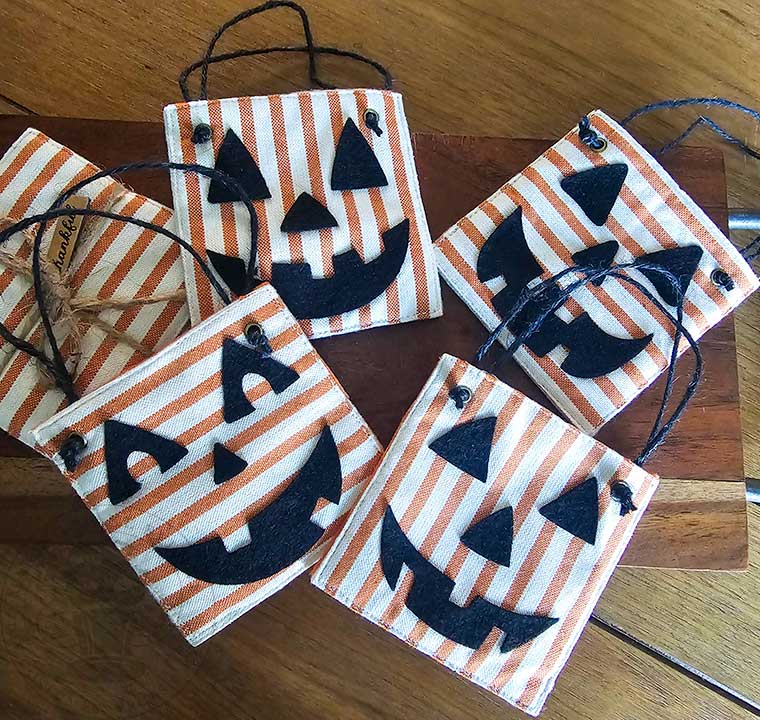
Haunting my dreadful to-do list: boo bags for a few unsuspecting mortals. A terrifyingly sweet surprise for a few of my favorite fiends.
There are numerous treat bags, boxes, and sacks on this site (such as here, here, here, and here), but on a recent trip to Hobby Lobby, I found inspiration for a new way to boo.
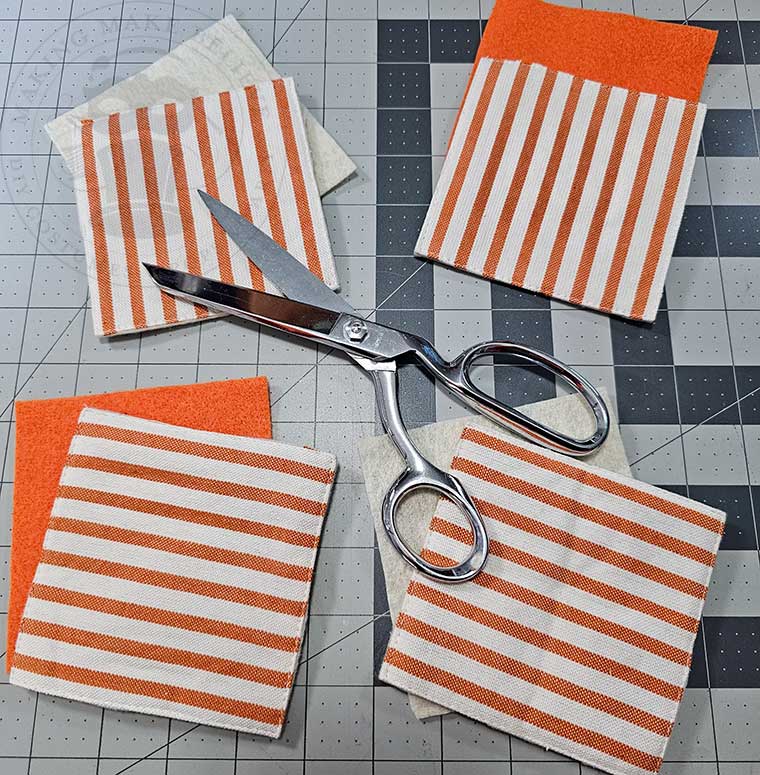
I spotted some coasters in the Thanksgiving section last month, and at first glance, they whispered of vintage Autumn charm, but with a nudge (and some scissors), they could become something far more spirited.
Inspired, I whipped up a wickedly simple brew of Halloween hijinks to transform them into boo bags worthy of tastefully executed, yet tiny, treats.
If this sounds like a trick you’d like to get in on, let’s get started.

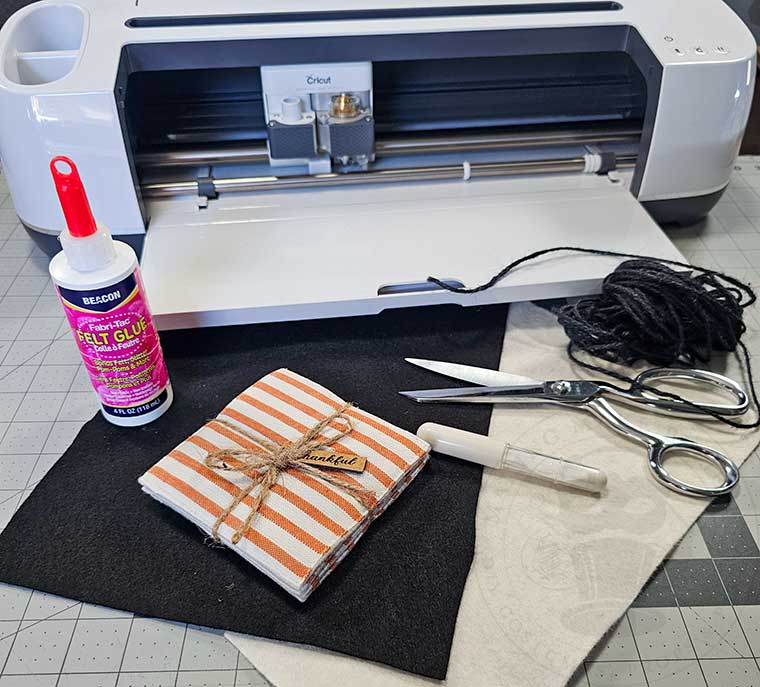
For this project, we will need:
Fabric coasters
Felt scraps
Scissors
Cutting machine with fabric mat and blade (optional)
Fabric chalk marker
Adhesive – I recommend Beacon Felt Glue
Eyelet setter and eyelets (optional)
Twine or ribbon
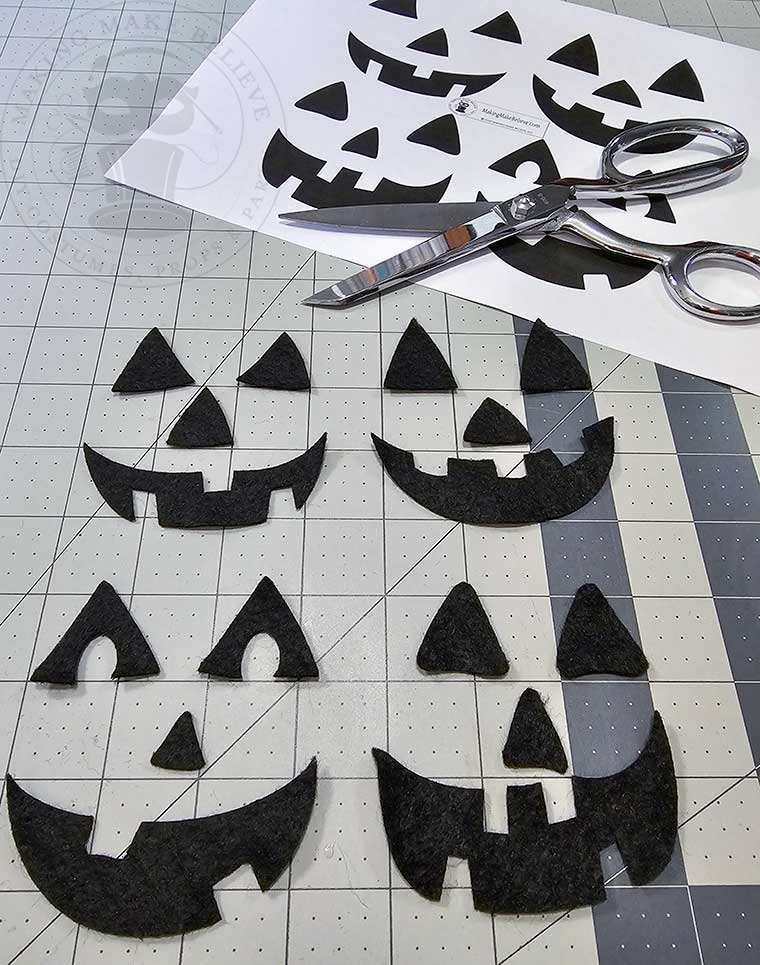
We will also need the Jack O’Lantern Faces Collection from the Haunted Library. Select the SVG for machine cutting or the PDF if cutting by hand.

If cutting by hand, open the PDF in your favorite reader (Adobe, FoxIt, etc.)
Print and cut out the Jack faces to use as a template. Trace the templates onto your felt and cut them out.
For machine cutting, upload the cut file to your design software, such as Cricut Design Space.
I’m using the Cricut Maker with the fabric mat and blade to cut out the Jack faces.
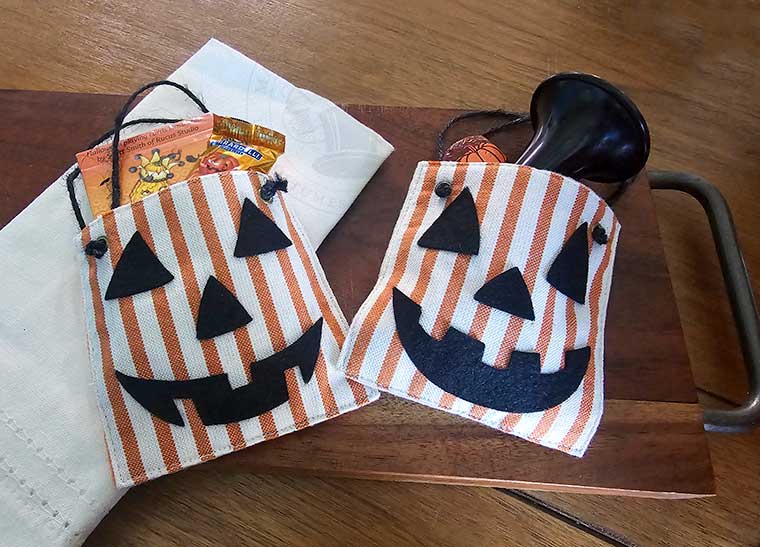
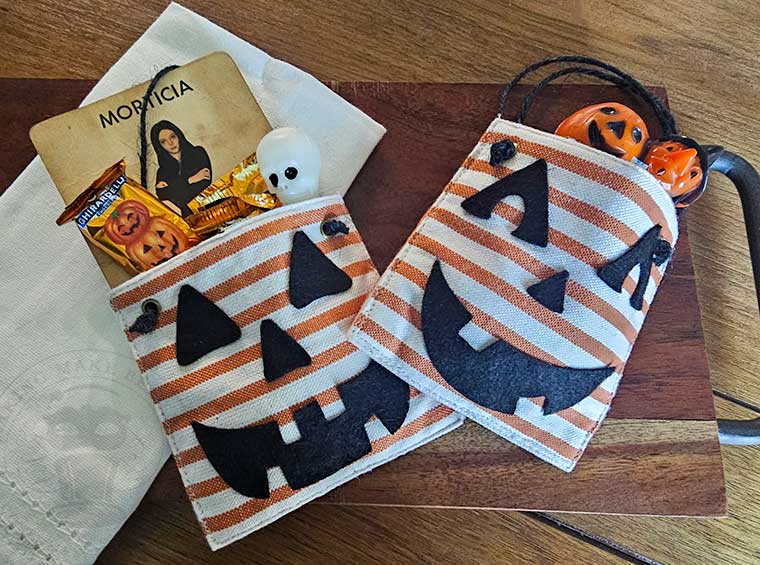
Next, lay the coaster on top of a felt scrap, trace around it, and cut it out. This piece will serve as the backing of your bite-sized Halloween boo bag.
Lay the Jack face onto your coaster, and when satisfied with the arrangement, glue the pieces into place.
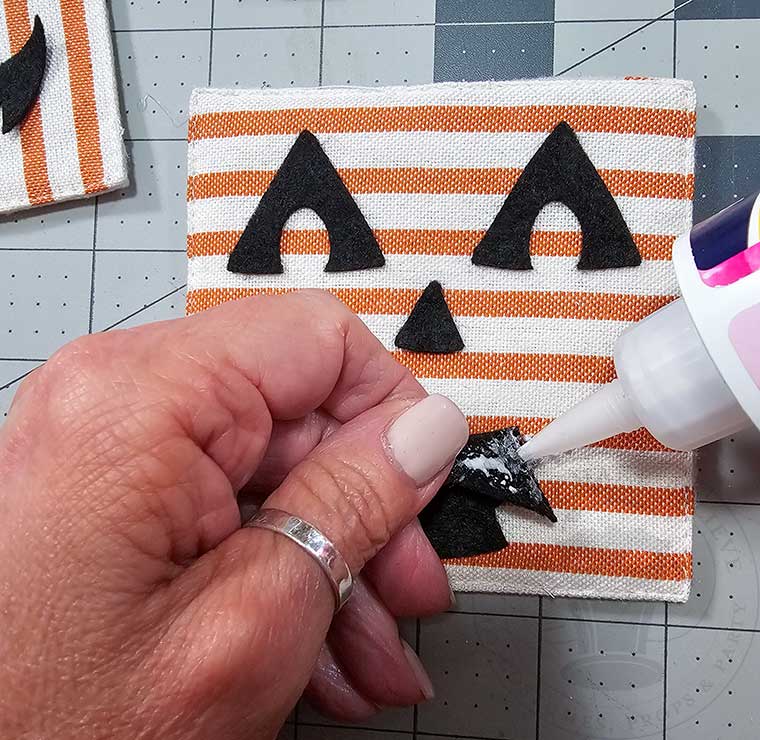

Add a generous bead of felt glue around the bottom and sides of the back of the coaster.

Then, place the backing piece onto the coaster and allow it to dry completely. Clips can be used to ensure a secure bond if desired.
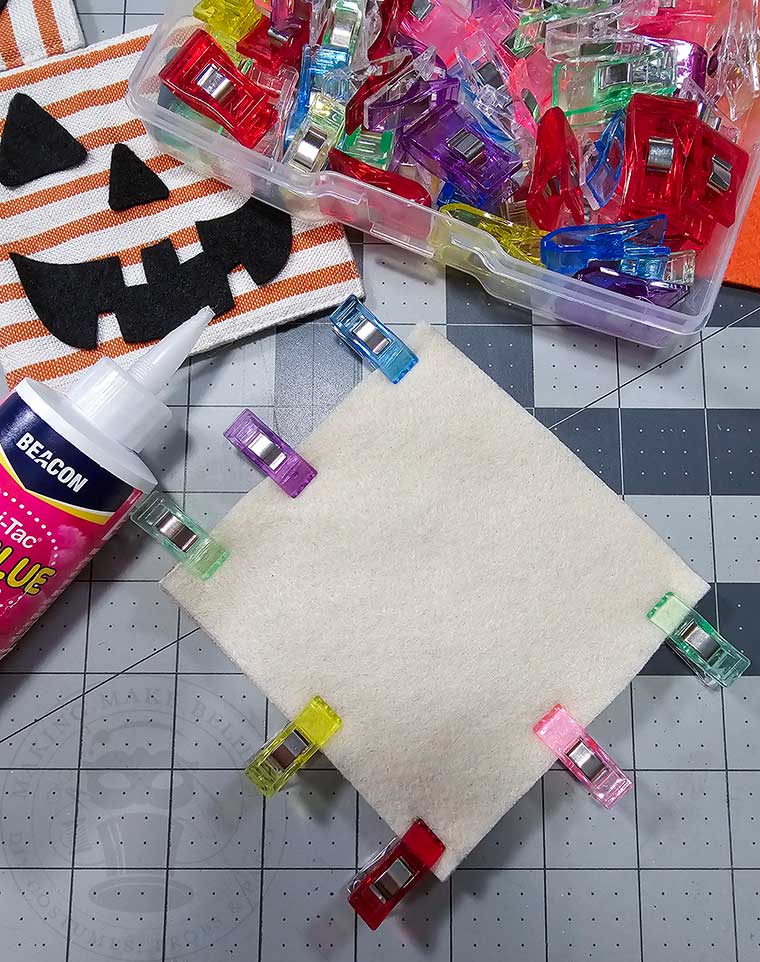
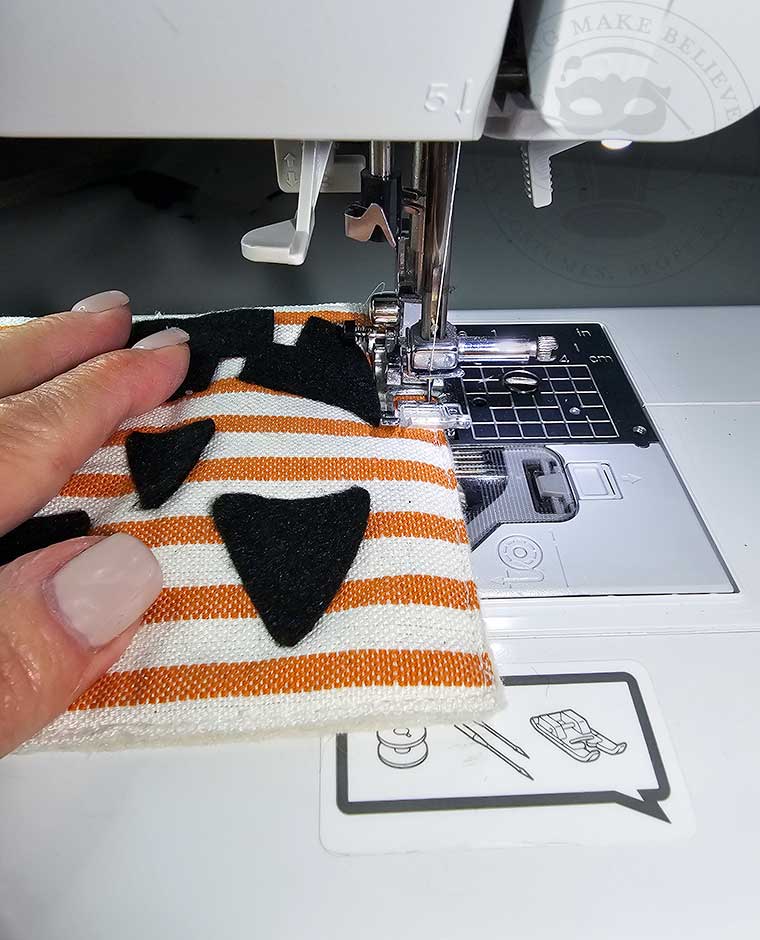
Optionally, for a more secure boo bag, the backing can be stitched onto the coaster using a machine or by hand using a blanket stitch.
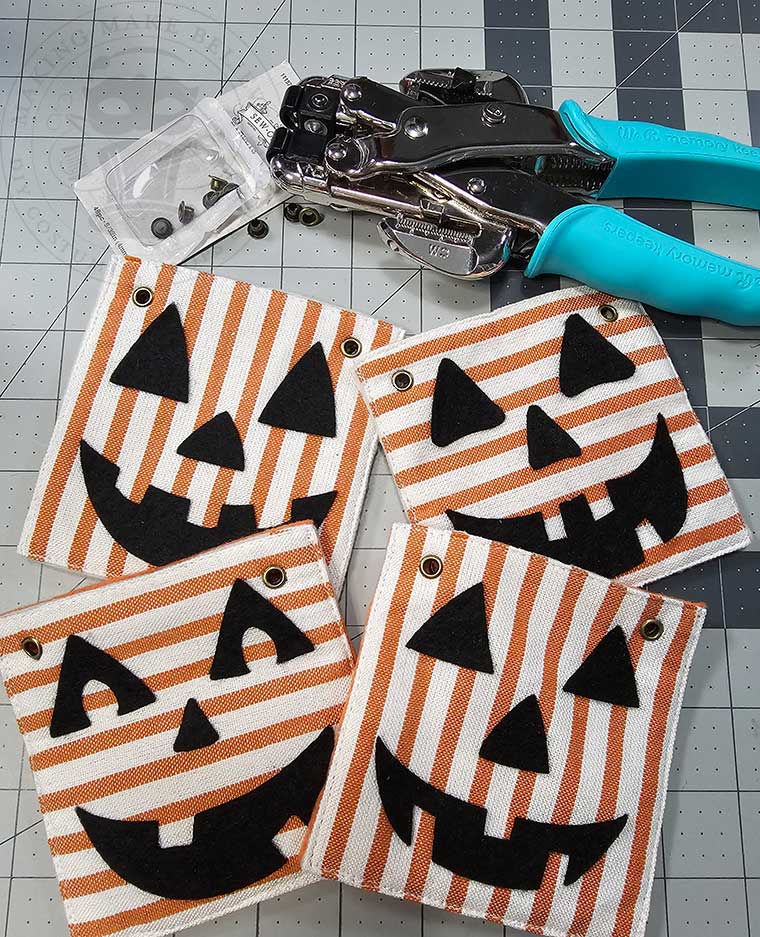
To make handles for your boo bag, cut a small slit in the coaster along the top near each corner of the front and back sides.
To better ensure the holes are aligned, try using an awl punch to make a small hole.
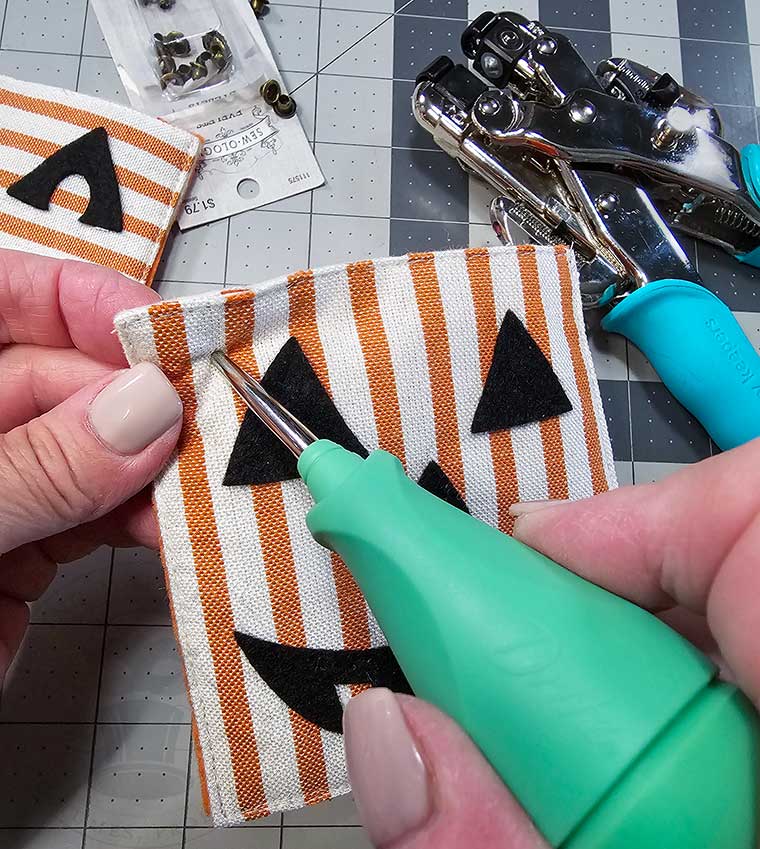
I’m still trying to justify my new Crop-A-Dile (which I love!), so, of course, I’m using it to make the holes and set the eyelets.
Cut two lengths of twine or ribbon, knot the ends, and run them through the holes you made to create handles for the boo bag.
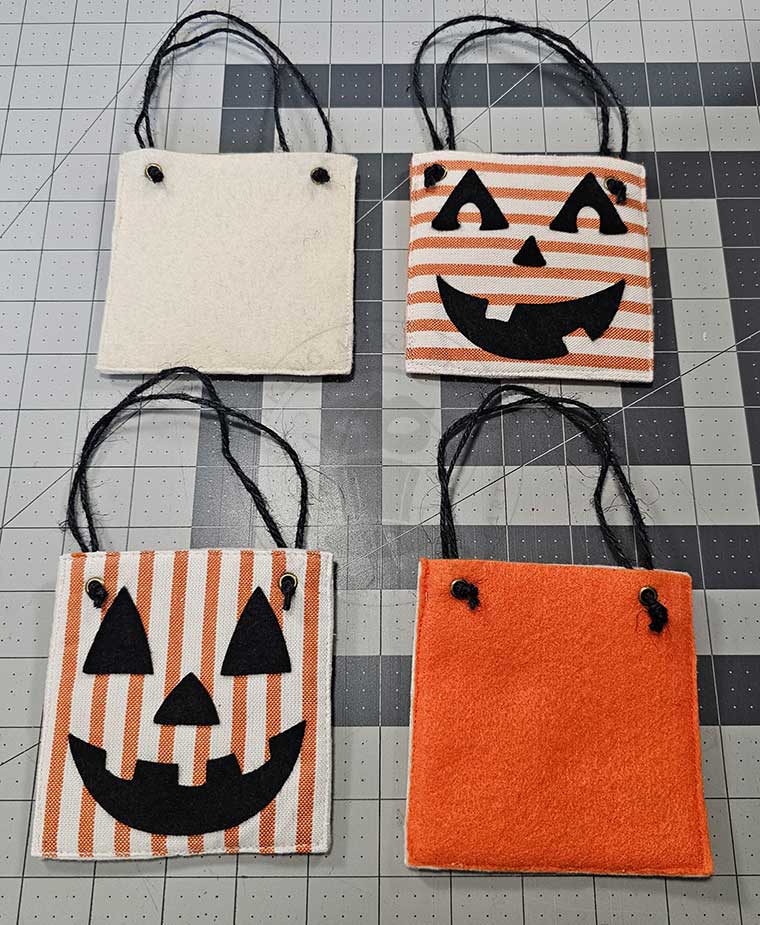
All that’s left to do is fill these little bite-sized Halloween boo bags with tiny treats. These are the perfect size for bite-sized candies, miniature spirits, or tiny terrifying trinkets.
Perfectly proportioned for miniature sweets.
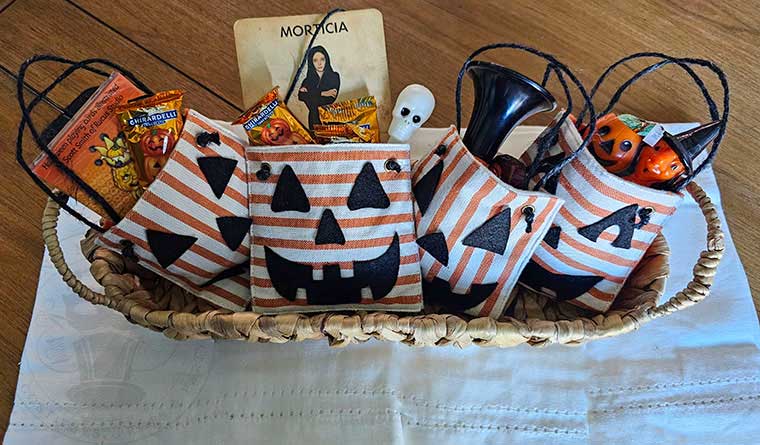
Who will you boo?
Until next time – stay spooky.