

A misty veil hangs in the air today, the kind of weather that tricks the senses into believing October has crept in early. Gray skies, a chill in the breeze, and that deliciously eerie stillness – it’s the kind of Midwest day that makes my Halloween-loving heart beat a little faster.

This moody atmosphere is the perfect invitation to dive into spooky-season crafting. Even though our haunted home only sees a handful of trick-or-treaters each year, I can’t resist going all-in with treat bags. (And between us – my husband enforces a “no icky candy” rule – only the good stuff makes the cut, and in generous heaps.)
So, for the few mischief-makers that will land on our doorstep this year, I’m crafting some fun treat sacks that offer a teasing glimpse into the candy stash within.
If your idea of fun is spoiling visitors with frightful flair and sugar-dusted generosity, then let’s get started.

Planning your Halloween treats already? Pin this Halloween Treat Sack idea so you’ll have the free template ready when it’s time to assemble your candy stash.
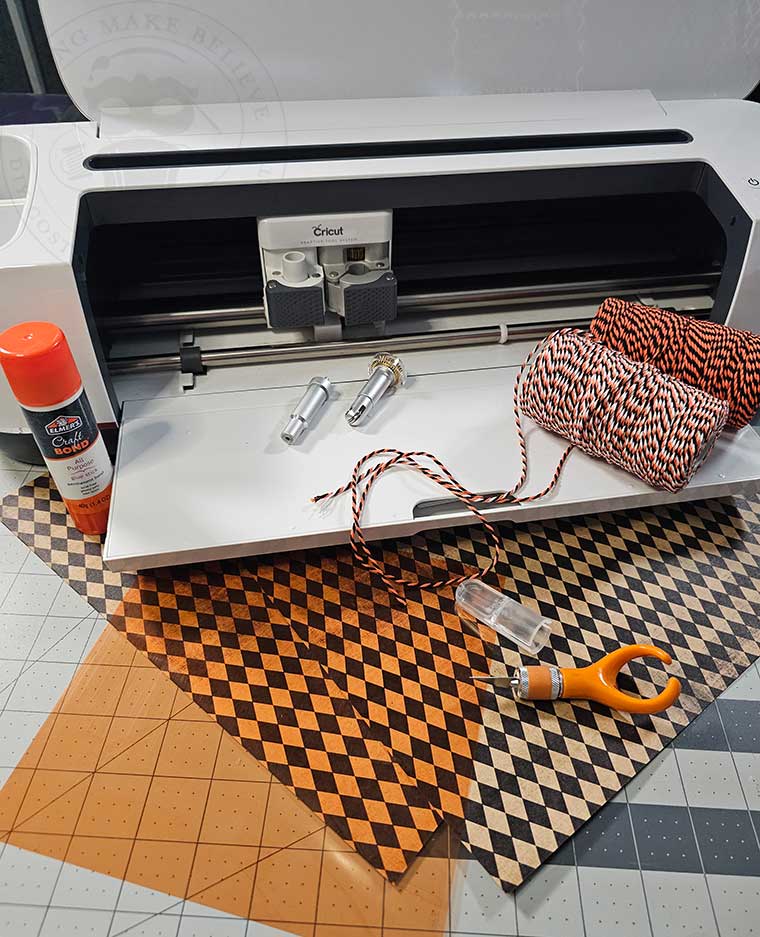
For this project, we will need:
Cardstock
Cutting machine with fine cut blade and scoring wheel
Finger blade (if cutting by hand)
Scissors
Cellophane
Adhesive – this one is my favorite
Baker’s twine or ribbon
We will also need the Halloween Treat Sack with Window Collection from the Haunted Library.
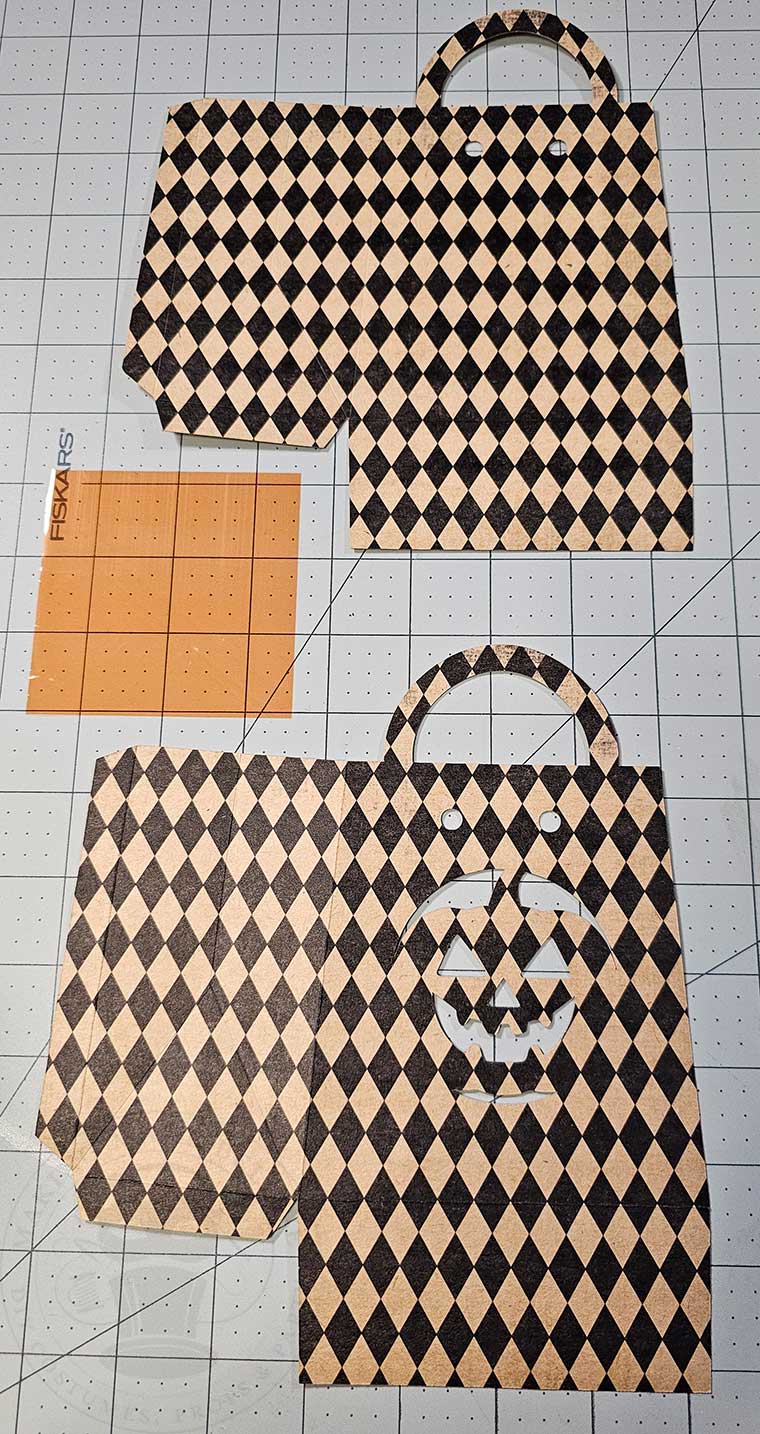
This collection includes four sack options with windows featuring bats, a ghost, a skull, and a Jack-o’-Lantern, as well as one sack without a window for faster crafting. Select the SVG for machine cutting or the PDF if cutting by hand.

For hand cutting, open the PDF template using your favorite PDF reader (Adobe, FoxIt, etc.).
Ensure the pages are set to print at Actual Size, then print and cut your template.
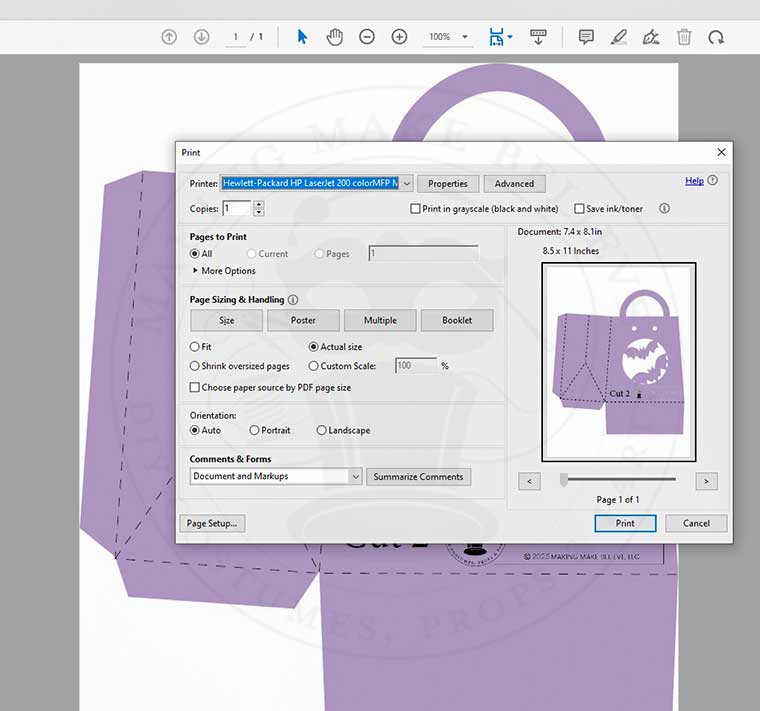
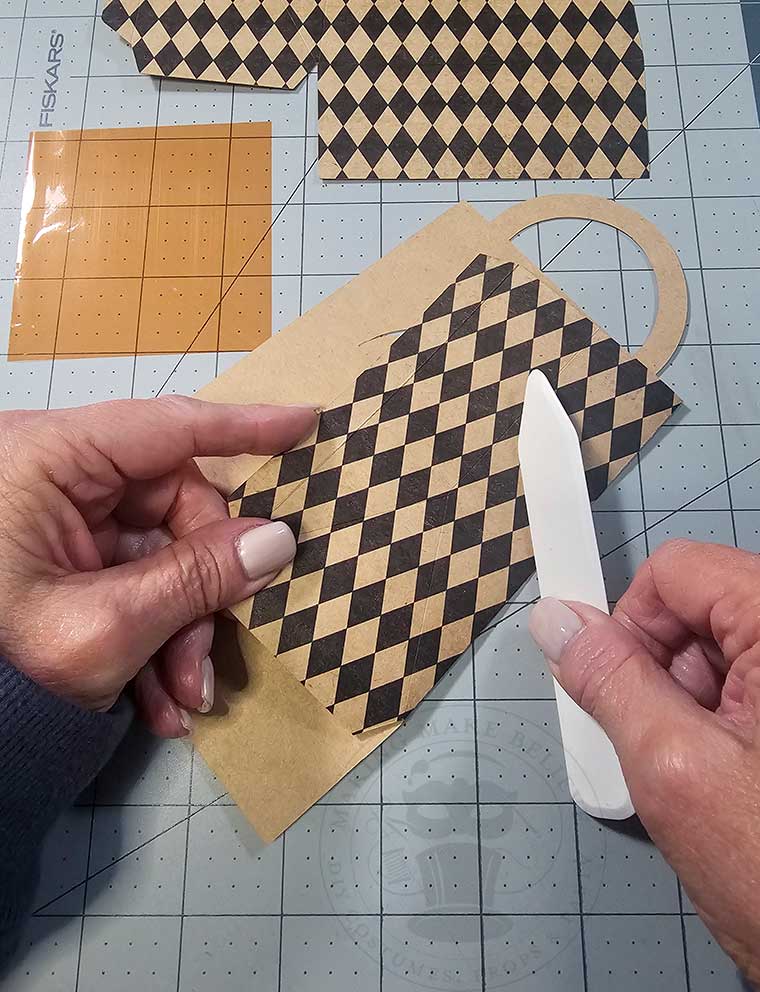
Transfer the template to your cardstock and mark the score lines.
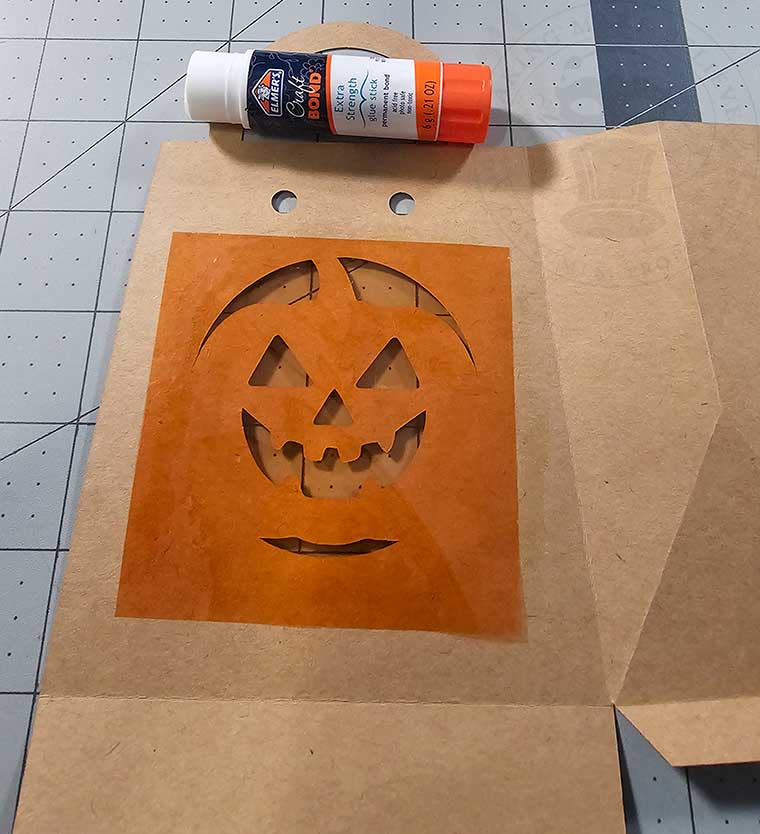
Cut the window section first, followed by the sack. Then cut a 3″ square of cellophane for each window.
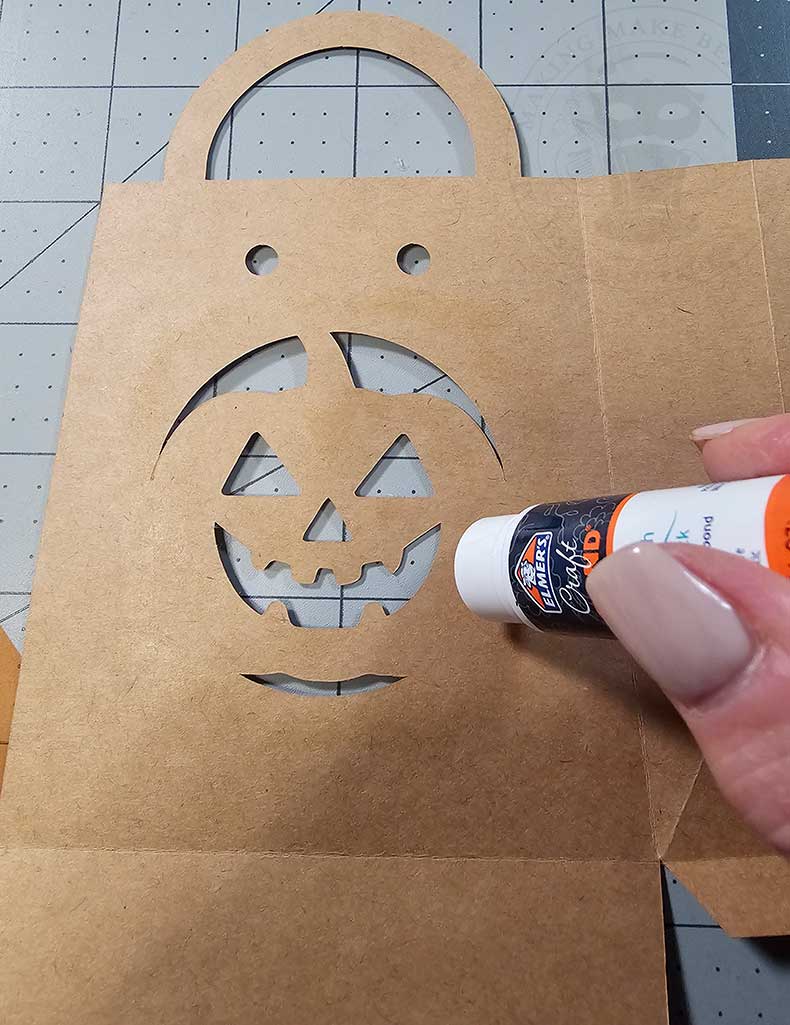
Optionally, use the windowless option and cut a Halloween motif from cardstock and attach it with glue.

Upload the Halloween Treat Sack with Window files into your design software for machine cutting. I’m using Cricut Design Space.
Each sack design includes two identical pieces ready to cut. There is no need to mirror one. Ensure each piece measures 7.365 inches in width by 8.082 inches in height.

Ungroup the file, and select the dotted lines in the Layers Menu for one of the sack sides.
By default, all lines will be displayed as a Basic Cut.

With the lines selected, select Score from the Operation drop-down list.
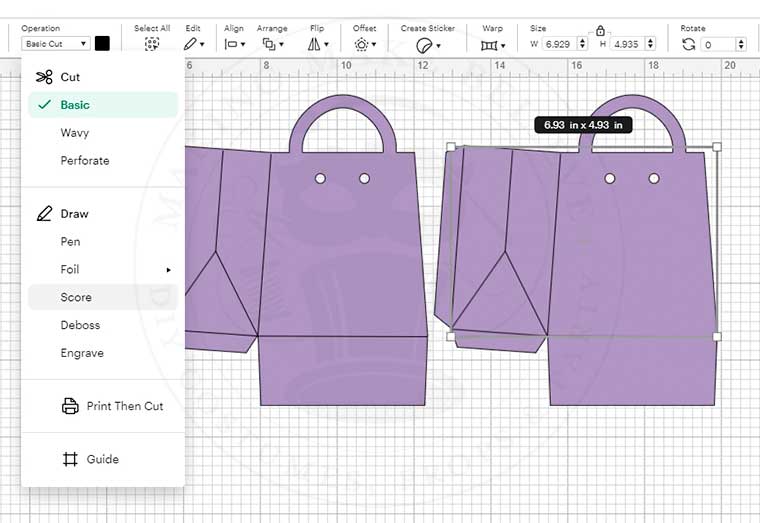
Now, select the bag section and the score lines, and click Attach.

Repeat this process with the other sack piece.
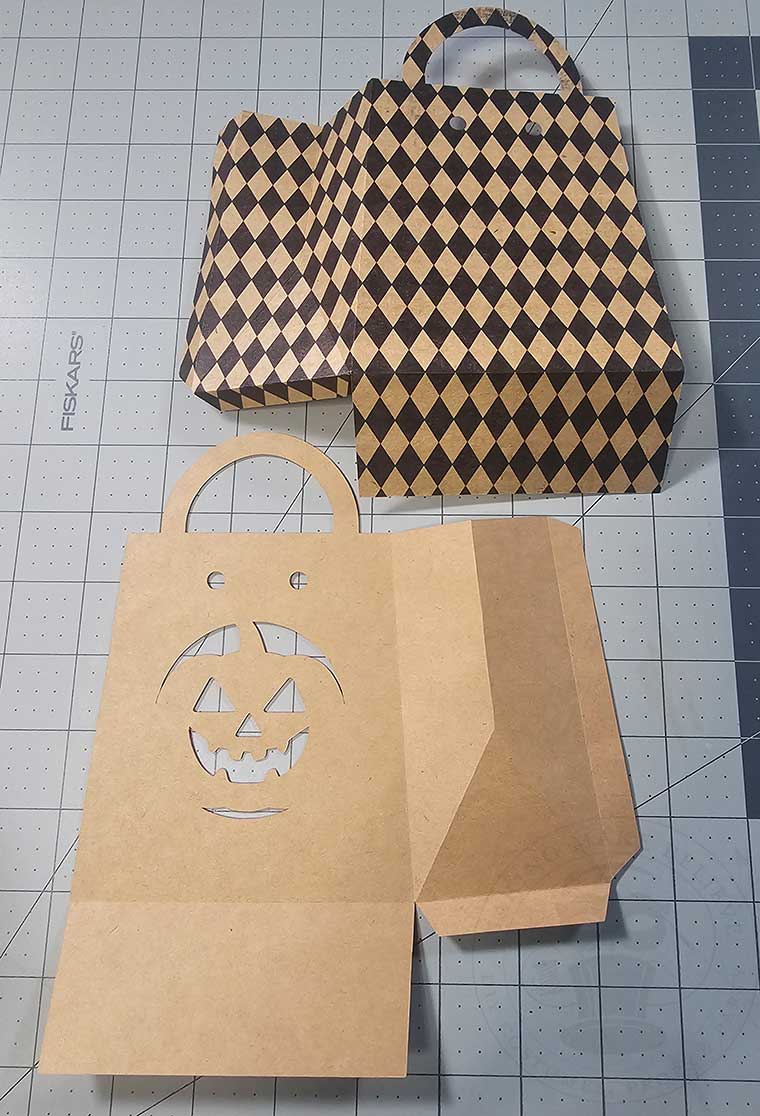
Cut both of the Halloween sack pieces from your cardstock, as well as a 3″ square piece of cellophane for each window.
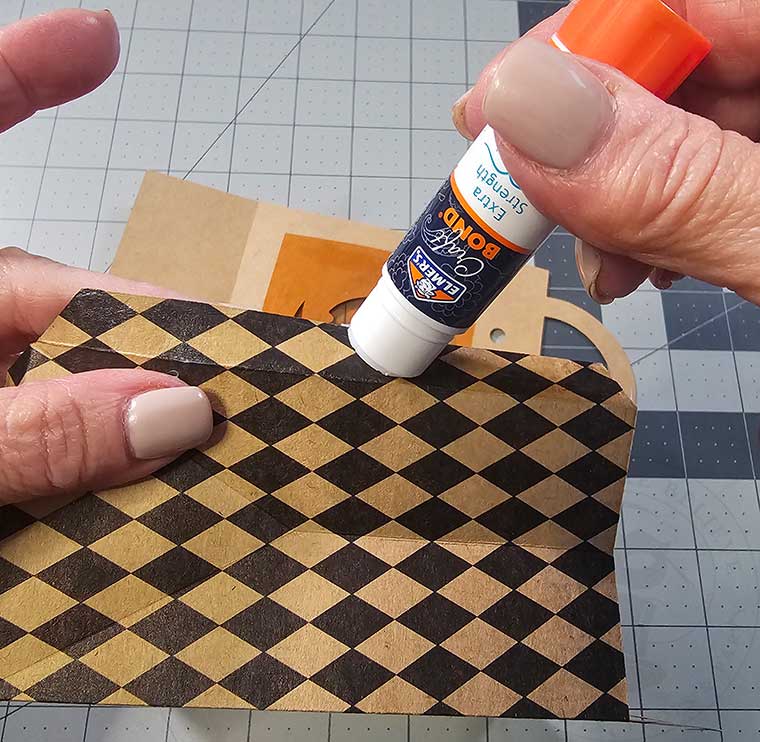
Fold along the score lines. I use a bone folder for this, but it is optional.
Fold the side score lines inward.
Attach a colored cellophane square background behind each window.
Adhere the side tab to the inside of the adjoining panel.
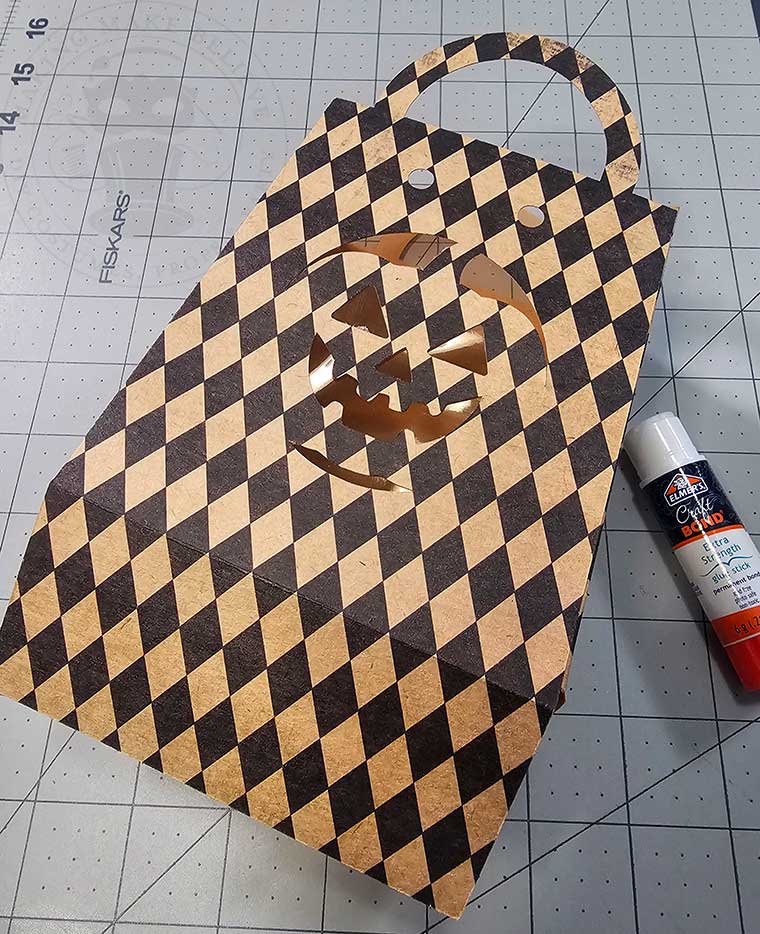
Glue the bottom base to the bottom tabs.

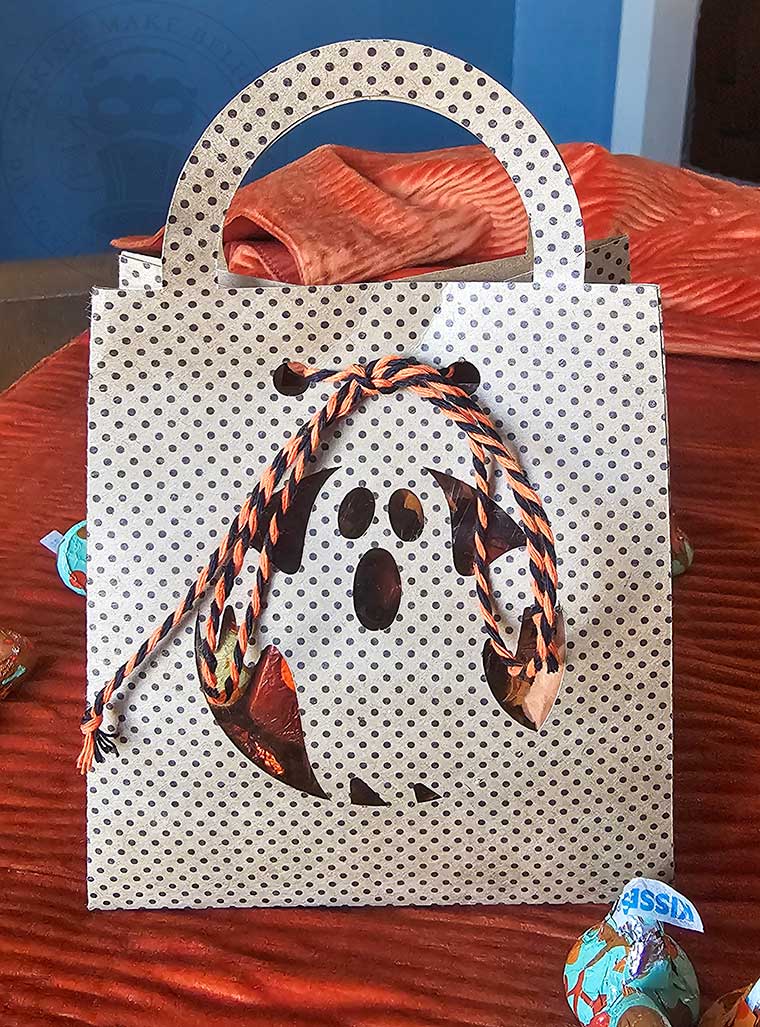
Now, load up your Halloween Treat Sacks with filler, stickers, and tons of treats. Contain all the candy goodness by tying off your sack with some colorful Halloween baker’s twine.
For a fun twist, mix and match the windows so there is a different scene on each side.
Peek-a-boo! I can’t decide which is my favorite.


I made several of these in the hope of seeing lots of ghouls and goblins on Halloween night – keeping my fingers crossed!
Until next time – stay spooky.
If you love elevating your trick-or-treat game, pin this Halloween Treat Sack tutorial now so you’re ready to craft when October rolls in.
