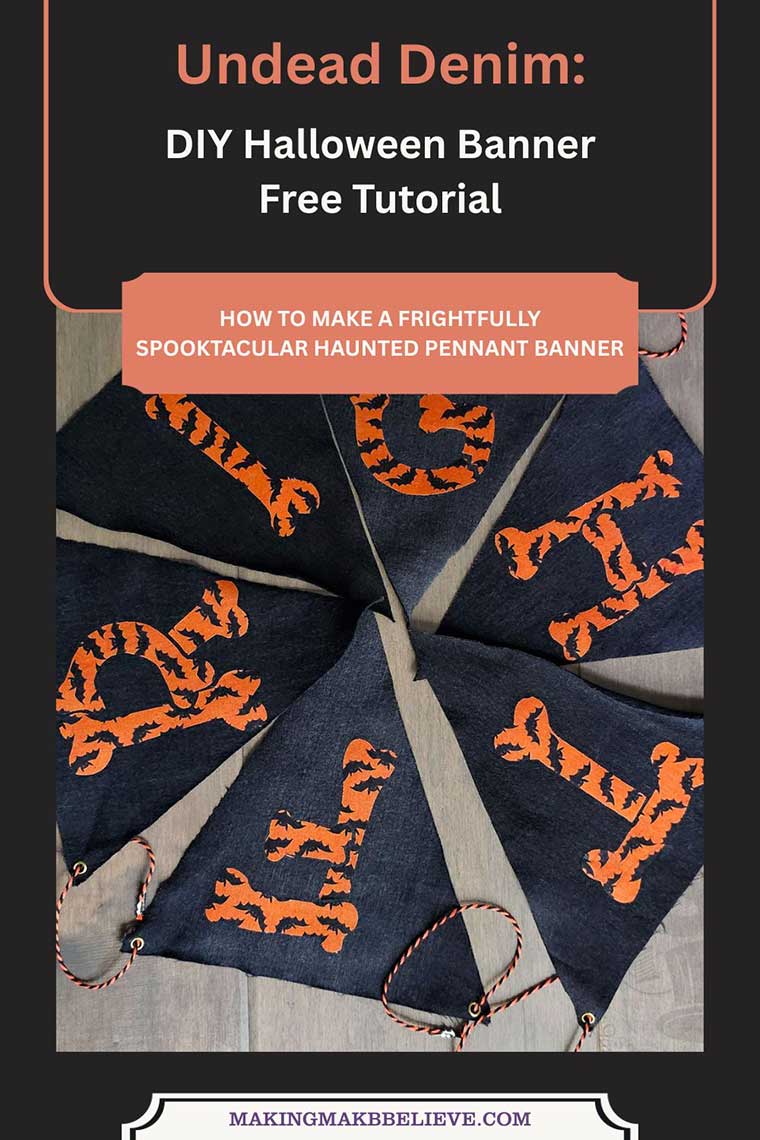
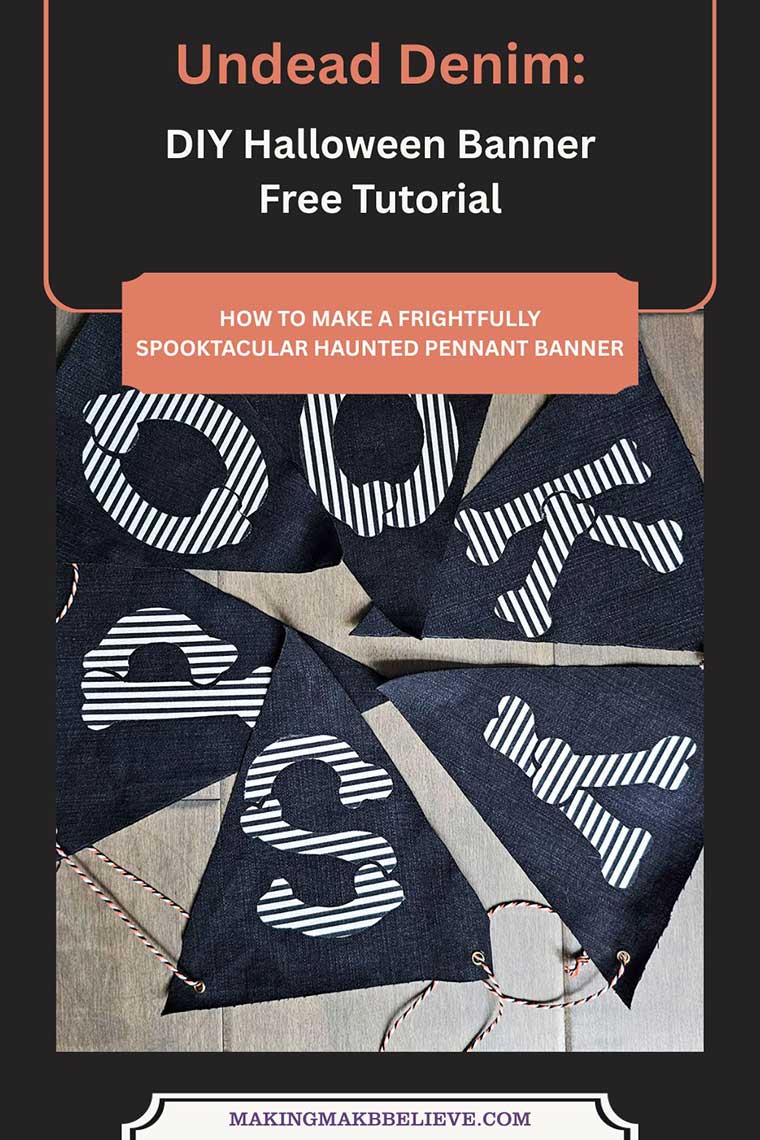
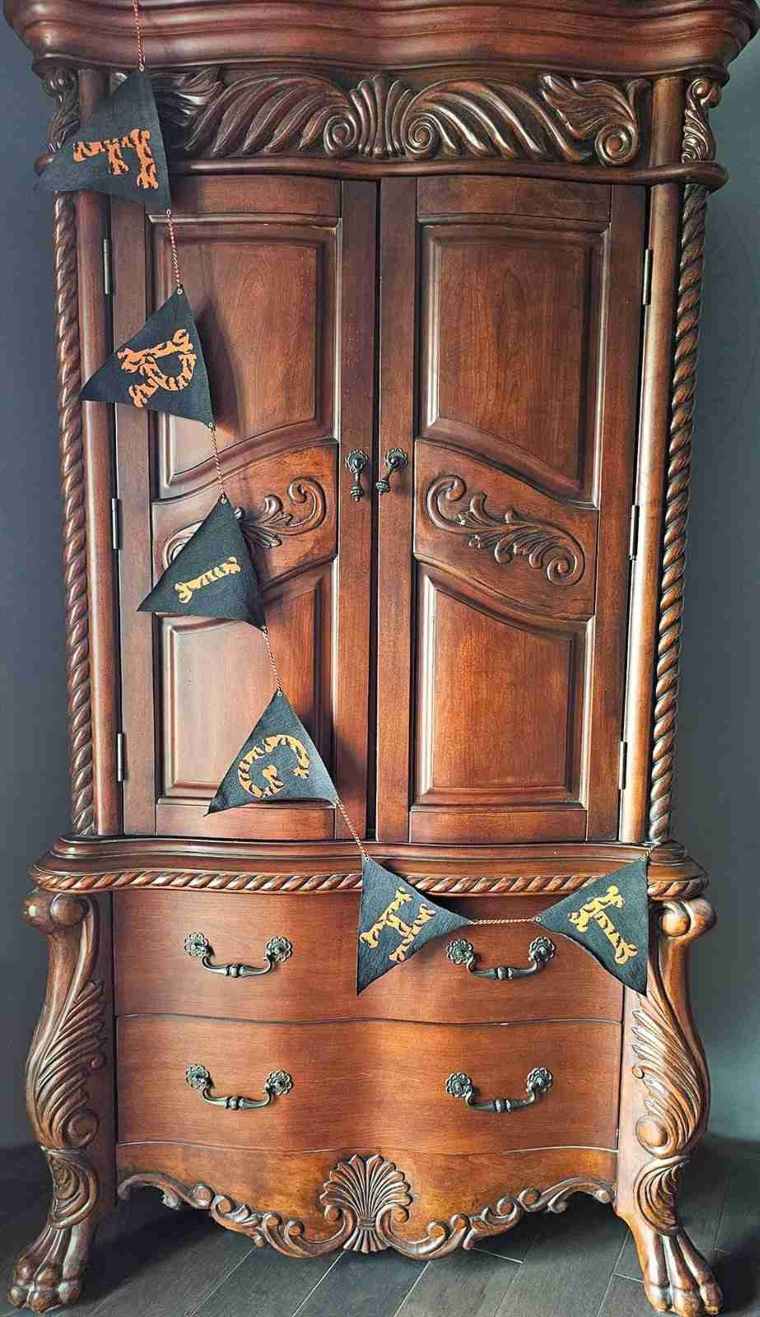
We are halfway to Halloween, and this frightfully fun denim pennant banner has been lurking on my haunted project list for ages, just waiting for the right time to rise from the grave -and this year, I finally summoned it into existence.
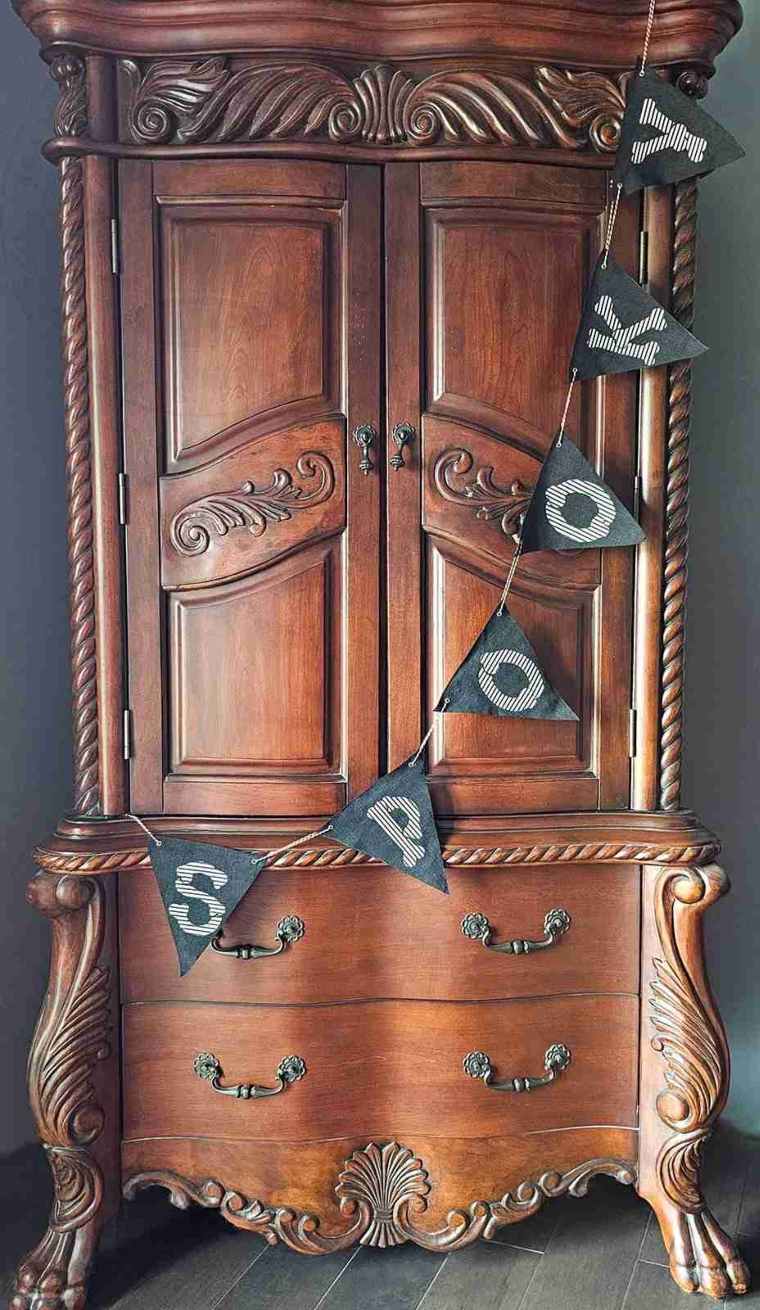
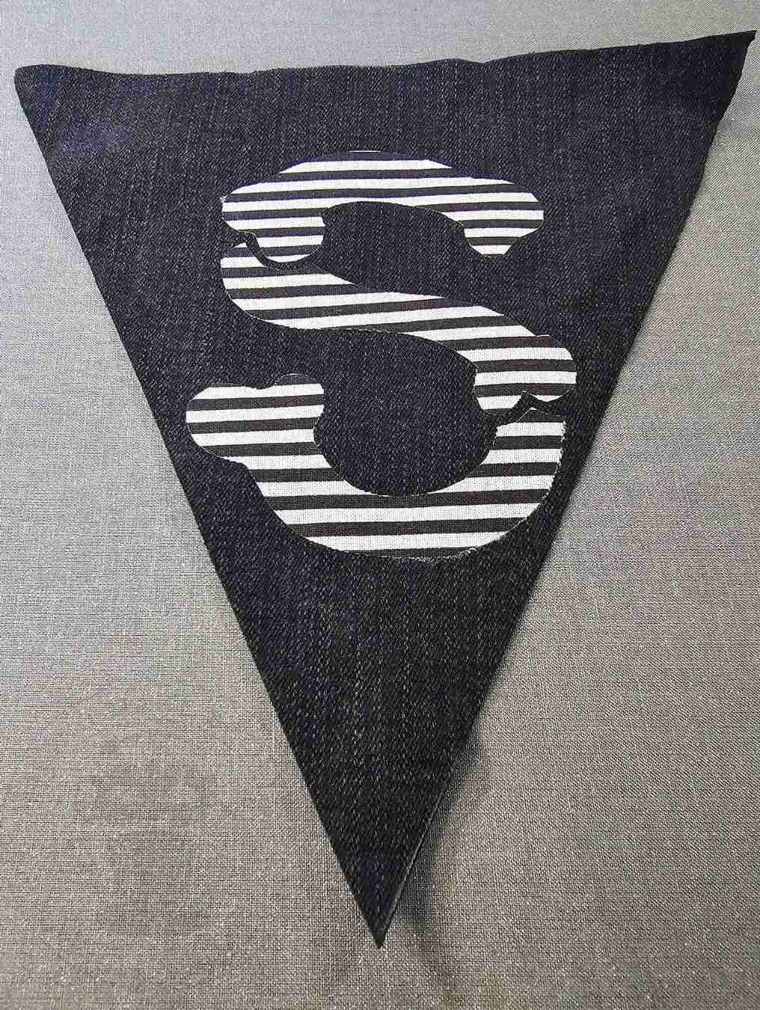
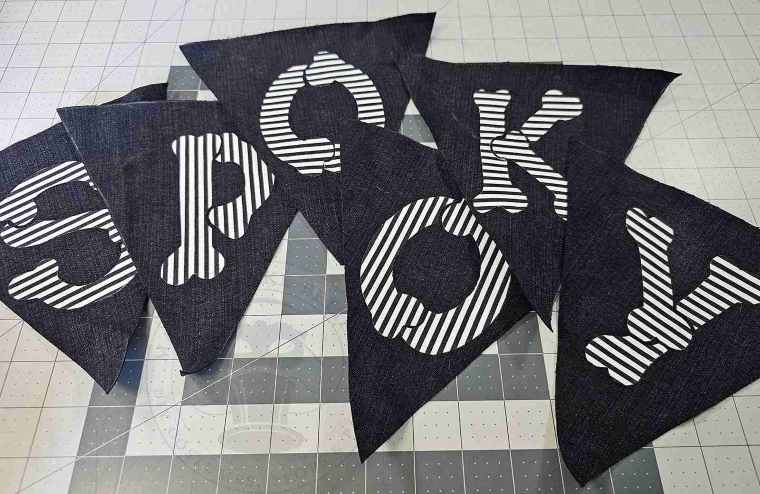
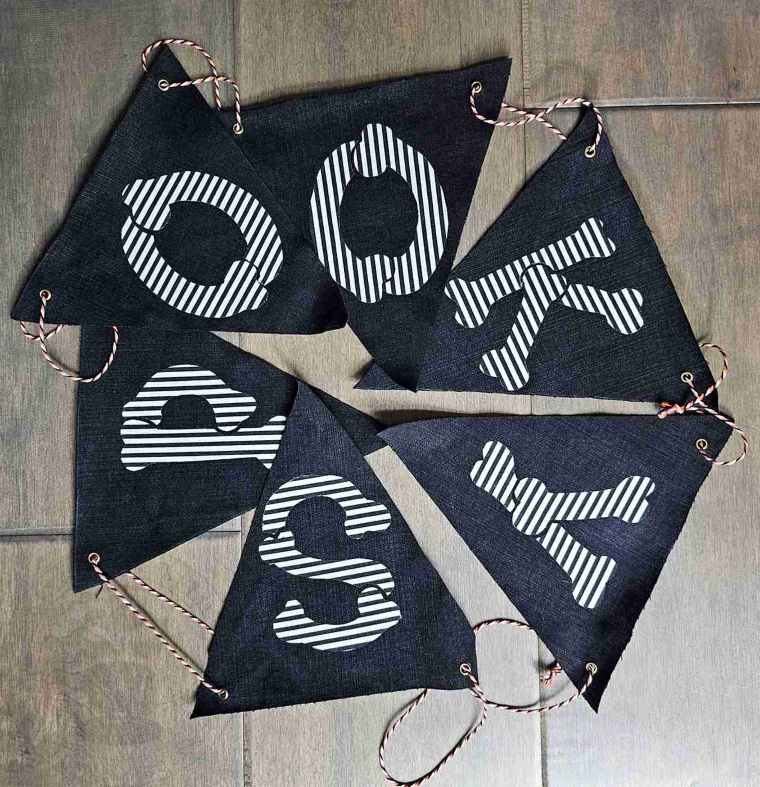
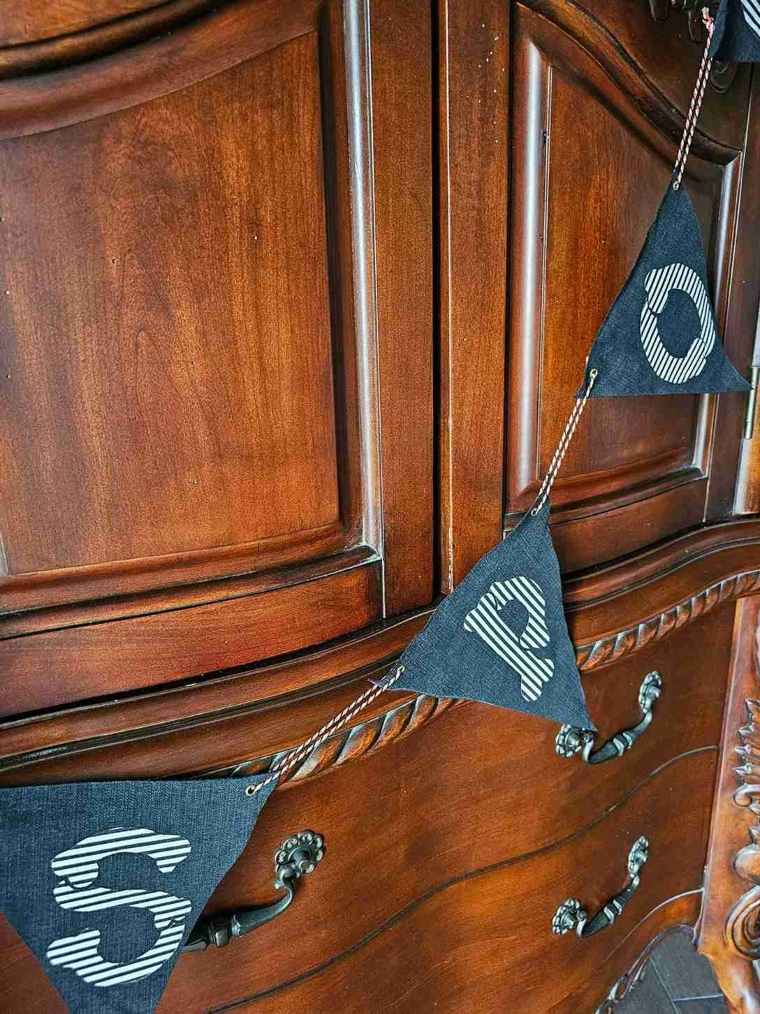
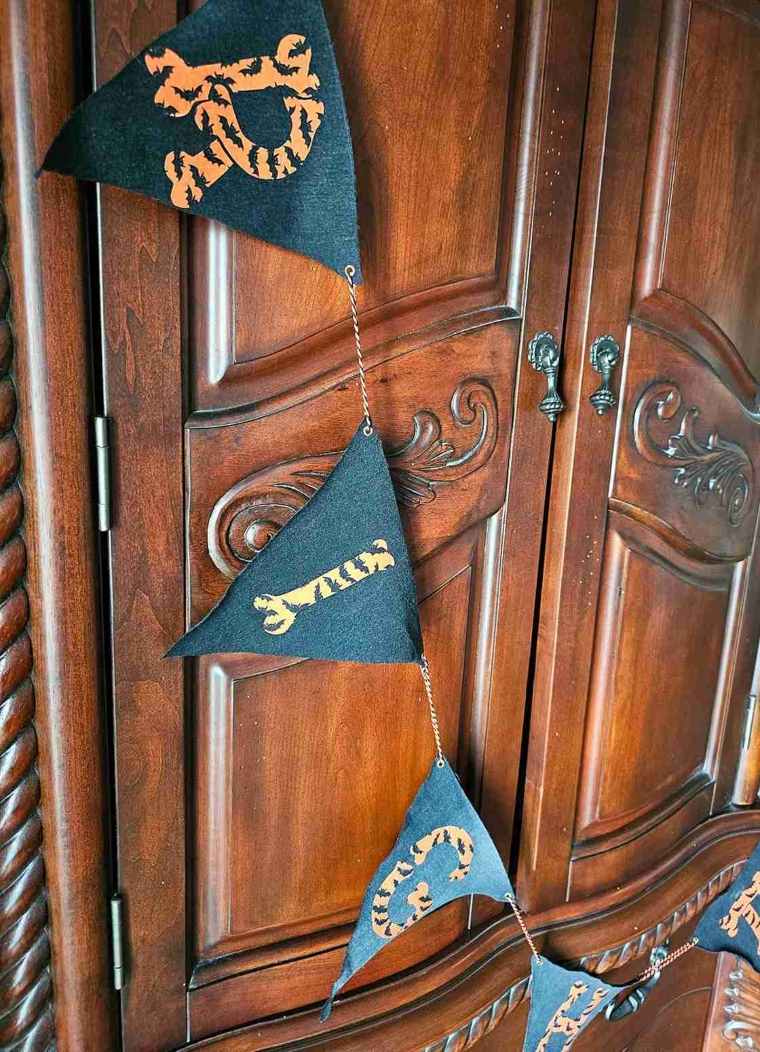
Each eerie pennant boasts a boney letter against a shadowy denim backdrop, spelling out a chilling message once all the pieces are strung together.
I had my Halloween heart set on using black denim, but, alas, our local JoAnn Fabrics had already met its untimely end – shelves picked clean to the bone and permanently shuttered earlier this week.
So, what’s a ghoul to do?
To the thrift!
I haunted the aisles of my local DAV thrift store, clawing through racks in search of some dark, distressed denim to deconstruct for this spooky little craft.
Most of the offerings were in the standard shades of mortal blue, but with a bit of persistence, I unearthed a couple of black pairs perfect for my bone-ified banner.
If the idea of turning castoff jeans into creepy-chic decor makes your monster heart flutter, grab your shears and your spooky playlist -and let’s do some creepy cutting.

Resurrect your old thrifted jeans with this frightfully spooktacular haunted pennant banner tutorial! Check out the step-by-step guide for turning “dead denim” into a bespoke piece of Halloween home decor that looks amazing in any Haunted Library.
For this project, we will need:
Denim fabric
Halloween print fabric
HeatnBond
Iron and mat
Scissors and/or rotary cutter
Cutting machine (optional)
Fabric marker and pen
Cording – I’m using black/orange and black/orange/white
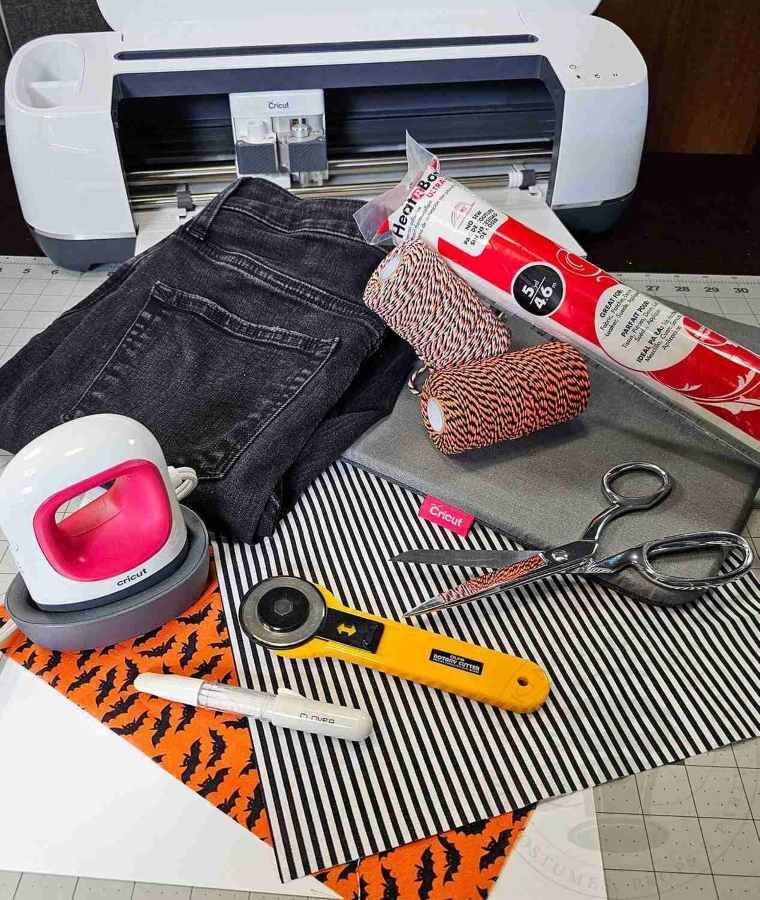
We will also need the Haunted Pennant Banner files from the Haunted Library. Select the SVG to machine cut or the PDF to cut by hand.

Lay open the jeans and cut them along the side and inseam.

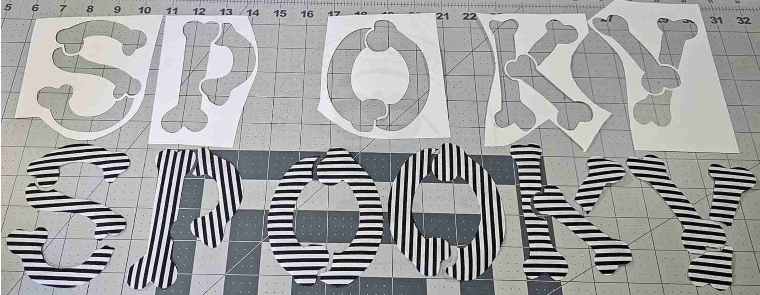
Cut the pennant flag pattern from cardstock and trace it onto the jeans.
The Haunted Pennant Banner file has the pennants sized at 8.2″ by 8.2″ and the letters at 4.5″ tall.
My jeans were petite (size 7), and the six pennant flags barely fit. I managed to get two from the back and one from the front of each leg.
(Can I pause here for a moment of silence in remembrance of the last time I fit into a size seven pair of jeans?)
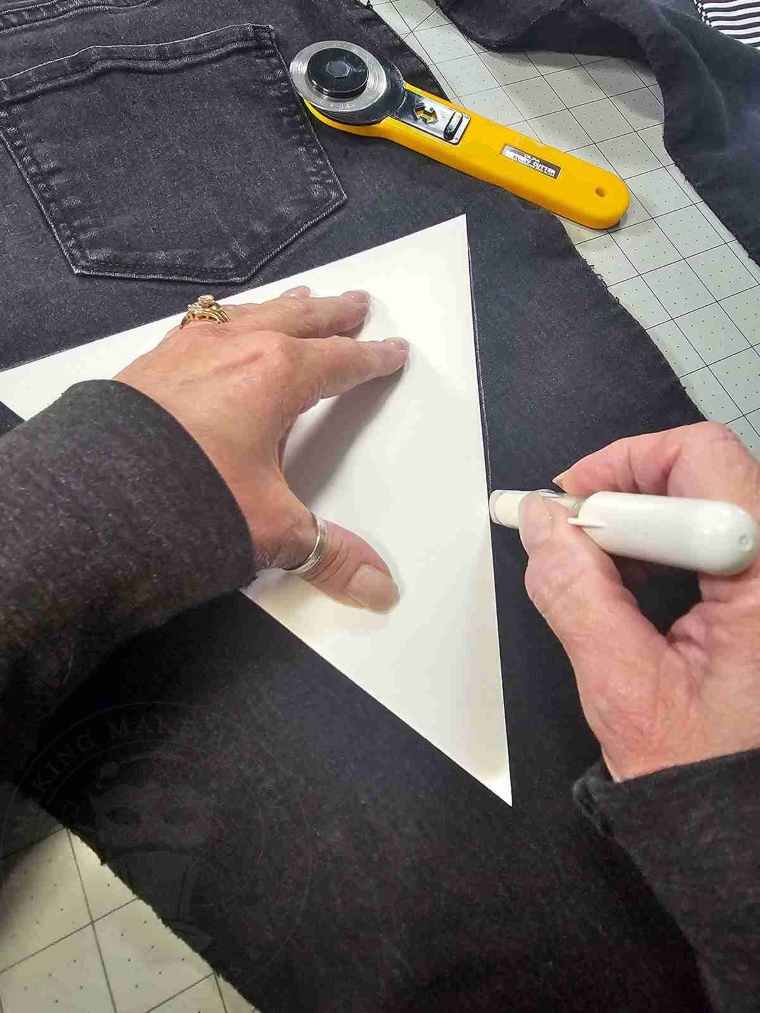
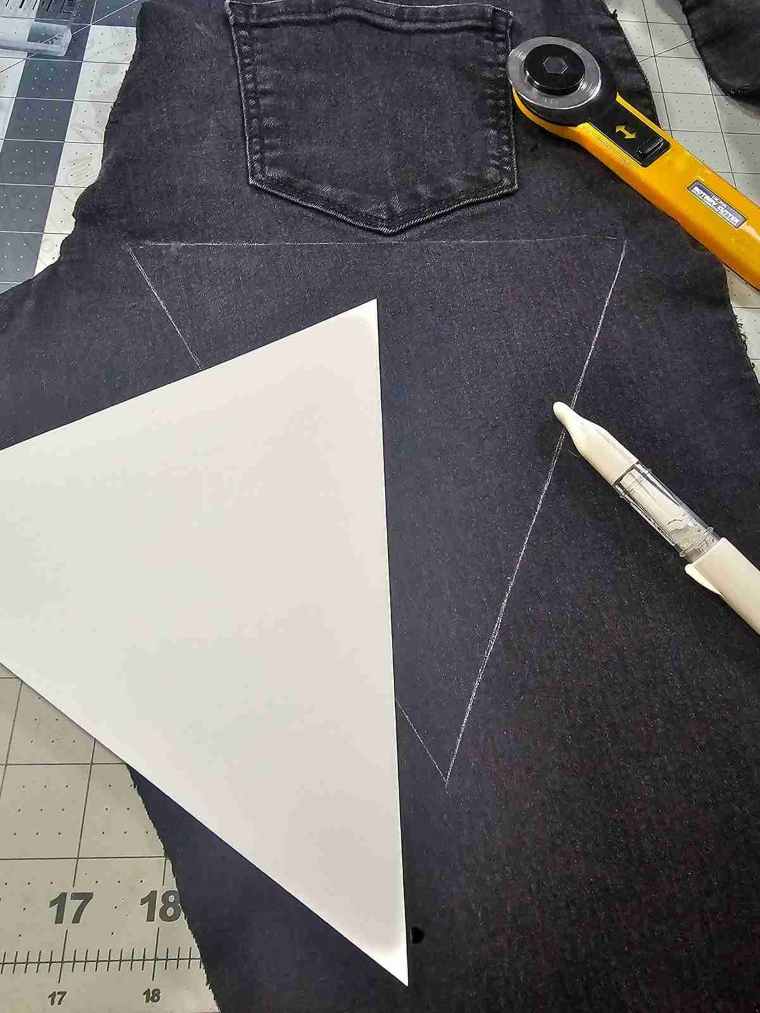
If you wish to shrink or enlarge the pennants, adjust the size of your letters to ensure they fit on your flags.
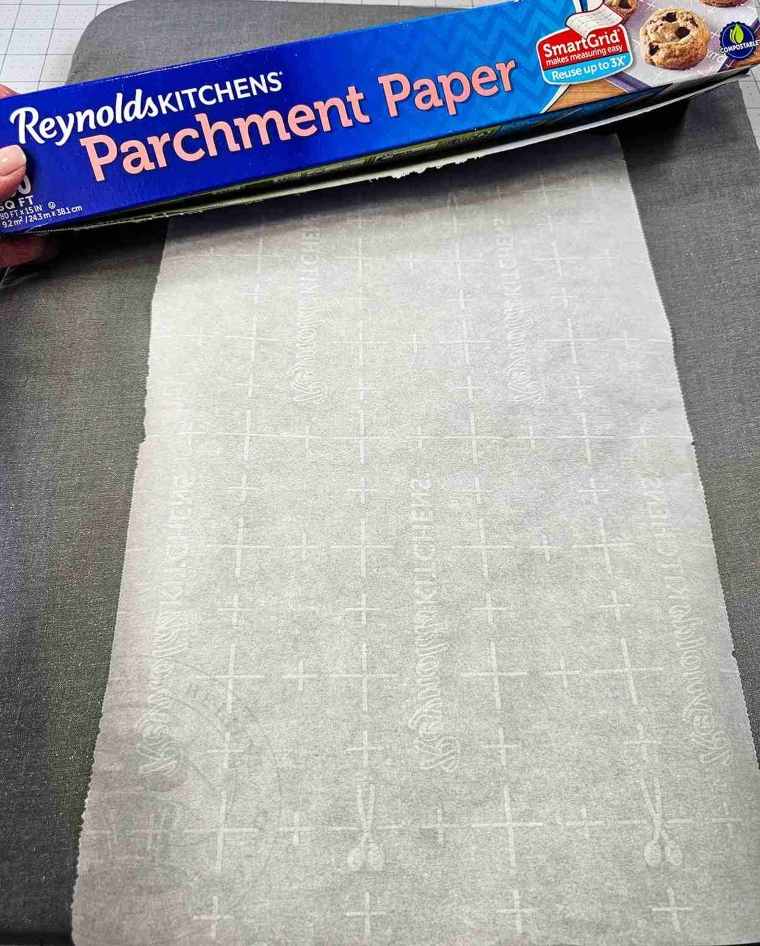
Next, back your Halloween print fabric with HeatnBond, following the instructions on the package.
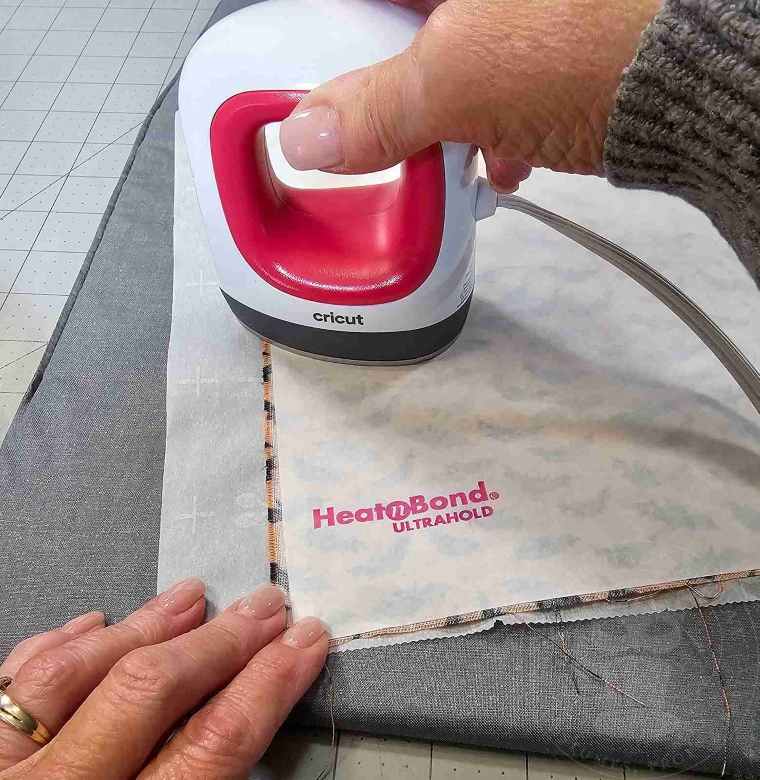
I like to use parchment paper as an extra layer of protection against any adhesive from the HeatnBond sticking to my pressing mat.
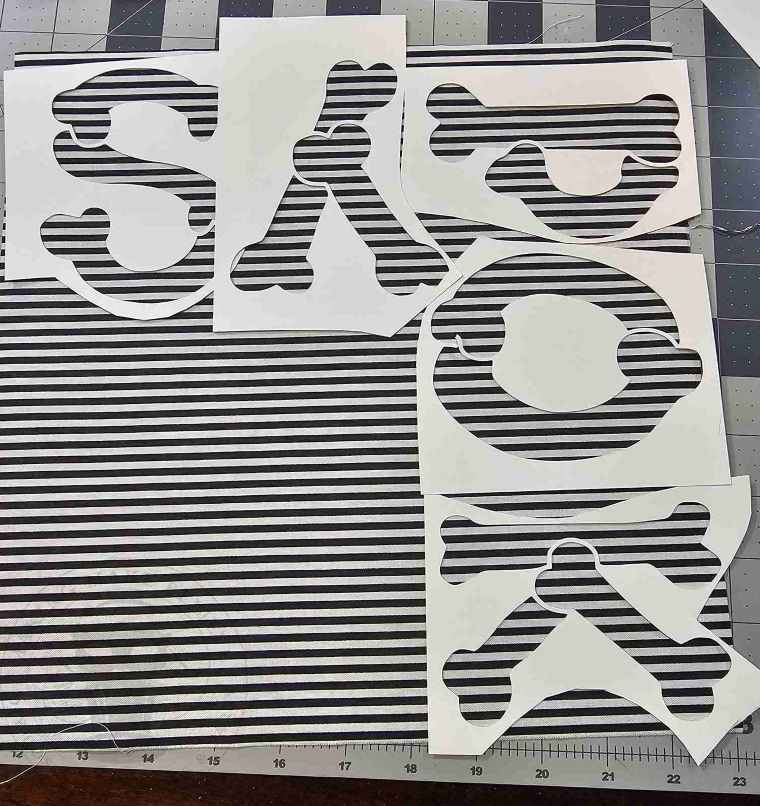
While the fabric cools down, cut out the bony letters from cardstock. You can cut these by hand or with a cutting machine.
Set the letters aside for another project and cut around each stencil letter.
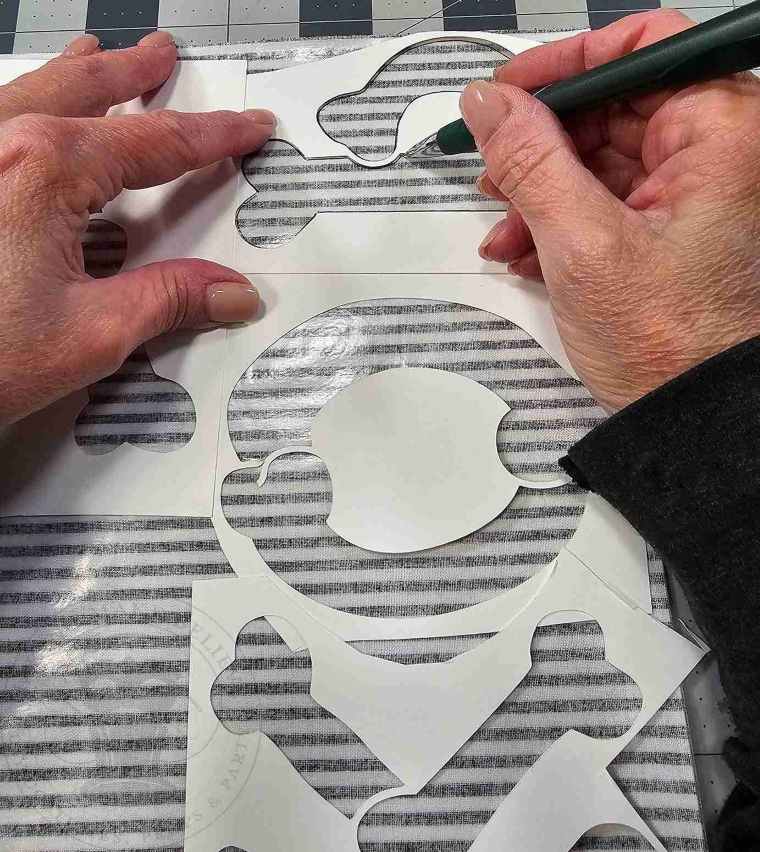
Remove the paper backing from the HeatnBond, and place the pretty side of your fabric down.
Mirror (flip backward) the stencil of each letter and trace on the fabric.
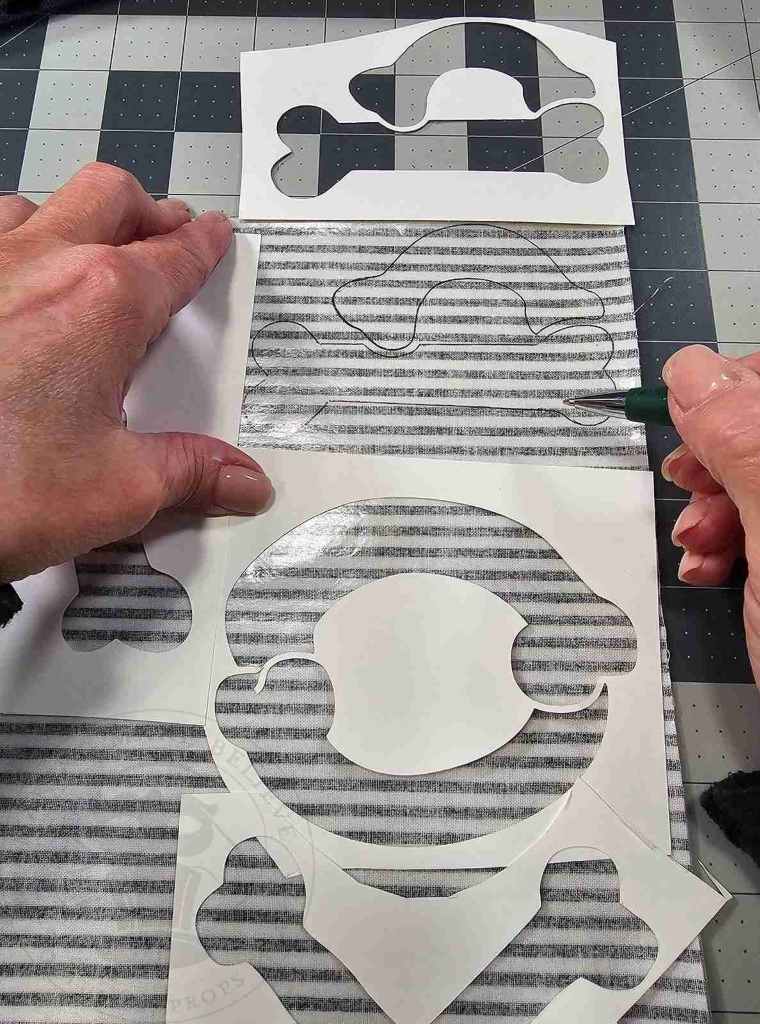
Optionally, if you prefer, cut the letters from the HeatnBond-backed fabric directly on your cutting machine.
I cut mine by hand for two reasons: one – it’s a pretty simple cut, and two – I have yet to master cutting HeatnBond-backed fabric on my Cricut machine.
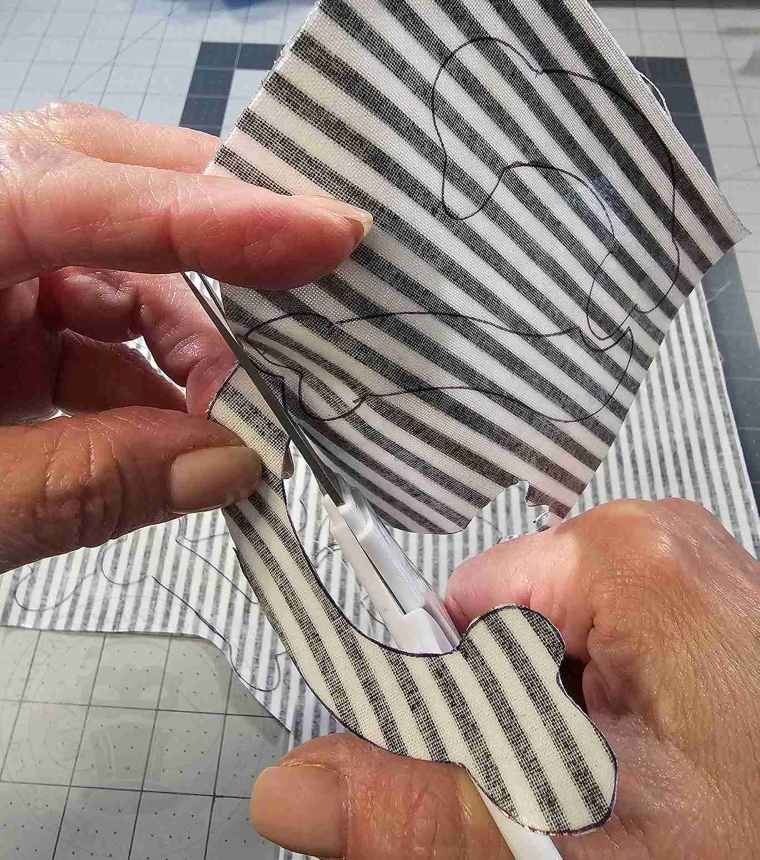
Pro tip: Keep all the little bony bits together by letter to avoid disappointment and future regret.
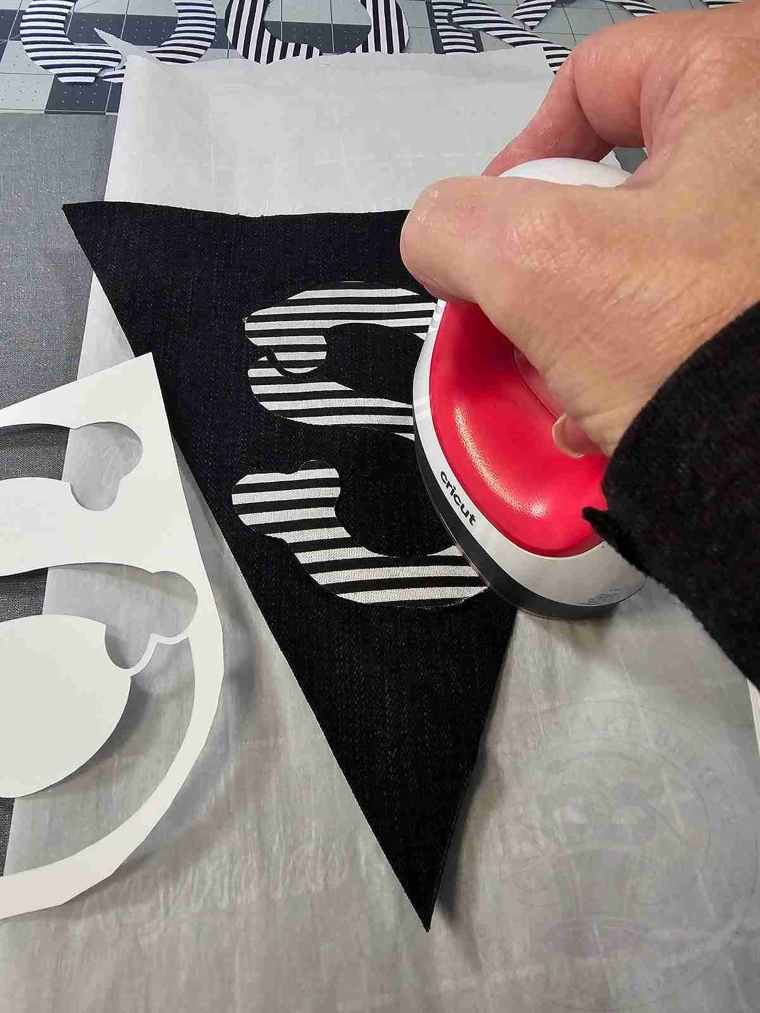
Position each letter on a pennant. I like to use the stencil pieces to help me align the bones.
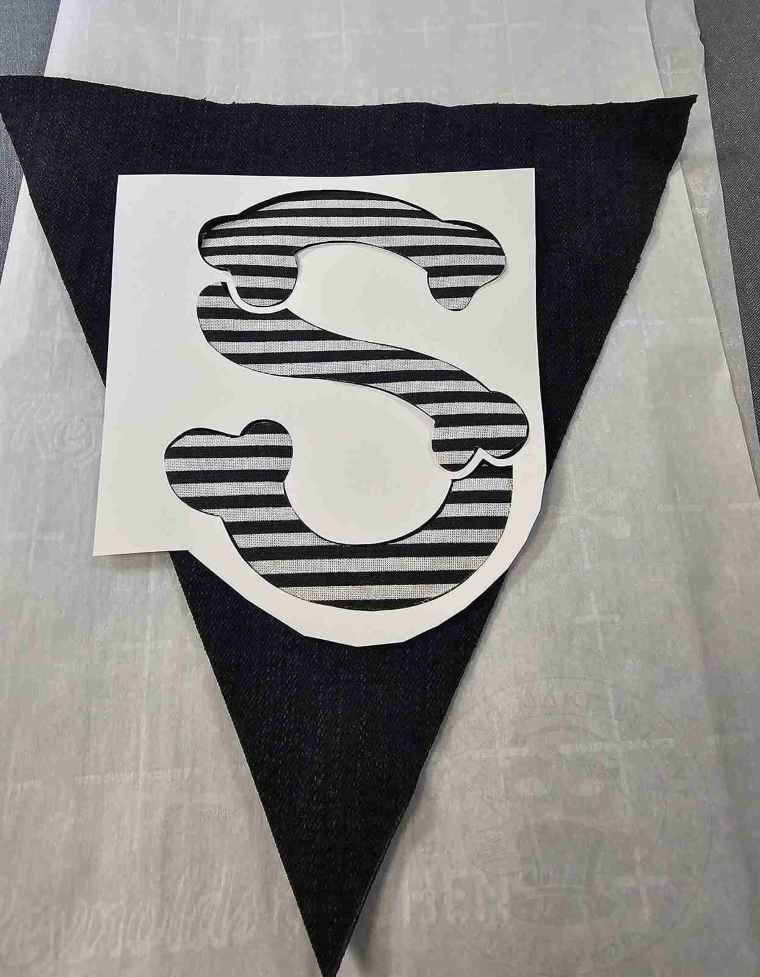
Once you have the letter where you like it, use the EasyPress Mini iron to press it into place.
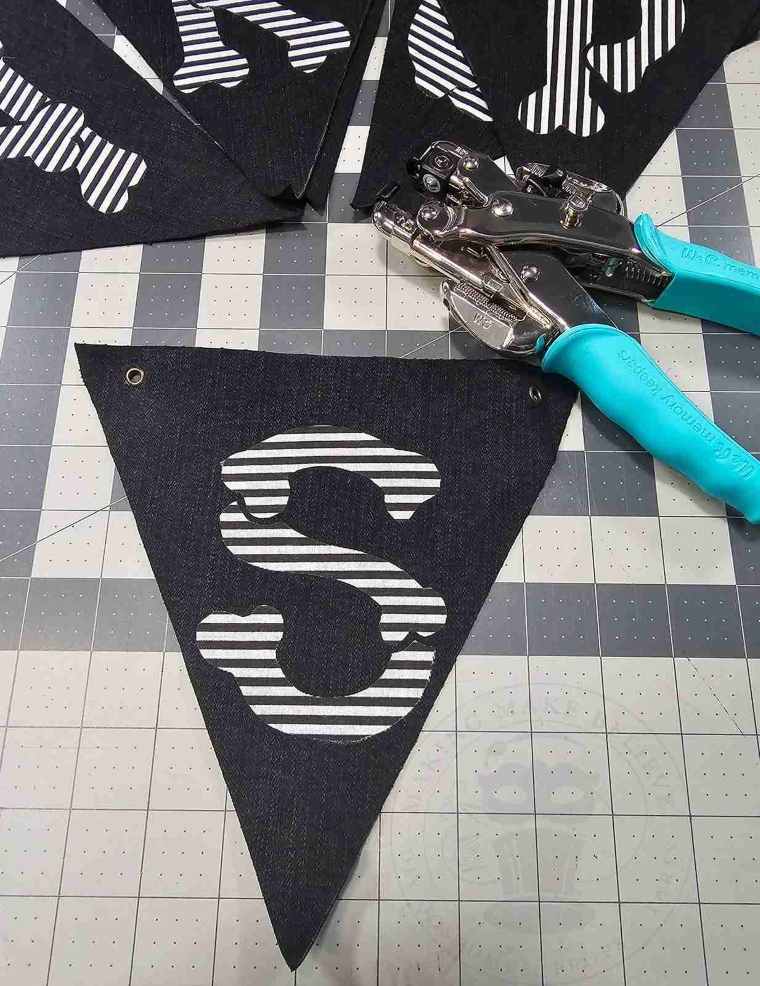
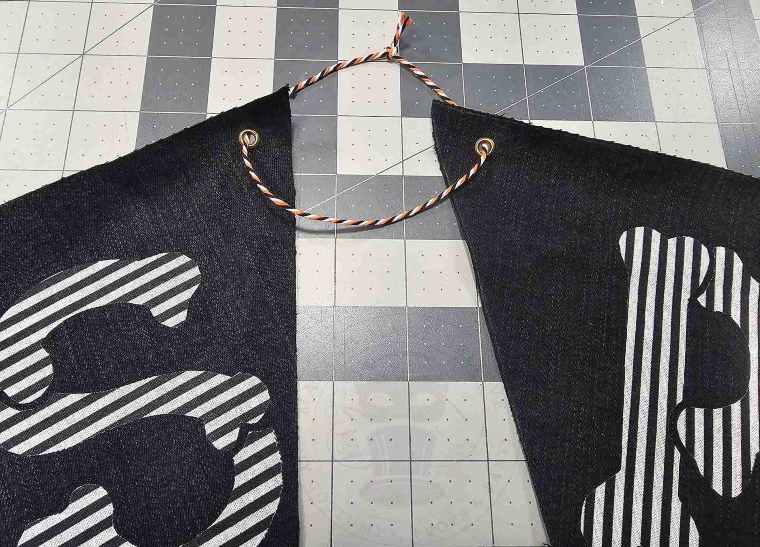
To string the haunted pennant banner, make a small hole along the top near each corner. A snip with the scissors will suffice, but I like a bit of extra, so I opted to add eyelets.
In addition to the fact that I love the look of the eyelets, I wanted to test out my latest crafty tool, a We Are Makers Crop-A-Dile.
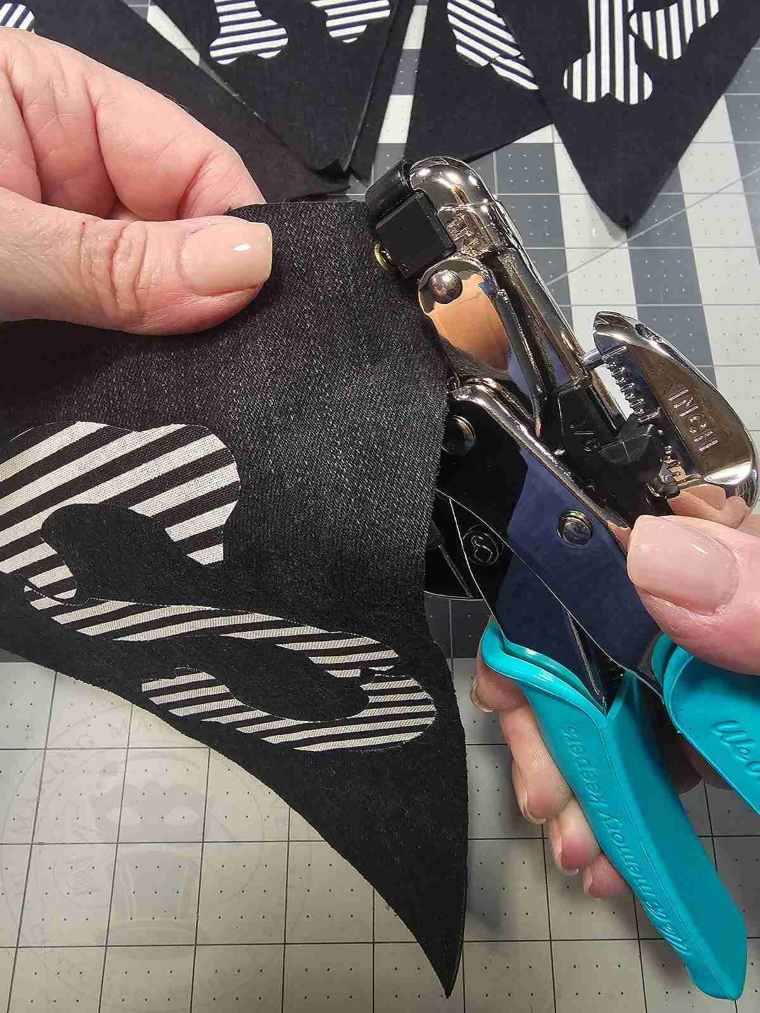
This critter was very intimidating but after reading the instructions, watching a video or two, and doing some test runs, I am loving it!
This small but mighty tool makes adding grommets and eyelets so simple, I may have to add them to every project.
Cut approximately 12″ of cording. Run the cording through the holes from the front to back of two adjoining letter pennants and knot to secure.
Repeat with each pennant.
Finally, tuck each knot behind a pennant, add a loop of cording at each end, and hang.
There’s something perfectly Halloween-y about upcycling forgotten fabrics. It’s almost like raising them from the grave.
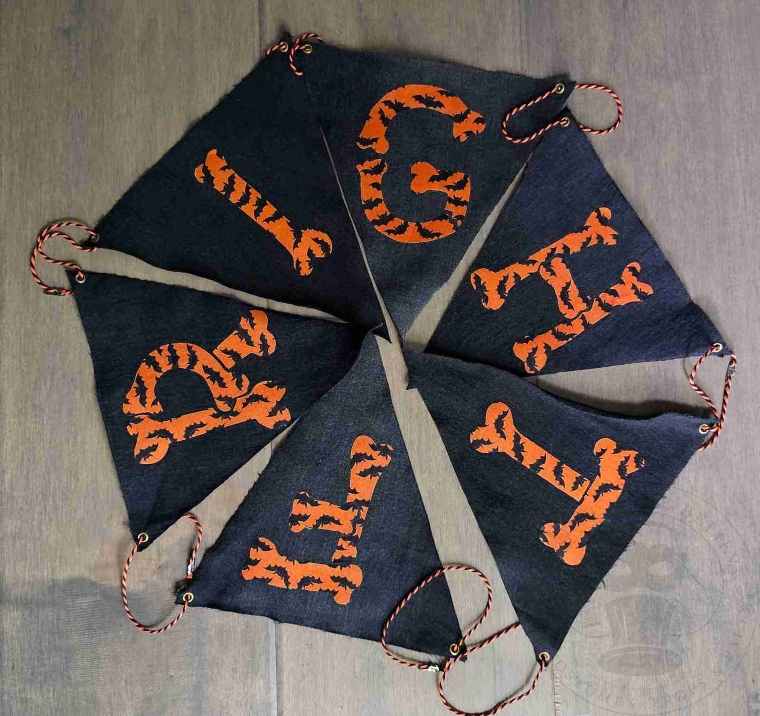
Are you team Spooky or team Fright?
Until next time – haunted dreams and Halloween screams.