

A few years ago, I decided it was time to perform a full-scale excavation of the Costume Closet in my studio. Not a gentle tidy-up – a complete, floor-covered, chaos-inducing purge. Every overstuffed bin, every gloriously weird costume piece, and every spooky accessory came out so I could see exactly what haunted treasures I actually owned.
It took a while. I’ve become something of a Tetris master when it comes to packing that closet for the off-season. So good, in fact, that certain pieces occasionally vanish into the dark recesses like lost relics in a cursed crypt.
And that’s exactly what happened to a whole collection of latex Halloween masks. Somehow they had slipped into the shadows of the closet, completely forgotten – which felt like the perfect reminder that these wonderfully creepy masks deserve a little more attention when it comes to wearing, caring for, and storing them properly. Because if you’re a true Halloween fanatic, your masks should be ready to terrify at a moment’s notice
When I finally unearthed them, I had that all-too-familiar moment of, “Oh yeah… I forgot I had those.” Tell me I’m not the only one who does this? Half the fun of digging through Halloween storage is rediscovering spooky treasures you completely forgot existed.
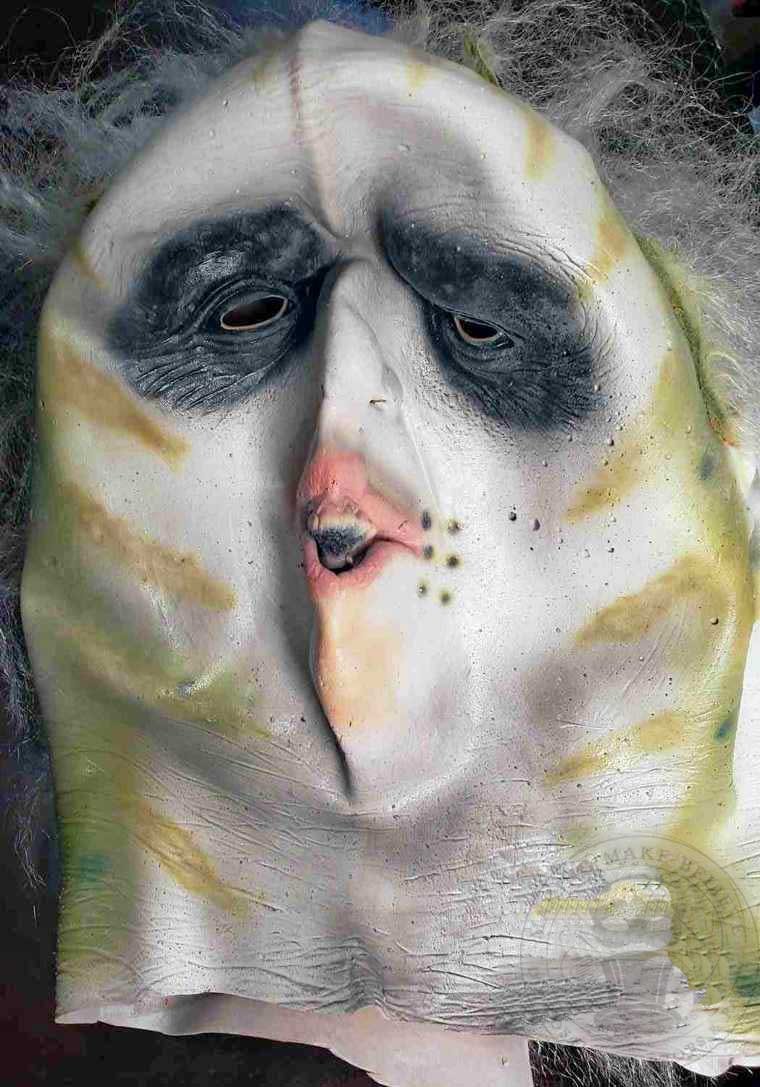
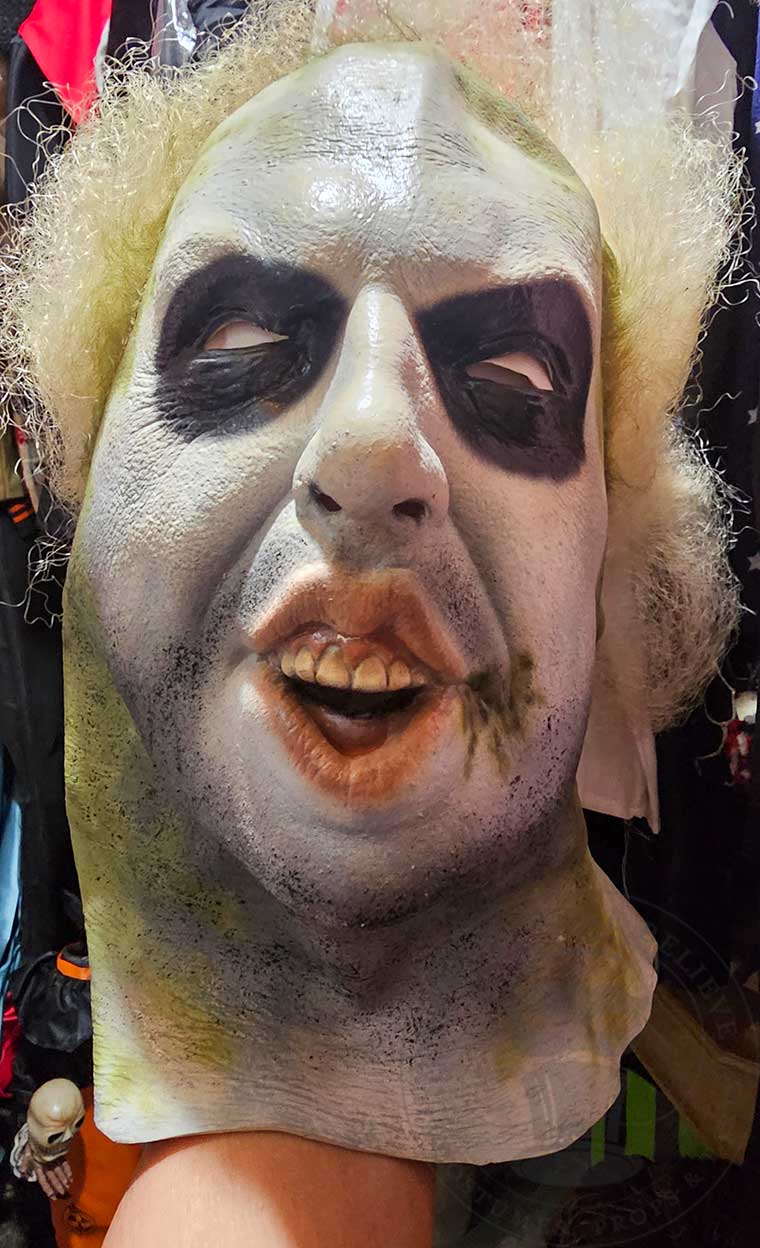
Most of the masks were still in excellent shape – exactly how a Halloween fanatic would hope to find them. But a couple of them didn’t survive their time in the Costume Closet quite so gracefully. Turns out latex masks can be a little fussy if you don’t store them properly.
So consider this a friendly warning from someone who learned the hard way. If you want your creepy collection to stay hauntingly good for years to come, here are a few simple tips to help you wear, care for, and store your latex Halloween masks without accidentally ruining them.

Don’t let that Halloween latex mask get smashed and damaged! Save this tip list to avoid a disguise disaster.

Before you make your grand entrance at the party, do yourself a favor and take your mask for a test haunt. Even better – if you’re shopping in person – try it on in the store before committing.
Most Halloween latex masks are designed as one-size-fits-most, which is a polite way of saying they’ll fit every head a little differently. What looks perfectly sinister on the display wall might sit a little crooked, tight, or awkward once it’s actually on your own skull.
A quick test drive lets you check the fit, see how well you can breathe and see, and make sure the mask feels comfortable enough to wear for more than five minutes. After all, the goal is to terrorize the party in style, not spend the night wrestling with a rebellious mask.
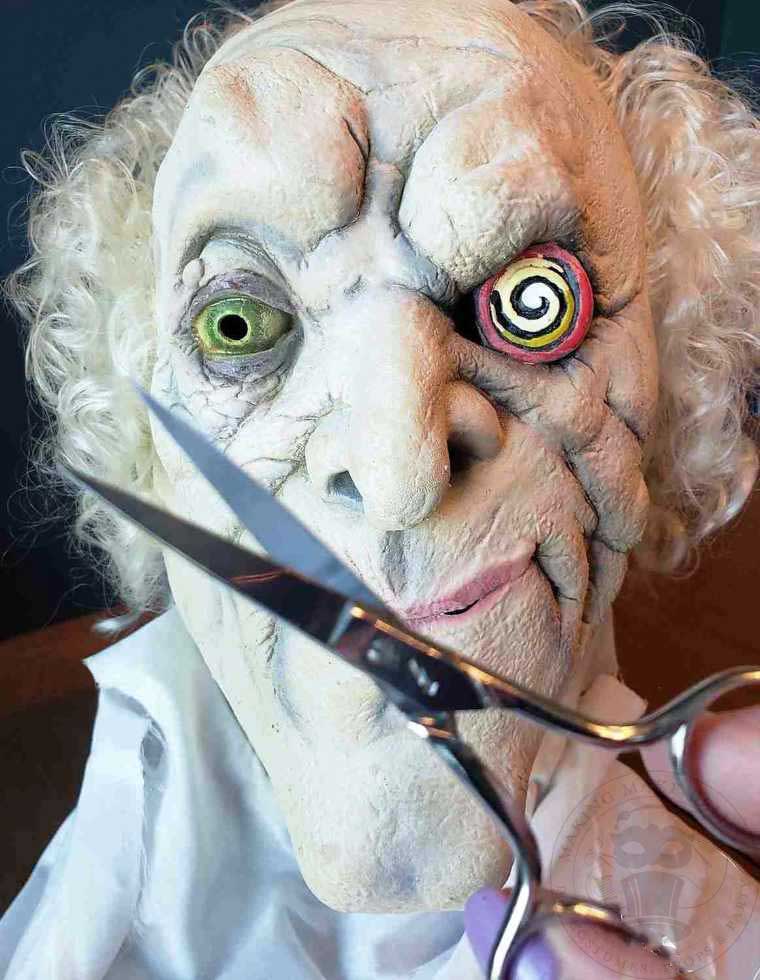
Once you slip on your mask, take a moment to check your line of sight. If the eye openings feel a little restrictive – or your view of the haunted festivities looks more like a blurry tunnel – it’s time for a small adjustment.
Using a pair of small, sharp scissors, carefully enlarge the eye slits. The key here is patience: trim just a tiny bit at a time, then try the mask on again to check the fit. A gradual approach keeps you from accidentally turning subtle eye openings into giant cartoon holes.
You can use this same careful trimming method to slightly open the nostril or mouth areas if the mask feels stuffy. A little extra airflow can make a huge difference when you’re wearing your mask for an entire evening of spooky shenanigans.
Some latex masks – especially the oversized, extra-dramatic ones – have a habit of sliding down your head so your eyes end up staring out through the mask’s forehead instead of the eye holes. Not exactly the terrifying effect you were going for.
Luckily, this is an easy fix.
Grab a small piece of upholstery foam or craft/project foam and a little rubber cement. Trim the foam to size and place it inside the top of the mask, right above where your head sits. This added padding lifts the mask so the eye openings line up properly with your own.
Before committing, use painter’s tape to temporarily hold the foam in place while you try the mask on and make adjustments. Once everything lines up perfectly, secure the foam permanently with rubber cement.
And here’s a surprisingly effective trick – bladder control pads. I know – it sounds ridiculous, but they actually work great for masks that only need a tiny bit of lift. They’re soft, pre-padded, and already have adhesive backing, so you can stick one inside the mask and remove it later if needed.
What can I say – sometimes the best Halloween hacks are the weirdest ones?
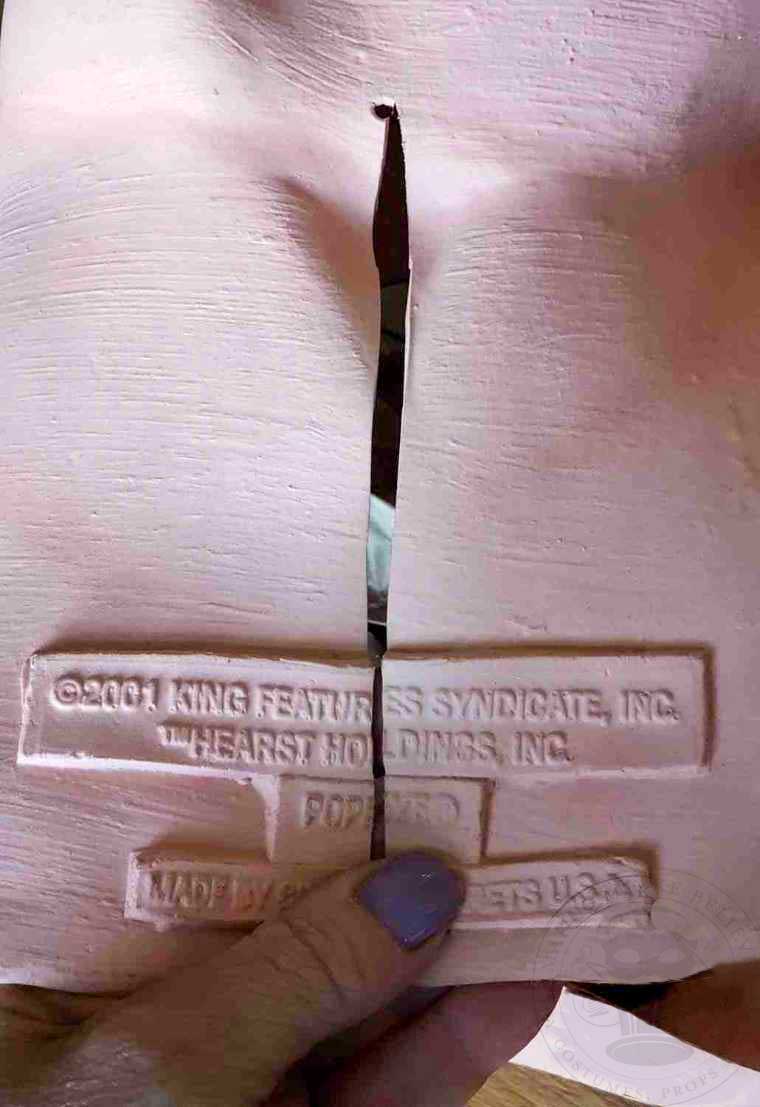
If you got stuck back at Tip 1 because the mask wouldn’t even stretch over your gloriously oversized skull, don’t worry – we’ve got a fix for that too.
Turn the mask around and look at the back seam. Many masks already have a small slit there. All we need to do is carefully extend it. Grab those small, sharp scissors again and slowly lengthen the slit a little at a time. Try the mask on between cuts and be gentle – pulling too hard while testing the fit can tear the latex.
Once the opening is large enough to comfortably fit your noggin, finish the cut by trimming a small circle at the top of the slit (a hole punch works great for this). That little circle acts as a stopper and helps prevent the slit from continuing to tear upward.
Some full-over-the-head masks don’t come with a slit at all. In that case, simply locate the center back of the mask and create your own slit using the same method – ending with that small circle at the top for reinforcement.
At some point during the party – or halfway through a haunted house shift – you may briefly question your life choices. Latex masks can get warm – very warm. But most Halloween diehards will agree the heat is absolutely worth the shrieks, screams, and startled jumps.
Before storing your mask after its night of terrorizing the neighborhood, give it a quick cleanup. Most mask manufacturers recommend using mild dish soap diluted in water. Dip a paper towel into the soapy solution and gently wipe the interior of the mask – especially around the eyes, nose, and mouth areas, where moisture tends to collect.
Once cleaned, allow the mask to dry completely before putting it away. Skipping this step can lead to unpleasant odors or damage to the latex, and nobody wants that haunting their costume closet.

When the party ends and the fog machine shuts down, resist the urge to toss your mask into the trunk of your car until next October.
Instead, start with your clean, completely dry mask (see Tip 5). Gently stuff it with paper or plastic grocery bags so it holds its natural shape. You don’t need to pack it tightly – just enough to keep the face from collapsing or wrinkling.
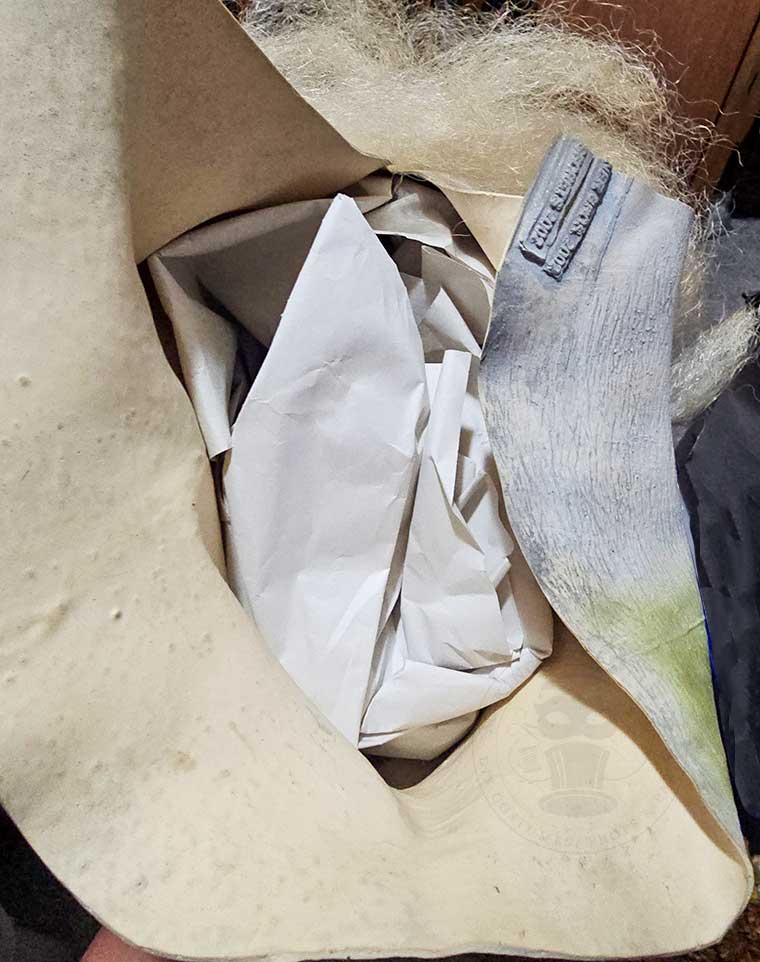
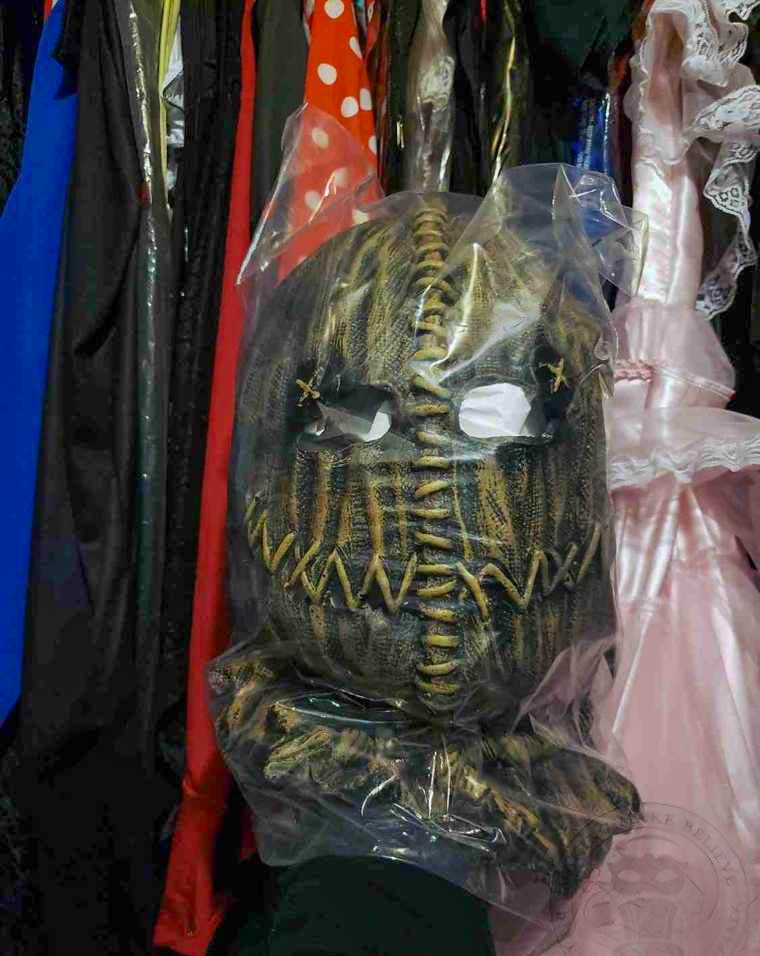
Next, place the stuffed mask inside a plastic bag and store it somewhere cool, dark, and dry, like a closet or storage bin.
Taking a few minutes to store your masks properly means they’ll be ready for the next Halloween season without unpleasant surprises. In fact, after learning this lesson the hard way, I can finally say that all the masks in my Costume Closet are now properly stuffed, bagged, and easy to find.
Hopefully, these Halloween latex mask tips will help you keep your own creepy collection in terrifyingly good shape for many Halloweens to come.
Until next time – stay spooky.
