
Some projects arrive quietly. Others kick the door open and refuse to leave your brain alone.
This one? Definitely the latter.
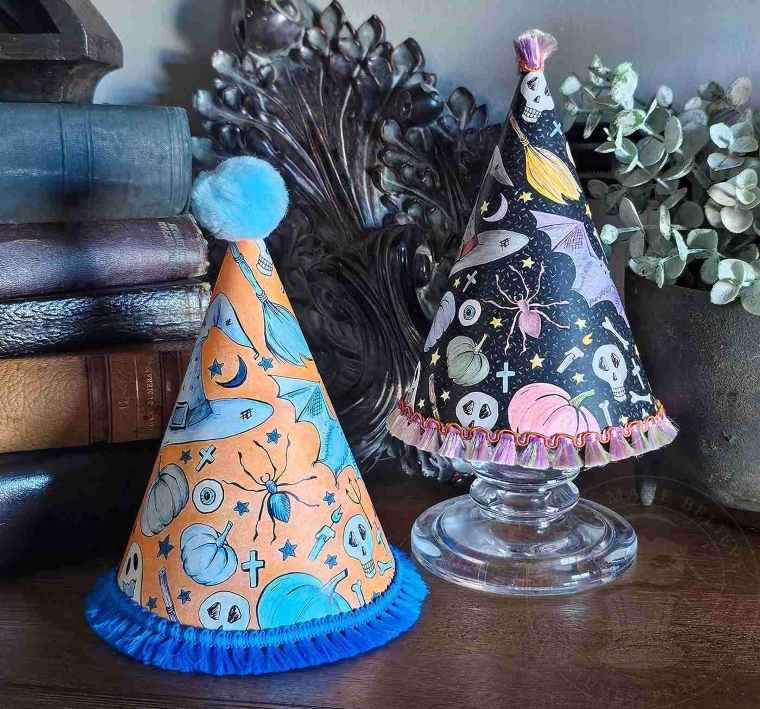
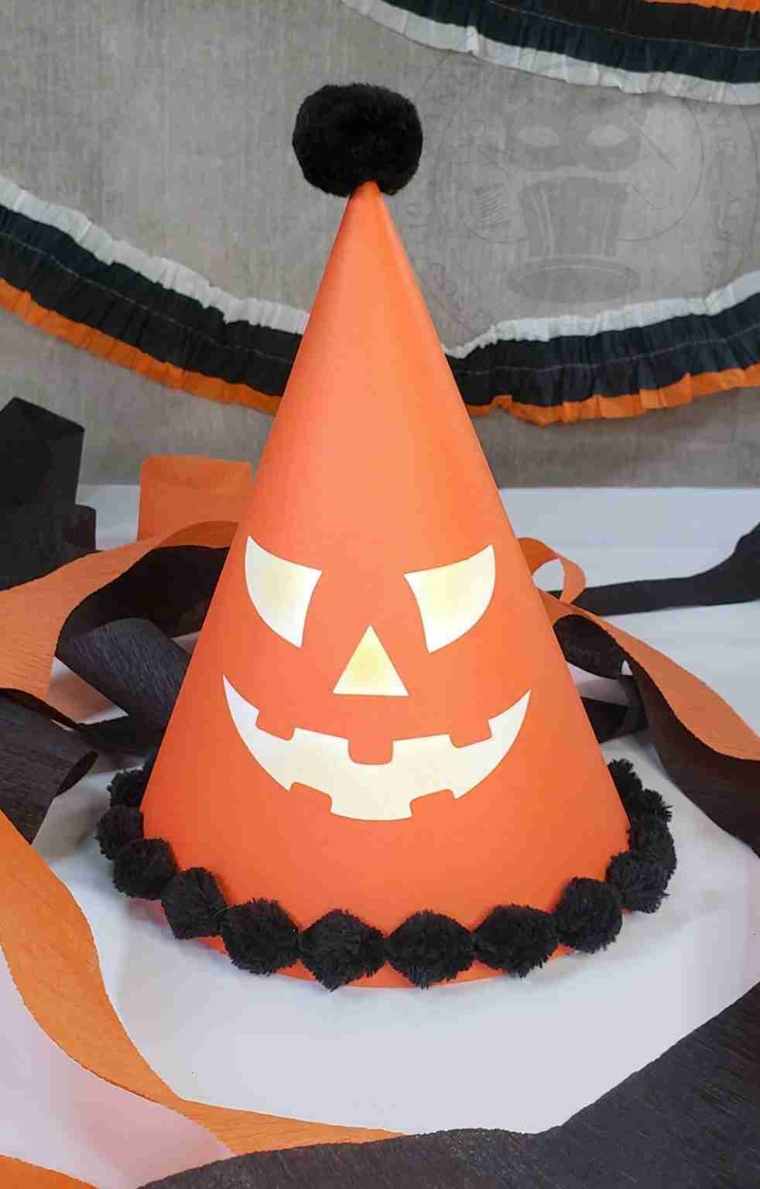
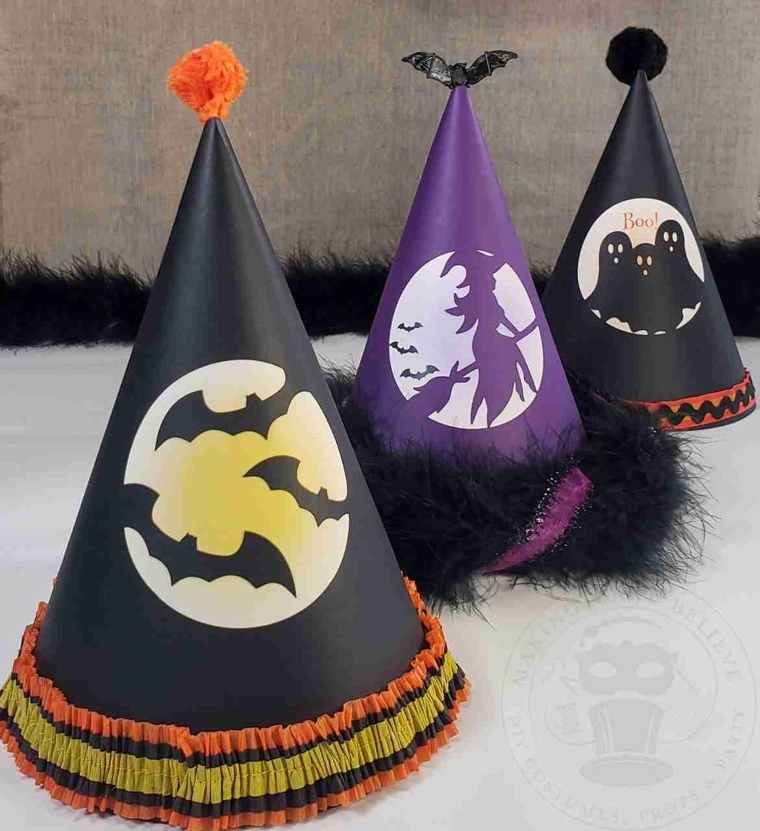
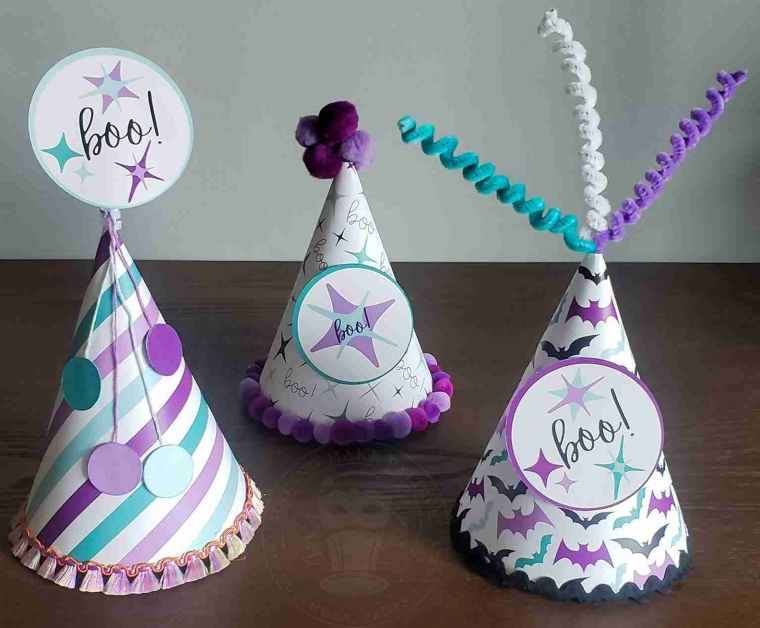
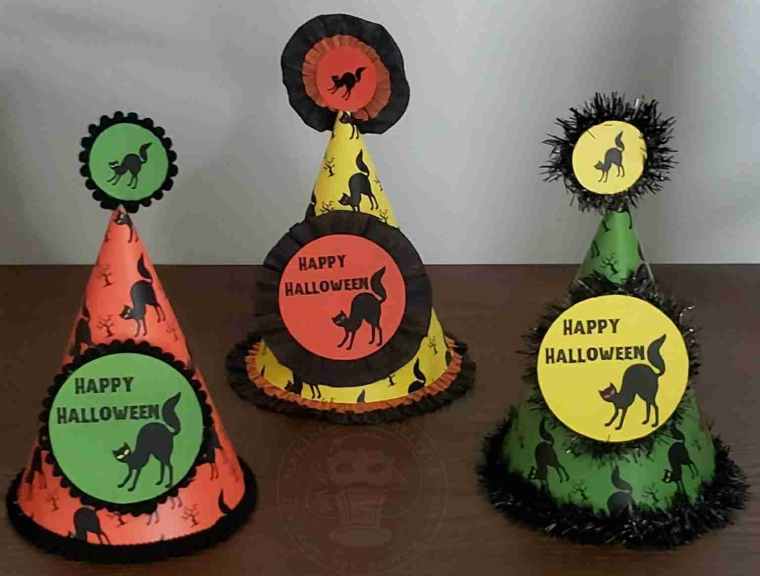
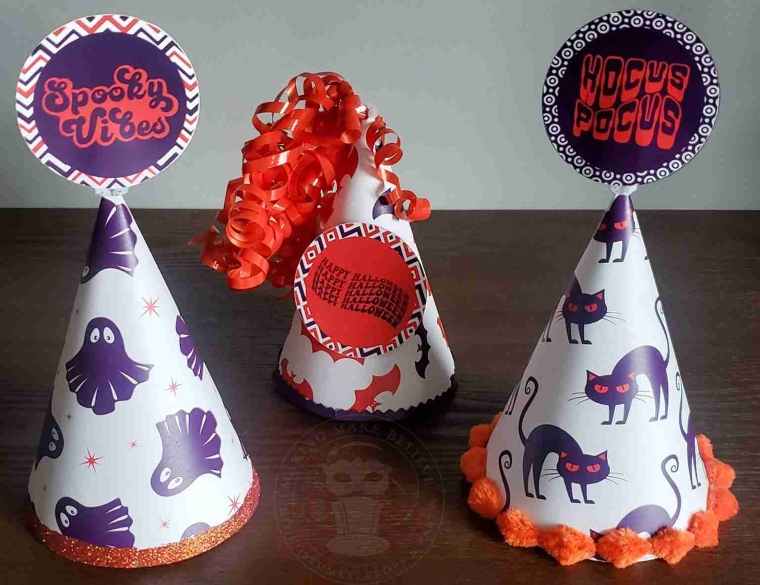
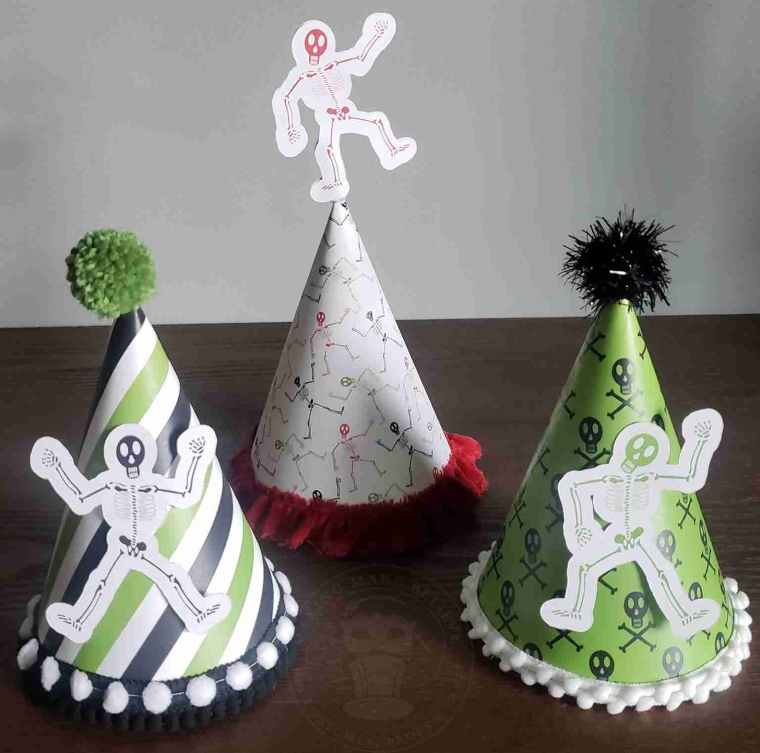
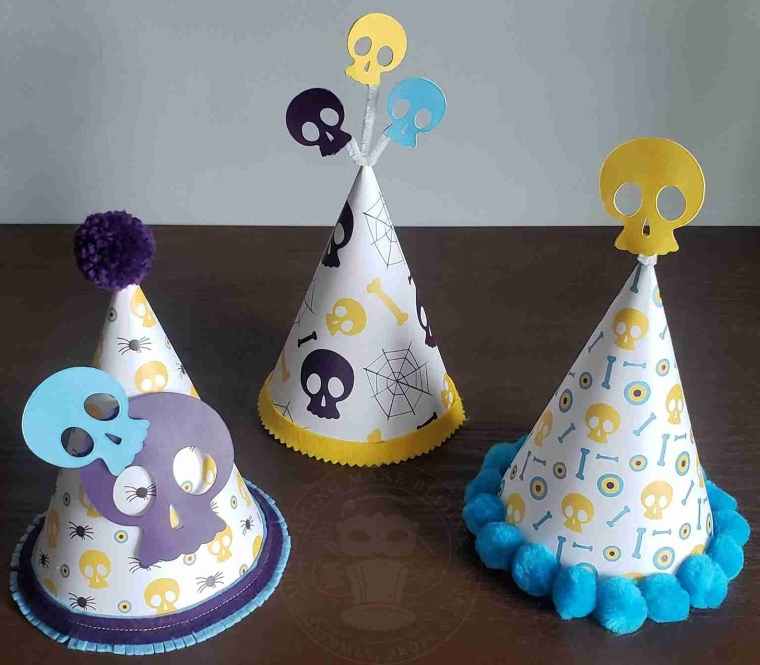
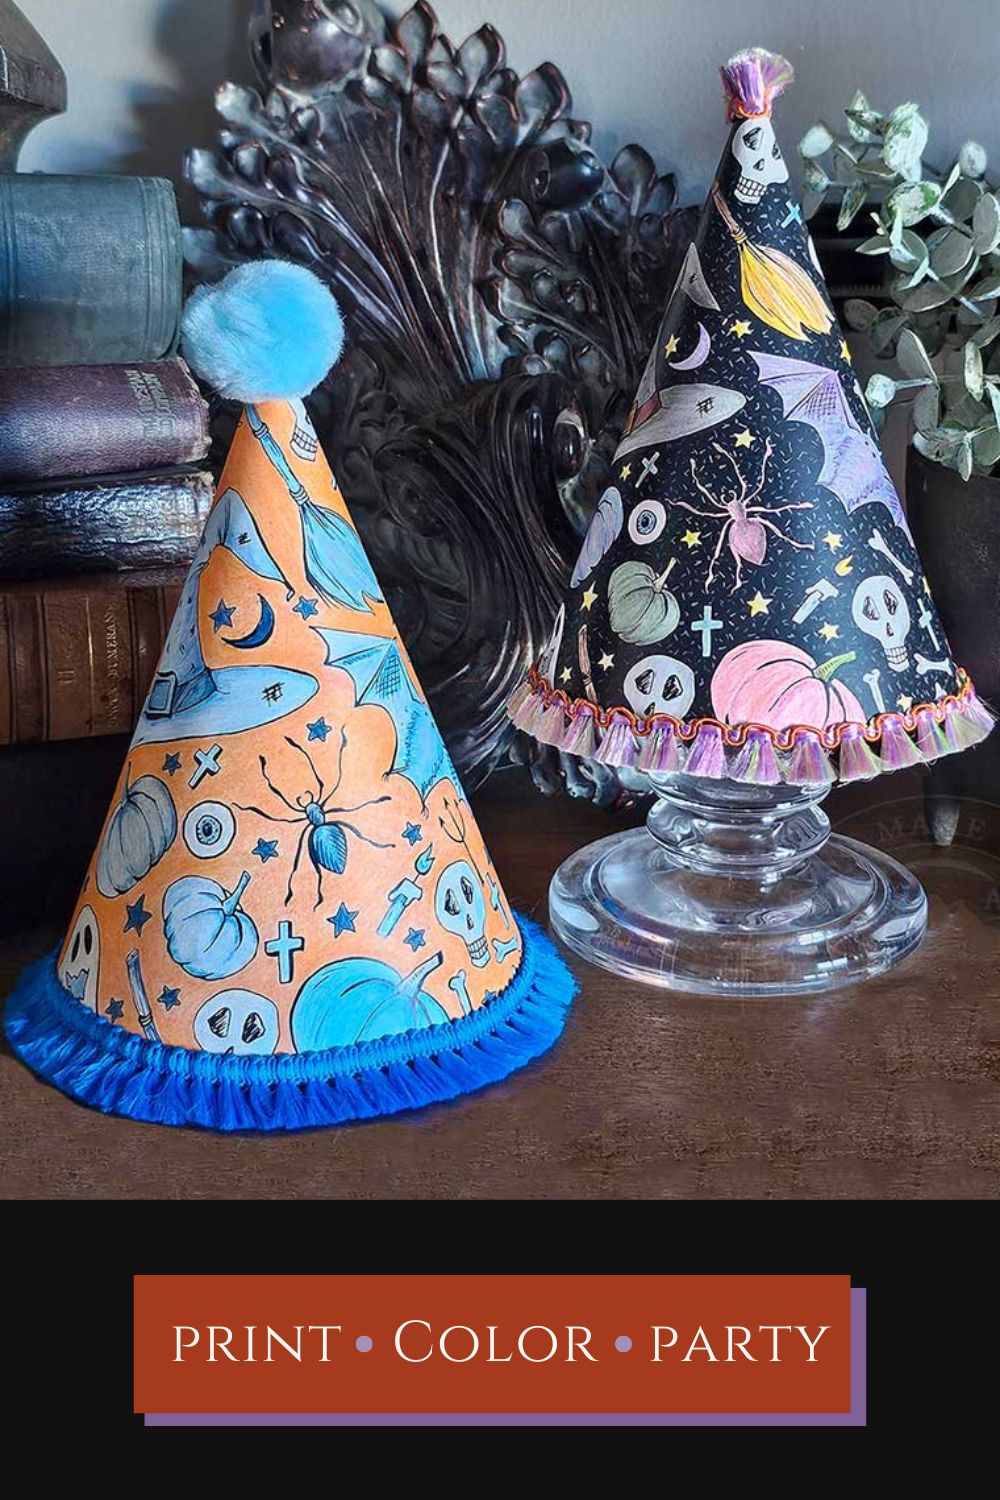
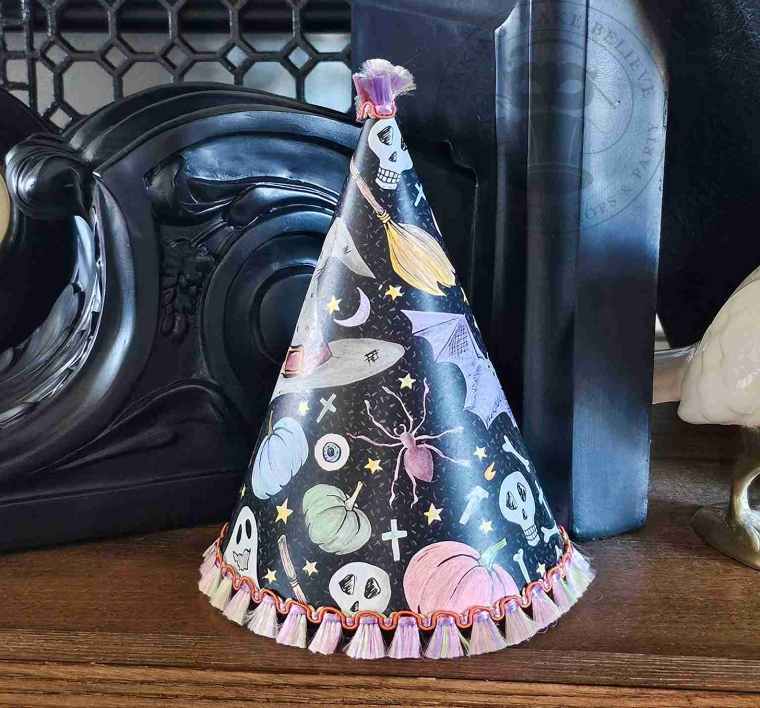
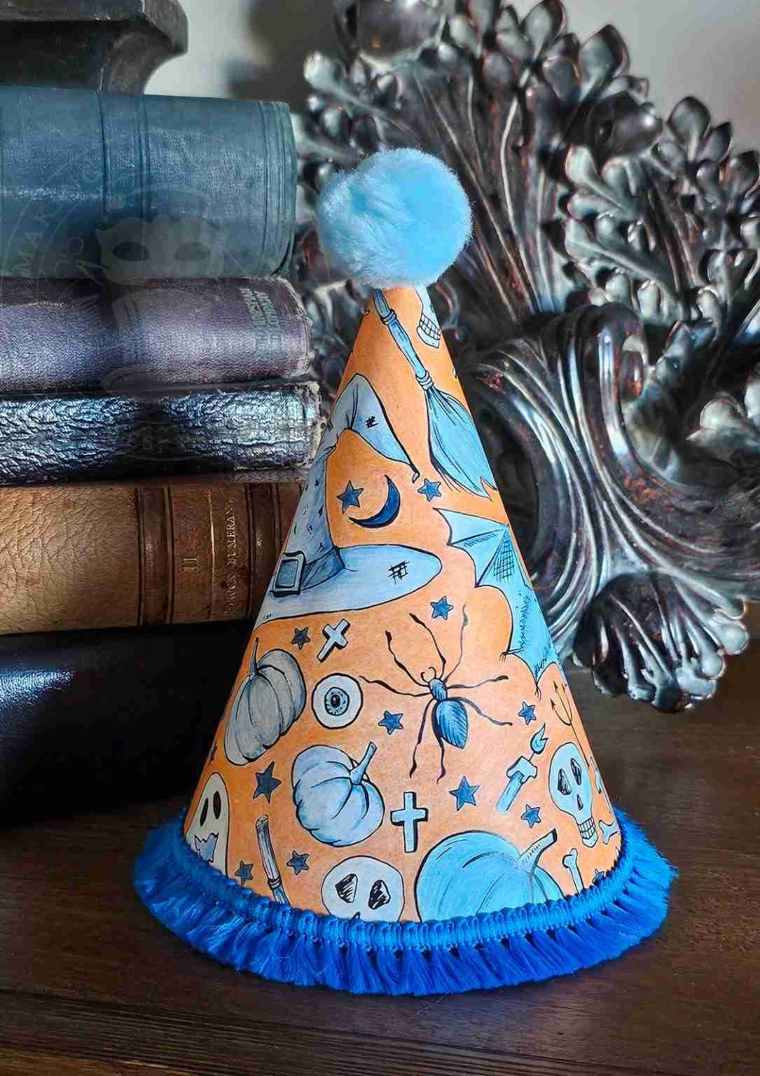
What started as a single Jack O’Lantern party hat quickly spiraled into a full-blown design obsession. One idea turned into three. Three turned into five. Before long, I had an entire collection of hand-crafted party hats staring back at me – each one begging for its moment.
And just when I thought I was finished – another version insisted on existing.
This time, it’s all about slowing down and indulging in a little creative ritual or – what I like to call craft therapy – coloring.
Because let’s be honest- there’s something deeply satisfying about sitting down with a fresh design, a sharp set of pencils, and absolutely no rush.
Whether you’re crafting solo with a cozy drink nearby or hosting a low-key Halloween gathering, these color-your-own party hats bring just the right amount of festive mischief, with the bonus of being wearable.
So if a bit of creepy coloring sounds like a good way to spend some time, this project is for you.

Keep this printable handy for your next Halloween gathering or quiet creative night – just save it to your favorite board.
For this project, we will need:
White cardstock
Printer
Scissors or finger blade
Colored pencils, markers, or crayons
Adhesive (glue stick or roll-on adhesive)
Small hole punch
Elastic cording
Embellishments (optional)
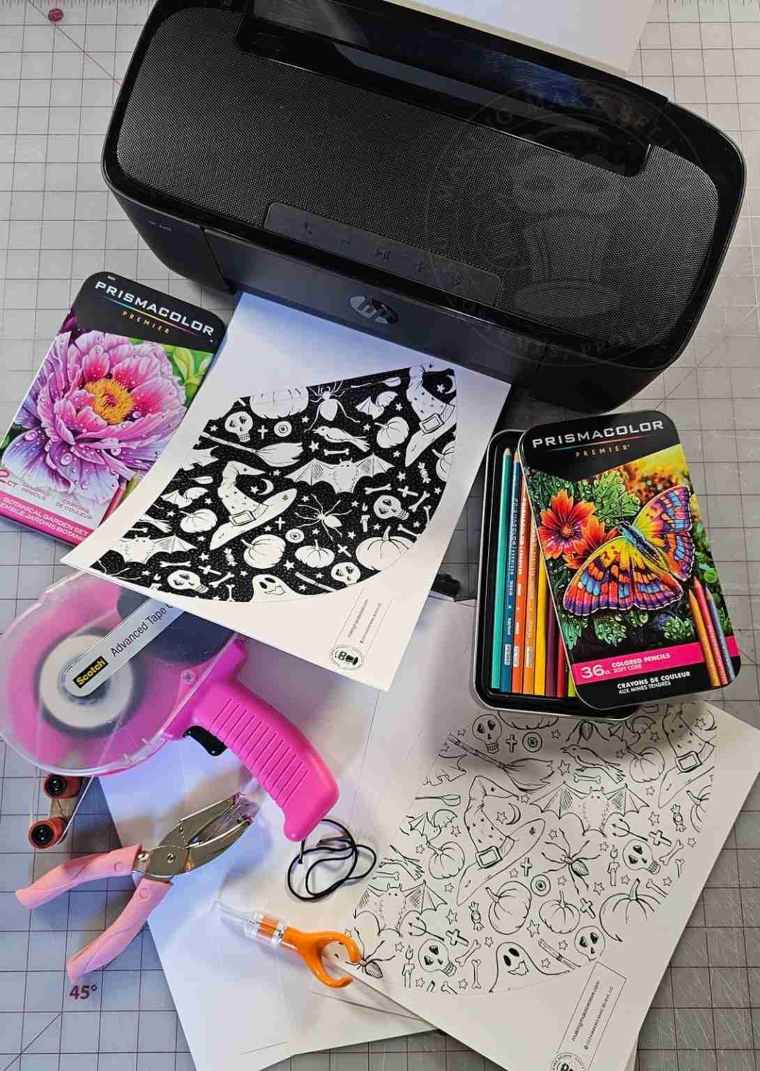
You’ll also need the Printable Halloween Party Hat Coloring Sheet from the Haunted Library.

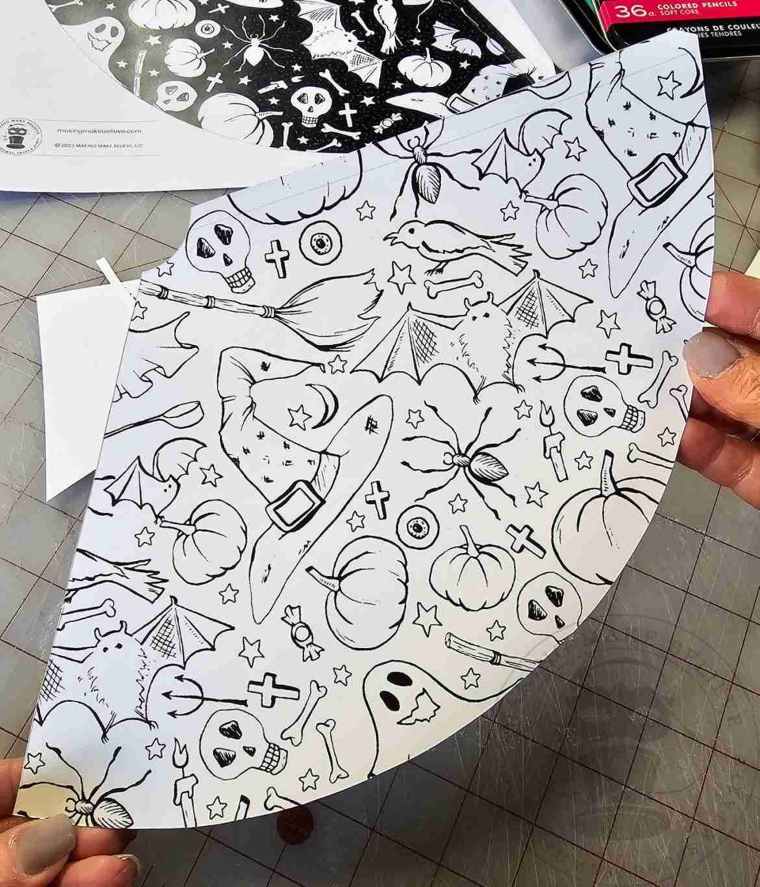
Open your printable party hat file using your preferred PDF reader (Adobe Reader, FoxIt, or similar). Print onto white cardstock for a crisp, sturdy finish.
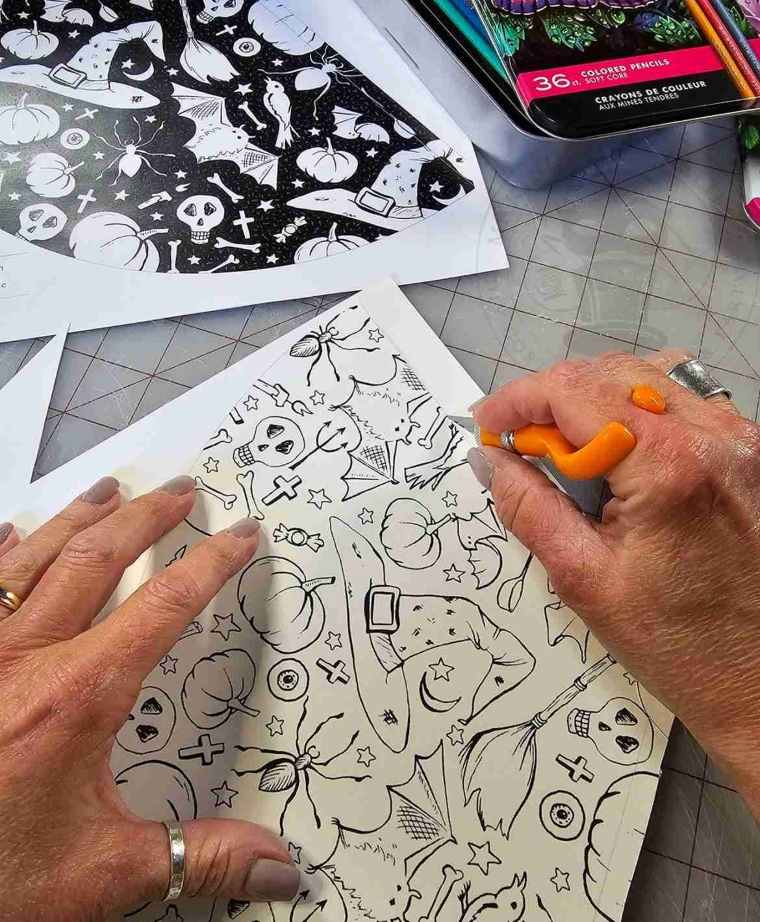
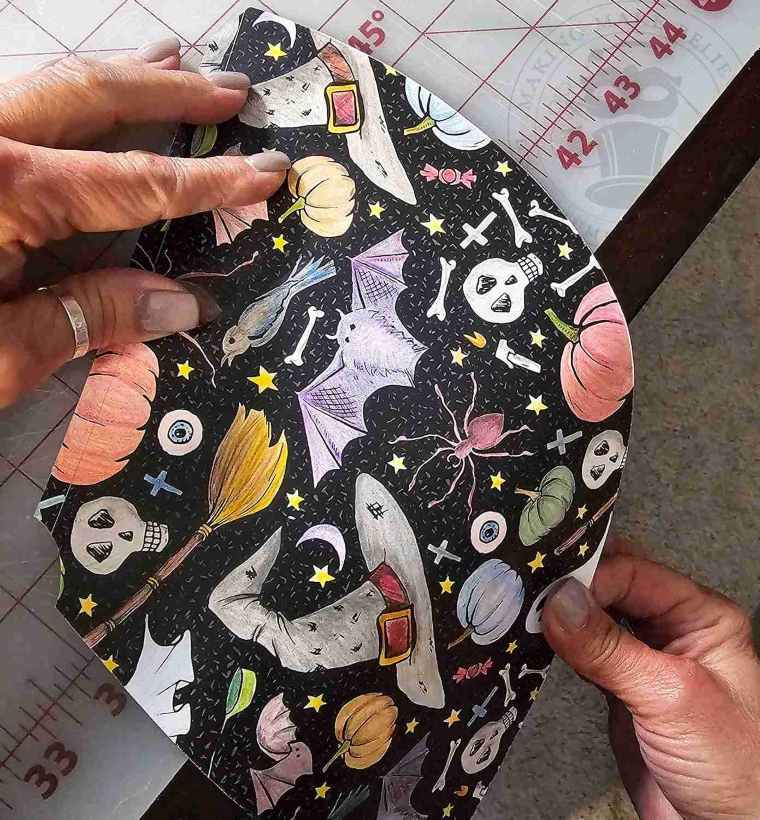
Carefully cut out each hat shape using scissors or a finger blade.
A quick note before you start trimming:
The solid line along the straight edge is your overlap guide – not a cutting line. Leave it intact so your hat assembles perfectly.
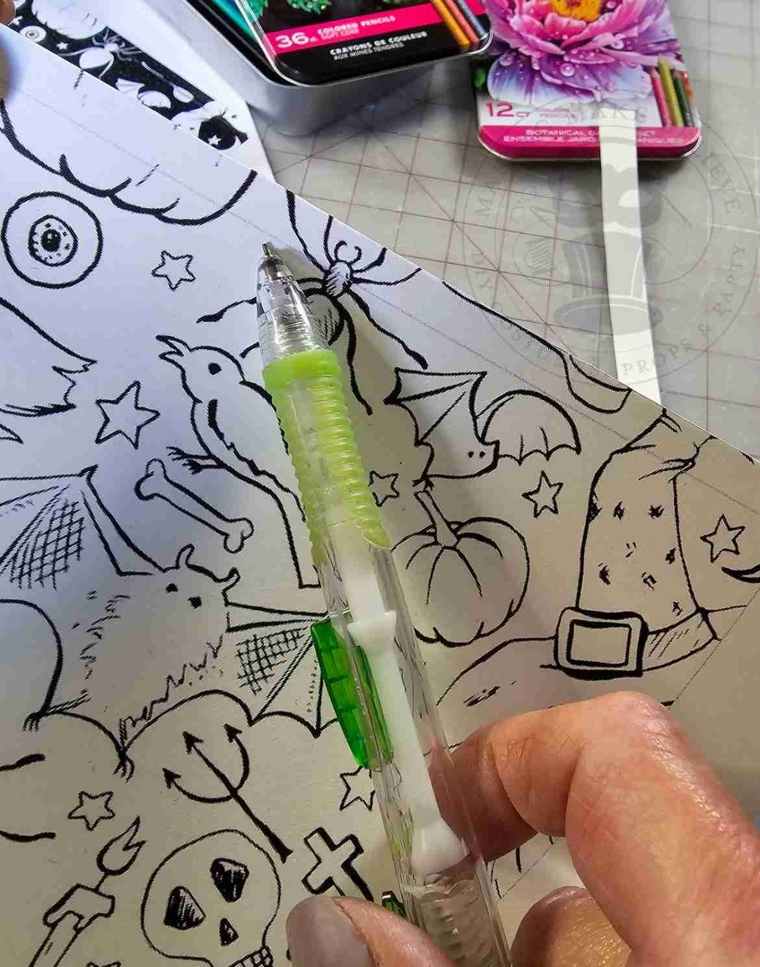
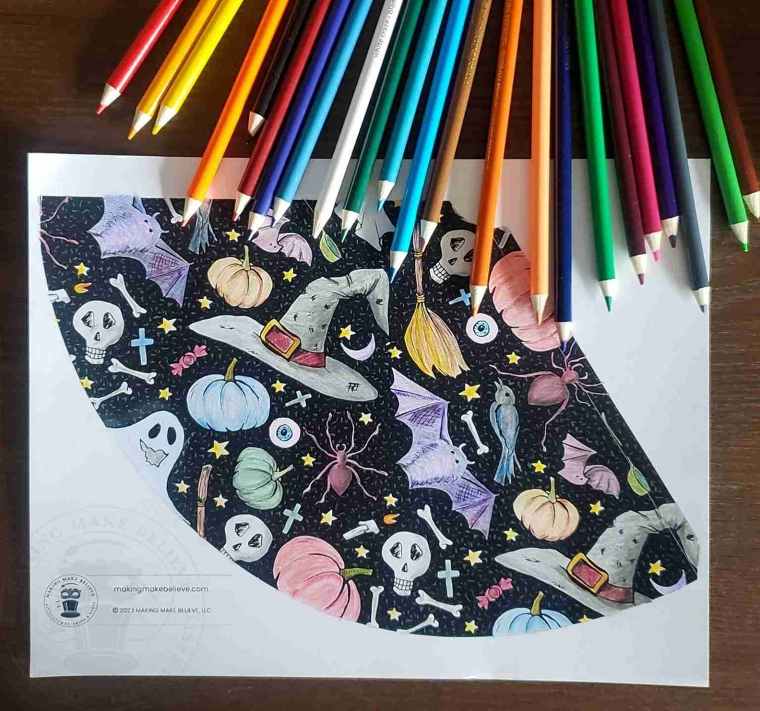
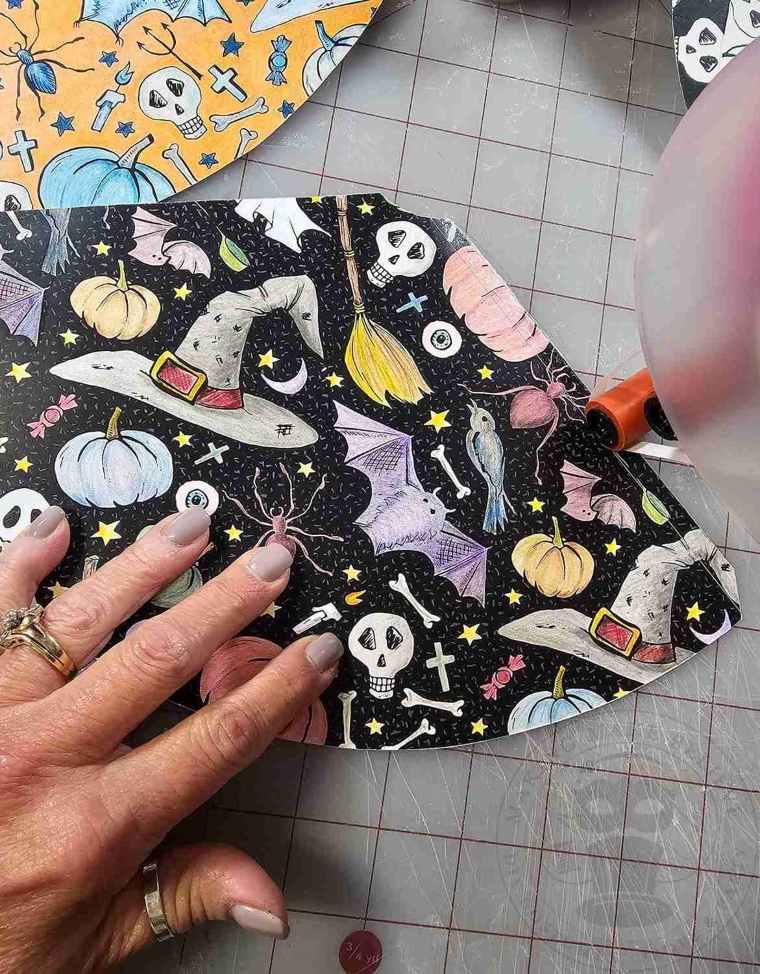
Now comes the good part.
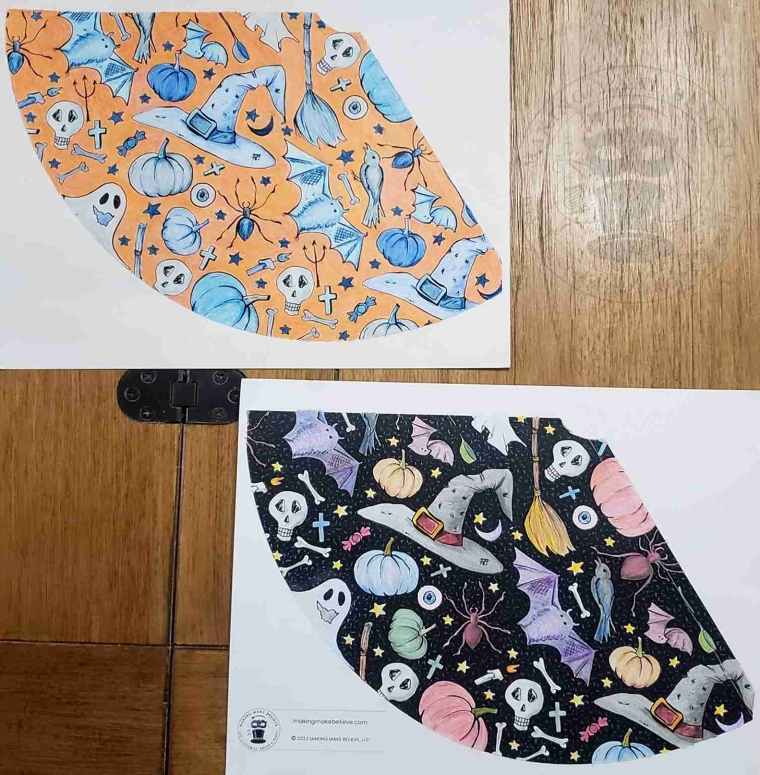
Settle in and bring your designs to life. Moody neutrals, vintage-inspired tones, bold contrasts – whatever fits your aesthetic.
There’s no right way to approach this, which is exactly the point. Each hat becomes its own unique and personal monster-piece.
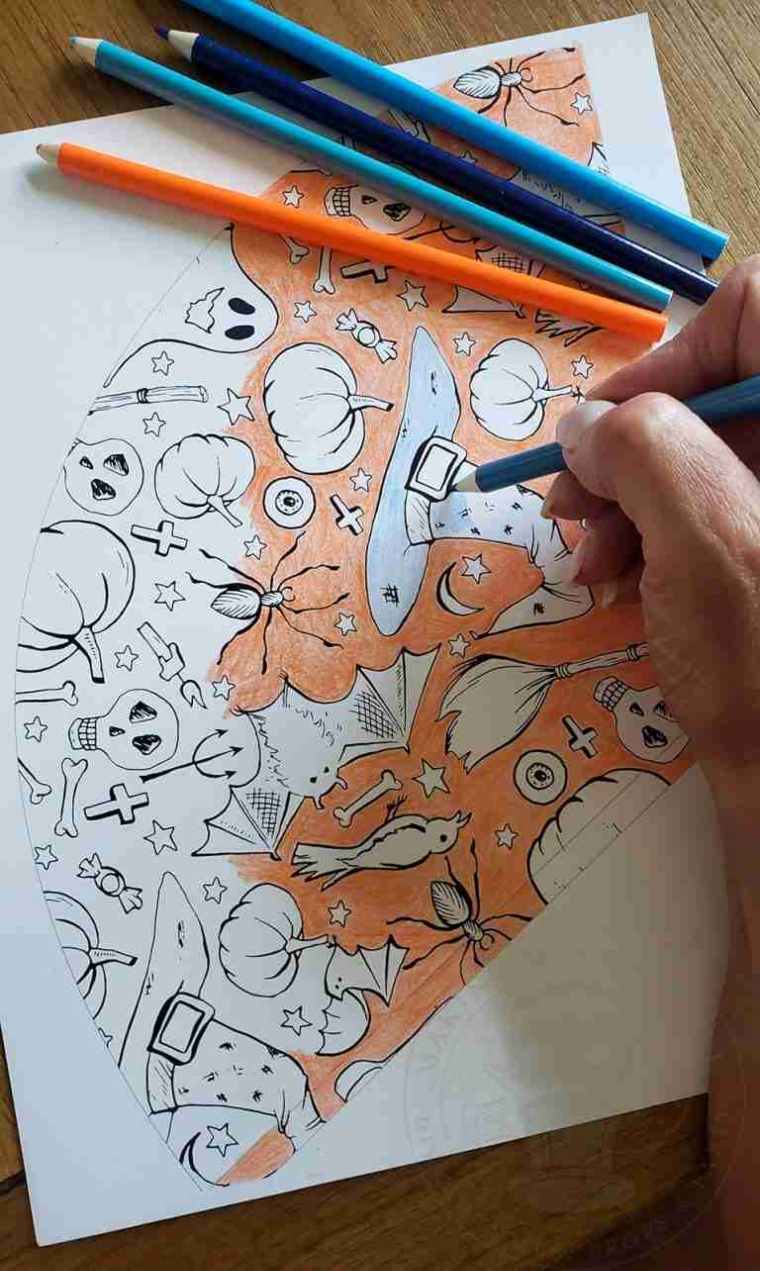
Different day, different mood? No worries – there’s no limit to the variations you can create.
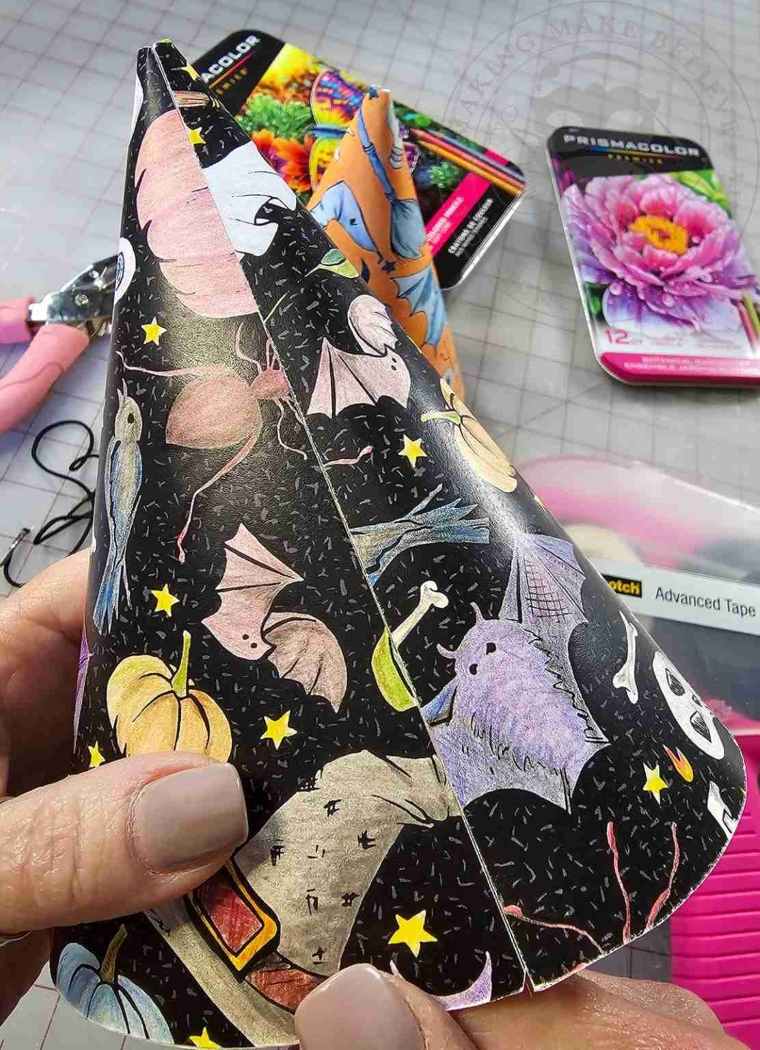
Once your coloring is complete, gently curl the hat along the edge of a table to form that classic cone shape.
This gives your hat structure and makes assembly easier.
Run a line of adhesive along the straight edge, keeping it just outside the overlap guide.
Wrap the opposite edge over and press firmly to secure. Hold briefly to set a the seam.
To wear your party hat, punch a small hole into each side of the hat.
Cut a length of elastic to comfortably secure the hat under your chin and thread it through the holes, knotting on the inside.
Optionally, cut two lengths of ribbon, insert one on each side and tie under your chin.
I like to live on the edge so I plan to secure mine with hair pins.
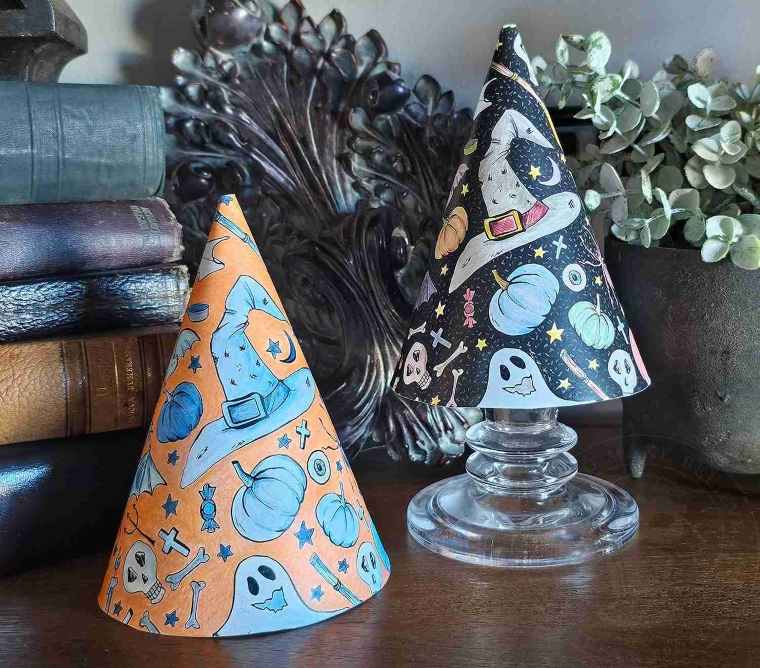
Your hat is ready to make an appearance.
Let your colorwork stand on its own, or add some eerie embellishments for a shocking showstopper. Either way, you’re ready to get your pumpkin season party started.
I’m calling it -for now – the party hat ideas have been fully exorcised from my brain.
But if experience has taught me anything… they’ll be back.
Until then – stay spooky.
