
If you’re anything like me, you long for spooky season. The scent of spiced pumpkin candles, the rustle of fallen leaves, the crisp Autumn air, and, of course, an eerie glow casting haunting shadows.
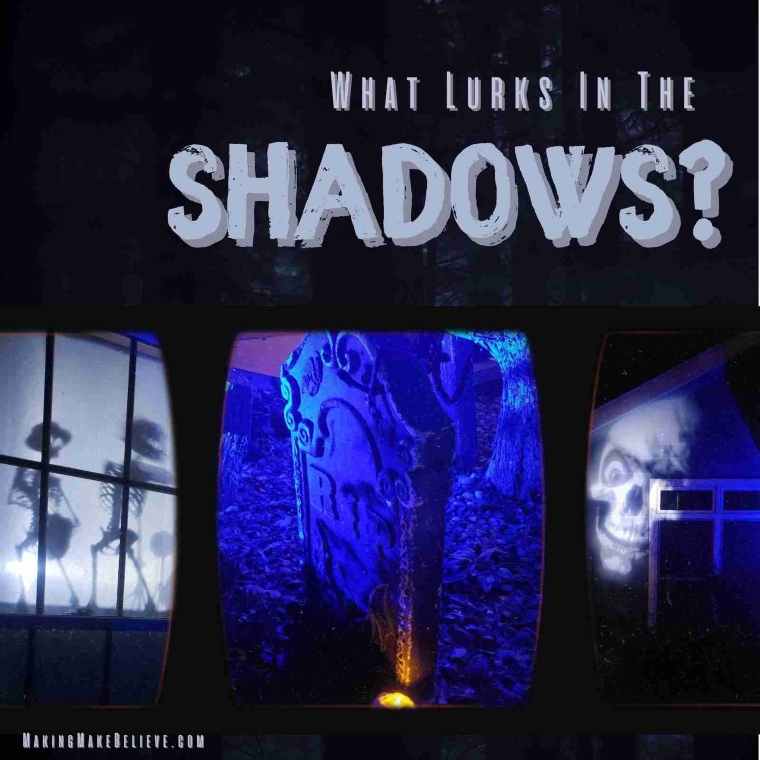
There’s nothing more satisfying than crafting your own haunted ambiance, especially when it’s quick, fun, and spine-tingling.
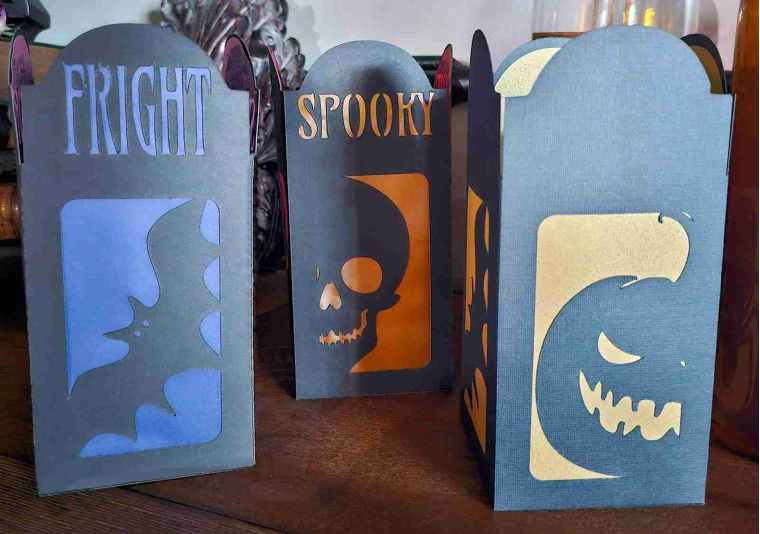
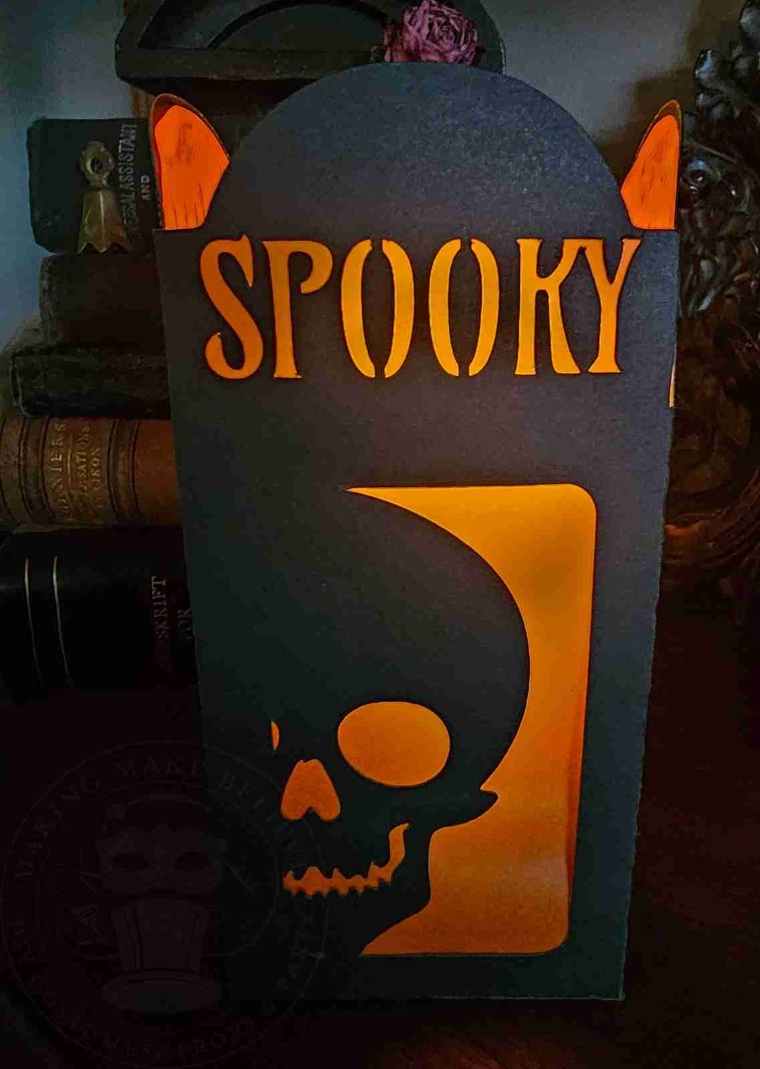
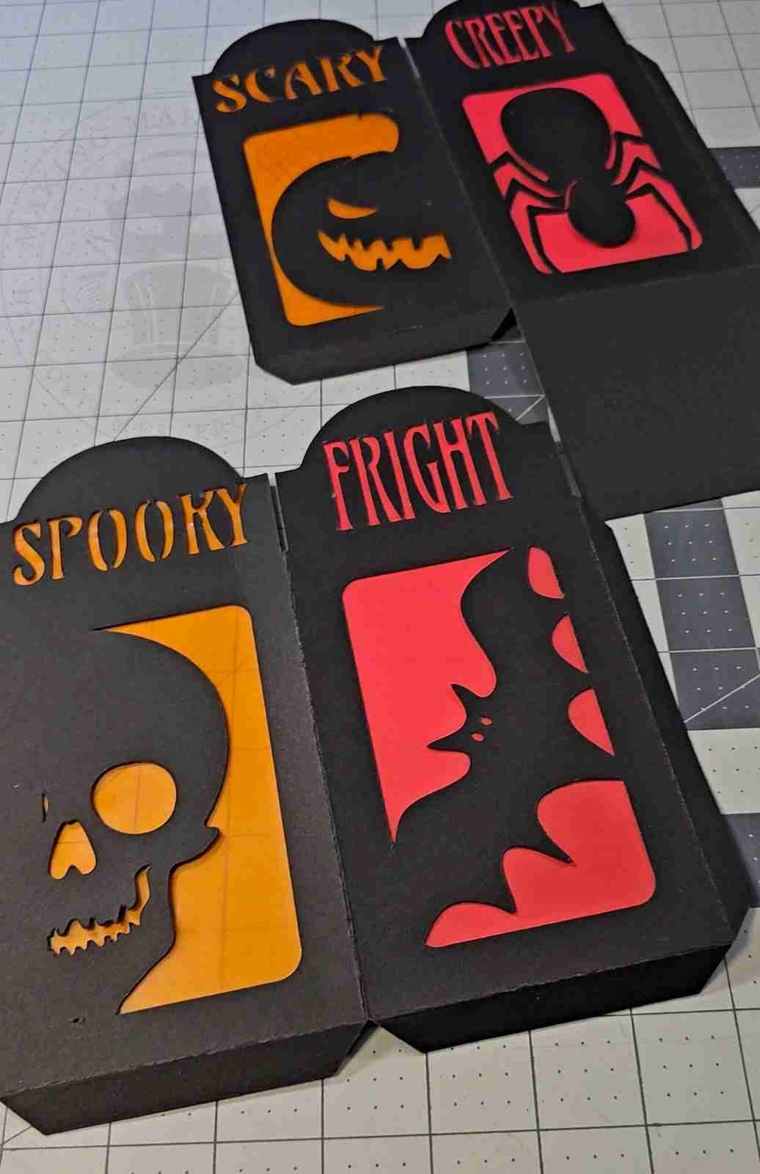
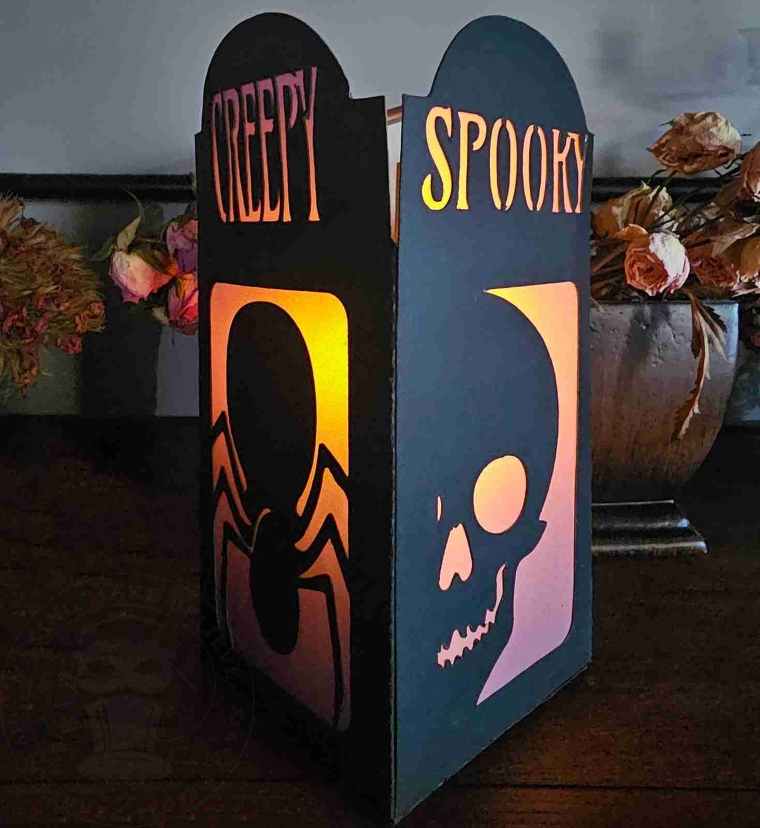
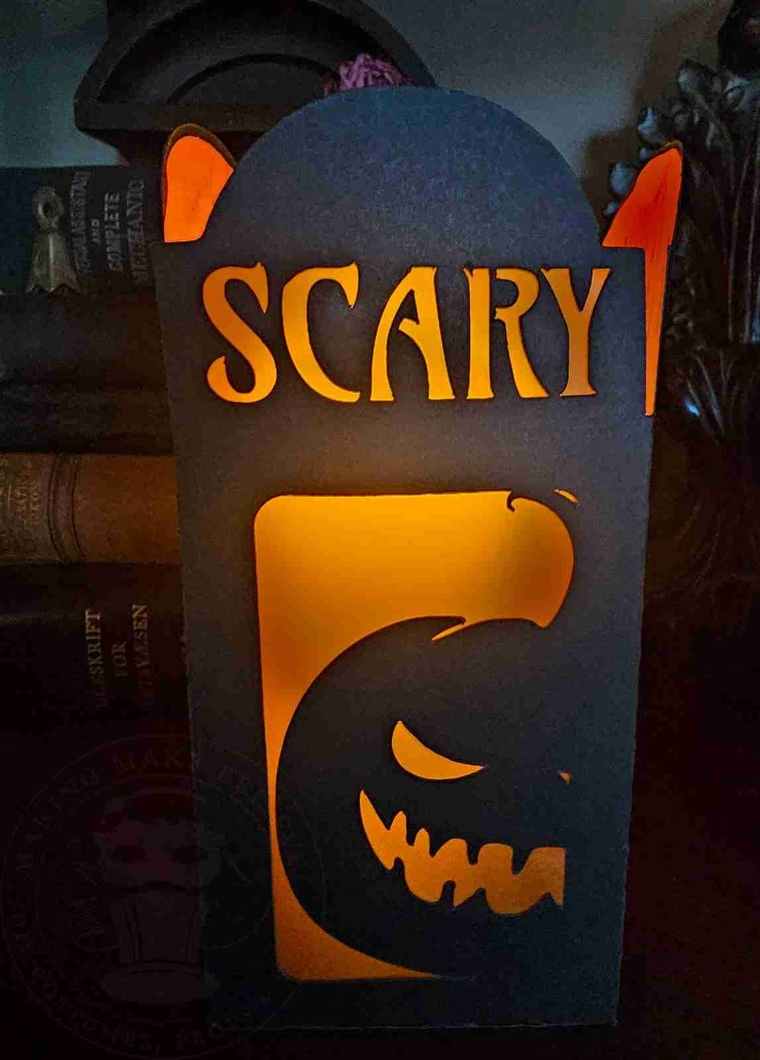
Today’s haunted DIY adventure is a fun fright-night project – a Halloween paper lantern featuring ghoulish silhouettes and macabre messages that light up with an eerie glow. Whether decking out the mantel, dressing up the dinner table, or adding some creepy charm to a corner, this lantern is a must-make for the Halloween enthusiast.
Crafted with a cutting machine or by hand and using just a few supplies, this project is simple to construct but packs serious haunted-house vibes.
If that sounds like a ghoulishly good time to you, let’s get glowing.

Ready to cast some sophisticated shadows in your favorite room? If you prefer your lighting with a side of literary dread, make sure you save this project to your Halloween DIY or Haunted Decor board on Pinterest. Keep these lantern templates and layering tips tucked away for whenever you need to turn a dimly lit corner into a focal point of spine-chilling elegance.
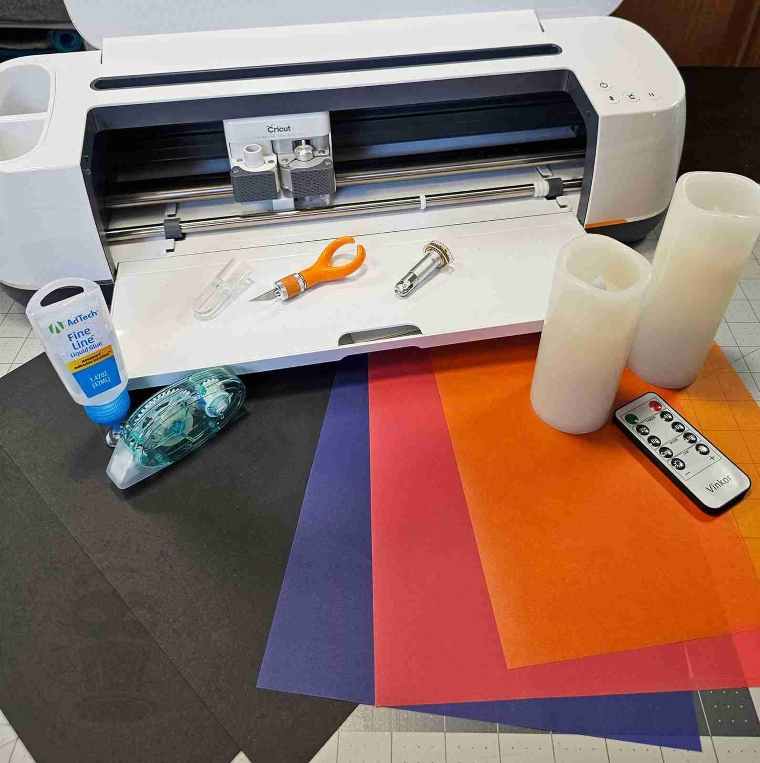
For this project, we will need:
12 x 12 black cardstock – two sheets per lantern
Finger blade or cutting machine with scoring tool – I’m using the Cricut Maker
Colored vellum (orange, purple, green, red – whatever creepy color or combo you like)
Adhesive
Flameless candle
We will also need the Spine-Chilling Lantern files from the Haunted Library.
Each lantern panel features a unique spooky silhouette centered under a macabre message. The pattern includes SVG (machine-cutting) and PDF (hand-cutting) files.
As a bonus, a non-text version is included, so you can craft your own monstrous message or keep it simple.

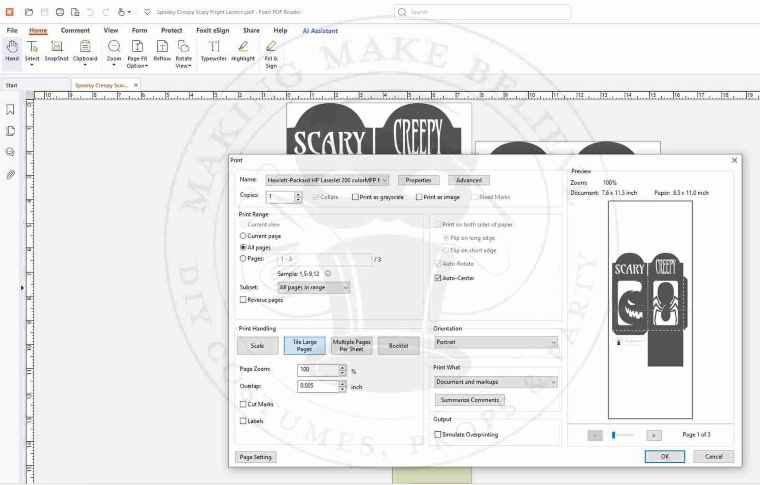
For hand cutting, open the PDF template using your favorite PDF reader (Adobe, FoxIt, etc.).
Print your template, and ensure the pages are set to print at Actual Size.
The Spine-Chilling Silhouettes Lantern will exceed the print area, so select Tile Large Pages under Print Handling (FoxIt) or Poster under Page & Size Handling (Adobe) from the Print Dialog Box.
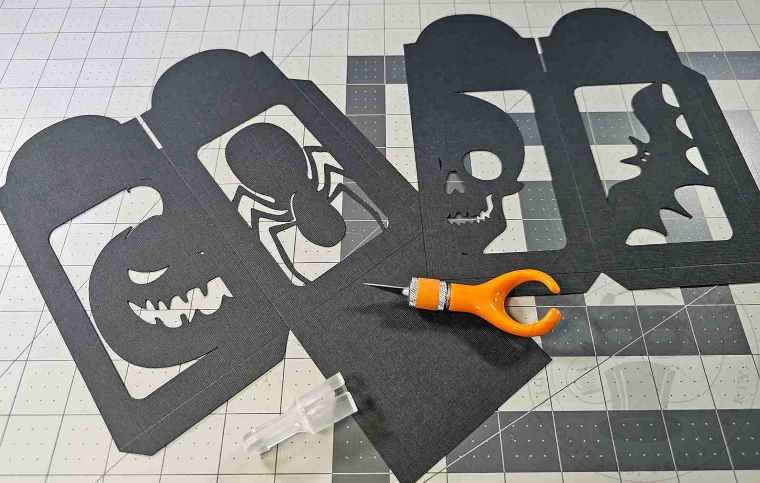
Tape together the template sections, transfer them to your cardstock, and mark the score lines.
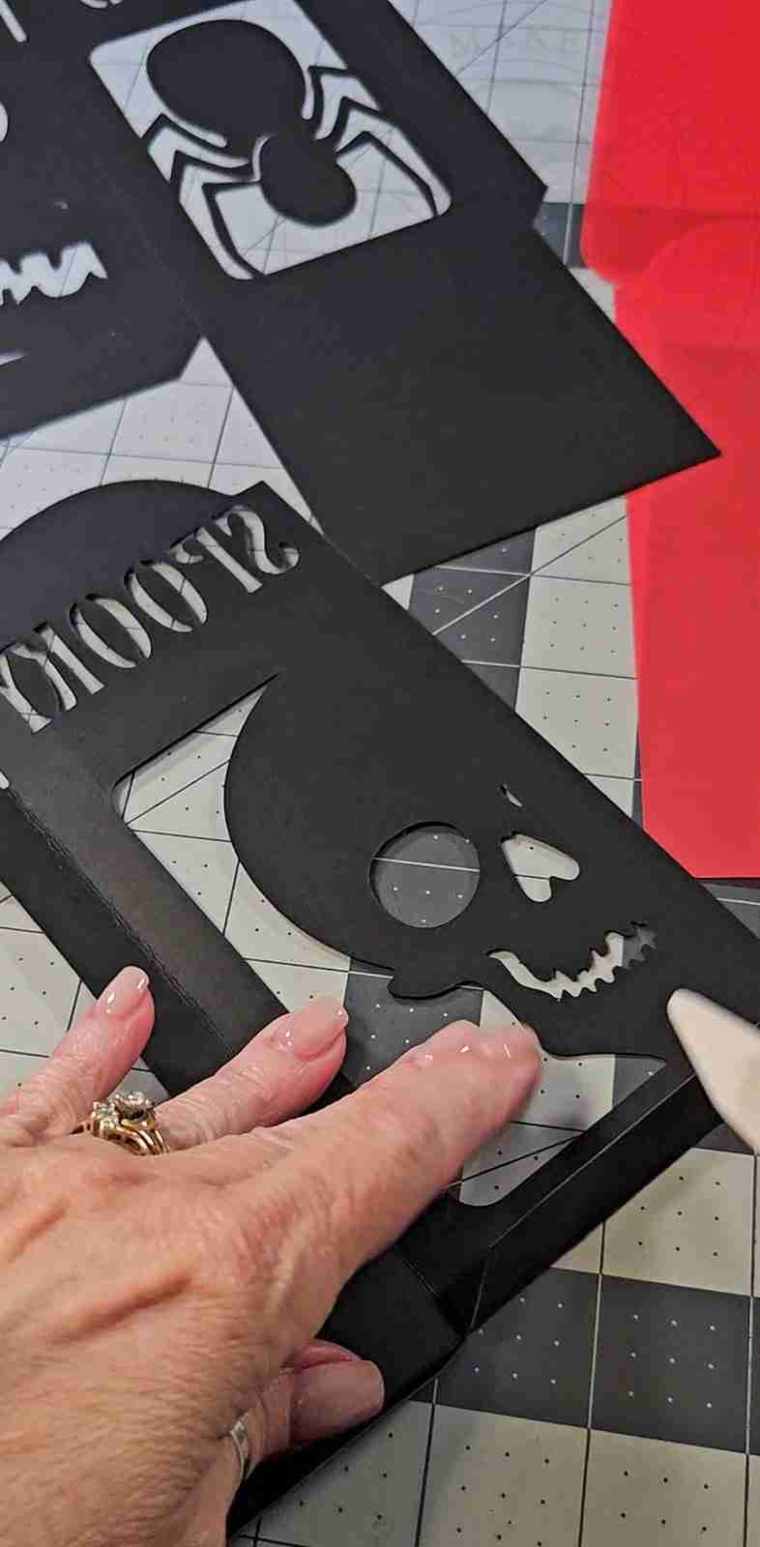
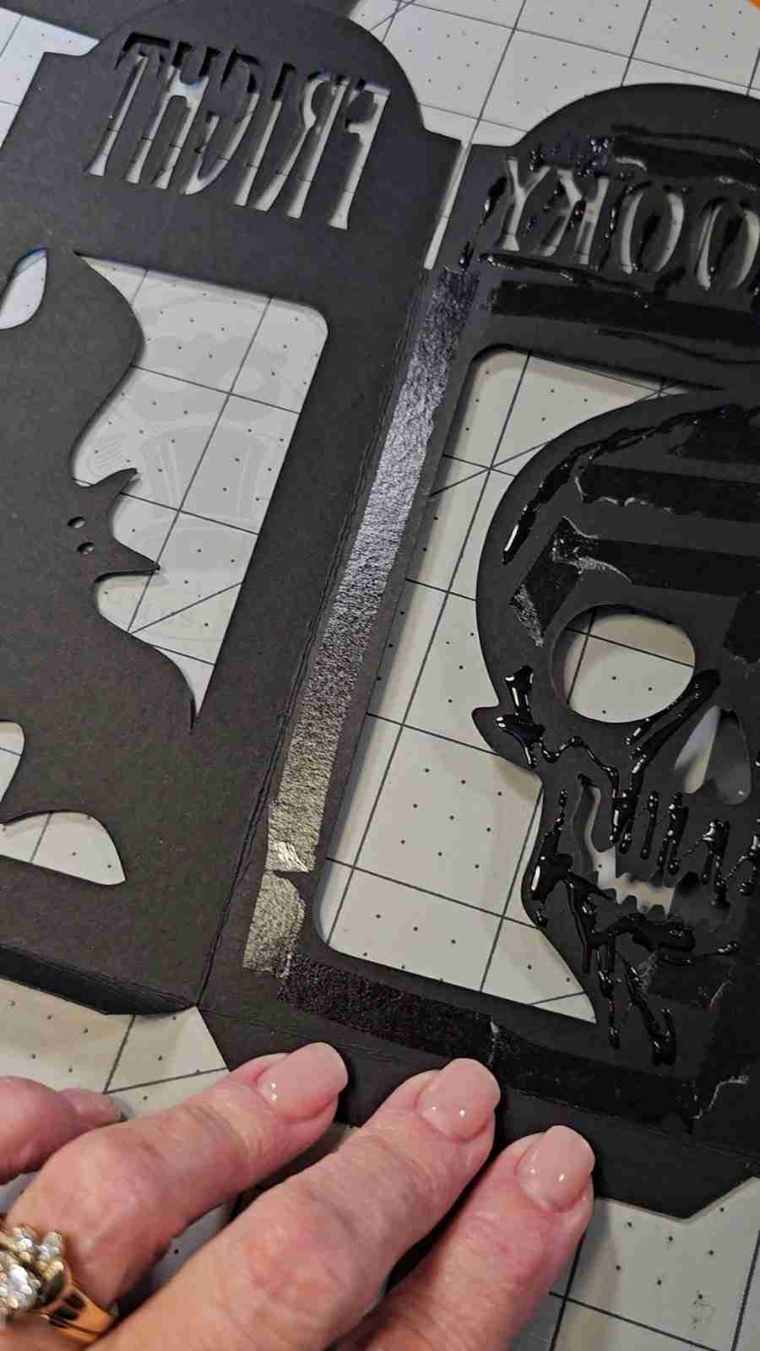
Cut around the silhouette and then cut out the lantern.
Due to the intricate nature of cutting the lettering by hand, these can be omitted from the final design if desired.
Upload the Spine-Chilling Silhouettes Lantern files into your design software for machine cutting. I’m using Cricut Design Space.
Ensure that your lantern measurements are as follows:
Lantern with bottom flap: 7.649 inches x 11.5 inches
Lantern without bottom flap: 7.647 inches x 8.321 inches
Background 3.292 inches x 7.683 inches

Ungroup the file, and select the dotted lines in the Layers Menu for one of the lantern sections. As a default, all the lines will be shown as a Basic Cut.
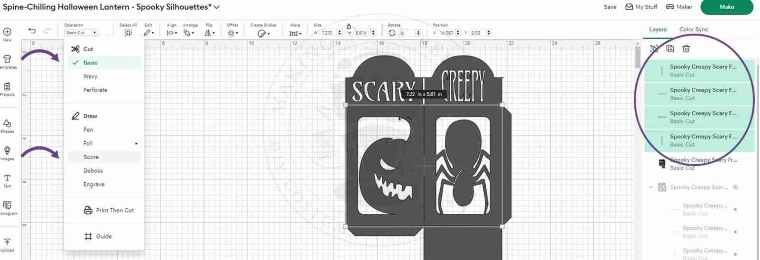
With the lines selected, select Score from the Operation drop-down list.
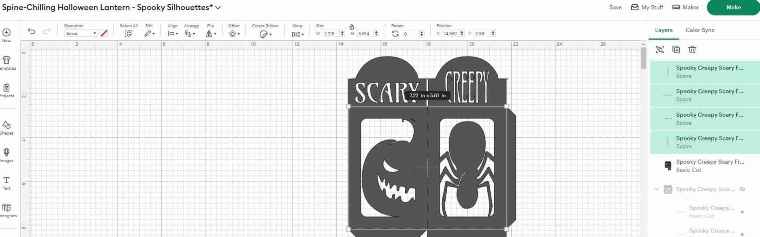
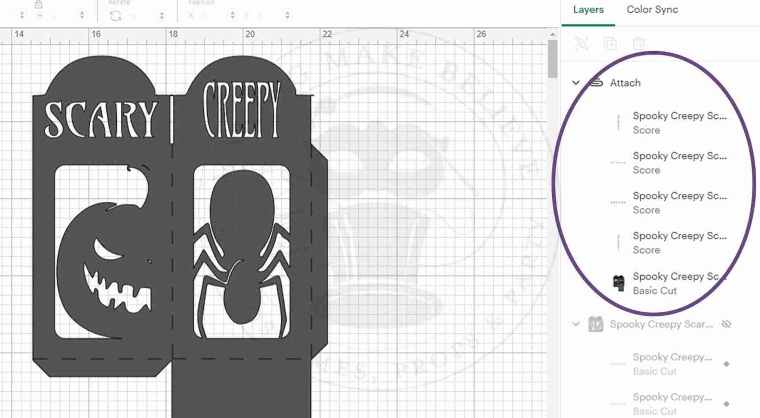
Now select the lantern section and the scorelines, and click Attach.
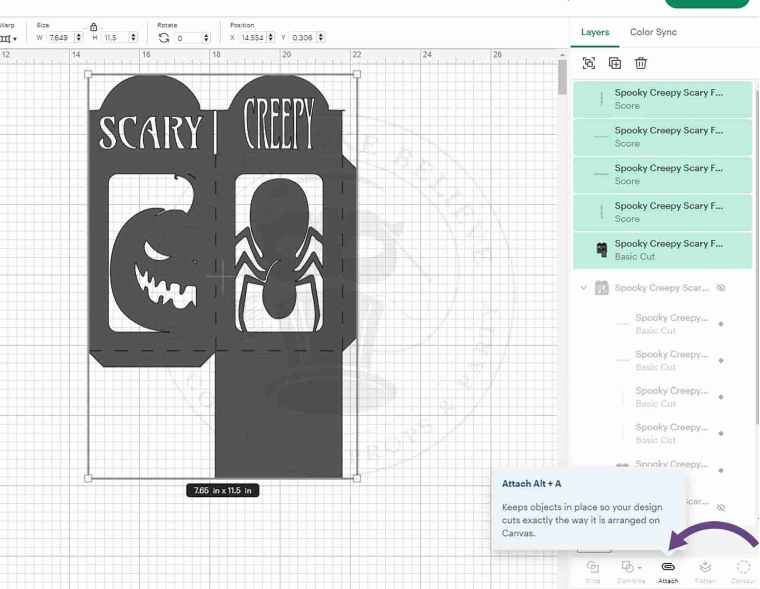
Repeat this with the other lantern section.
Duplicate the background piece until you have four copies on your canvas

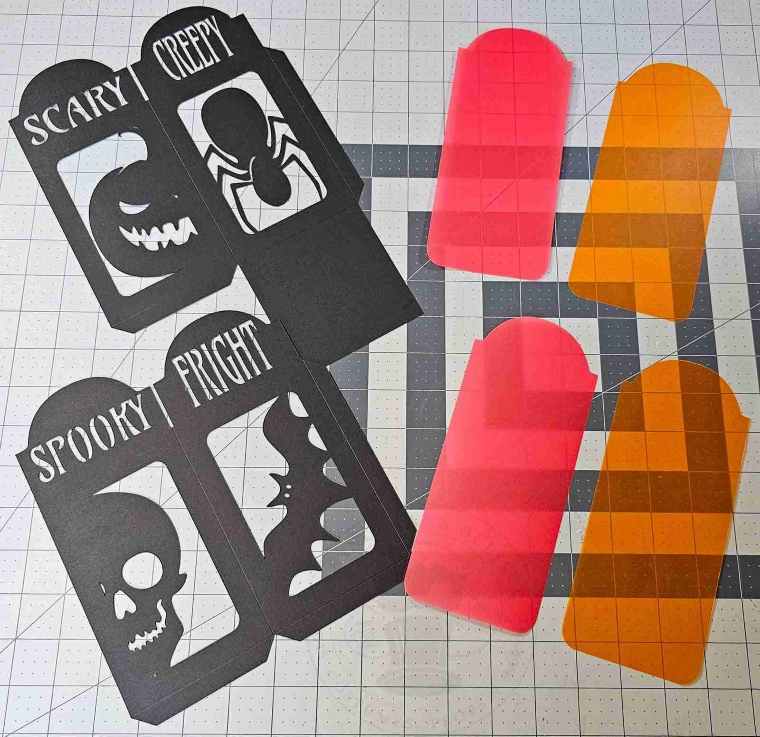
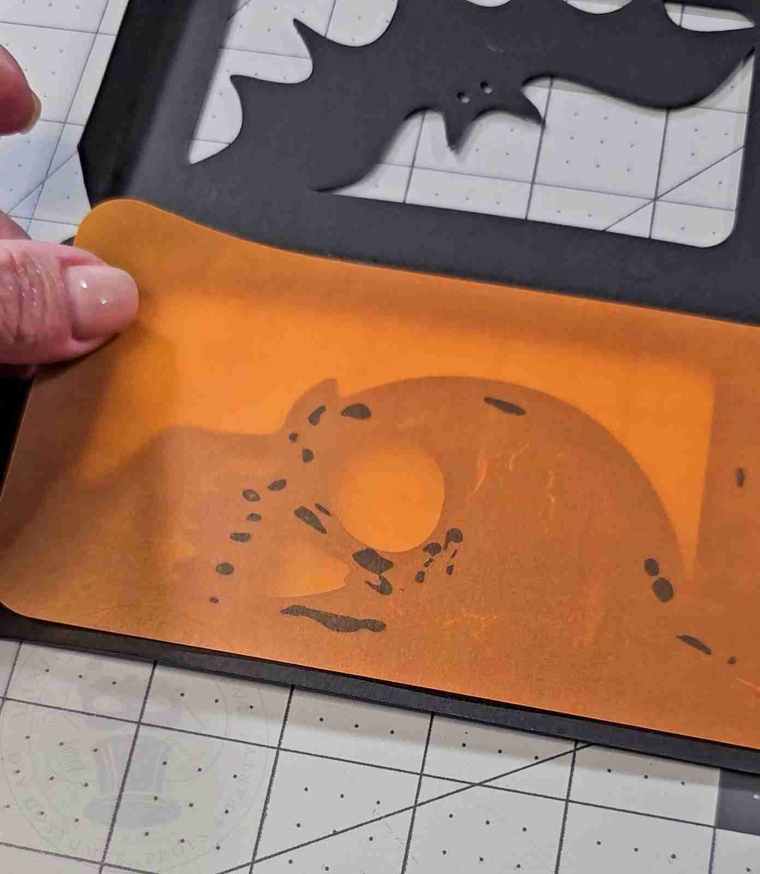
Cut the lantern pieces from black cardstock and the four backgrounds from colored vellum.
Fold along the score lines. I use a bone folder for this, but it is optional.
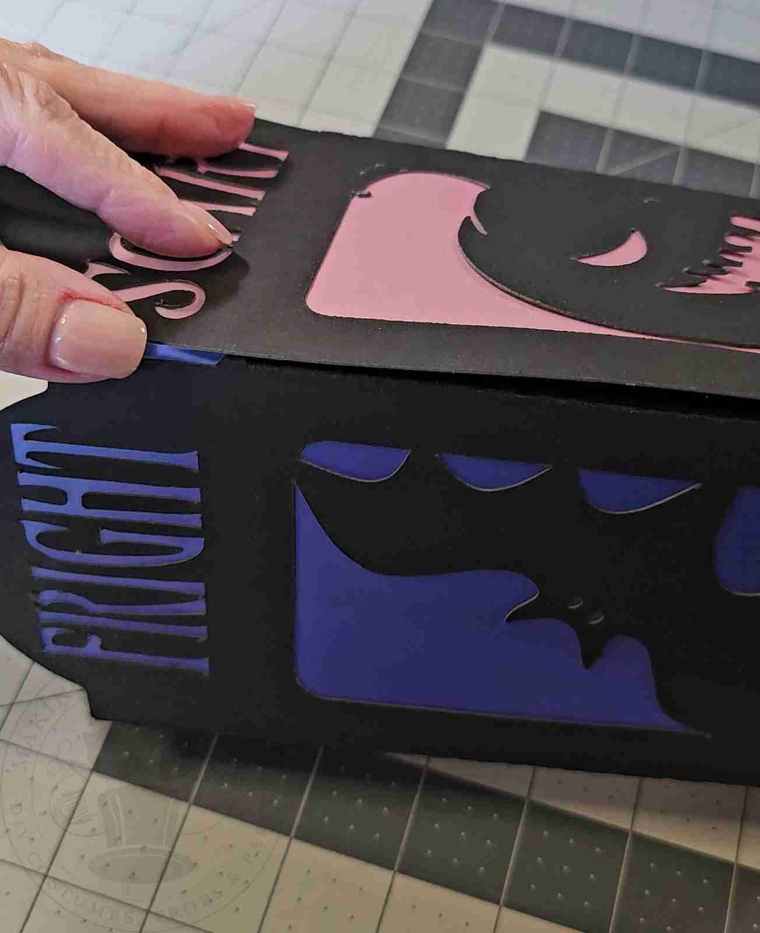
Attach a colored vellum background behind each silhouette.
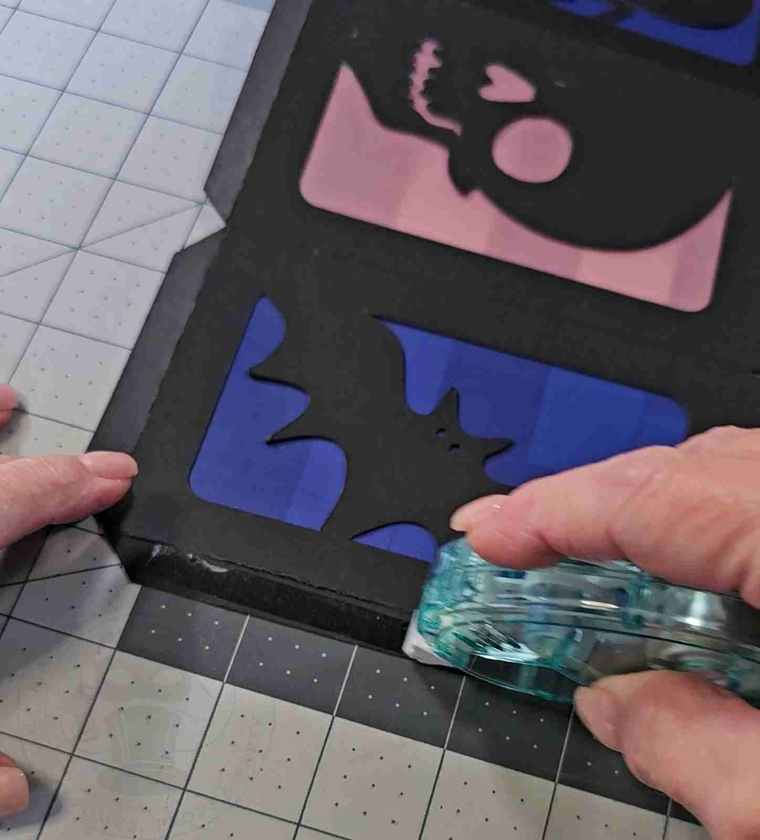
I opted to use two types of adhesives: roll-on adhesive around the edges and in the larger areas of the silhouette and a liquid adhesive for the smaller, more intricate, detailed areas.

Adhere the side tabs to the inside of the adjoining panel.
Glue the bottom base to the bottom tabs.
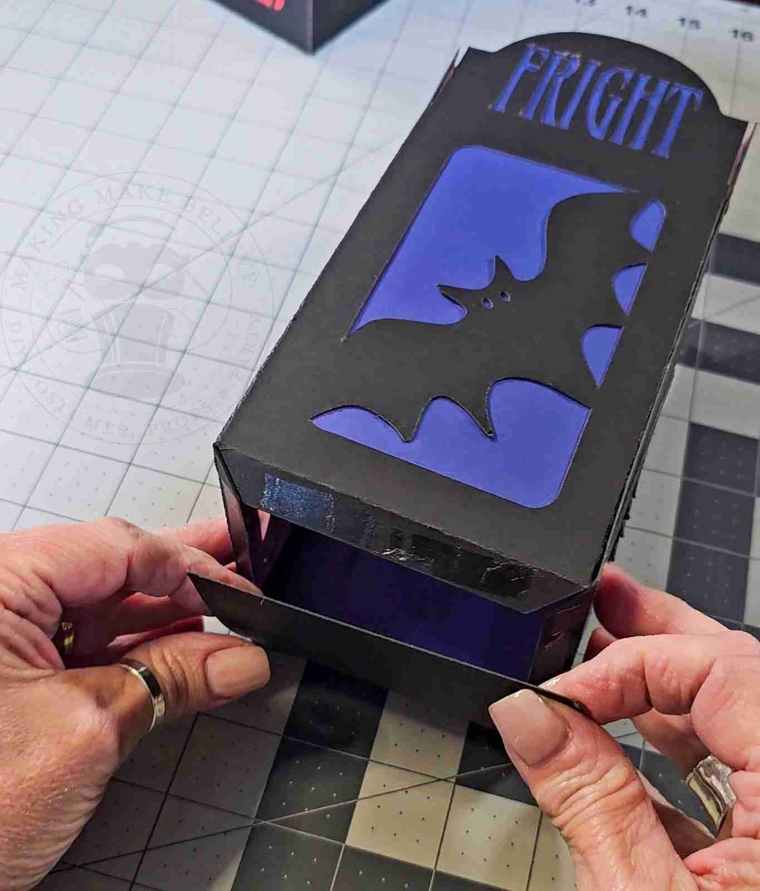
Insert a flameless candle and let it glow!


Who needs store-bought decor when you can conjure up your own glowing Halloween lanterns?!
Until next time – stay spooky.